Wood floors are one of the best options for environmentally friendly and reliable flooring. They are durable, beautiful and do not harm the health of people living in the house. The disadvantage of such a base is that if it is installed incorrectly or after some time, the floor boards begin to move apart - cracks form between them, which is why the floors look unsightly, and various debris gets underneath them, and an unpleasant squeak may appear. To prevent this from happening, the technology for laying such a coating must be carried out exactly according to time-tested rules. But, fortunately, even old floors can be restored to their original form if you use a tool to screed the floorboards. Now there are a lot of variations on how to join together floorboards quickly and without much expense.
Tool for screeding floor boards
Existing fixation methods
The floor covering is constantly under heavy loads.
Therefore, it is necessary to choose the fastening method based on the performance characteristics of the material. With an irresponsible approach to resolving the issue, there is a high probability of damage to the floor within the first year of operation. The most important thing is to ensure the proper level of fixation rigidity. The first sign of poor-quality fastening is loosening of the boards. After some time, the elements begin to gradually shift, which is accompanied by a characteristic creaking sound. As a result, there are two scenarios for the development of events - either individual elements break, or the entire structure fails.
There are 4 main ways to attach floorboards:
- Nail installation.
- Glue method.
- Fastening with clamps.
- Installation using special types of screws for floor slats.
Each of the presented methods differs in severity, so each method should be considered.
Fastening boards with nails
This method allows you to properly fasten the floorboard either to a solid base or to a joist structure. The mounting principle is simple:
- First you need to fix the first row of boards. To do this, nails are driven through the ridge at an angle of 45°. The task is to attach the element to the base without damaging the part.
- When the next row is adjusted, the nails need to be hidden. Next, fixation is made through the surface of the board.
Adhesive installation method
When laying boards on a perfectly flat base made of concrete or other materials, special glue is used. The grooves in the products must be carefully coated with glue and placed on the tongues of already laid boards. Craftsmen, showing how to properly attach boards, use regular PVA glue. This composition is able to reliably hold joints for many years.
In this case, the glue should be distributed in a small layer. The tongue-and-groove edges are also treated with glue to stiffen the corners.
Fixation with clamps
Products that are sold in a set with clamps deserve special attention. The fasteners are inserted into the slot located on the inside of the tongue-and-groove board. The parts are capable of rigidly fixing the material to each other.
Stages:
- The subfloor must be covered with a layer of high-quality waterproofing. The edges of the material should be secured to the walls with tape.
- The clamps are driven into the cracks of the first row with a hammer. Be sure to follow the direction of the tongue.
- The ends of the planks should be coated with adhesive, after which the first row is installed.
- Wedges are inserted between the sheets and the wall.
- The second row is also equipped with clamps before fastening and is mounted by tapping the block with a hammer.
- After this, you can lay all the remaining rows in the described sequence.
- At the last stage, you should remove all the wedges and fix the baseboards.
Special screws, self-tapping screws for floorboards
The most popular fastening method is using self-tapping screws for fastening floorboards. This method is characterized by high speed of execution and durability of the finished structure.
The only difference from ordinary screws is the high cost of professional fasteners for floorboards. A special milling cut allows the self-tapping screw to quickly enter the wood and hold firmly in the material.
Option 2. Installation of a monolithic screed
In general, experts do not recommend leveling wooden floors with a concrete screed. It may be too heavy for the old flooring, which will accelerate its destruction. And this order of arrangement of layers violates the immutable rule of construction: the base must be stronger than the coating in contact with it. Therefore, you need to make sure that they do not contact each other.
Poured concrete base
The most important thing is proper preparation of the base
However, in special cases, sometimes it becomes necessary to pour a screed over a wooden floor. Since these materials have completely different properties, the main task that will have to be solved is to make sure that the mobility of the wood does not interfere with the long-term service of static concrete.
Important! During the first 4-5 years of operation, the boards are most susceptible to shrinkage phenomena, so only old wooden flooring can be poured with concrete. In a new one, as a result of the loss of moisture from the wood, after some time cracks appear and the linearity of the boards changes.
Construction of wooden interfloor ceiling
Installing crossbars after opening the deck
The last stage of preparing a wooden base, if it is not a painted floor, will be treatment with a biocidal-hydrophobic primer, which will slow down the process of its destruction and extend its service life.
Calculator for calculating the amount of ingredients of a mortar for floor screed
Pouring process
Table. Step-by-step instructions for pouring.
Step 1. Installation of shock-absorbing tape
Step 3. Marking and installation of beacons
Step 4. Selection of reinforcement and calculation of coating layers
| Steps, photo | A comment |
| Shock-absorbing tape - damper, is mounted along the perimeter of the walls. It will provide the screed with a technological gap for thermal expansion. The tape can be purchased ready-made or cut from a laminate backing. | |
| Step 2. Laying polyethylene | Before you proceed directly to monolithing a wooden floor, it needs to be waterproofed with rolled material overlapping the walls. For this purpose, ordinary polyethylene is used - a film 1.5-2 mm thick. Width - the larger the better, there will be fewer joints. It is only important to handle it carefully so as not to damage it. Note! You can, of course, use bitumen-based materials instead of film. But polyethylene is better in this case, since it is smooth and does not adhere to the solution at all. |
| Then you need to bring the zero level to the walls, and break off the horizontal top of the screed from it. Instead of beacons, you can use a tightly stretched cord secured to self-tapping screws screwed into the floor. How all this will ultimately look is shown in the picture. On a note! When determining the thickness of the screed, do not forget about the thickness of the tiles and the adhesive layer. The thinner the fill, the better. If you need to raise the floors, say, by 20 mm, then it is better to first install cement-bonded particle boards, and then pour a 1-2 mm screed on top of them. A large thickness of concrete will create unnecessary loads on the wooden base with its weight. | |
| To make the structure lighter, there is no need to use a reinforcing mesh, at least a steel one. There are lighter composite meshes on sale. | |
| Step 5. Mixing the solution Step 6. Filling the screed Prices for cement M400If you are going to lay tiles, allow the monolith to gain at least 70 percent strength, which for concrete is 19 to 20 days. However, as for the screed, the drying time will depend on its composition and thickness. If it is a 1-2 mm self-leveling floor, you can lay the tiles within a week. |
Advantages of the material
Do-it-yourself floor screed, how to properly make a cement floor screed
Plank
deserves to be in demand, since the floor made from it has the following advantages:
- a tongue-and-groove lock, thanks to which the floorboards are assembled into a single whole without gaps between them;
- strong wood structure allows you to refine a good floor;
- environmental safety, since no artificial products are used in production, but only real wood treated with natural resins;
- low thermal conductivity of the material. The floors are warm and help retain heat in the room.
- not a difficult installation process.
When choosing, it makes sense to look at moisture-resistant materials that have a long service life and will give the interior a solid look.
Why is it important to use the right tool?
Modern technologies greatly simplify human life and work. New tools and equipment appear, which are quite difficult to keep track of and always be aware of new products. The right tool will allow the master to:
At the same time, it is worth understanding that not only the quality, but also the ability to complete the job as a whole depends on having the right tool.
To install a board field, it is important to securely attach the boards to the joists and avoid the occurrence of gaps (cracks) between them. Failure to comply with these tasks will cause such an unpleasant effect as creaking boards .
What determines the price of moldings?
DIY kitchen tile installation
The three most important criteria on which the price of solid molded wood products depends:
- Wood species. In some cases, hardwoods are more expensive than conifers, in others, on the contrary, there is a good article on this topic here.
- The presence of such defects as blue discoloration, rot, rotten knots, and wormholes reduce the cost of molded products significantly. Therefore, the owner who wants to save money buys solid moldings of a lower category and finishes it himself, the blue is painted over, knots and wormholes are easily covered up.
- Molding length. The shorter the product, the cheaper it is. This is due to the fact that shorter products are obtained by removing defects from longer products. Also, the cheapness is due to the fact that obtaining a longer product is more expensive in production, since the yield of lumber from a log increases, and the likelihood of a defect appearing on the product increases.
Is it possible to make the device yourself?
Previously, there was no such tool on sale, and all craftsmen made such a device for screeding floor boards with their own hands. There are several types:
Let's take a closer look at all these devices, how to use them, their advantages and disadvantages.
Car jack
In my opinion, the most reliable and effective compression method that you can do yourself without spending extra money and time. This is one of the tools with which you can compress the boards when laying flooring. One side rested against some kind of stop or even against a wall, the other against a board. This equipment can be easily found on many households, which is why home craftsmen often use it. Using this method, you can compress several floorboards without reinstalling the stop; their number depends on the working stroke of the jack itself.
Wooden wedges
This is one of the oldest methods of compressing boards, which was used by our grandfathers.
The thrust part was pressed onto the joist at the required distance, and a wedge was driven between it and the board, which produced compression. You can make with your own hands the required number of wedges of various sizes, which allows you to work with different gaps. In this case, one stop can be placed so that you can press from 1-3 boards, using more wedges. Advantages of the method : availability, the required quantity can be produced.
Disadvantages : long installation.
Metal staples
This method works in a similar way to the previous one, with the only difference being that a metal bracket driven into the joist is used as a supporting base.
This method is faster, since you do not need to remove the nails and the stop block; it is enough to remove the bracket using a pry bar. But the reliability of the stop is not always sufficient to withstand the force that may be required to compress wooden floor boards. In cases of using the Smolyakov bracket, the reliability of the stop is much higher, but now it is quite difficult to buy such brackets.
Mount
Compression occurs with the help of a mount; a wooden beam placed on the joist, an osprey, or some kind of clamp fixed to the joist can serve as a stop.
Advantages : availability of the device.
Disadvantages: the need for at least 2 people to complete the work, one compresses the boards, the second fixes the pressed board with screws or nails. It is impossible to perform this operation on several lags at once, even with two people. The compression quality is not high and requires significant effort from the device.
Correct fastening of the block house
How to lay a chipboard floor. Laying chipboard on a wooden floor, on a concrete floor with your own hands, instructions, photos.
The block house fastening is used at the final stage of cladding a country house, in order to maximize its protection from climatic influences and create a pleasant aesthetic perception. Emphasizing the environmental friendliness of the house and its originality is possible only thanks to the correct fastening of the block house.
The most common type of block house material is wood, however, vinyl and metal have recently become widespread on the market. Depending on the material, you need to decide on the method of fastening. To answer the question - how to calculate a block house, you will need to calculate the dimensions of the finished building, taking into account the holes for doors, windows and other individual features of the finished structure.
When the owner chooses a block house for finishing, price plays a significant role. A house block used as cladding for a country house is a fairly practical and economical option. Experts agree that proper fastening of the finishing material allows you to extend its service life and save the owner from unnecessary repairs caused by installation flaws.
The procedure for attaching the block house:
- Mandatory surface preparation. The walls should be as level as possible. They are leveled using plaster or surface grinding and treated with an antistatic primer. You should also carefully caulk all cracks with a special primer or putties if the frame of the house is made of wood.
- A special sheathing with insulation made of metal or wood is installed to secure the block house.
- Before attaching the block house material, it is placed outside for several days so that the material gets used to the temperature.
- Fastening can be done using nails, self-tapping screws and special galvanized staples. A novice builder should know that nails, despite the fact that they are the cheapest fastening, last much less than self-tapping screws and staples. They are used only when the budget is insufficient.
- The use of wooden block house material is much more expensive and its installation takes longer, unlike metal material. It is enough to simply cut it with a special tool and secure it with staples or screws. When choosing a metal cladding, you should secure it with stronger self-tapping screws.
- At the final stage, the question arises - how to treat the outside of the block house. As a rule, the outside is treated with a special wood antiseptic. This treatment is quite sufficient to prevent rotting processes. At the production stage, the material is treated against insects and fire. To treat a block house inside a building, you can use special acrylic solutions; they are safe for human health and prolong the life of the material for a long time.
Summarizing
In order to make a wooden floor in an apartment, it is enough to have the necessary materials and tools, and follow the described technology for laying a wooden floor on joists. All work must be done slowly and conscientiously, and only high-quality material must be purchased. To get a durable and reliable coating, it is best to use tongue-and-groove boards 10-12 cm wide.
Wooden flooring has always been and remains popular; it optimally combines such qualities as aesthetic appearance, environmental friendliness, high quality and affordable cost.
Step-by-step instructions for laying a wooden floor on joists
The process of installing tongue and groove products on joists includes several stages. By following a certain procedure, you can install it yourself.
Necessary tool
To lay and fix the elements you will need the following tools:
- hammer;
- roulette;
- chisel;
- pencil;
- Bulgarian;
- milling cutter;
- bar.
This is a basic set that can be supplemented with professional equipment.
Laying the first row
Since the natural material will begin to dry out over time, the boards are laid in 2 stages. The first stage includes fixing every 4-5 strips. After 6 months to 1 year, all tongue and groove floor boards will be removed. This is done to ensure that there are no gaps. However, the first row is fastened immediately.
The boards should be distributed so that they are slightly separated from the wall. To do this, wedges are used, the thickness of which is 1 cm. After fixing them to nails or glue, the elements are removed.
When installing the first row, use a building level. Products must be perfectly aligned in relation to the joists and the wall.
Laying subsequent rows
The remaining rows of material are installed in strict sequence with the installation principle of the first row. You need to check for any cracks. When tapping the strip, a block is applied to its edge, which softens the blow.
How to tighten floor boards
It is best to fasten the elements together with special screws at an angle. This will prevent the structure from moving during operation. Self-tapping screws have different lengths - from 30 to 50 mm.
Additional tips for installing floorboards from the professionals
Useful tips from experienced craftsmen will help save time and money:
- The pitch between the screws should be at least 25 cm. The most common scheme is with a spacing of 30 cm.
- Before attaching the floorboard, it is recommended to coat the inside of the product with parquet glue.
- The material should not be allowed to adhere to the walls of the room.
- The screw heads should be slightly recessed into the wood.
Installation of the last row
When installing the last row of boards, it is necessary to check the entire plane and separately the location of the final row. No distortions should be observed. The products are secured to the joists, maintaining a distance from the wall.
The base can be any type of material. However, joists are best suited due to the simple and quick method of fastening. If you follow the steps described, you can assemble a high-quality coating with your own hands.
Other floor tightening methods
In order to effectively pull the floor boards together, you can use a regular ax. It acts as both a stop and a lever, helping to apply a certain force to move the boards in the desired direction and seal them together. One of the boards is placed against the wall, secured with nails or self-tapping screws, and the next (adjacent) is pressed against the first with an ax that rests on the joist with its sharp part, while the blade of the tool exerts pressure on the second board.
You can use an ax to pull the boards together
Sometimes clamps are also used to screed the floor. It is only important to ensure that there is rubber at the point of contact of this metal device with the wood. Otherwise, there is a risk of damaging the floorboards. The clamp acts as a spacer; it rests against a block temporarily attached to the joists.
Using a clamp
To implement another popular method of screeding wooden floors, you can use a regular car jack. This is where its lifting power comes in handy. To do this, a wooden block is attached to the support beams, which will serve as a support for the jack. Then this tire mounting device is installed on this block and the jack is expanded - the lifting force acts on the laid floorboards.
Car jack
Due to this action, the boards are compacted together.
Video - Floor screed
Video - Screeding a floor using a jack
Prices for tools for screeding boards
board clamping tool
How to fasten a floorboard photo and video of fasteners
Environmental friendliness is the main advantage of wooden building materials. They support the “rustic” style of country house interiors, giving the interior space aesthetic beauty and comfort. High-quality installation of the floor covering will guarantee its durability. Squeaking and sagging are the main problems associated with wood floors. As a rule, they arise as a result of illiterate installation.
Installation technology
The planks can be laid directly on the old floor, on a plank structure along joists, or on an artificial plywood base. The main point that is worth emphasizing is the installation conditions. Firstly, the building material must acclimatize, that is, lie in the room being repaired for a certain amount of time (at least 3 days). Secondly, laying floorboards is permissible if the humidity of the room atmosphere does not exceed 60%. If this indicator decreases to 40%, the likelihood of deformation of the building material increases.
Installation on an old subfloor
Work begins by checking the condition of the substructure. If necessary, worn boards are replaced with inexpensive lumber. The second stage involves sanding the old coating. We fasten the floorboards in such a way that their joining does not coincide with the joining of the rough base (perpendicular direction).
Installation on plywood sheets
Lay moisture-resistant plywood in a diagonal direction in relation to the floorboard. Fix the material with screws or dowels. A technological, compensating gap is left around the perimeter of the room, as well as between the sheets.
When choosing adhesive fastening technology, special attention is paid to the selection of glue. The binder composition must correspond to the type of subfloor and heat and sound insulating materials
The workflow looks like this:
- laying plywood and sanding it;
- removal of construction dust from the surface being repaired;
- applying primer;
- installation of finishing board;
- polishing the coating, varnishing or painting.
Floor installation using joists
This method involves fastening the floorboard to wooden blocks with self-tapping screws. Fixation can also be done using adhesive mastics. Lay the logs in a direction perpendicular to the finishing coating. The paving structure is adjusted by placing chips on uneven areas. The space between the joists is filled with thermal insulation and waterproofing material. A ventilation gap of 3 cm between the waterproofing and the floorboard is required.
The final stage
After laying the floorboard, the surface is inspected and in case of mechanical damage, all defects are eliminated using wood putty , and it is necessary to match it to the color of the wood.
To remove small protrusions and irregularities, the coating is sanded. It is better to do this not with a manual machine, but to rent a professional sanding machine, otherwise, after applying the paint and varnish coating, all existing defects will be very noticeable.
If you have purchased a high-quality and solid floorboard, then during its installation, practically no protrusions are formed, so sanding may not be carried out or fine sandpaper is used for this.
At the last stage, the floor is covered with paints and varnishes. It is better to take varnish on a polyurethane basis. You can use oil and wax based coatings, which look very beautiful after application; in addition, they are natural, so the wood breathes and helps maintain an optimal microclimate in the apartment.
Floor piling and its features
Unlike conventional material, floor tongue and groove is connected according to the tongue-and-groove principle: it has a longitudinal protrusion on its edge, which, when installed, fits into the groove of the adjacent board. If the floor is to be laid “finish”, then it is made of hardwood with high resistance to wear. Lumber from pine and other types of soft coniferous wood can be used when it is planned to install a “sub-floor”: after installation, it will be necessary to apply a layer of varnish or other protective coating to it.
Wood is a living, breathing material: it can absorb moisture or dry out, so it is advisable to use well-dried material (with a moisture content of no more than 10%). An important point is that before installing the floor, the material must stand for some time in the very room where it will be laid.
We offer for sale tongue-and-groove floorboards with a length of one to five meters. When calculating the amount of material, you need to take into account that during the installation process an average of 10% of its volume goes to waste.
To assemble a floor with this type of material you will need:
- hacksaw;
- staples;
- nails;
- roulette;
- hammer.
Laying scheme
The length of the plank that is laid first should correspond to the length of the wall. It is fitted with a protrusion (spike) to the wall, and it is necessary to make a gap of 20 mm - after installation, the floor will “breathe”, expand and contract. The board is fastened with nails to the base of the floor, after which the laying of the covering begins. Boards from the second to fourth row are fixed with two nails, and for the fifth row you need to use a full-length, long board and nail it with one nail. The rest of the floor is installed according to this scheme.
How to join short boards?
When laying, the ends of short boards must be fixed to each other on the joists, with a gasket placed between them. Trimmings can be used for this purpose. To join, you need to nail U-shaped brackets to the joists at a distance of 70 mm from the end of the short board. Between it and the brackets you need to insert wedges and knock the slabs together until the tightest possible connection is achieved.
Installation of the last rows
The last rows should be made of full-length boards, and in order to lay the last one, you will need to cut it lengthwise along the mark. For this purpose it is better to use a circular saw. After finishing the installation, you need to drive wedges into the gaps between the outer board and the wall: when the last row of boards is fixed with nails, the wedges can be removed.
When the work on assembling the floor is completed, it is necessary to carefully sweep away wood chips, sawdust and other debris from it.
Pouring technology
It will be possible to make a screed on wooden joists only if you strictly follow the instructions. It is recommended to study it carefully, and only then get to work. Before starting active operations, you should check your inventory for the presence of basic tools and materials for creating a screed. You will need to prepare: plastic film, epoxy putty, moisture-proof primer, cement, sand, acrylic sealant, fiberglass or reinforcing mesh, and plasticizer.
Calculations and foundation preparation
To make calculations, you should use a simple scheme: when using 15 kg of mixture per 1 m², a layer of screed of 1 cm is obtained. Based on the data, you should calculate how much material will need to be purchased for the entire area of the room. It is recommended to buy everything with a margin of at least 10%.
The base is prepared as follows:
If there are damaged areas, it is strictly not recommended to proceed to the next stage. Everything must be serviceable and level.
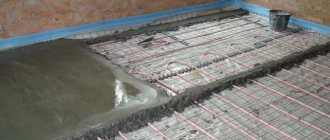
electric pool floor heating
Priming and marking
After the sealant has dried, you need to clean the base from debris and even dust in order to apply a primer to it. This needs to be done in 2-3 layers, which will prevent the appearance of air bubbles, absorption of moisture from the cement and the formation of mold or mildew. It is recommended to use a primer with antibacterial and waterproofing properties.
Using a level (it is better to choose a laser model), you need to apply markings to the walls. It is placed 35–70 cm from the floor level. It will be necessary to mark several points of the zero horizontal at the same height for greater accuracy. After this, you should measure the distance from the points to the subfloor to determine its relief. From the smallest value, you need to subtract the thickness of the future screed, which will be equal to 3–5 cm, and draw an alignment line using the resulting height.
Waterproofing and reinforcement
The next step is to create a layer of waterproofing that will protect the wood from moisture from the concrete mixture. You will need to prepare a damper tape and a polyethylene sheet.
How to create waterproofing:
For reinforcement, you can use a special mesh or fiberglass. In the first case, you will first need to pour out a little cement mortar, then install a reinforcing mesh, and then fill everything again with the prepared mixture. This option is less popular, since you have to wait for the first layer to dry before pouring the second, which affects the work time. In the second case, you only need to add fiber fiber to the cement mixture at the mixing stage. It will increase the strength of the rough screed and have virtually no effect on its weight. The second option is recommended.
Installation of beacons
Beacons should be installed taking into account that the solution does not have time to set. They are metal profile slats laid on the base of the floor on top of polyethylene sheets.
How to install them:
The distance between the slats should be 10–15 cm less than their length. The outer beds should be placed 25 cm from the walls.
Important! It is strictly prohibited to secure beacons with self-tapping screws or nails. Such actions will disrupt the waterproofing of the surface.
Mixing the solution and pouring
You can tighten a wooden floor with a store-bought mixture purchased in the form of a dry powder. Most of them are prepared by mixing in water. A 50 kg bag will require 13 liters of clean water. You need to mix the mixture with a drill with a mixer attachment. It can be used within 15 minutes, after which it will begin to set.
Self-preparation involves mixing cement and sand in a ratio of 1 to 3, additionally adding plasticizer and fiberglass. The amount of water is approximately the same - 13 liters per 50 kg. The mixture is mixed with the same drill, but it can be used within an hour and a half.
The floor must be poured continuously, starting from the far corner. When pouring, all unevenness must be smoothed out. The total working time should not exceed 2 hours, otherwise the mixture will begin to set and will not adhere as effectively to the floor. If the room is quite large, then formwork will be required to divide the area into several sectors.
The last step-by-step actions are performed 24 hours after pouring:
All that remains is to wait for the screed to dry, and also to carry out work related to the interior and decorations.
What is a tongue and groove board and why is it better?
A tongue and groove board is a board that has a groove cut along one side and a tenon along the other. When laying, the tenon fits into the groove, creating a more durable connection, eliminating “blow-in”. And this is a plus compared to edged or deck boards.
This is what a tongue and groove floor board looks like
Another advantage is related to the technological process: the tongue-and-groove board is “adjusted” to its geometry by cutting off the sidewalls, grinding the front side, and cutting longitudinal grooves on the back side for better ventilation. Then a tenon and groove are formed on the treated sidewalls using a milling cutter. After this, the tongue and groove board is ready. With such processing, there is certainly a difference (especially in low-grade goods), but not so great and sanding is needed, but not to the same extent as when using edged lumber.
A little about why it is so much more expensive. There is a lot of work, which is why this material is much more expensive, but the floor is stronger and more reliable.
Why do floors creak?
You need to check the flooring by applying intense pressure, visually inspect the floor, cracks.
A building level or rule will help you find the problem area: creaking usually occurs in places of greatest differences in height. In this case, it is best to remove a couple of floorboards and look under the flooring: this way you can accurately assess the condition of the joists, the degree of their wear, and the quality of the rough foundation.
Checking the levelness of the base
Creaks near the wall are often caused by incorrectly fastened or dried out skirting boards. Inspect them carefully, pressing your hand in several places, check whether nails come out of them when pressed, and whether there are cracks in the material. To make sure there is a gap between the boards and the wall, you should carefully remove one of the plinth fragments.
Inspect the baseboard along its entire length
So, when the reason is determined, you can choose the optimal method of strengthening the floor. There are several effective methods that have long been tested in practice by home craftsmen.
| Ways to strengthen the structure | Causes of squeaking | Peculiarities |
| Using dowels | Small gaps in the flooring, loose end connections | Minimum labor costs and financial investments with high efficiency |
| Strengthening with anchors | Gaps between the subfloor and joists | The method is expensive, but very reliable |
| Pulling with self-tapping screws | Loose connection of floorboards to joists | Economical and fast method, no need to spend a lot of effort |
| Floor bulkhead | Worn material, drying of floorboards, presence of large cracks and other damage | The method is time-consuming and labor-intensive, but it allows you to effectively eliminate squeaks and other defects |
| Bonding floorboards | The presence of wide cracks in the flooring as a result of drying out | The method is effective and durable, but requires some experience and physical effort |
| Foam blowing | Small gaps in the floor, loose fit of elements | Expensive, but quick and easy. The method allows you to remove squeaking for a maximum of 3 years |
| Using self-tapping screws as supports | Deflections of boards due to large distances between joists | Easy to implement, but not suitable for high traffic areas |
Pulling together floorboards
Pulling (or rallying) floor boards is a process that leads to the fact that the individual elements of the covering will lie next to each other as closely as possible, which will eliminate the formation of cracks and gaps. The procedure is performed when installing new wooden floors, laying floor boards, as well as during the repair of old floors.
General rules for laying floorboards
The bonding of floor boards should not be neglected, since wood is a “living” material; it reacts sharply to any changes in the microclimate in the room. For example, with fluctuations in humidity and temperature, especially seasonally, floors often begin to deform, as a result of which quite large cracks and gaps appear between individual floorboards. Moreover, they can form in the most unexpected places, that is, where there was not the slightest hint of free space.
The gap between the boards should be no more than 1 mm
Correct laying of floorboards and the use of special devices for screeding wooden floors helps to get rid of such gaps, as well as carry out the necessary prevention of their occurrence. Moreover, problems that arise can be corrected quite quickly.
Methods for tightening floorboards
There are several different methods for fusing floor boards together. They differ from each other in the use of a certain device, but in general the principle is the same. Methods for screeding floor boards:
- using an ax and a hammer;
- using wedges;
- metal clamps;
- ordinary car jacks;
- special lever Bowrench or Bowjak;
- with a mount.
Pulling together boards using wedges
On a note! All these methods are suitable for screeding old floors, but can also be used when laying fresh flooring or installing ceilings and subfloors.
Let's take a closer look at the most popular and interesting (and most importantly, effective) methods for reliably screeding floorboards.
Special floor slats are environmentally safe and accessible
Floor slats mean one of the types of lining, which allows you to assemble a flat floor without gaps.
Positive qualities of the floor slats
The popularity of special floor slats is due to the advantages that this floor covering has, namely:
- equipped with a stylus on one side and a cavity on the other;
- strength and reliability;
- environmental Safety;
- high thermal insulation properties;
- easy assembly of the structure thanks to special elements.
In addition, the material, made from moisture-resistant wood honeycomb, has a long service life and gives any room a solid appearance.
Manufacturing technology
The production of slats for floor coverings is carried out according to the same scheme as the production of other types of lumber. First, the wood is harvested and sawed. Next, the material is dried and planed. This lumber is sorted into three classes. To organize the finished floor, class A and B laths are used. And class C products can be used under laminate or parquet.
Durable types of wood are used in production: larch, beech and others. Thanks to its anti-slip properties and abrasion resistance, the material is advantageous for use in public and commercial interiors.
Requirements for the quality of the material
The quality of modern lumber must meet the requirements of GOST 8242-88. Deviations in plane are allowed per 1 meter of length up to 3 mm and width up to 2 mm. The material for production can be all coniferous trees, except poplar or alder. There should be no core on the front side of the material.
Preparing tools
First you need to prepare the necessary tools and materials. Under the logs you will need bars, screws and dowels, and roofing felt. To carry out the work, you need a hammer drill, a level, and wedges. You also need slats measuring 45 by 20 mm.
Next, you need to mark the floor on which the logs are installed. A waterproofing material is installed underneath them. The pitch of laying the lag depends on the thickness of the board. Heat and sound insulation materials (mineral wool) are also laid between the joists.
Material calculation
When carrying out installation yourself, you need to correctly calculate the number of boards. Ideally, the length of the board matches the length of the room. You need to calculate the area of the room and divide it by the area of one product.
Laying the floor slats
Laying the floor slats can be done on your own, provided that all installation rules are followed. Before starting work, the old floor is removed and logs are installed. Installation of the structure must begin after a week of adaptation of the wood at room temperature.
Installation of floor slats is carried out perpendicular to the direction of the lag.
Installation An important point: the installation of the first rail is carried out by screwing the board to the joist at a distance of no more than 1 cm from the walls. The board must be perfectly flat. All subsequent boards are mounted using the groove-to-groove method.
When the structure is assembled, the floor surface is sanded using a sanding machine. Now the floor can be treated with moisture-resistant impregnation and varnished.
Information about installing the first rail
As already noted, the first rail is mounted directly against the wall. Before installing the floor slats, you need to check the straightness of the walls. If necessary, stretch a horizontal line along the walls using a level along which the first board will subsequently pass.
The scheme of work is as follows:
- You can fasten the board with self-tapping screws on top and a comb on the side of the joists;
- for hidden installation, the remaining elements are mounted at an angle from the groove side;
- structural elements should fit together as tightly as possible;
- The last board is installed on top under the baseboard.
The final touch is the installation of skirting boards.
In custody
Flooring made from floorboards is considered an excellent way to organize rough and finished floors. When choosing a material, you need to take into account parameters such as the thickness and quality of the boards. And with proper installation, you can create a comfortable coating. Moreover, the cost of a floor lath is significantly less than the price of parquet or laminate. The cost of installation depends on the type of wood, complexity and volume of work. This material helps to establish an optimal microclimate in the house.
Choosing a screed
A screed is the best device for tightening floor boards, which is available to every person. The main feature of pouring wood with concrete is the need to separate them using an insulating layer. Sheets of glassine or roofing felt, bitumen mastic and roll material can be used as it. The most popular option is to choose polyethylene film.
When screeding on joists, you can choose not only a concrete solution, but also some others: cement-sand, dry construction mixture, self-leveling floor. Most often, concrete and cement mortars are used in combination with some additives. You need to determine it from the selected type of screed. There are three of them: dry, semi-dry and wet.
Dry
The most effective dry screed is for the floor of the first floor in old wooden houses. For a bathhouse or bathroom, it is better to prefer the second type of tightening of boards.
Dry screed consists of a special layer of insulation and two-layer floor elements for the Knauf system. The latter can be replaced with a coating made of gypsum fiber board or gypsum board. For insulation, it is permissible to use expanded clay, Penoplex or rigid mineral slabs.
The main advantage of dry screed is the perfect leveling of the base. The surface can be finished immediately without waiting hours or days. An equally important advantage is increased heat and sound insulation if expanded clay was used as insulation. The low weight of the entire structure does not require reinforcement, which also positively distinguishes the dry type of screed.
The downside is its thickness. It is quite large, which is due to the need to use insulation. The result is that it is impossible to use the screed in rooms with low ceilings.
Semi-dry
If the wooden base is strong, then a semi-dry screed may be the ideal choice. It does not allow water to pass onto the wood even if the waterproofing layer is damaged and creates a base that is as reliable as possible for installing any floor covering. The most effective use of such a screed is on a wooden floor under tiles.
It is made from cement with sand, reinforcing fiber, as well as special additives. Water in the mixture is used in minimal quantities. It is necessary for mixing cement. When laying the screed, you need to take into account that the thickness should not exceed 5 cm.
The coating is very wear-resistant and durable, which is considered its main advantage. It is lightweight and does not put too much stress on the wood structure. The appearance of cracks, shrinkage, and moisture penetration into the ceiling are excluded. The material is distinguished by increased sound and heat insulation properties, which is why it is very effective in homes with strong audibility. The screed can be prepared very quickly in large volumes, which is an equally significant advantage.
Reference! Semi-dry screed is perfect if you plan to install a heated floor. But for this you will need to lay polystyrene foam and a special foil-coated insulation roll on the base.
Wet
Wet screed includes cement mortar, sand, and water. All elements are mixed until a creamy state is formed, in which they will be poured onto the base. Therefore, increased waterproofing is required to provide protection against moisture ingress.
It is best to use a wet screed in an apartment in a multi-storey concrete building or an industrial building. And in a bathhouse or wooden house, its installation is possible only if the base is strong enough to withstand the weight of the mortar and the required reinforcement.
It should be taken into account that the total humidity in the room will increase significantly, having a negative impact on the floor and other wood elements. And the slightest damage to the waterproofing will lead to liquid getting onto the plank base and lower floors. The period of strength gain for a wet type screed is 28 days, during which it will need to be protected from drafts and moisture.
How to choose material
The quality of your floor directly depends on the quality of the material. Therefore, you need to choose it carefully and thoughtfully. Tongue and groove boards can be made from:
- Pines and spruces. These are inexpensive and common tree species that grow almost throughout Russia. Their main advantage is low cost, high heat capacity, and good elasticity. Among the disadvantages is softness (pine boards are not recommended to be laid in public places). Falling heavy objects can leave dents in the pine, so be sure to treat the surface with varnish. It is also recommended to protect the underside of pine and spruce boards with special means from rotting and insects.
- Larch. Despite the fact that it is a coniferous tree, it is quite hard. The main advantages are excellent strength, moisture resistance, durability, beautiful color and texture. Larch doesn’t even need to be varnished. The main disadvantage is the high price.
- Ash, oak. Practical hardwood trees. Excellent texture, nice color, good hardness and wear resistance. Oak can retain its qualities for decades, but its price is quite high.
Devices for screeding floor boards
Do not think that devices for joining floorboards are a recent invention. Our grandfathers and great-grandfathers also built a smooth floor surface. Construction magazines of the last century described various options for eliminating gaps when installing floorboards.
For this purpose, metal staples were used - both ordinary and specially designed.
Both modern methods and devices are all variations of old methods.
Special automatic equipment and Bowrench
Special automatic equipment from Belarus slightly changed the Bowrench design produced by the Americans. But essentially the device is the same.
There is a part with two protrusions that is fixed to the joist. A metal stop and a handle are movably attached to this part. By pressing on the handle, we ensure that the board fits tightly and secure it. The downside of this device is that it blocks access to the end of the board.
When laying a tongue and groove board, you will need to move the device several times when you need to attach it to each support.
Logs are used in different thicknesses. To “rest” against them, there are replaceable nozzles. The stop is removed simply: two pins are removed that secure the bolts. The device consists of 3-4 attachments, so there are not many options.
Belarusian manufacturers have made changes to the design: one part of the base grip is movable and adjustable. There is an adjusting bolt at the end that allows you to extend or retract one of the fasteners. There are more possibilities for regulation, but the likelihood of damage is also greater.
Both devices are easy to use, although the Bowrench is more refined.
But the price decides a lot - Bowrench is 3-4 times more expensive.
Floor lath and lining are the most popular products made from solid wood
Each type of product has its own technological recommendations. So, here is actually a list of the most common whole products on the Russian market; by producing these products, the company will always have sales:
Floor slats. Solid floor slats on an industrial scale are usually made from softwood lumber. This is due to the fact that deciduous lumber is not so resistant to rotting, on the one hand, and on the other hand, manufacturing, for example, from oak is quite expensive.
Larch flooring is used in saunas, baths and places with high humidity. Sawing of lumber for the floor slats is carried out from not too thick wood, with a diameter of 18-22 cm. Today there is a tendency to reduce the thickness of the floor slats and increase the number of logs, this is primarily due to the rather high price of the slats. Wood species such as oak and mahogany can be classified as extra class floor slats.
Floor lath is one of the most popular products of advanced wood processing...
Lining. This type of solid product is used for cladding and giving an aesthetic appearance both indoors and outdoors. Cladding with clapboard is carried out vertically. The lining is obtained from the so-called side lumber or by cutting thin timber diameters of 12 - 16 cm. Again, there is a decrease in the thickness of the lining, due to the desire to reduce the cost per square meter.
Lining is inferior in terms of production volumes of floor slats, but stubbornly holds second place...
Block house. Thanks to this material, you can design any wall to match the design of round timber. The block house cladding is carried out horizontally. It looks quite aesthetically pleasing. It is made from a central timber board with a diameter of 16-22 cm or a side board when sawing with a diameter of 26 and above.
Imitation timber is perfect if you want to decorate your house like a wooden beam.
This material is increasingly entering the market every year...
Skirting board. As a rule, it comes as a by-product from the main one and is more expensive. For example, when producing laminated veneer lumber, there is often waste left over that can be thrown away or used to make a short skirting board.
Door frame.
Good luck and see you again!
A few tips from the master
m http-equiv=»Content-Type» content=»text/html;″>g class=»lazy lazy-hidden aligncenter wp-image-1837″ src=»data:image/gif;base64,R0lGODlhAQABAIAAAAAAAP///yH5BAEAAAAALAAAAAABAAEAAAAIBRAA7 ″ data-lazy-type=”image” data-lazy-src=”https://vremya-stroiki.net/wp-content/uploads/2018/01/1-2.jpg” alt=”” width=” 500″ height=”376″ data-lazy-srcset=”https://vremya-stroiki.net/wp-content/uploads/2018/01/1-2.jpg 640w, https://vremya-stroiki.net /wp-content/uploads/2018/01/1-2-300×225.jpg 300w" data-lazy-sizes="(max-width: 500px) 100vw, 500px">
Is it worth buying a device such as a bowrench for one-time work? Most likely not, since this tool costs 10,000-15,000 rubles, which may not be affordable for everyone. But, if you are planning to lay 50 square meters of flooring or work professionally in this direction, you cannot do without it.
For one task, for example 1-2 rooms, it is best to use a jack; this is one of the most reliable and proven “folk” methods. It can compress boards of any cross-section with sufficient force.
Wedges or a pry bar simply won’t cope with large-section floorboards. It takes considerable effort to compress them to the required degree.
How to tighten floorboards using a clamp and wedges?
You can hold the floor boards together using clamps and two wooden wedges. The clamp is secured to the joist at a certain distance from the board being mounted. Wedges 40-50 centimeters long are made from cutting boards by sawing the piece diagonally.
The clamp is strengthened on the joist, turning the arc towards the board (as in the photo above). The wedges are fixed between the board and the arc of the clamp. The wide part of the wedges is tapped with a hammer until the gap between the two boards disappears. Then you can secure the floorboard with self-tapping screws.
If you need to install fasteners in a groove or tenon, then a “window” is made in one of the wedges, placing it above the joist.
A self-tapping screw is screwed through it.
Preparing boards for laying
Before use, wood must be treated with antiseptics.
Wooden floors are best laid in the spring, after the end of the heating season. If they are laid in winter, the boards may dry out. To protect the floor from fire and rotting, all wooden material is treated with a fire retardant. It is better to impregnate the underside of the boards with an antiseptic, for example, ammonium fluorosilicate.
