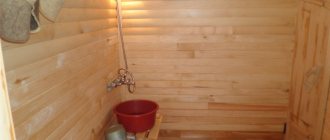
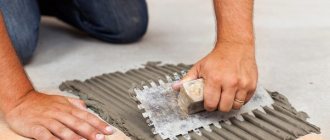
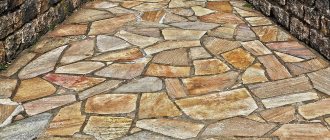
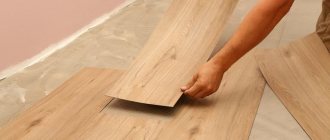
You can decorate the floors and walls in a bathhouse with different materials, and one of the most popular is tile. Its big advantage is that it is not afraid of constant exposure to moisture, so if installed correctly you will not have to replace it often. It is important to know that not every tile is suitable for a bathhouse, and in order to make the right choice, you should know in advance about all the properties and characteristics of a particular coating.
Bath tiles
The need for a floor slope in the bathhouse
Before laying tiles on the floor in a bathhouse, it is important to correctly calculate the required slope of the surface, which will be obtained after finishing it with the finishing material. If it is insufficient, then all the water from the floor tiles will not flow into the drain system. If there is a large slope, it will be necessary to increase the estimate for construction and finishing work on installing the floor.
Therefore, to solve this problem, professional help is required, as well as to perform all other rather complex work. An error in their implementation will lead to a deterioration in comfortable conditions when using bathhouses and even to the destruction of the building structures of the structure.
If the floor is sloped, then the following problems can be solved:
- slow down the process of deterioration of the floor finishing material;
- prevent water accumulation on the floor surface;
- ensure accelerated drying of building structures;
- reduce the likelihood of mold and fungal growths.
Mold and the beginning of destruction of structures under the floor of the bathhouse Source disinsection-moscow.rf
The slope of the floor in the bathhouse can be created even at the stage of construction of the rough foundation. When performing such work, a large number of technological nuances are taken into account. Therefore, calculations are performed first. Designers do this at the stage of developing a bathhouse project or after the construction of the building and its owner contacts a specialized organization.
Preparing the base for a tiled floor
Before laying tiles on the floor in a bathhouse with a slope towards the drain, specialists always level the surface of the base. During such work, the required slope may even be created towards the drain hole. The need to carry out such an operation depends on the features of the construction and/or decisions made in the design of the facility.
Concrete base
In a bathhouse, concrete is often poured when arranging the base for floor tiles. This is the optimal solution. The reason for this is the good frost resistance and high degree of flexibility of concrete. A base made of this material does not rot or deform and will last at least 40 years if properly installed. Moreover, it can be done immediately with the necessary bias.
Concrete floor base with a slope in a shower bath Source texnotoys.ru
The concrete base for a tiled floor is a screed. It can be performed in all wet rooms of the bath. If laying is carried out on the ground, then the angle of the floor is created due to the slope of the soil. When work is carried out on small areas, in this case the slope is ensured by changing the thickness of the underlying layer.
When installing a concrete base, specialists take into account the specifics of a particular bathhouse. Features of the building, the climate of the area and construction requirements affect the materials used. Most often, concrete floors under tiles are poured on the ground or joists.
Regardless of the option, specialists must insulate them when using penoplex foam up to 50 mm thick. Polystyrene foam can also be used. However, its thickness is usually 100 mm. Porcelain stoneware is also often used for these purposes. It is laid approximately 150 mm thick.
Laying insulation when constructing a concrete base Source mtdata.ru
Professional stages of creating a concrete base
The work is carried out during the warm period. Before pouring concrete, a drainage system is laid in the prepared trench. It is laid to the sewer pit. Specialists also, at the initial stage, before making a final decision on how to lay tiles on the floor in the bathhouse, determine together with the customer what type of slope will be created. One of its types is called an “envelope”, and the other is a drain in 2 planes.
When creating a base on the ground, craftsmen perform the following work:
- Remove the top layer of soil.
- Compact the recess.
- Cover the drain hole to prevent unintentional clogging of the system.
- Create a box from boards and install it around the drain hole. This will allow, if necessary, to subsequently replace the drain head with a similar product, but with a higher or lower height.
- Fill the created depression in the soil with sand, and then compact it. The thickness of this layer is usually from 100 to 120 mm.
Important! During compaction, the sand is moistened. Moreover, it does not contain any impurities, including silt and clay.
Compaction of moistened sand Source bomond-club.com.ua
- Fall asleep and compact the crushed stone. After that, he is slammed into the sand. The result is a layer approximately 150 mm thick.
- Remove the box made of boards that protected the drain pipe.
- Fill the empty space around the drain with a solution of cement, sand and foam chips.
- Roofing felt is laid overlapping on a compacted layer of sand and crushed stone to prevent the penetration of moisture from the concrete solution. The joints of the waterproofing material are coated with bitumen. In this case, the roofing material is placed on all walls of the room to a height of approximately 200 mm.
- Cut a hole in the roofing felt under the ladder and install its lower part.
- A metal reinforcing mesh is laid, the individual parts of which are connected with wire.
- Beacons are fixed with plaster to level the concrete solution. They are installed from each other at a distance of 1500 to 2000 mm.
- Prepare a solution for the subfloor using waterproofing additives. Additives protect metal fittings and the base as a whole from the negative effects of water.
Preparation of mortar for the subfloor Source ooo-dsk.ru
See also: Catalog of companies that specialize in finishing materials and related work
- Pour the solution, level it and, if necessary, adjust the slope using a building level. This process is accompanied by compaction of the mixture to eliminate cavities with air. The thickness of such a layer is at least 50 mm. It hardens in about 10 days. This period depends on the temperature and humidity in the room.
After the first layer of concrete has cured and before laying the tiles in the bathhouse, craftsmen lay thermal insulation. Then it is covered with a reinforcing mesh, on top of which beacons are installed. Then a leveling screed with a thickness of 50 to 60 mm is poured. This is the second layer of concrete mortar, which is compacted and leveled along the beacons to obtain uniform density and remove voids. Finally, specialists apply a waterproofing impregnation to the subfloor.
Wooden non-leak base
If it is decided to make the base from wood, the structure must have a non-leak design. To make such a subfloor, only boards are used, and not sheet wood material. The reliability of the entire structure can be ensured if each of its elements has high strength.
Construction of a wooden non-leaking floor with a slope Source stroyday.ru
Despite the complexity of the work, professionals lay tiles on wooden floors after eliminating the mobility of individual elements. During installation of floorboards, a certain slope towards the drain is maintained. Professionals perform this work in the following sequence:
- remove dirt from the rough surface and install a drainage system;
- pour the screed at an angle if it is provided for in the project;
- allow the concrete structure to harden for 10 days;
- install the boards in accordance with the slope of the screed.
When constructing a leak-proof wooden base, the floorboards are laid tightly together. The result is a warm structure, because insulation material is placed in the underground space. This could be expanded clay, expanded polystyrene, and so on. In this case, the boards are laid on the logs.
Experts use several technologies for preparing the wooden base before laying the tiles in the bathhouse at a slope towards the drain. The most common method is the “dry” method. When using it, OSB sheets, waterproof plywood or gypsum fiber board are laid on a rough wooden floor.
Preparing a rough wooden base using GVL Source chudopol.ru
Advice! It is not recommended to lay chipboard in the steam room, because it can release hazardous substances when heated.
Craftsmen must waterproof the rough structure. For this, bitumen and roofing felt are used. The sheet material is attached with self-tapping screws, the heads of which are recessed into the coating, and the seams between its individual parts are sealed with sealant. At the end, the structure is coated with a primer. It will increase the adhesion of the sheet material to the tile adhesive and topcoat.
Professionals can also prepare the rough wood base using the “wet” method. When using it, a screed is created on top of the laid boards. The thickness of the concrete layer is no more than 50 mm. The technology also involves installing a damper gap along wall structures. Its width ranges from 10 to 20 mm.
Craftsmen always cover the wooden base with waterproofing. This can be plastic film, roofing felt or bitumen. Waterproofing also protects the lower parts of the walls. The height from the floor of such areas is 100-120 mm.
Waterproofing a wooden subfloor Source buildup.ru
Experts also use damper tape. It is fixed along the walls. Reinforcing mesh is also used. The screed itself is most often created when using a leveling mixture. To prepare it, craftsmen use two parts of liquid glass, the same amount of sand and half as much water.
Cladding with cladding
This option is practically no different from the previous one, however, if you don’t know how to decorate the wall behind the stove in the steam room in such a way as to preserve the beauty of the room while creating safe conditions, then this option is undoubtedly for you. Protect the walls using heat-resistant decorative materials laid on thermal insulation.
The finishing around the stove in the bathhouse can be done with the following materials:
- Clinker tiles are made from baked clay. It is characterized by high strength, heat resistance and durability. One of the advantages of this option is also the rich color palette, which includes not only black and white tones, but also blue or green colors;
- Terracotta tiles are also made from clay, but they are inferior to the previous option in terms of density and the number of possible colors;
- Soapstone is a good cladding option for a bathhouse, made from rocks of green and grayish shades. Has good heat resistance and strength;
- Tiles are ordinary ceramic tiles, characterized by good heat resistance and a pattern on their surface;
- Porcelain tiles are heat-resistant tiles that imitate natural stone or wood.
The tile will not dissipate heat, protecting the walls from fire, so it cannot be mounted directly on the wall. We recommend using the following design:
- Wall;
- Clearance for ventilation;
- Fireproof material;
- Tiles (the distance from the tile to the stove must be at least 15 cm).
Such a “pie” will create reliable protection for walls from heat, preserving the beauty of the room.
One of the following options can be used as a fireproof material:
- Fireproof drywall - made from the same materials as regular drywall, but using fiberglass;
- Minerite slabs for baths are absolutely not exposed to moisture and heat.
- Glass-magnesium sheet - plates made of fiberglass and magnesium binder. Excellent resistance to heat, moisture and noise.
This option will perfectly protect your bathhouse from the possibility of fire, and will also insulate the room, preserving its aesthetic component.
Types and features of sloped floors
The type of slope is selected during the design of the ramp floor. The installation of this element is carried out in all rooms where water regularly enters the floor tiles. A ramp is an inclined part of the floor. Thanks to the slope, water flows into the drain. The required angle is formed using the backing layer. At the same time, the installation of floor ceramics differs in a number of features.
Floor made of 6 inclined parts - ramps Source vse.kz
The nuances of laying ceramic tiles at an angle
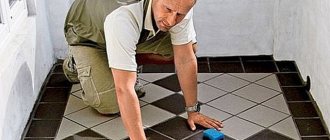
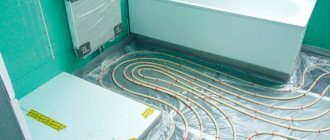
Before laying tiles in the shower on a sloped floor or in any other bath room, professionals always first create a waterproofing layer on an already prepared base. Thanks to additional protection, water will not wash away, for example, a concrete structure.
Usually craftsmen lay tiles away from the walls. If there is a horizontal frieze, its lining is first performed. Only then do they lay the ceramics on inclined surfaces along which water flows into the drain.
The “envelope” type layout begins with the sides representing the bases of triangular or trapezoidal surfaces. First, be sure to fix the tiles that do not need to be cut.
Laying the material begins exclusively from the center of the base. If an even number of ceramic pieces are placed in one line, the triangular inclined surface is divided into two equal parts. Each of them is lined separately.
Laying tiles on a slope on the floor with a drain Source mega-santehnika.ru
How to choose
So, we found out that it is better to use glazed tiles for finishing a bath. When choosing specific samples, you should definitely inspect their base. It should not be too porous, this reduces the strength and durability of the material and can serve as a convenient area for fungal growth
An important characteristic is the ability of ceramics to absorb moisture. These types of material are marked either “AI” or “BI”
However, it should be taken into account that cutting such tiles is quite difficult.
“A” or “B” is a reflection of the manufacturing method; for the consumer, there is not much difference between them.
It is also worth first stacking two tiles with sides facing each other, and then placing one on top of the other. If the connection is smooth and the overlap is complete, these are quality products that will suit you. Tiles with defects will create a lot of unsolvable problems during installation; it is better not to purchase them. Such a characteristic as “wear resistance” for wall tiles is secondary and you don’t have to pay much attention to it. The presence or absence of relief is also not important, although smooth tiles usually last slightly longer than textured ones. The dimensions of an individual product are also not very important, although large tiles are laid faster. Well, the colors are generally entirely at the discretion of the buyer: his bathhouse is his tastes.
Of course, all the nuances regarding the choice of tiles for finishing bath rooms cannot be outlined in a fairly short text; a fairly thick brochure would be needed for this. But I think that we have given you at least the most general idea of the problem of choosing tiles for the walls of a bathhouse.
Video description
You can get acquainted with the process of laying tiles from a ladder onto a pre-prepared screed with a slope in this following video:
However, professionals carry out the work of tiling a sloping floor with ceramic tiles as follows:
- first, cover the far triangular surface opposite the entrance door to the room with tiled material;
- then the tiles are laid on the left and right sides of the ladder;
- then the ceramics are placed on the last sloping section of the floor near the entrance;
- at the end of the process, the surface directly next to the drain is coated.
Thanks to this sequence of work, the master moves less on the facing material, the glue under which has not yet reached its maximum strength. At the same time, during the masonry process, experts pay increased attention to the watershed lines of the floor with expansion joints, as well as cuts and joints between the ladder and the tiles. After all, such places are most susceptible to damage of various types.
To increase the strength of the seams, they are reinforced using metal profile elements. In this case, the gaps themselves are first filled with bitumen, which is preheated. Such a mass, when cooled, can reduce the negative impact of loads.
Metal profile for protecting tile joints Source profil-mo.ru
Lining of cuts
Craftsmen perform this work after laying all the solid ceramics and drying the glue underneath. In the process, specialists use exclusively individually cut tiles for a specific location. At the same time, the tile material is distinguished by its decent thickness and high strength. Therefore, only experienced craftsmen can cut floor ceramics efficiently. Moreover, they use a special tool.
Briefly about the main thing
Before laying tiles on the floor in a bathhouse with a slope under the drain, choose the option of laying out the ceramics. The tile material is laid with a break in two planes and using the “envelope” method. In the first case, you have to trim the ceramics less.
Before work, prepare a leak-proof wooden or concrete base. In this case, the concrete subfloor is poured in two stages with sequential filling of sand, crushed stone, laying of waterproofing, reinforcing mesh, insulation and application of waterproofing impregnation.
When constructing a wooden base, only boards are used, and it is prepared using waterproofing and sheet material. A wooden subfloor can also be leveled using a screed no more than 50 mm thick.
Ratings 0
Log repair
If, after opening the wooden floor, it turns out that the joists have reliable support, but are not aligned in the same plane, or some have dried out and bent, then the matter can be corrected with even overhead boards. They can be attached to joists with nails, self-tapping screws, and for those who find this not enough, then with bolts and large washers.
Everything can be leveled at the highest point by pulling the cords in a horizontal plane. If there is a large gap between the lags, then you will have to install additional lags .
The end result is a great timber floor which can be enhanced by adding 15-20mm moisture resistant plywood In this case, it needs to be cut crosswise into 4 parts and screwed with self-tapping screws at intervals with a gap of 3–5 mm. We lay the tiles in the usual manner using elastic adhesive on primed plywood.
