Each academic publication begins with defining the subject of conversation or research, we will follow the same path and define what a tongue and groove floorboard is. By and large, this is a ready-made, natural construction kit that allows you to assemble both finished and rough flooring in a short period of time.
More specifically? More specifically, here are instructions for using the material, and in the end - a floor made of tongue and groove boards.
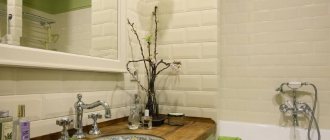
The photo of the final result is impressive.
What is a tongue and groove board?
A tongue and groove floorboard is lumber made on a milling machine in a factory. A notch is cut along the edge along one long side, and a protrusion of the appropriate size is made on the other. When joined into a single covering, the tenons are completely buried in the grooves of adjacent floorboards, which makes the resulting joints practically invisible and eliminates the formation of through gaps in the floor.
The tongue and groove board is distinguished by:
- Tenon and groove at the ends.
- Polished front surface.
- One or more longitudinal recesses on the bottom side for ventilation.
- Use in the manufacture of well-dried lumber.
In fact, this is an ordinary floorboard that has been subjected to additional processing. The tongue-and-groove end locks strengthen the overall final covering, and factory sanding of the top face eliminates the most labor-intensive part of the work of laying a plank floor. Plus, the recess at the bottom guarantees continuous air exchange in the space under the wooden finish, thereby reducing the risk of damage to the wood.
Structure of a tongue and groove board
Advantages and disadvantages
Among the strengths of tongue and groove floor boards:
- high speed of coating installation;
- no through gaps;
- the ability to restore a wooden floor by sanding;
- aesthetic appearance of the floor finish;
- reducing the risk of floorboards being damaged by fungus and mold;
- increased strength of the tongue and groove connection.
As part of the renovation, it is permissible to scrape and sand a classic parquet floor a maximum of 3-4 times. The number of possible restorations is very limited; each scraping of parquet removes 3–4 mm of wood from the surface of the dies. And if deep scratches appear, the laminate will have to be replaced altogether.
A tongue and groove floor board is a solid wood up to 50 mm thick. You can safely sand it at least 5-10 times. The main thing is not to cut the top layer down to the tenons, which will lead to a loss of strength of the end locks.
Among the disadvantages of a board with tongue and groove, only its higher price should be mentioned compared to a conventional edged analogue and the low water resistance characteristic of all wood. But if you compare the material in question in terms of cost with laminate, then the first option will give a strong head start to the second. A laminated finish per square meter will cost 5–7 times more than a sanded board, even taking into account the cost of painting the latter. And to increase the resistance of the floor to moisture, there are varnishes and impregnations for wood.
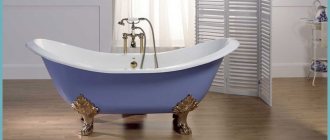
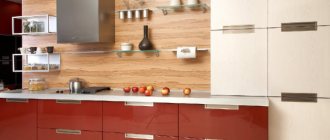
The tongue and groove floor looks very presentable
Painting features
Floor painting can be done in three ways, each of which is used under certain conditions. In the first case, drying oil or primer is applied to the wooden flooring, after which it dries, first one and then a second layer of paint is applied. This method allows you to get a beautiful surface if the flooring initially had no visible defects.
The second method includes an additional step that involves eliminating floor defects before applying layers of paint. In this case, all cracks and crevices are first puttied and sanded. The third method of painting a wooden floor involves filling the surface and painting in three layers.
Which of these methods you can use to finish the floor in your home depends on the original condition of the floor and how you solved the problem: how to paint a wooden floor - varnish or paint.
Varieties
Based on the appearance and condition of the wood, tongue and groove boards are divided into three grades:
- Extra.
- A (“first”).
- B (“second”).
Lumber of the “extra” grade is distinguished by the complete absence of knots and other defects. For class “A” small inclusions and stains are acceptable. Usually this option is offered in stores as the most popular product.
Floorboards marked “B” are the cheapest, but they are characterized by the presence of visible irregularities and knots. There is also a third grade “C”. However, such polished boards are practically not produced, since, due to its aesthetic characteristics, it is absolutely unsuitable for flooring as a finish.
Tongue board classes
Aspect #4 - Humidity
The ideal moisture content of tongue and groove boards is 12-16%.
If the boards are poorly dried, then deformation of the finished floor is inevitable. Cracks and warping of boards often occur. There will almost certainly be gaps between the boards, so the floor will have to be re-laid.
The moisture content of the boards can be determined using a moisture meter. If this device is not available, you can get by with simpler evaluation methods:
When tapped with your knuckles, dry (suitable for flooring) wood produces a ringing, clearly audible sound. A wet board, on the contrary, sounds dull, barely audible. If you touch a wet board, you can feel the dampness. There is no feeling of moisture on a dry board. The color of a wet board is darker than that of a dry board.
Also, after high-quality industrial drying, the surface of the board acquires a noticeable shine. A damp board remains matte. There should be no condensation inside the packaging film. Droplets of moisture on the film always indicate excessive moisture on the boards.
Dimensions
Manufacturers most often offer tongue and groove floorboards in sizes with a thickness of 28–45 mm. But you can also get products up to 50 mm on order. The width of sanded tongue and groove floorboards varies between 80–200 mm. And its length can reach 6 meters, but usually four-meter versions are found in stores.
Thickness of tongue and groove board
Materials
For the manufacture of tongue and groove boards the following are used:
- Spruce and pine.
- Larch.
- Aspen and linden.
- Ash and oak.
The first option is distinguished by its affordable price and soft wood. These won't be the most durable floorboards, but they will be cheap and the easiest to process and saw. Products made from larch are characterized by a dense wood structure, which increases the strength and durability of the lumber, but at the same time complicates its processing with your own hands.
Aspen and linden boards are characterized by increased resistance to moisture. It is recommended to take them for installation in baths and steam rooms, as well as on verandas. And for rooms with high floor loads, oak and ash are most suitable.
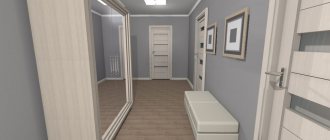
Grooved board in the interior
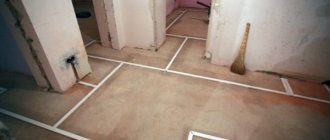
On what basis can a floor tongue be laid?
The tongue and groove board can be laid on almost any base. In order for such a coating to last as long as possible, the floor surface must be prepared. Make additional thermal insulation and waterproofing.
Floor tongues can be laid on almost any base, for example, on joists
On what bases can you lay tongue-and-groove boards with your own hands:
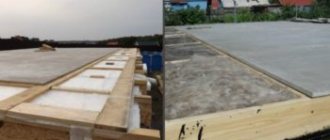
- Tongue and groove boards can be laid on a concrete base. If there are pronounced irregularities on such a surface, then it must be filled with a new layer of screed.
- You can also mount such a structure on logs. The logs are attached to the base with screws, dowels or glue.
- If you decide to use tongue and groove boards as the front finish, you can lay down plywood. The plywood is attached to the base with glue or self-tapping screws.
- An old wooden floor can also be covered with tongue and groove boards. The main thing is that all its elements are intact and firmly attached to the base.
Whatever base you use, you need to take care of additional insulation of the floor. First, a waterproofing film is laid on the subfloor, then insulation, for example, glass wool, and the film is laid again as the last layer. Only after all the layers are in place can the tongue and groove board itself be used.
How to choose for the floor?
When selecting a floorboard with tongue and groove, you should carefully inspect each product, or it is better to simply measure everything with a caliper. The thickness and width of the tenons should exactly match or be slightly smaller than the size of the grooves. To avoid mistakes, you can take a couple of offered floorboards directly from the warehouse and join them together - there should be no visible recesses or gaps in the joint.
You also need to compare the edge with a tenon and the edge with a groove in terms of thickness. If one of them turns out to be smaller than the other, then after laying in the joints, adjacent floorboards will be at different levels. Then you will have to scrape them additionally, which will greatly increase the labor intensity of the work.
The lumber should be dry with a moisture content of 8–12%. Such boards are dried in special chambers. Wetter options for natural drying (20–25%) will begin to shrink and deform on the joists after installation, which often leads to the appearance of cracks in the coating.
Preparing a Wooden Floor
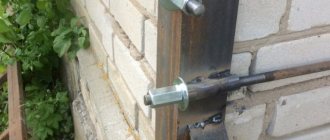
Fastening with nails
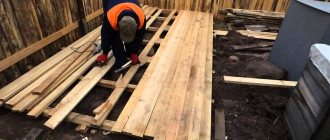
First, let's look at how to fasten floorboards with nails. It should be noted right away that this method can only be used if the flooring is fixed to a solid wooden base or along joists.
So, the installation technology includes the following steps:
- Logs are installed from square timber at a distance of 70 cm, pre-treated with an antiseptic composition. The thickness of the boards should be between 50-70 centimeters.
- Sound and heat insulation is installed. For these purposes, mineral wool or expanded clay can be used.
- They begin to install boards on top of the insulating materials, placing them with the grooved side towards you.
- The first plank is fastened with nails so that their heads do not interfere with the further installation of the plinth.
- All subsequent boards are fixed with nails, which are carefully driven into the groove at an angle of 45 degrees. In cases where the plank is shorter than the length of the room, the joining of the two elements is located on the log.
- After laying the finished floor, you can begin sanding and decorative processing.
In the same way, you can fasten the floorboard with self-tapping screws. For this purpose, special fasteners designed for working with wood are selected.
Laying for now
Installation of a wooden floor made of tongue and groove boards is carried out as follows:
- The logs are set and leveled horizontally in increments of 40–50 cm.
- The first board is nailed with a distance of 10–15 mm from the wall and a groove to it to prevent damage to the tenon when tapping (joining) the floorboards.
- The next five to six boards are laid without fixing. They are then held together using a hammer and wedges before being nailed down.
- The procedure is repeated with the next few floorboards.
- The board of the last row is cut so that there is a ventilation gap of 10–15 mm near the wall.
- Finally, the floor is sanded, if necessary, and then the baseboards are nailed.
There is nothing special about the installation of this finish. It’s easier to lay only the varnished coating; step-by-step instructions on how to lay laminate flooring with your own hands consist of three or four points.
When laying boards, you can fix them on the joists using screws and nails. It is permissible to screw (drive) fasteners from above or into the end of the floorboard. The second option is more aesthetically pleasing, but will create repair problems later.
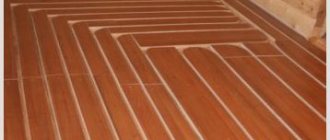
Step-by-step instructions for laying the floor
How to fasten a floorboard photo and video of fasteners
Environmental friendliness is the main advantage of wooden building materials. They support the “rustic” style of country house interiors, giving the interior space aesthetic beauty and comfort. High-quality installation of the floor covering will guarantee its durability. Squeaking and sagging are the main problems associated with wood floors. As a rule, they arise as a result of illiterate installation.
Installation technology
The planks can be laid directly on the old floor, on a plank structure along joists, or on an artificial plywood base. The main point that is worth emphasizing is the installation conditions. Firstly, the building material must acclimatize, that is, lie in the room being repaired for a certain amount of time (at least 3 days). Secondly, laying floorboards is permissible if the humidity of the room atmosphere does not exceed 60%. If this indicator decreases to 40%, the likelihood of deformation of the building material increases.
Installation on an old subfloor
Work begins by checking the condition of the substructure. If necessary, worn boards are replaced with inexpensive lumber. The second stage involves sanding the old coating. We fasten the floorboards in such a way that their joining does not coincide with the joining of the rough base (perpendicular direction).
Installation on plywood sheets
Lay moisture-resistant plywood in a diagonal direction in relation to the floorboard. Fix the material with screws or dowels. A technological, compensating gap is left around the perimeter of the room, as well as between the sheets.
When choosing adhesive fastening technology, special attention is paid to the selection of glue. The binder composition must correspond to the type of subfloor and heat and sound insulating materials
The workflow looks like this:
- laying plywood and sanding it;
- removal of construction dust from the surface being repaired;
- applying primer;
- installation of finishing board;
- polishing the coating, varnishing or painting.
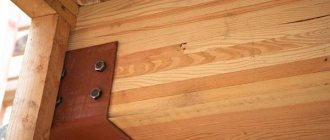
Floor installation using joists
This method involves fastening the floorboard to wooden blocks with self-tapping screws. Fixation can also be done using adhesive mastics. Lay the logs in a direction perpendicular to the finishing coating. The paving structure is adjusted by placing chips on uneven areas. The space between the joists is filled with thermal insulation and waterproofing material. A ventilation gap of 3 cm between the waterproofing and the floorboard is required.