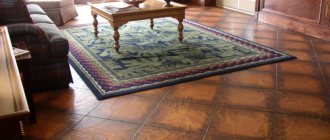
The ease of use of an acrylic bathtub largely depends on the correct installation. There are many types of bathtubs, they can be mounted only on legs, on legs with a frame, with plastic or stone screens. In addition, the bathtub can be installed either in a fully prepared room or before the walls are finished with ceramic tiles.
Installing an acrylic bathtub under tiles
Before making your final decision, it's helpful to know the pros and cons of each method.
| Method | A short list of advantages and disadvantages |
Installing a bathtub on tiles | The entire floor and wall area is covered with ceramic tiles. This method makes the tiler’s work easier, nothing interferes with him, and it is much easier to mark and lay. Another plus is that further work on installing the bathtub can be done within one day, minimal amount of construction waste, dust and noise. Most owners use this method to install plumbing fixtures. Disadvantages - the seam between the bathtub and the walls is always noticeable. |
Installing a bathtub on tiles, but the enclosed space under the bathtub is not finished | This option is very rare; the floor and walls directly under the bathtub do not have a finishing coating. Advantages: minor savings in materials and time. Disadvantages - under the bathtub is always dirty; when replacing a worn-out bathtub with a new one, problems with dimensions may arise. |
Installing a bathtub under tiles | The space under the bathtub can be tiled or not; the wall surfaces are finished after the final installation of the bathtub. Advantages - problems with the junction of the sides of the bathtub and the walls are solved, stability is increased (the tile serves as an additional support and does not allow the bathtub to tip over). Disadvantages - the tiler’s work becomes more complicated; you can only replace the bathtub with one that is exactly the same in all respects. |
In the article we will look at the third option - installing a bathtub under the tiles. Our main attention will not be paid to the process of assembling and installing the bathtub; it is no different from all the others. Let's talk in more detail about changing the technology of finishing walls and floors; this is a very important issue. Incorrect solutions to technological issues can cause major problems during the operation of the bathroom.
Installation of a bathtub followed by tiling
Finishing a bathroom with tiles
Why choose the option of installing an acrylic bathtub under tiles?
Only true professionals do this. Why? When preparing walls for tiling, the main attention is paid to the verticality of the corners. If they have a slope in one direction or another, then at the joint you will have to cut the tiles into a cone; this is always noticeable, ugly and considered a defect. But tilers are of little interest in the angle between the walls. It can be 90°, 85°, or 95°. If only the walls were smooth and vertical. But when installing a bathtub at an indirect angle, problems arise.
It is important that the corners of the bathroom are straight, then the plumbing will be installed smoothly and accurately
The fact is that the width of the gaps between the side of the bathtub and the ceramic tiles depends on the position of the walls; if in one place the bathtub fits tightly, then at the other end the gap can increase to a centimeter depending on the specific angle.
If the walls are uneven, there will be gaps between them and the side
It is impossible to make this discrepancy invisible even with the use of modern building materials and technologies. When installing an acrylic bathtub under the tiles, such gaps can be easily eliminated during finishing work.
Another problem with conventional installation technology arises with sealants. Over time, they not only peel off, but also change their original color. Ideally white materials become dull and the sealant layer becomes visible.
A layer of old sealant
There is only one way to eliminate the defect - remove the old sealant and apply a new one. This takes a long time and is fraught with damage to the surface of the acrylic bathtub.
Old sealant can only be removed mechanically
In our proposed method of installing an acrylic bathtub under tiles, such a problem cannot arise in principle.
acrylic bathtubs
Calculation of the required number of decor units
Finding the right number of ceramic border pieces is not difficult. For this:
- Using a tape measure, measure all sides of the bathroom that are in contact with the wall and summarize the obtained results.
- Divide the resulting amount by the length of one unit of the product and round up to the nearest whole number.
- 5–10% is added to the purchased amount of border in case of damage or breakage of the product (usually 2–4 units of ceramic module).
How to attach and what to glue on
Step-by-step instructions for installing ceramic borders under tiles:
joining tiles to an acrylic bathtub
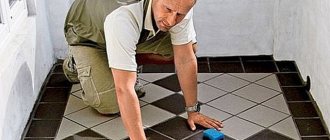
- The walls and bathtub are cleaned of dirt, degreased and wiped;
- Markings are made along which the ceramics will be laid. curbs;
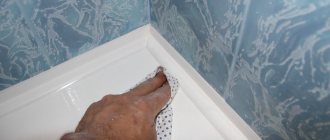
- After everything has dried, silicone sealant is applied to the joint using a gun. Use a spatula to smooth it out and seal the remaining small cracks;
- To glue ceramic borders, glue is used that is resistant to mold and mildew. It should be diluted according to the manufacturer's instructions;
- Laying ceramic skirting boards begins from the corner. They are adjusted as close to each other possible The glue is applied to the back side of the border with a spatula. After installation, the protruding solution is immediately removed;
- To ensure that the curbs sit more closely to the wall and to each other, they are carefully tapped with a rubber mallet;
- The same plastic cross is placed between the baseboards, which will be used when laying tiles;
- After installing the tiles and borders, all seams are rubbed with the same substance.
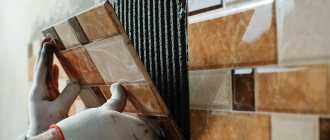
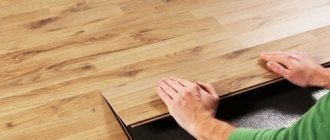
Tile installation
Directions for installing ceramic borders on tiles:
- The wall and bathtub are cleaned and degreased;
- Once everything is dry, the joint between the wall and the bathtub is sealed with silicone;
- It is recommended to strengthen the borders on the tiles using watery nails. Apply the adhesive to the back side of the baseboard, then press it firmly against the wall;
- End caps are installed on the edges;
- After installing the curbs, the connections are treated with transparent silicone sealant.
What glue, sealant to use
To install plastic skirting boards use:
- Silicone sealant for ceramic borders.
Silicone sealant. This option is incomprehensible: over time, the seam darkens and mold appears. The structure has to be dismantled, disinfected, and reinstalled.
- Aquarium glue. In this case, the spread of mold is not observed, which is due to the presence of disinfectant additives in the composition. The product is offered in small volume tubes.
- Waterproof glue. Moment Crystal is suitable, which is used strictly according to the instructions. It provides a secure hold and does not become a breeding ground for mold.
- Polymer sealant. This product does not lose its water-repellent properties for 5-10 years. There are hydrophobic compositions with antifungal additives. After setting, the glue retains its elasticity, which is why it is used when attaching a border to an acrylic bathtub.
Sequence options
Option 1: first tiles, then bath
The bathtub is brought into the tiled bathroom. All that remains is to install it. To fill the gap between the bathtub and the wall, sealant is most often used. It keeps water out and holds the bowl.
If the bathroom is large and the bathtub is on legs, you don’t have to put it against the wall at all.
Option 2: first the bath, then the tiles
The bathtub is brought in before finishing the walls begins. Installed and fixed. Only after this does the laying of tiles begin.
In fact, the bathtub is lined with ceramics or, in other words, built in. The tile goes onto the side of the bathtub, but does not rest against it, but “hangs” with a gap of several millimeters. The gap is subsequently filled with sealant and/or moisture-resistant grout (preferably epoxy). Next, the junction can be decorated with a special ceramic border or plastic corner.
Option 3: first measure the bathtub, then lay the tiles
The bathtub is brought into an unfinished room and installed. Measurements are taken and markings are made for the tiles. Then the bath is taken out or moved aside. The tiles are not placed from the floor, but from the level of the side of the bathtub, taking into account the required gap. When the finishing is completed, the bathtub is placed under the already laid tiles.
Mistakes are unacceptable here: if you missed the measurements a little, the bathtub may not fit.
Required materials and tools
To install a curb in a tiled bathroom, the following materials and tools will be useful:
Installation technology under tiles
Installing a border before finishing the walls is a difficult option, which is implemented as follows:
- Using a gun, smoothly fill the space near the wall with sealant. It is recommended to use silicone compounds designed for sealing aquariums. The product in a small soft tube can be squeezed out without a gun.
- Smooth out the sealing layer. In all this, there should be no voids left in which water will accumulate. For smoothing, use a rubber spatula. If it is absent, the layer is smoothed with a moistened hand. The huge gap is filled with polyurethane foam. After hardening, the protruding areas are cut off.
- Prepare adhesive for tiles. The dry mixture is diluted with water according to the instructions. The mixture should not be very watery.
- In the absence of corner profiles, 4 elements are connected in pairs, forming angles of 45°. To cut out the material, use a grinder with a diamond attachment. In the absence of this tool, the unnecessary part of the module is removed with pliers. The cut is treated with sandpaper.
- Using a laser level, set the tilt angle to 5-10°. If the width of the curb is 10 cm, it is raised above the horizontal plane by 1 cm.
- The reverse sides of the ceramic modules are treated with glue, and the product is pressed against the wall. The next part is laid as possible to the previous one. Tap the surface with a rubber hammer and remove excess glue.
- The surfaces of the tiles are wiped with a damp cloth and the structure is left overnight.
- In the morning, water the border, which speeds up the setting of the glue. The structure is left to dry completely, which will avoid the occurrence of cracks.
- Eliminates the gap between the wall and the baseboard. The distance is filled with acrylic or silicone sealant. After which the joint is rubbed with a latex-based water-repellent compound. The tone should match the design of the wall covering.
So that the border does not stand out against the background of the wall, similar distances are left when gluing. To do this, plastic crosses are installed between the modules.
READ Laying PVC tiles on the wall
Hatch inspection
Some owners cover the bathtub with a blank panel, leaving no access to the water supply and drain pipes. In the event of a leak, such a screen will have to be completely dismantled, which will entail the need for cosmetic repairs of the room. To avoid such consequences, you need to provide a special hole through which you can fix the problem.
You can purchase a ready-made inspection hatch, but it is not cheap. It's easier to make it yourself. The easiest option to implement is a tile equipped with magnets.
To make it you will need eight small magnets up to one centimeter in diameter. Four of them are fixed directly around the hole, and the rest are glued to the edges of the tile decorating access to communications. After fixing the magnets, the panel is inserted into place. It should be remembered that the size of the opening should be slightly smaller than the tile. This is necessary to place the holder magnets.
When the glue dries, you can use the improvised door. To pull it out of the opening, you need to pry the edge of the tile with a sharp object. For ease of use, experts recommend attaching a furniture handle to this tile.
To summarize the above, we can say that when renovating a bathroom, it is better to refrain from saving tiles and tile the entire floor and walls of the room. This will help avoid problems with the appearance of mold and musty smell in the room, improve the quality of room cleaning and give the interior design a complete and harmonious look.
Owners of acrylic bathtubs.
Tired of libations and solemn consumption of salads and boiled pork, I began to realize the long-standing need to eliminate leakage of the bathtub in the places where it adjoins the decorative elements. (Oh, how I bent it! :-))
In fact, all owners of acrylic bathtubs face this: no matter how much glue or sealant you apply, cracks still appear. This is due to the fact that fiberglass, from which the bathtub is actually made, is a fairly flexible material, and during use the seam “plays”, the silicone comes off, and water gets into the crack. and then all the “delights” of black seams and the aroma of decay.
Because the bathtub is adjacent to a rigidly installed ceramic drainage system, the idea came to seal the seam with a door rubber band, like this:
I removed the decorative casing and loosened the nuts on the legs: the bathtub dropped about a centimeter and a half, and a gap formed between the bathtub and the drainage basin.
I dried the sides with a hairdryer and stuck in an elastic band:
It's self-adhesive, so it fits easily.
Then I pushed the bathtub into place and tightened the nuts on the legs so that the rubber was pressed against the drain.
And I applied silicone on top, purely for aesthetics.
The test by pouring water from a shower head onto the joint was successful: not a drop penetrated the wall and floor under the joint with the bathtub.
I made up bullshit. This collective farm won't last a week. Do you want it forever? Use polyurethane sealant for gluing car windows. After sealing the seams with it. You'll rip your bathtub dick off the wall. if only with pieces of fiberglass
If only he were also snow-white. there would be no price for him. Only dark stsuko. But again, nothing prevents you from passing snow-white sealant on top
this is the web, here no one trusts anyone, here people are fucked up
Are you a drug addict or what?! Which factories? Have you even read what it's about? Polymer sealant for gluing car windows, I say I didn’t see a dark bleat. I recommended it specifically at first due to its availability. And later they concluded that snow-white also happens. construction only
This rubber band is like a self-adhesive tape - bullshit. There are 2 mistakes here - the border should also be acrylic, not ceramic. Silicone has long been outdated - it is better to use MS polymer.
In general, all methods are temporary. Any connection that comes into contact with water at some point needs to be redone.
For myself, I would like to test using polyurea (Raptor type paint) to fill everything and form a border from it.
wait, do I understand correctly that this “border” is made of tiles? And later there will be a bath underneath it?
Uh. The acrylic bathtub comes with cleverly shaped hooks for the wall. You screw them on in increments of approximately 45 cm, approximately 45 mm below the level of the edge of the bathtub. Later you put a rim on their bathtub. You adjust the legs so that they are level.
Then you pour warm water into the bathtub right up to the edge, wait half an hour and coat the edge with sealant. Remove excess sealant with a soapy finger. You leave it for a day.
If the legs are ordinary, and not made of 4mm hairpins, then everything will stand perfectly.
If the legs give rise to doubts, you can build a pedestal under the bathtub from languid shit and strong sticks, and when you glue the bathtub to the walls, one after another, attach it (certainly full to the brim) with polyurethane foam to the pedestal.
Unfortunately, cast iron is limited in size. Bathtubs under 170 cm made of cast iron are not sold enough and are very expensive (40-50 thousand rubles)
Good movers, install it yourself later)))) I wanted to move it (I didn’t know it was made of cast iron. It was restored with an acrylic insert). I was so taken aback, but I realized what kind of bathtub there was)))
I'm sorry, but laying tiles after installing a bathroom is something to do - fuck off
Actually, just the opposite, if we talk about “heavy” baths. And the layout of the tiles comes out normally, and the tiles overlap the edge of the bathtub, so there are definitely no leaks, and there is no need to install bad corners if the bathtub has a normal geometry. So there are only advantages.
And it is absolutely not necessary to install the bathtub itself at the time of installing the tiles; just knock off the level and start with the tiles from it. And then you can simply press the bathtub against the edge of the tile, you can into the gap in the tile /side of the bathtub - the problem of leaks is solved for a long time.
Do you also consider the fact that the walls under your bathroom are unfinished to be a plus? Fucked up.
If the bathtub is not supposed to be closed, then I do this: I start from the edge of the bathtub with tiles up along the entire perimeter of the room, I usually grout immediately so as not to stain the bathtub, make an indentation to the thickness of the side of the bathtub with a reserve and lay the tiles down to the floor specifically in the area of the bathtub itself , I install the bathtub, file the last tiles that are adjacent to the visible end of the bathtub in place with the smallest gap, and add the rest of the tiles. From an ordinary level of vision, the tiles are everywhere and everything is neat, if you push your head under the bathtub itself, then yes, you can see a break in the tiles at the side. So there are options, if the sofa builder is simply not familiar with the technology, then there is no need to immediately throw excrement.
READ How to hang a picture on drywall
But the vast majority are still covered with a ready-made curtain or a box with tiles is made. Because looking at the black side and legs is not at all aesthetically pleasing. So it's even easier.
I feel sorry for those who entrusted you with the renovation of their own bathroom.
if the sofa builder is or simply not familiar with the technology.
Your rant is in the wrong place. If I didn’t know how to do it right, I wouldn’t leave comments
Soooo many people leave comments who are not even close experts in this area. You categorically stated that this cannot be done, because fuck off and in general it turns out to be fucked up.
If you do it as I described, or the bathtub is closed with a curtain/box (which is done in 9 out of 10 options, based on my experience), what is the problem with putting tiles on top of the bathtub?
Well, purely to support - I agree, the tiles laid from the bathtub - this bitch looks great and holistic.
Well, judging by what you wrote, you are specifically from this category. I say goodbye to SIM!
I asked a specific question for you and I won’t be too lazy to repeat it. What's wrong with my method? What are the immediate claims regarding the technology?
The fact that I’m an asshole, in your opinion, has already figured out, does not necessarily have to be repeated. It worries me very much, yes, but I will control my emotions. Let's ask the question directly. Or are you ready purely in personality?
In other words, he threw it in, gave a definition to everything, gave nicknames to everyone, rode off into the sunset on a stallion, but not a word about the matter. Well done, a worthy specialist.
Hatch inspection
Some owners cover the bathtub with a blank panel, leaving no access to the water supply and drain pipes.
In the event of a leak, such a screen will have to be completely dismantled, which will entail the need for cosmetic repairs of the room. To avoid such consequences, you need to provide a special hole through which you can fix the problem. You can purchase a ready-made inspection hatch, but it is not cheap. It's easier to make it yourself. The easiest option to implement is a tile equipped with magnets.
To make it you will need eight small magnets up to one centimeter in diameter. Four of them are fixed directly around the hole, and the rest are glued to the edges of the tile decorating access to communications. After fixing the magnets, the panel is inserted into place. It should be remembered that the size of the opening should be slightly smaller than the tile. This is necessary to place the holder magnets.
When the glue dries, you can use the improvised door. To pull it out of the opening, you need to pry the edge of the tile with a sharp object. For ease of use, experts recommend attaching a furniture handle to this tile.
To summarize the above, we can say that when renovating a bathroom, it is better to refrain from saving tiles and tile the entire floor and walls of the room. This will help avoid problems with the appearance of mold and musty smell in the room, improve the quality of room cleaning and give the interior design a complete and harmonious look.
How to glue a ceramic or plastic border to a bathtub
After installing the plumbing fixture, there remains a distance between it and the wall. Water constantly gets there, which contributes to the destruction of the facing material and the formation of mold or mildew. Installing a ceramic border for the bathroom solves this problem. The decorative element has a long service life and good aesthetic properties.
The procedure for installing plastic curbs for the bathroom
Installation of plastic skirting boards is carried out as follows:
Putties
Putty can also be used as tile adhesive.
- If the tiles will come into contact with water, only moisture-resistant putties are used - cement and acrylic;
- The same putty can be used for grouting joints;
- It is better to remove traces of acrylic putty from the surface of the tile before drying. Doing this later will be much more difficult: the putty fills the smallest bulges on the front side of the coating and is cleaned only with the use of abrasive cleaning agents.
Installing an acrylic bathtub under tiles | Kharkov | Master Tiler
One of the windows in my house. The tiles were glued to the window sill and slopes using acrylic putty.
Bustilat
Bustilate and other synthetic adhesives are rarely used for laying tiles, since they differ from cement adhesives and putties in their fluidity and relatively large shrinkage, which make it difficult to fill the bulges in the base. But in our case, there is no need to fill them: the base is the flat surface of the gypsum board.
Synthetic glue Bustilat based on latex, chalk and carboxymethylcellulose.
- to lay tiles on Bustilat taking into account its low viscosity: the first horizontal row should rest on the starting profile or a straight rail fixed to the wall. Otherwise, the tile will slide down under its own weight;
- to lay tiles on a dry screed made of gypsum plasterboard or gypsum fiber board with the introduction of Bustilat. In this case, the tile adhesive should be located over the entire area of the tile, distributing the load on the base and preventing the destruction of the tile under uneven load. Bustilate, when dried, gives a small but noticeable shrinkage, and cavities form under the final coating.
Laying tiles on a dry screed possible with the use of cement adhesive.
Preparing the floor
The quality of the final floor covering directly depends on the preparation of the subfloor. The optimal solution in terms of price and quality would be to level the floor with a cement mixture. It is strictly not recommended to leave a wooden base, as in some old houses. Wood is a material subject to a high degree of deformation when exposed to moisture. On such a surface, the ceramic coating will adhere very poorly. In addition, this will significantly reduce the service life of the tiles.
GCR structure
GCR consists of a gypsum core and two layers of construction cardboard or kraft paper. Kraft paper is a product of treating wood chips with an aqueous substance of sodium sulfate and sodium hydroxide. Its main feature is the highest mechanical strength compared to other types of paper and cardboard.
The structure of the plasterboard sheet is clearly visible in the cut.
In addition, thanks to processing, kraft paper acquires a number of additional parameters:
- It actually contains no resins;
- Fats are also washed out during the sodium hydroxide treatment;
- It virtually does not swell in water and is not subject to deformation due to fluctuations in humidity and temperature.
Kraft paper is used not only in the production of drywall, but also as a packaging material.
From a practical point of view, this set of parameters means beautiful adhesive properties: virtually any binder on a mineral and synthetic base sticks to the surface of kraft paper, while the strength of the adhesive connection is maintained throughout the entire period of operation of the coating.
If so, it goes without saying that during finishing and construction you can lay tiles on drywall. We will have to get acquainted further with the types of adhesive compositions used in this case.
Sliding design
The next bathroom screen model is characterized by accessibility to communication systems. When tiling with tiles with your own hands, the structure becomes unnecessarily bulky, so it is recommended to opt for plastic. In addition, ceramics constantly exert their mass on the sliding frame, which shortens its service life. Thus, tiles are very rarely used as a sliding screen.
Sliding screen
Preparing drywall for bathroom tiles
In most cases, bathrooms and toilets are finished with tiles. But these particular rooms are most inconvenient for ceramic finishing. tiles. After all, there are various sanitary and technical communications. How to tile them? No way, unless you first cover it with plasterboard or place it in a special box, which ennobles the interior and levels out room errors. Specifically, drywall under tiles in the bathroom is considered a widespread technology for preparing surfaces before finishing.
READ How to fix a chip in a bathroom
Those who are faced with the need for such repairs for the first time begin to wonder whether it is possible to lay tiles on drywall, or whether this cannot be done. For civil engineering experts, the answer is very clear. Below they share their experiences.
Shielding with decorative panel
A screen mounted from the side of the bathtub to the floor will help hide the water supply and sewerage communications. Such a panel, lined with tiles of the same shade as on the walls, will look very stylish. In addition to the aesthetic side, screen installation also has a practical load. The space under the bathroom, fenced off from prying eyes, can be used as a storage system for household chemicals and various household items. The main thing is to remember to take care of access to sewer pipes.
Despite the presence of a screen, it would still be better to completely cover the floor
If the screen is suspended and does not rest against the floor, be sure to lay the tiles under the bathroom to a shallow depth. This will increase the presentability of the appearance of the interior.
Preparing the base for cladding
A procedure such as preparing drywall for tiles inevitably precedes the start of construction work. The step-by-step scheme will follow here.
First, you should treat the drywall with a damp rag or sponge, walking over the surface and collecting microvilli and dust particles from it.
Next, the surface of the HA should be properly prepared. In any case, you will have to putty. This helps smooth them out before covering. Also ensure the best fit of the ceramic coating to them, reducing the consumption of glue significantly.
Seams and corners are processed first. The connections are additionally secured by applying reinforcing material - masking paper or sickle tape.
The priming process completes the complex of work on preparing the base. The primer is applied to the walls repeatedly (usually up to 3 times). The break for drying the layer takes from 40 minutes to 24 hours (the time depends on the soil parameters and is indicated by the manufacturer on the packaging). Some people are hesitant about whether it is necessary to prime drywall before laying tiles. Experienced craftsmen insist on this step. This way the putty will not fall off, and the glue will stick better. After all, the primer ensures such quality of materials as adhesion (better adhesion to each other).
It is important to note that not every tiler will agree to lay tiles on drywall if it was not installed on a profile.
Cement
Undoubtedly. Cement has excellent adhesion to kraft paper and provides sufficient adhesion between it and the back of the tile.
Toilet in the attic of my house. The tiles in the plasterboard niche behind the toilet were laid with tile adhesive.
I used Ceresit CM 117 elastic glue.
The technology for laying tiles is quite common:
- The tiles are pre-soaked in water for 5 - 10 minutes. This is necessary so that water penetrates the pores of the back surface and ensures its maximum adhesion to the cement;
- Tile adhesive is applied to the tile itself or to the gypsum board using a comb spatula and distributed evenly over the surface;
Comb spatula for applying tile adhesive.
In this case, the size of the trowel teeth should be directly proportional to the size of the tile. If you are using tiles measuring 30x30 cm, you should use a spatula with teeth 6 - 8 mm high, and for tiles measuring 60x60 it will increase to 10 - 12 mm.
- The tile is pressed against the surface of the drywall;
- Adjacent tiles are aligned according to the rule in the same plane, without differences between the edges. A rubber mallet is used to adjust the position of the tiles.
You can check the position of the edges using a rule or a long level.
To ensure that the seams between adjacent tiles have the same width over the entire area of the masonry, use plastic crosses.
Of course yes. In this case, the same binder is used - Portland cement. However, the result will be noticeably worse than when using a ready-made building mixture, due to the larger size of the filler fraction.
If you still want to do such an experiment, you should take the preparation of the solution very seriously:
- The sand must be sifted through a sieve with a mesh size of no more than 3 millimeters;
If you are too lazy to sift the sand, stones and debris that get into the mortar will prevent you from leveling the tiles in one plane.
- The solution is prepared in the proportion of 1 part M400 cement to 2.5 - 3 parts sand;
- You should add a little liquid soap to the finished solution. This will make it more mobile with the same amount of water. It is not worth adding water to increase the mobility of the solution: this will reduce the strength of the adhesive joint.
Construction of a removable screen
The factory-made removable screen has standard dimensions, which do not always correspond to the dimensions of the opening under the bathtub.
The owner of the premises can equip a homemade panel from OSB chipboard with a decorative covering of tiles or mosaics.
Additional materials for making the screen will require a wooden block with a cross-section of 20×40 or 40×40 mm and furniture racks with adjustable reach.
Algorithm for making a homemade removable screen:
- Cut a blank from the slab that matches the opening under the bathtub. The height of the panel is 40-50 mm less than the window, allowing the installation of supports.
- Attach a wooden block located on the lower edge to the rear of the screen. The elements are connected with screws, which are screwed through pre-drilled holes in the slab.
- Screw the legs to the body block. The resulting clearance allows you to stand right next to the bathtub, with your feet placed in a niche.
- Glue tiles or mosaics to the external surface; installation of inspection hatches is not required. The finishing uses silicone sealant, which protects the end edges of the decor from exposure to water.
- Grind the seams and then install the panel under the bathtub. Adjust the position of the structure using screw mechanisms in the supports. The screen is held in place by pressing the top edge firmly against the side of the tub. If the structure is unstable, then additional stiffening ribs will be installed on the rear of the panel.
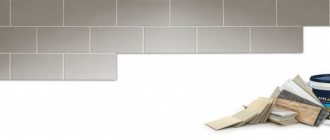
Selection of ceramic coating
For finishing plasterboard surfaces, the choice of tiles does not come down to any specific type. You can take any variety. However, aesthetic taste and financial capabilities can help in this matter.
From the entire assortment, several varieties are usually preferred.
Mosaic or glass tiles look great in bathroom design. Beauty and durability are the main characteristics of such cladding. During its creation, glass is mixed with various additives. Which give the material strength and resistance to temperature influences.
Ceramics can be wall or floor. Therefore, it varies in thickness and weight. For the floor, it is designed to be stronger and heavier, which has a high coefficient of resistance to regular pressure. Collections whose elements have a minimum thickness are suitable for walls. The varied external decor of such tiles, as well as the ability to combine them with stone, wood and even brick, makes them quite popular on the market.
tiles are considered lightweight and quite resistant to the influence of aggressive factors. It can be glued in absolutely any room conditions, which is explained by the water-repellent properties of PVC.
Polystyrene. Both in decor and in their characteristics, such products resemble foam slabs for a suspended ceiling. This kind of ceiling cladding is made of lightweight plastic, allowing even a beginner to work with them. They have good vapor barrier and water repellency properties and are durable. Their service life is long. Volume of the surface is given by different shapes and elements.
Sources:
https://whitestrip.ru/mozhno-li-prikleit-plitku-na-obychnyj-gipsokarton-p01/
Preparatory work
However, the process of laying tiles itself is not so simple, especially if you have an acrylic bathtub of 180 cm or other large sizes, since in this case the finishing will take even more time and effort, and doing it incorrectly will doom you to a whole series of problems.
Therefore, if you have already decided to do the finishing on your own, then initially you should carry out all the necessary preparatory work. To do this, a small brick wall should be laid under the side of the product, which will serve as the basis for applying the tiles. It is advisable that the outer edge of the brick does not protrude beyond the edge, and the larger the gap, the better, since in this case you can apply plaster or other adhesive base.
At the same time, it is much easier and faster to make a base from plasterboard. This solution will cost you much less and will take less time. As for durability, plasterboard, despite all existing prejudices, can last no less than a brick structure. In any case, the base does not affect the aesthetic parameters, since plaster is applied to it, and in the case of drywall, it can simply be a primer, on top of which ceramic tiles are used directly, on which the appearance of the room will depend.
What is the best way to tile a bath?
Regardless of whether you liked an acrylic bathtub of 170 cm, a small length of 130 cm, or a large solution with a length of more than two meters, the finishing technology will be the same, except that the consumption of materials will be different. As for the time spent, with the right approach everything can be done independently and quickly enough.
But if you are not confident in your abilities, do not have enough time, or simply do not want to deal with finishing, especially with tiles, which will require both painstakingness and certain skills, then we advise you to turn to specialists. In this case, on the one hand, you can save your time, on the other hand, guarantee yourself an excellent result in finishing the room. Perhaps in this case you will spend a little more money, but the result in this case will fully justify itself. The main thing is to choose the right specialists and give preference to proven companies!
Please tell me how to properly seal the connection between the bathtub and the silicone tiles, plastic corner, or is there a more rational solution? Thank you in advance!
Experts answered the question
Best answer
It's not that simple. For example, acrylic and curved bathtubs cannot be tiled.