How to take advantage of the terrain
Owners of yards with slopes believe that this area has complete disadvantages. They can easily be turned into advantages if you design them correctly. Professionals claim that areas of this type have the following advantages, which can easily be exploited when organizing the landscape:
- Most of these areas face south. This guarantees active and healthy growth of vegetable crops and ornamental vegetation. Therefore, it is safely allowed to plant such plants.
- If there is a slope not exceeding ten degrees, you do not need to resort to the use of additional means to level the area. And the highest point is allowed to be made in the form of an alpine slide.
- If the living space itself is located on a hill, then you can guarantee that the foundation will not be flooded during floods.
- On such a site you can arrange a high-quality pond with a smooth waterfall. This decor is most common for similar areas.
Beautiful arrangement of plantings Source dachanaladoni.ru
If the owner wants to acquire a beautiful landscape design with evergreen vegetation, he should prepare for frequent watering. The fact is that on a slope, water does not stay well in the ground, and accordingly, the entire decor will turn yellow and dry out.
Decorating uneven areas with stones Source aquagroup.ru
On a note! If the house is located at the bottom of the site, then all the moisture will accumulate at the bottom. This will lead to the formation of dampness and fungus inside the home.
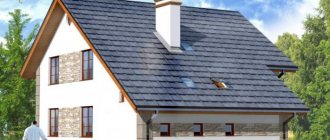
Cottage on a slope Source udachnyi.ru
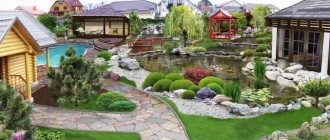
Successfully managed slope on the site Source aquagroup.ru
Shaping
At the highest point, stones are laid, and the future waterfall is made in the form of a rock. You can place a jug on the top of the cliff, from which water will flow. It is necessary to provide a hole for laying the pipe.
Depending on the height of the stone structure, several ledges can be laid out.
All elements of the structure should be fastened with mortar, and the bed should be treated with a waterproofing substance in order to maximally protect the entire path of water from leakage.
Layout, slope strengthening and drainage organization
Before you begin installing a drainage or strengthening system for your yard, you need to think through all the little things in advance. It is advisable to create a diagram or sketch that will clearly show which object will be located and where. More often than not, this is what is used as a starting point when seriously developing a territory.
Paths in the garden Source www.supersadovnik.ru
Alpine slide on a slope Source roomester.ru
See also: Catalog of companies that specialize in landscaping work on sites.
Construction of terraces
This technique is used for areas whose slope is 15 degrees or higher. Terracing is the construction of horizontal platforms with supports that make life much easier.
Despite the fact that this procedure is quite labor-intensive and expensive, the result is a comfortable, convenient and cozy area.
Terracing involves:
- Protecting the soil from deformation, creating a moisture removal system.
- Convenient and safe movement of people along the slope.
- Creating comfortable places for relaxation, gardening and vegetable gardening.
- Construction of reliable and high-quality supports.
- Arrangement of the territory for a comfortable pastime.
The process of building terraces is quite creative. The sites can be located on the same line, in a checkerboard pattern, or in any other pattern desired by the owner.
Ways to strengthen the territory
There are plenty of options for fixing a relief area. They all vary in complexity and financial costs:
- Using perennial vegetation with a branched root system. This approach is optimal if the slope level does not exceed 10 degrees. Various flowers and ornamental shrubs can be used for this purpose.
- Using a retaining wall. It is usually made from various building materials. The most commonly used materials are concrete block, floor slabs, brick, shell rock or limestone. Foam concrete is used less often, as it is considered quite fragile.
- Using geogrid or geogrid. This design is suitable for areas where the slope is more than 70 degrees. The features of such strengthening are the laying of geotextiles and filling the prepared cells with coarse crushed stone.
- Using gabion. A gabion is a cage made of durable wire. This cell is filled with rubble, stone or gravel. They are successfully used for strengthening, in some cases they even play a decorative role.
Slope at the base of the house Source www.landshaft4u.ru
Preparatory stage of design: construction of concrete supports Source www.abitant.com
After all installation work has been carried out in order to strengthen the soil and prevent it from sliding. Next, the area must be drained.
Home waterfall Source 9dach.ru
Stages of building a stone gazebo
Let's return to the gazebo aaa3701. Its construction began in 2014, and finishing work continued in 2021. Let’s consider the main stages of its construction:
1. Construction of a slab foundation for a stone gazebo
Having drawn a plan for the gazebo, the user began the process of building the foundation.
At first I wanted to make a shallow strip foundation, but then I changed my mind, because... I calculated that it would not take much more material for a slab foundation than for an MZFL. But I will immediately receive a ready-made base for laying tiles.
The work consisted of the following stages:
A pit was dug under a slab foundation measuring 7x3.5 m.
The bottom of the pit was lined with geotextiles. Sand was poured onto the geotextile in a layer of 100 mm, which was carefully leveled and compacted.
Having placed the formwork, a layer of insulation - extruded polystyrene foam about 3 cm thick - was laid on the prepared base.
The top of the insulation was covered with waterproofing.
Next, a reinforcement frame is knitted from tens of rods, in the form of a mesh with a mesh size of 250x250 mm.
The mesh is laid in 2 levels on special stands.
You can learn everything about the nuances of knitting reinforcement: from a hook to a cordless gun, as well as calculate its consumption, in articles on how to knit reinforcement manually, as well as using electric tools.
The next stage is pouring M300 concrete.
Pouring the slab was a whole epic affair. I chased the cheapness and ordered some strange mixer; they don’t give documents for concrete. Having agreed that payment would be made upon unloading on the spot, I began to wait for the driver. I ended up waiting all day for the mixer. When I called, the driver, who is also the dispatcher, answered that he was about to arrive, and that he had to wait another hour. As a result, he never arrived, because... the truck broke down, and other vehicles, in his words, were working on a large order and could not arrive.
Having decided not to take risks and not to chase dubious mixers with unknown quality of concrete, the user placed an order at the plant according to all the rules - with the conclusion of an agreement, the exact delivery time for 9 am on the weekend and documents for the concrete mixture .
But the car did not arrive at the specified time. After calling the dispatcher, aaa3701 found out that the truck had been involved in an accident and the accident was being processed. The mixer arrived only at 4 o’clock in the afternoon, and the driver said that after the accident, a representative of the plant came to him and poured about 30 liters of a special additive into the mixer, which prevents the concrete from hardening quickly.
After all the “adventures”, the slab was successfully filled, and during the entire period of its operation there were no problems with it. The concrete is strong, so the user had difficulty drilling a hole in it for the outlet of a sewer pipe with a diameter of 50 mm.
2. Construction of brick walls
I did brickwork for the first time in my life. That's why it didn't turn out very smooth. Now I would love to redo it.
First, the user made a “dry” layout in order to determine the number of bricks in a row and avoid waste in the form of halves.
On the front part, the spaces between the pillars are lined with bricks.
The purpose of drainage and features of its implementation
The drainage system in the yard is a structure in which there is practically no soil. Several layers of soil are dug into the pit, after which it is filled with sand and large stones. This allows all the moisture to seep deep into the drainage, from where it goes into the groundwater. Arranging such a structure will help avoid several problems:
- The appearance of excess moisture, which often accumulates near the foundation, causing its destruction.
- Mold formation in the basement.
- The formation of excess moisture in the soil, and this will prevent the development of rot in the root system of plants.
- After heavy rains, the yard will always be clean and dry. The drainage will absorb the entire mass from precipitation.
Support for a slope made of stones Source gerberpark.ru
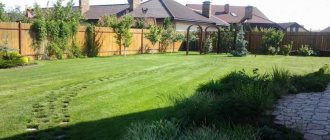
Dense lawn on a slope Source artofwar.spb.ru
Green spaces Source dizainvfoto.ru
Please note that all work on the technical arrangement of the territory is carried out even before the start of construction and organization of the landscape.
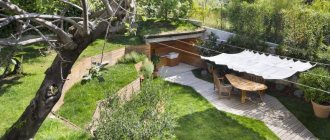
Outdoor kitchen Source www.gd-home.com
Drainage system
A system for draining excess water will help quickly drain shaded areas and lowlands. And collecting this drained water in a special container will help save on water for irrigation.
Landscaping rules for a site with a slope
After purchasing a plot of land on a hill, it is important to take into account that during its further registration it is necessary to take into account several professional rules:
- Houses and non-residential buildings in such conditions are always installed in the upper parts of the slope.
- The location of functional and decorative zones in the yard is carried out using the features of the relief (something is extremely necessary to be located at the foot of the slope).
- At the lowest point, they try to plant tall crops. They help smooth out elevation differences.
- For a southern slope, plants that can withstand dry conditions are preferably chosen.
- Alpine slides are best located on the southern or southwestern parts of the slopes. This also applies to any other rocky decor.
- Bulbous primroses are best planted on the western part of the garden plot.
- Since the northern slope is shaded but quite warm, dwarf conifers should be planted here.
Using slope steps as beds Source www.supersadovnik.ru
Large slope Source travka-shop.ru
Even with the correct arrangement of the drainage and strengthening system of the site on a slope, you must adhere to the recommendations for planting plants. Moreover, it is necessary to check with a specialist which materials are best used for the construction of buildings.
Decorative plantings on a steep slope Source dachnaya-zhizn.ru
Recreation area at the foot of the slope Source roomester.ru
Which foundation to choose for a gazebo
Before starting work at the design stage, decide which foundation to choose for the gazebo. Consider these factors :
Let us introduce symbols for the types of foundation:
| Soil type | Foundation load (kg/m2) | Suitable foundation | |
| Groundwater up to 2 m | Groundwater over 2 m | ||
| Coarse, rocky and semi-rocky soil from the surface to a depth of 2-3m | up to 40 kg/m2 | WITH | L |
| over 40 kg/m2 | L | L | |
| Sandy soils (dense and medium density) 5-6 m thick | up to 40 kg/m2 | WITH | WITH |
| up to 120 kg/m2 | L | L | |
| over 120 kg/m2 | L | L | |
| Clay soil (plasticity up to 0.5) with layers of silty and fine sand up to 5 m thick to a depth of 5-6 m | up to 30 kg/m2 | WITH | WITH |
| up to 120 kg/m2 | L | L | |
| over 120 kg/m2 | B, P | L | |
| Clay soil with plasticity more than 0.6 with sands, (silty, fine), loose to a depth of 5-6m | up to 100 kg/m2 | L | L |
| over 100 kg/m2 | B, P | L | |
| Clay soil with a plasticity of more than 0.75 to a depth of 2-4 m | up to 80 kg/m2 | L | L |
| over 80 kg/m2 | B, P | L | |
Foundation for a gazebo made of tires
If you have a small budget, but want to make your own foundation for a gazebo and save as much as possible, we recommend an excellent option - making it from car tires. Tires are suitable for the construction of both columnar and strip foundations.
Among the main advantages of a tire foundation for a gazebo:
Strip foundation made of tires
When constructing a strip base, adhere to the principle below.
Mark your site for the future gazebo. Use pegs to mark boundaries;
Dig holes 40-50 cm high around the perimeter of the building;
Lay the tires in one layer around the perimeter. Then, on top of the first layer, make a second one;
If you make a foundation for a gazebo out of tires with your own hands on a slope, your structure should still stand level. Add more than two levels of tires to one side for leveling
Fill the void between the layers with sand or gravel. We fill a layer of crushed stone over the entire area of the site for leveling;
Columnar foundation made of tires
If you want to make a columnar foundation for a gazebo with your own hands from tires, then it will differ from the first one in some steps:
After marking, no recess is dug, but tires are immediately placed along the edges of the structure. Sand, earth or crushed stone is poured inside and around.
Waterproofing is placed on the sides of the tires.
We fasten the cross beams. To do this, cut special holes for fastening in all beams. After the beams are in the grooves, they are secured with self-tapping screws for greater strength.
Gazebo on screw piles
If the soil on your site has a high moisture content or is swampy, screw piles are best suited. It is based on screwing screw piles of a certain diameter into the ground. Construction requires good physical strength and a minimum of technical skills, so you can make a gazebo on stilts with your own hands.
Piles with a diameter of 89 or 108 mm are suitable for the gazebo.
The place is prepared and then marked.
The first pile is screwed in at the end of one side. When screwing in, the soil is not loosened, but compacted.
The required distance is measured and the second pile is screwed in. The distance is measured from the third to the other two and diagonally. The remaining longitudinal and transverse piles are screwed in;
It is recommended to make the distance between piles 2.5-3m
We check that all piles are completely screwed in. We cut one horizontal level at a time so that there is a distance of 40-55 cm between the end and the surface (optional).
We concrete the piles. To do this, pour concrete mortar into it and around the perimeter to the brim. This will give greater strength to the structure;
We weld the head to the upper ends of the piles, in this case 15x15;
We make a wooden or metal harness. Three methods of metal strapping in the photo below.
Advantages:
Columnar foundation for gazebo
A columnar foundation is suitable for a small or medium sized gazebo. To make a pillar-type foundation for a gazebo with your own hands, follow the instructions below.
The best ideas for using a slope in design
Landscaping of a site on a slope, subject to housing construction, is popular. In such areas, the most unusual design can easily be organized. You can use various ideas for arrangement.
Design of a site on a slope Source www.green-dream.com.ua
A multi-level slide will look very interesting and quite unusual. Such designs are incredibly simple to implement. To create a similar option, it is enough to know how to build steps and make borders along their edges. The total area of the designed decor can be sown with lawn.
Landscaping design of a two-level plot Source reformtheweb.com
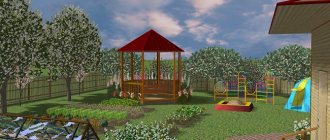
A plot with a slope can be used as the basis for the formation of a children's playground or a single gazebo with circular landscaping. For this design, you will need to build a retaining wall and build steps from above. The structure will be successful if the slope has two sides.
Recreation area on the slope Source taemoodle.org
The original gazebo, which can be located at the bottom of the slope, is arranged in a special way. This will make it possible to create calm and prevent the penetration of winds. The foot of the slope, which is made in the form of a semicircular brick reinforcing wall, will look very original. The upper part of the slope is intended to accommodate residential buildings.
Design of a site for a small summer house Source ogorod-bez-hlopot.ru
Decorative plantings Source remoo.ru
A slight descent can be simply zoned, while creating a design with steps in marble stone. In this case, a low concrete wall is built in the middle of the slope with decoration. In such areas, mainly bulbous perennial plants are planted.
Backyard Design Idea Source www.walsallcs.com
A slide that is too tall is usually designed using different design principles. One of these is concreting the site with the organization of deep flower beds and stairs. If you look closely, this object will resemble a geometric alpine slide.
How to build a gazebo
This is exactly the question that any developer who chooses a gazebo design asks himself. This can be an open or closed option, the advantages of which we will discuss below. The second question is what to build a gazebo from, because the construction market offers a variety of materials - timber, gas or foam concrete, frame structure, or, as aaa3701 decided, brick.
I have a plot in the Moscow region measuring 23x70 meters. I wanted to build a house, but after balancing the debit with the loan and calculating how much was left after mortgage payments, I realized that I couldn’t afford a cottage. Therefore, I began to build a gazebo, and it was closed and made of stone, because... I believe that such a structure fully meets the following requirements:
The stone closed gazebo has become a real center of attraction for the entire family and friends of the portal participant. In addition to relaxing, holding birthdays and just spiritual gatherings, the gazebo, and in fact a mini-house - a summer kitchen, has become a place where they make home preparations for the winter, children watch TV, play and draw.
When I decided to build a gazebo with good insulation and a layer of vapor barrier (it turned out to be a so-called “thermos”), many of my friends expressed skepticism. Like, it will be a greenhouse, but in the gazebo it will be hot and stuffy. The operation of the gazebo for two seasons completely refuted these misconceptions. Due to the layer of insulation, the gazebo is not stuffy or hot in the summer, but warm and comfortable on cold days.
Also, the gazebo is correctly “planted” on the site and oriented to the cardinal points. For this purpose, the structure was erected on the south side, at a distance of 1 meter from the neighbor’s fence, in the middle of the site, located strictly from east to west (if viewed along the length).
Therefore, a two-meter high fence constantly shades one of the sides of the gazebo. Large windows are located on the north side of the building, and the wall facing south is solid.
Ventilation is provided through tilt-and-turn windows and a door.
Rules for landscaping a summer cottage on a slope
You can create an unusual home exterior using landscaping from different angles. Vegetation should be planted if its growing conditions correspond to the characteristics of the territory.
- It is important to plant greenery between rocky structures. To do this, you need to make small niches and shallow flower beds. However, not all plants grow successfully this way. In these conditions, thyme, phlox, and sedum are planted.
- Low-growing coniferous plants and shrubs are best planted on a northern slope. They then become incredibly bright and large. Planting petunias, marigolds and other small-seeded herbs next to them is acceptable.
- Large flower beds and locarias grow well on a southern slope. Such living decorations should be grown in wooden or stone flower beds.
Beautiful slope Source www.udec.ru
Recreation area with barbecue on an uneven landscape Source melardi-studio.ru
Taking into account all the requirements regarding landscaping of the territory, it will be possible to create original flower beds and compositions from living plants. Here it is important to consider what shade the plant will be during its ripening period. This must be emphasized in order to organize an interesting palette.
Modern landscape design of the site Source landshaftm.ru
How to make a staircase from wood cuts
Laying wood cuts into a staircase structure is not difficult.
Saw an even log into segments according to the height of the steps.
There are no particular difficulties in building such a staircase, except that you have to tinker with the base (under the bottom row).
We make a trench 25-30 cm deep.
We fill the trench with crushed stone and sand and compact it conscientiously.
We put a metal mesh (chain-link, etc.) on the surface.
Fill it with concrete. The base must be level.
We lay rows of wood cuts on glue, preferably polyurethane. First, we fill the entire area with wooden cuts, then reduce the number of cuts, arranging steps of the required width.
Preparatory work on a site with a slope
Before you begin to clean up the organization of a house plot outside the city that has a slope, you need to decide on several important points. Be sure to carry out preparatory treatment of the area. To do this, an irrigation system, decor and functional areas are provided in advance.
The nature of the soil and the angle of inclination are mandatory points that should be taken into account when developing landscape design. For example, if the soil is quite alkaline and filled with acids, then it is better to refuse to grow cultivated plants on it.
Chic relaxation area with an open fireplace Source designerdreamhomes.ru
Standard topsoil is less aggressive and therefore ideal for growing fruit and vegetable crops.
For example, on the northern part of the slope it is better not to create various rock gardens with green spaces. This object will always be dim and almost lifeless.
Beautiful alpine slide on the slope Source picpanzee.com
Terracing is often used. This is one of the well-known technologies that will hide strong differences in the area. Before installing balconies at a high point on the slope, it is necessary to design the area that will be used for this object.
In this same place it is very easy to create an individual space for relaxation, leisure, or to arrange an outdoor kitchen or an open veranda in this place.
What to consider when designing a greenhouse
Greenhouse construction diagram.
- Site layout. First of all, when designing, it is necessary to take into account the slope. For the most uniform illumination, the ground plane should be located at an angle of 15-19o. This is not difficult to do if you use a building level and a plywood template when leveling the ground. If you plan to use a large area for the construction of a greenhouse, then it is better to use a tracing cord and pegs for leveling.
- Material for the frame. Currently, the greenhouse frame is most often made of wooden beams, rectangular metal pipes or a metal corner. All these materials have both advantages and disadvantages. The wooden frame has a low coefficient of expansion, which is very important for glass greenhouses. However, wood is susceptible to rot and therefore requires additional processing. Metal, on the contrary, easily changes its dimensional parameters when temperature changes, but is much more durable than wood.
- Covering material. Today, covering materials for greenhouses are presented in a very wide range. This is glass, fiberglass, polyethylene film, organic glass and even canvas from plastic bottles. But the undisputed leader is polycarbonate. Cellular polycarbonate can withstand high dynamic loads, transmits up to 90% of light and bends easily, which does not require much labor during installation.
How to design a garden plot on a slope
If the slope in the local area is used for garden ornamental plantings, then it is best to use well-fortified soil. From the photo you can choose various ideas on how best to arrange a garden on a slope.
Decorating slopes with plants Source www.pinterest.com
It is known that people try to improve rock gardens and other living decorations in the spring. Many of the slopes are also decorated with spring vegetation. Slender, newly bloomed tulips will look very romantic and interesting on the site. They are usually planted in flower beds and special niches. Seeds of perennials with small foliage and short stems are often sown together with them.
Slope landscaping Source dachnaya-zhizn.ru
Many people try to design terraces or flower beds directly in the low-lying part of the site. You can organize this object in your own way. Some people plant a lawn on their property, others prefer to put up flower beds and much more. One of the common design options that every owner will like is the creation of a hard platform under the gazebo area. Gravel is often used for this purpose, and sometimes sea pebbles are added.
Steps lined with stone Source www.pinterest.com
Decoration with plants
Such decoration will help not only create beauty on the slope, but also strengthen the soil.
Dwarf spruces and pines, junipers and thujas, barberries and hawthorns, daisies, cornflowers, bluegrass, and clover are perfect plants. A fluffy lawn of these plants will make the slope sparkle with bright colors.
And between them it will be possible to place beds with more useful plants.
Landscape Design Tips
To complete all the work on arranging the design of a yard on a hill, you can take as a rule a few simple but very useful tips from designers:
- If there is even a slight hill on the territory, then in any case it is impossible to do without a ladder.
- All elements should be easy to move, but their harmony with other objects on the site is also important.
- They try to design any paths in the form of a serpentine, so they create a visual expansion of the nearby space.
- For all areas it is recommended to use only natural materials, including stone, paving stones, wood and other popular species.
House on an elevated slope Source landshaftnyi-dizayn.mydiz.biz
Slope with an amphitheater Source www.landshaftny-dizain.ru
House on a slope Source www.magazindomov.ru
Garden crops and a vegetable garden should not be located nearby on a slope. The minimum distance between such crops should be at least 3-4 meters.
Large wooden house Source severny.by
Territory with a swimming pool Source buildercamp.ru
Decor
After completion of construction work, it is time to decorate both the waterfall itself and the area around it.
The design should begin with the “coastal” area - planting ornamental grasses, low shrubs, laying out pebbles, boulders, roots and original-shaped logs.
Coarse sand is poured into the bowl, but so that it is at the farthest possible distance from the part of the pump that draws in water.
Guests of the site will be especially impressed by the multi-colored illumination of individual parts of the cascading waterfall. At night, the water area looks truly magical!
Polycarbonate greenhouse: advantages and construction instructions
DIY polycarbonate greenhouse
Cellular polycarbonate appeared on the building materials market not so long ago, but during its short lifespan it has replaced such popular materials for creating greenhouses as glass and film. Polycarbonate has many advantages, the main ones being the relatively inexpensive price and elasticity of the material. Other advantages of polycarbonate include the following:
- Durability
- Easy to install/dismantle
- The air gap in polycarbonate sheets creates additional thermal insulation
- The material is transparent, which contributes to good dispersion of light rays
- The lightness of polycarbonate eliminates the need for a complex foundation
Instructions for creating a polycarbonate greenhouse with your own hands
The first step is to decide on the dimensions of the greenhouse and make a drawing that will indicate all the dimensions, fastening system, number of sheets and type of roof.
It is recommended to select a greenhouse size that does not require cutting a lot of polycarbonate sheets, because... this entails extra cash costs and a large amount of construction waste.
The type of polycarbonate greenhouse roof can be either arched or “house”; the elasticity of the material allows you to make both structures without problems, but it is best to opt for an arched structure.
First of all, we prepare the area and pour the foundation; this stage may be identical to the previously provided instructions for making a wooden greenhouse, so read above about how to make a foundation.
Next we move on to building the frame. You can also use a wooden frame, but for variety we will provide you with another option - a metal frame.
The advantage of metal is high strength and durability; the disadvantage is corrosion, as a result of which the structure rusts and not only loses its aesthetic appearance, but also its strength.
To create a metal structure, you can use a steel profile, painted metal pipes or arcs. The latter are the most practical option if you use collapsible arches, because the structural elements are very heavy. Before connecting the frame, metal and wooden elements must be treated with anti-corrosion and antiseptic agents, respectively.
In this instruction we select the material for the frame – metal arches. They must be installed based on the drawing, options for which we will provide you with below. The polycarbonate is fastened to the metal arches using brackets that cover the pipe and fix the polycarbonate on both sides.
Greenhouse frame made of metal arcs
It is not recommended to drill holes in polycarbonate for fastening sheets, because... Water and dirt can get into the holes, which will not only worsen the appearance of the greenhouse, but will also lead to its destruction (during frost, the liquid will expand and destroy the cellular polycarbonate).
Drawing of a greenhouse made of metal arcs
Since polycarbonate can only be bent across the sheet, to create an arched structure it is necessary to install the sheets across the greenhouse structure.
Advice if you have not encountered polycarbonate roofing: choose material from well-known manufacturers and be sure to seal the ends of the structure with a special tape that will protect the material from harmful water and dirt.