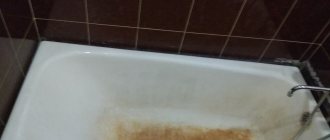
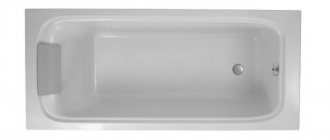
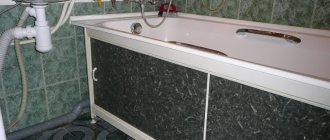
After years, any cast iron or steel bathtub becomes “shabby”, cracks and chips form on it, and in general it looks dirty and not aesthetically pleasing. In this case, dismantling and installing a new bathtub may well result in a full-fledged renovation with damage to the wall and floor covering, which can be inconvenient.
In this article you will learn a simple way out of the situation - how to cover a bathtub with acrylic yourself. With this modern technology, you can update your bathroom while spending a minimum of time and money.
- 1 Advantages of liquid acrylic
- 2 Tools and materials
- 3 Preparatory work
- 4 Preparation of enamel
- 5 Application of acrylic
- 6 Disadvantages of acrylic restoration
- 7 Method with acrylic liner
- 8 Care of acrylic coating
- 9 Should I buy a new bath or restore the old one?
Advantages of liquid acrylic
Restoring a bathtub by applying acrylic enamel is considered one of the most popular and simplest methods. Acrylic has many positive properties in comparison with other finishing materials, the price of which is often unreasonably high:
- If operating conditions are properly observed, the service life will be up to 15 years.
- The complete hardening time of 3 days is not so long, considering that complete hardening will occur without any defects.
- Covering the bathtub with acrylic ensures no stains.
- Acrylic enamel has virtually no odor, so all work can be carried out without burdening yourself with additional protection.
- Air bubbles, drops, smudges and lumps do not form in the uncured material.
Repair kit
There are ready-made repair kits for acrylic bathtubs. They come in one-component and two-component types. The former are usually cheaper than the latter. Single-component ones are used to repair scratches and chips. Two-component repairs cracks and small holes. There are also repair kits with polish. For clarity, you can find out prices for repair kits for acrylic bathtubs on Yandex.Market and Avito.
Typically the repair kit includes:
- Ready-made composition or its components;
- Syringe, brush or stick for application;
- Cloth for wiping.
Popular repair kit for acrylic bathtubs.
There are many manufacturers of acrylic bathtub repair kits. Their repair kits differ in composition. Due to this, they have different hardening and complete hardening times. Read the instructions carefully! Removing scratches using a repair kit:
- Wash the bathtub with detergent and wipe it dry;
- Apply a little composition to the damaged area;
- Rub it over the entire scratch or abrasion with your fingers;
- Wipe the repair kit with a cloth (lint-free, microfiber);
- Allow the composition to dry completely.
Important
When working with the repair kit, use rubber or polyethylene gloves. Apply just a little of the composition, a few drops to start. If it's not enough, add it. When wiping with a cloth, you simultaneously remove any remaining compound and rub it into the scratches.
Acrylic bath repair products
Are all acrylic bathtub repair products the same?
No, you need to select it depending on the degree of damage. One-component compounds can be used to repair small chips and scratches. Two-component ones are more expensive and they perform better when repairing large damages.
Are there any good manufacturers of repair kits?
No, basically all manufacturers have the same composition. If you want a brand, then you simply overpay for advertising. But we don’t recommend taking the cheapest ones - they may not have a mixture prepared for application.
Why are there one- and two-component mixtures?
One-component mixtures are intended for one-time use. Two-component ones can be used on several baths. This is a professional option for those who do this constantly.
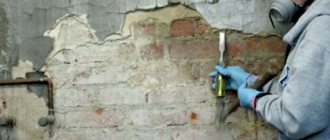
Preparatory work
How to cover a bathtub with acrylic correctly? The main thing is thorough pre-treatment of the surface:
- The old coating is removed with sandpaper. To speed up the process, you can use a grinder with an abrasive disc or a drill with a round attachment.
- Remains of enamel and dust are completely removed manually using abrasive powder.
- Then, the surface is degreased with a special solution and completely dried.
- The tap and drain will need to be insulated with film to prevent drops from damaging the metal structure.
- It is better to disconnect the siphon to avoid getting the hardening mixture into it. You can place a basin or bucket under the drain hole.
If any of these actions are performed poorly, the new acrylic will begin to peel off almost immediately.
Toothpaste
The easiest way to remove shallow scratches on acrylic. Toothpaste polishes the surface due to the small abrasive particles it contains. The procedure is as follows:
- Apply a little (see photo) toothpaste to the scratches;
- Polish them with a sponge or rag;
- Rinse off any remaining paste;
- Repeat if necessary.
This amount of toothpaste is enough to remove such a large abrasion.
Preparation of enamel
- Thoroughly mix the liquid mixture and hardener in a container.
- Slowly add the solvent in small portions, continuously mixing the mixture. The composition must be homogeneous.
- Add the dye of the desired shade, the final intensity depends on its quantity. In the absence of a dye, the bath will turn out white.
Before you start applying the prepared mixture, you need to let it stand for some time, taking into account the air temperature:
- 15 degrees - 20-25 minutes;
- 20 degrees - 15-20 minutes;
- 25 degrees - 10-15 minutes;
- More than 30 degrees - 5-7 minutes.
How to remove sealant from ceramic tiles on a wall
Ceramic plates are wear-resistant and practically unaffected by chemicals, but they must be wiped carefully, following the following sequence:
- Remove the excess with a stationery or household knife, without cutting right to the slab, so as not to scratch it.
- Soften with Silicone Entferner, Penta 840 or White Spirit.
- Mechanically work on the excess with a homemade wooden scraper.
For more information on cleaning walls from silicone, read the article How to remove silicone sealant from tiles.
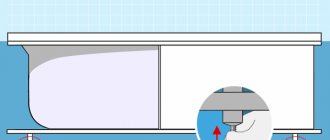
Application of acrylic
Now let's look at the most important thing - how to cover a bathtub with acrylic at home. First, you need to pour very hot water into it to warm it up. Application should be carried out by progressively pouring the mixture around the entire perimeter and distributing it in an even layer using a spatula. Excess can be removed through the drain hole.
The area around the drain hole should be given special attention; here the acrylic layer should be well sealed. The bottom should be formed immediately, without allowing the mass to harden. It is better to apply it in a certain amount of time in accordance with the ambient temperature:
- 15-20 degrees - 50 minutes;
- 25 degrees - 40 minutes;
- More than 30 degrees - 30 minutes.
Other surfaces
We sort of sorted out the acrylic bathtub. But what to do with other surfaces that have silicone-based sealant left on them?
To clean a glass surface, you have three options:
- The first and most common is to use a sharp blade. The disadvantage of this option is that it takes a lot of your time, and there is also a chance of scratching the surface of the glass.
- The second is to use Penta-840, which is designed specifically for removing sealant.
- The third is to use white spirit or gasoline. They are cheap, and in addition they are easy to purchase at any specialty hardware store.
Here's what you can use to clean ceramic tiles:
- Remove more of the silicone-based sealant from the tiles, but be careful not to damage or scratch the tiles. Then, using a soft cloth soaked in gasoline or white spirit, rub the product into the remaining glue. Once it has softened, use a wood scraper to remove any remaining sealant. When using a scraper, do not use too much force to avoid damaging the ceramic tiles.
- You can rub kerosene into the sealant until the glue softens and it doesn’t take a lot of time to remove it. Instead of kerosene, you can use a solution of a liquid product, although it will take longer to act. You decide.
- You can use extractants Penta-840 or Silicon-Entferner. But before you start full-scale work, you need to check whether your tiles are resistant to them, otherwise you may damage the surface of the ceramic and it will crack and harden.
We suggest you familiarize yourself with How to get rid of an unpleasant odor in a bag
You can remove sealant from the countertop using similar means:
- If the sealant has not completely dried, you can remove the sealant from the countertop using gasoline. Apply a little product to it, and when it softens, remove it with a cloth.
- If, for example, the sealant has hardened, then cut off as much of the layer as possible with a sharp knife or blade. Then apply a detergent to it until it is completely softened and remove it using a wood scraper.
- If you want to use modern solvents on the surface of the countertop, then carefully read the instructions so as not to break the material from which it was made.
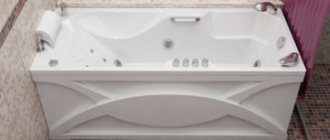
Acrylic liner method
This restoration technique is used quite often and differs from the classic one by the presence of an insert. An insert made of ABS plastic 6-7 mm thick, repeating its shape, is placed in the inner surface of the bath. It is glued to a special foam and sealant, and the entire installation will take no more than an hour.
Such a tab will hide the metal or cast iron base from external eyes and create the illusion of a modern acrylic bathtub. At the same time, the two-layer texture of plastic and acrylic makes the insert quite durable, while being white and smooth.
The method with an acrylic liner, like the classic one, is not without its drawbacks. The thickness of the acrylic itself will be less than that of a finished bathtub, and it is unlikely that you will be able to install it yourself, since special tools will be required. In addition, its installation will require dismantling the lower rows of tiles, which will cause additional costs for their restoration.
Polishing
There are special liquids for polishing acrylic bathtubs. We recommend using them if it is not possible to repair scratches with a repair kit or paint them. It is better to polish scratches on an acrylic bathtub by hand. You can use the softest felt circle for a drill, screwdriver or grinder.
Acrylic polishes can have different bases. Basically they matte the coating. It is better to use a wax-based polish - it gives the surface an even glossy shine. Despite the type and composition, the procedure is the same:
- Rinse with detergent, dry or wipe the bathtub;
- Apply polish to scratches or abrasions;
- Polish the surface by hand or with a tool;
- Rinse off any remaining polish.
Important
When polishing with a drill, grinder or screwdriver, set the tool to minimum speed. Periodically clean the area being treated and check how well scratches and abrasions are removed.
Acrylic coating care
To ensure that an acrylic-coated bathtub lasts longer, the following measures must be observed:
- Do not throw metal objects at it or hit it with something heavy.
- Do not use harsh abrasives, liquids with acid or chlorine, or rough brushes for cleaning.
- Do not wash hair dye, tinted shampoos and other dyes into the bath, which may leave stains.
- Do not pour boiling water, as this may cause the coating to delaminate.
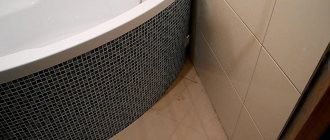
Remove sealant from tile joints
Silicone sealant is a popular method for sealing tile seams, joints and cracks. But in the humid environment of the bathroom, mold appears on the grout, which is impossible to clean off.
The only method for restoring tile joints is to replace the sealant. Before filling the seams with a new layer of silicone, the initial one must be completely removed.
The process consists of the following steps:
- A very likely amount of old grout is removed mechanically. Operate comfortably with a sharp object: a knife, screwdriver or scraper.
- The remains of destroyed silicone are removed with a vacuum cleaner.
- Then a special solvent is applied to the tile joints. The action time of the solvent is 2-10 hours. Specific periods are indicated on the solvent packaging.
- After the required time has passed, the paste is cleaned off with a soft cloth, and the seams are washed with a soapy substance.
- The prepared tile joints are filled with a new portion of silicone.
Buy a new bath or restore an old one?
Bathtubs are not replaced often, so when they plan to renovate, of course you want to buy a new one. It would seem that it could be simpler, especially since there are now many models of different shapes and sizes in stores. However, this solution is not suitable for everyone and it’s not even a matter of price.
Old bathtubs themselves are very strong, although the coating deteriorates over time. They already match the dimensions of your bathroom; there is no need to waste effort on dismantling and installing the structure. In the end, when you buy another bathtub, you only get updated enamel in a fresher color.
Bathroom sealants: properties, methods of sealing joints
Today, for high-quality design, decoration, as well as proper renovation in the bathroom, many modern materials are used. Among them are sealants for the bathroom. They are used for sealing seams during the installation of plumbing fixtures or tiles, as well as bathroom accessories.
Indeed, sealants are widely used in the bathroom, due to their high resistance to temperature and humidity changes. They are often used to seal seams between walls and plumbing fixtures or accessories. After high-quality treatment of the seam, moisture does not penetrate through the sealant and does not go under the bathroom or cabinet, and, accordingly, does not accumulate in unnecessary places and does not cause fungus.
Properties of bathroom sealants
Today's craftsmen are increasingly using silicone sealant for the bathroom. It is this sealant that does not contain other impurities that is considered the highest quality. It has the property of the lowest shrinkage (less than 2%), and is most often used in the bathroom for sealing various seams.
If you find that the sealant you have chosen contains impurities, and there are quite a lot of them, then you should abandon such a product. Experts say that due to the dilution of silicone with other substances, its properties are noticeably lost, and such a sealant is not suitable for use in the bathroom.
But, if silicone contains mechanical fillers in small quantities (quartz flour or chalk, as well as organic solvents or organic extenders), then there is nothing wrong with that, and the sealant will be suitable for the job.
The highest quality sealants are considered to be those in which the amount of additives does not exceed 10%. Only they are suitable for working in damp areas, and therefore for sealing joints in the bathroom. Please also note that a small amount of fungicides, which effectively prevent the appearance of fungi and mold in the bathroom, will not hurt in the sealant.
An interesting property is the uniformity of modern sealants, which can stretch perfectly in one long line (with continuous sealing of the seam). It is for this reason that during sealing there are no gaps through which moisture can penetrate.
The best sealant manufacturers
There are a huge number of sealants on our market, each of which has some positive or negative aspects. Especially, in a positive way, the products of the company Ceresit, which have long been recognized throughout the world, stand out.
With the help of sealants from this manufacturer, you can not only seal joints and prevent moisture from penetrating into places where it is not needed at all, but even glue some elements together.
An example could even be ceiling tiles made of polystyrene foam, which are quite simply glued to the ceiling using bathroom adhesive-sealant.
The products of the Turkish manufacturer, CIKI FIX, which has many advantages, are also considered quite popular. In addition to excellent technical characteristics and low prices, CIKI FIX bathroom sealants, as well as Ceresit sealants, can be used to glue decorative elements or simple and lightweight accessories in the bathroom.
In addition, remember that high-quality sealants, examples of which we gave above, have a high level of adhesion, ductility, water resistance and safety.
Now that you know which sealant is best for the bathroom, you need to understand how to use the sealant in the bathroom so that any process you start will be completed successfully.
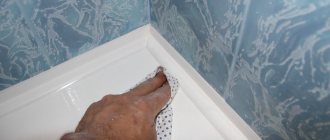
How to seal a seam in a bathroom with sealant
Whatever sealant you choose for the bathroom, you need to use it correctly, and also have additional tools and materials on hand.
To properly seal the joint between the bathtub and the wall, you will also need: masking tape (for edging the seam to avoid defects on the bathtub and wall after sealing), acetone or alcohol (as a substance for degreasing surfaces), a rag (to remove the sealant from the bathtub) , as well as a spatula (to remove excess material) and a sealant gun (a special tool for applying a substance to a joint). Such a simple set should also be equipped with the sealant itself, with which we do not recommend you skimp.
Before you start work, you need to properly prepare the surface, otherwise all your efforts and costs may go down the drain.
To do this, you should thoroughly clean the surface from dust, dirt, remnants of possible building materials, and so on, perhaps even wash it, and then degrease it well. The latter can be done using alcohol or acetone.
Degreasing the surface plays into the hands of high-quality adhesion, that is, the adhesion of materials. After cleaning and degreasing, the surface should be given about an hour to dry.
Next, you need to prepare the sealant for work. First of all, cut the tip of the tube at an angle of 45 degrees. You will get a hole with a cross-section through which the material will exit correctly.
After this, a special cap is screwed onto the edge of the tube, and the tube is inserted into the sealant gun and fixed.
In order for the sealant to come out of the reservoir and fit correctly into the joint, you need to apply proper pressure on the trigger or gun key, smoothly and with constant force.
If you didn’t succeed in sealing the joint neatly the first time, it’s okay, you can always remove the remaining material with a wet spatula. Also, if you don’t like the seam, it turns out crooked or uneven, then you can again shape it with a spatula.
Painting tape can also help with this quite well, with the help of which you can not only draw even boundaries of the sealant, but also save the walls and bathtub from stains, which are not always removed so easily.
But, with the help of our recommendations, you will learn how to remove sealant from a bathtub or ceramic tiles very quickly. To do this, you need to use thinner or purified gasoline. You need to moisten a small piece of cloth in any of the products, twist it a little so that no drips remain on the surface, and then wipe off the sealant.
Security measures
Any sealant is a chemical product, just like gasoline, thinner, acetone or other substances that you will use to wash the sealant or degrease the surfaces for its installation.
Therefore, you should definitely use gloves while working so as not to dry out or damage the skin of your hands.
It is also important to constantly ventilate the room in which work takes place, otherwise chemical fumes and a specific smell can cause headaches and dizziness. Take this point very seriously, since you are working with chemistry.
Question answer
And finally, I would like to answer a few questions from our readers:
- Can polyurethane bathroom sealant be used in a bathroom? Yes, of course, only you need to pay attention to the manufacturer and the technical characteristics of the sealant. Its properties will depend on this;
- Where can I read reviews of bathroom sealants?
Source: https://VannaDecor.ru/remont-i-otdelka/materiali/germetiki-dlya-vannoy-svoystva-sposobi-zadelki-shvov.html