Andrey
10984 0 1
Andrey September 16, 2016Specialization: facade finishing, interior finishing, construction of dachas, garages. Experience of an amateur gardener and gardener. We also have experience in repairing cars and motorcycles. Hobbies: playing the guitar and many other things that I don’t have time for :)
If you decide to equip a private house or even an apartment with a balcony, you need to make a frame, which is the basis of the structure. You can do it yourself, even without the help of specialists, but for this you need to familiarize yourself with the theory. Therefore, below I will introduce you to the most important nuances of this work.
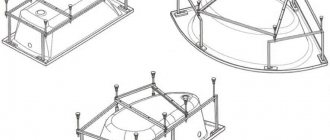
Metal frame for balcony
How to make a metal frame for a balcony
Having decided on the type of finishing material, you need to calculate how many profiles and components for it need to be purchased.
The metal profile will form the basis of the frame for the balcony or loggia and will bear the main load when installing the frame for glazing the balcony. It consists of two horizontal and four vertical reinforced parts. When carrying out work, you need to understand that you cannot load this part of the apartment indefinitely. The design feature of any balcony is that two-thirds of the slab protrude outward, and only a third is supporting. A large load on such a lever is simply unacceptable. Therefore, an advisable solution would be to cut off the heavy fence and make a lighter one with your own hands. Regardless of which area of the loggia or balcony the dismantling work is being carried out, place a warning fence at the bottom of the house.
Having dismantled the old fence, you will have to resort to the services of a welder or weld a new, lighter frame with your own hands. When performing welding work, please note that the corners of the frame must have an exact size of ninety degrees. To do this, it is advisable to use a square. For a loggia frame, this condition is not necessary; however, aesthetically, even the smallest area with a clear geometry looks more neat and beautiful.
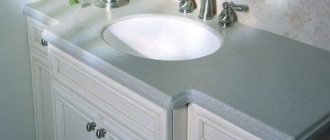
Lining is a practical, inexpensive material
Lining (lath, finishing panel, tongue and groove board) is actively used by professionals and amateurs. Working with small elements is easy; they can be processed with ordinary household tools (plane, grinder, hacksaw, drill). Technical characteristics depend on the quality of the material, respectively, and its cost.
Lining on the balcony is convenient for covering walls, cabinets, benches, shelves
Also note the class:
- extra (O) – smooth texture, absence of core, defects (cracks, bends, knots);
- A – there may be a knot, a resin pocket or a small crack (1 flaw per one and a half meters);
- B – up to 4 knots (no more than 2 cm in diameter), 2 cracks, 2 pockets per one and a half meters of fabric;
- C – many of the listed shortcomings, dark spots up to 15 cm in diameter, stripes, and minor mechanical damage are also possible.
If both the technical and aesthetic characteristics of the material are important to you, choose extra, or at least class A.
>
Softline profile for covering walls and doors
The boards also differ in profile and design. For example, “eurolining” on the reverse side has hollows - channels for ventilation, which relieve structural stress and prevent the appearance of condensation. Most popular profiles:
- block house;
- standard;
- American;
- softline;
- Landhau.
All products are equipped with edges and grooves for a tight connection into a single fabric. Most of them have a flat surface, but the block house is distinguished by the convex structure of the outer side, as it imitates a log.
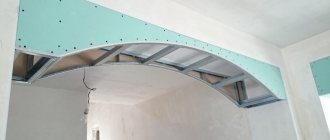
Frame installation work
Welding of the balcony frame can be done directly on the balcony slab.
To do this, when dismantling the old fence, metal protrusions are left, to which the frame parts are subsequently welded. The lower part is attached first, then the vertical support parts are welded, then the upper part is attached. The side elements are made in the same order and welded together. The metal profile components are fastened together with self-tapping screws, fitting into specially made grooves. The profile frame for the balcony exactly follows the contour of the main fence and is attached with self-tapping screws to the fence. If a decision is made to make a similar structure from a wooden beam, then the technology of execution is completely no different from a frame made of a metal profile. However, it is worth noting that such a design requires more reinforced fastening of the elements to each other. When preparing the frame on the loggia, you should also securely attach it to the wall.
To do the work yourself you need:
- Screwdriver;
- Hammer;
- Bulgarian;
- Hacksaw blade;
- Hammer;
- Pliers.
Preparation of material and tools
For arrangement you will need:
- profile pipe in the required quantity;
- welding machine and electrodes;
- grinder and special circles;
- metal corner;
- base for steps (tread), it is made of stone, wood, plastic;
- hammer;
- hammer drill and drills.
We should not forget about safety precautions: welding glasses and a protective suit are mandatory elements of welding work.
Don't forget to prepare your instrument
System assembly
When figuring out how to weld and assemble a staircase from a metal profile, you should take into account various design solutions.
A metal profile structure can consist of a bowstring (two load-bearing beams with steps fixed between them; it can be constructed using one or two stringers). It depends on the preferences of the home owners. The central broken stringer is made from individual parts by welding. Two pieces of metal profile are welded at right angles.
A central beam made of a steel profile pipe is often used; special supports are welded to it on top, on which treads are installed. It should be taken into account that the structure with a central stringer must withstand heavy loads; accordingly, it is necessary to use a pipe with a wall thickness of at least 6 mm.
A ladder made of a metal profile on two stringers located at the edges is more durable and reliable. During manufacturing, it is necessary to ensure that the two stringers for the flight of stairs completely coincide with each other. Therefore, the parts to be welded must be located on a perfectly flat surface. It is best to use a table. The elements of the stringer located at right angles are secured by welding, first on one side, then on the other, and then they are thoroughly welded. Proper manufacturing of the stringer is the key to the safety and beauty of the entire structure.
Usually a metal profile of 40×60 cm is used; it provides the optimal balance between lightness and reliability of the structure. If heavy material for treads is planned, a metal corner is welded to the stringers, forming a frame.
Installation of steps
To install steps, through holes are pre-drilled in the stringers. The treads can be attached from the reverse side using self-tapping screws. Between the stringer and the tread you need to install a small backing made of plywood, a piece of linoleum, or apply a strip of silicone sealant; this will prevent the steps from squeaking. They are often attached from the outside using bolts with decorative heads. Some time after the start of operation, the fasteners should be additionally tightened.
As an element for fastening stair steps, you can use a metal footer, additionally fixed in a wooden tread with glue. This fastening allows you to remount the steps several times if necessary.
Painting the structure
Carefully manufactured and polished staircase elements made from metal profiles can easily be coated with an anti-corrosion compound, primed and painted. Hammer paints or automotive enamels are often used for painting. To ensure high-quality painting, use a spray gun. That is why it is performed before installing the tread and risers. You can use a small roller for painting.
Installation of fences
The staircase fencing can be different: forged elements, metal or wooden balusters, transparent or colored plates of glass or plastic - there is plenty of room for imagination. It should be remembered that if there are small children in the house, the staircase fencing should be especially thoughtful - the child should not crawl between the fencing elements or get stuck between the balusters. The height of the railings should be at least 90 cm, in a house with children, elderly people and disabled people - 120 cm.
Don't forget about the fences
Railings can be attached to the steps or welded to the strings of the stairs. Often, additional support posts are mounted along the edges of the flight span. This is done to improve security. To attach wooden parts to the steps, special pins are used. The balusters are secured to the railing with screws, and the railings are mounted on top. They are most often made of wood or plastic. The wood is well processed and covered with several layers of varnish.
Cladding and glazing
After welding the frame, you can begin cladding the balcony. Vinyl siding is best suited for such purposes. For cladding you will need to make a frame from a metal profile. It is not recommended to make a frame for a balcony from wooden beams. Although some strongly recommend this particular material, citing its relative low price. The metal profile is more reliable, as it is made of galvanized steel and is therefore not susceptible to corrosion.
When covering the siding panel with your own hands, gaps should be left at the joints of the elements for thermal expansion, and all unevenness and minor errors should be covered with special corners included in the package.
Before starting the interior finishing of the frame, it is necessary to glaze the upper part of the balcony or loggia. To do this, it is necessary to make the upper ebb from galvanized steel. You should not make such elements yourself; it is better to purchase a finished product. The lower ebb, as a rule, is included in the package for the glazing frame made of metal-plastic.
The interior decoration of the frame directly depends on the design of the walls and ceilings of the entire balcony, and is carried out as part of the wall arrangement.
The nuances and dangers of installing wooden frames
When making boxes and window frames yourself, it is necessary to impregnate the wood with antiseptics. On the outside, all surfaces are varnished with acrylic varnishes with water-repellent properties. The inside of the box and binding can be varnished with oil-based furniture varnish and polished.
Countersunk holes are drilled for through bolt anchors. This method allows you to disguise a metal bolt with a wood plug, which is not visible when the sash is open. At the same time, the metal fastening is additionally protected from rust. Do not use wedges or bars filled with mounting foam to strengthen the frame structure. They are not strong enough to withstand strong gusts of wind.
If you plan to install a balcony extension, it is better to make its frame from a metal channel, the parts are fastened by welding or bolted connections.
Installation operations at height are dangerous. When working with the upper fastenings of wooden glazing of balconies and loggias, it is recommended to use stable, wide scaffolding. The normal methods of insurance when mounting at height would be a mounting belt or a chest strap with a three-meter end of a strong rope. The rope is secured to the metal parts of the fence or tied to the door of the balcony block. It is not recommended to install the structure alone; it is better to work with two or three people.
How to make a remote balcony
Have you ever wondered what affects the cost of housing? You can name a dozen factors, but the main one is the square meters of the apartment. Their remote balcony adds a nice touch.
After all, in the cramped conditions of a multi-storey building, the only way to expand an apartment without harassing neighbors is to go outside. In our market times, the cost of square meters is rising. Therefore, money spent on expanding balconies can safely be considered a profitable investment.
In principle, everything can be done with your own hands. You just need to carefully study the issue, look at photos and videos, and consult with an experienced builder. In this article we will give you useful tips.
Useful theory
Removing balconies or loggias is a complex of construction and installation measures, as a result of which we not only increase the space of the apartment, but also strengthen the structure of the slab. The process involves moving the enclosing structures both forward and to the sides.
We definitely install balcony glazing to ensure warmth, silence and comfort in the new room. But if we install glazing with a distance from the original edge of the slab, then in any case the top of the glazing “looks” into the sky. We solve the problem of fastening the window frame together with the installation of the roof.
There are two ways to remove a balcony.
- Take out on the windowsill.
- Removal along the base of the slab.
Using the first method, you can expand the balcony by 10-35 cm. But when expanding, only the glazing is removed. The lower part - the parapet remains at the same level. As a result, the parapet and glazing are not located in the same plane.
This way we increase the volume of the balcony. Another positive side of this extension is the ability to install a window sill across the entire width of the extension. Paired with sliding windows, you can use it as a shelf, table or rack.
Removal along the window sill is simpler and cheaper than removal along the base of the slab , but this method of expansion has one significant drawback - the floor area does not increase. This imposes a limitation on the use of the extended balcony as a new room.
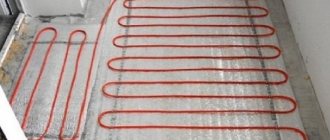
Related article: How to make a heated floor on a balcony
How to extend the balcony to a greater distance? The second method allows extension up to 0.5 meters. Please note that this is the maximum safe extension size. Removal over a greater distance leads to a heavier expansion structure, increased load on the balcony slab and problems with fastening to the wall.
A distinctive property of the extension along the base of the slab (or extension along the floor) is the displacement of the parapet along with the glazing by the amount of expansion. The window frame rests on the parapet and is located in the same plane with it.
The main positive property of extending along the base of the slab is that it increases the area of the balcony. Thus, we turn it into a full-fledged room.
Is it possible to enlarge the balcony in another way?
Our people are resourceful and inventive. He quickly combined both methods to achieve the greatest expansion results.
Let’s consider this combined version of a balcony with a take-out in more detail.
How to choose a protective coating for balcony structures
The balcony of a wooden house is constantly exposed to aggressive weather conditions. Rain falls on the uncovered area, snow and fallen leaves accumulate on it. All this contributes to the rapid destruction of wood, even in houses made of laminated veneer lumber. The weakening of wood at joints is especially dangerous.
To extend the life of the balcony in the house, all wooden structural elements are treated with special compounds.
To strengthen wood, antiseptic impregnations, insect repellents, primers for painting and paints and varnishes are used.
Materials are treated with protective solutions at each stage of construction:
- when constructing the frame, beams and lintels are coated with an antiseptic and primed;
- the base of the floor is treated with an antiseptic and then protected with rolled waterproofing;
- the flooring is treated with a primer and painted with enamel for exterior use or varnish;
- The fence is primed and painted.
To protect floor boards, antiseptic primer VISASOL is recommended. It penetrates deeply into the wood structure and protects the surface from the appearance of fungus.
For the finishing coat, durable enamels for exterior use or alkyd-urethane varnishes are used. They retain their original color for a long time without fading in the sun, and they resist shock loads and temperature changes well.
To obtain the best result, impregnations, antiseptics and paints from the same manufacturer are used to treat the balcony space. They complement each other's positive qualities.
It must be remembered that repairs on the balcony are only cosmetic. To replace the supporting structures, you will need to completely dismantle the structure and build a new one. Therefore, you cannot skimp on quality protection.
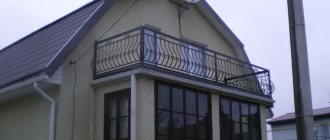
A balcony in a private house is a good way to make your home more elegant, romantic and easy to use. Whether it's spring, summer, fall or winter, we all enjoy enjoying the outdoors. There are several different types, each suited to a specific style of architecture. It is very important to correctly combine the internal ergonomics and external stylistic unity of the facade of the house.
This is an important area in an apartment or house. It connects the interior of the house with the outside world. We usually use it for:
- Enjoying breakfast or reading
- Supervising children playing in the yard
- This room controls the penetration of heat and air into the room
- Increasing the area of the room
- We raise the price of real estate
- We arrange a storage place
Preparatory work
Before you begin work on removing the balcony, you should thoroughly prepare, think through and calculate everything. Thus, we will save time, money and nerves during the restructuring process.
Before starting expansion work, you need to answer two questions:
In other words, plan the end result and figure out which balcony extension design will be able to implement our expansion plans. After this, we select materials, tools, devices, and an assistant for practical work on removal.
Before you begin, you should draw a drawing or a detailed diagram of the installation of a balcony with an extension. It would be even better to order an expansion project. This way we can accurately calculate the type and quantity of materials needed to remove the balcony.
Tools and equipment:
- welding machine;
- mount;
- hammer;
- hammer drill (drill) and set of drills;
- angle grinder (grinder);
- building level and tape measure.
As a material for the manufacture of the expansion frame, we use a rectangular pipe of 100×50 mm.
What to give preference: roof or visor
The roof is not included in the list of mandatory components of a balcony, but it can significantly expand its functionality. Instead of a roof, a canopy can also be installed, which will also act as protection from bad weather and direct sunlight.
Roof requirements:
- The surface area of the roof should be slightly larger than the surface area of the load-bearing slab and balcony railing.
- The roof must be installed at an angle to prevent accumulation of snow mass.
On a note! The roof can be single-pitch or gable. The first option is the simplest and most budget-friendly, the second is ideal for corner balconies.
A special Marquise canopy will help give your balcony an unusual and stylish look . This metal structure is covered with a special fabric, which allows it not only to act as a protective element, but also to emphasize the individual style of the entire structure.
Dome-type visors are less popular . This is due to certain difficulties in its manufacture, but many owners of individual buildings prefer this method of decorating the facade structure.
The arched canopy looks stylish and elegant , which is practical and highly functional.
Installation work
First of all, we empty the balcony of all things and disassemble the floor covering to the base. Using a grinder, we cut off the old fence and begin to strengthen the edge of the slab. Regardless of its condition, the edge must be closed with a metal corner 50x50 mm. It will serve as the basis for the lower mounting of the stem frame.
We cut two profiles from the pipe, the same length as the new width of the balcony along the facade. We place one profile on the floor and wall slab and attach it to it.
Along the side edges of the slab we install two profiles for the width of the external balcony, weld them to the wall profile and the corner.
We weld a second element to the ends, similar in size to the wall extension profile.
We prepare two side profiles. Their size is the width of the balcony plus 2/3 of the wall thickness. We make holes along the edges of the wall profile in the wall in such a way as to insert and weld the side elements of the frame. The result is a rectangle - the floor of the future balcony with an extension. We weld the logs in its inner part. The basis of the first part of the balcony extension along the base of the slab is ready.
Next we install gussets - vertical elements of the parapet structure. With their help, we solve the problem of how to make an extension along the windowsill, thereby combining both methods of expansion. To reduce the weight of the structure, we make the elements of the window sill extension from aluminum profiles.
We install horizontal connections, fencing and ceiling elements. The latter, being the rafters of the balcony roof with an extension, serve as fastening elements for the entire spatial frame of the expansion.
The frame is attached to the wall with anchors.
Basic methods of building a balcony
For buildings built from logs or timber, the technology for constructing a balcony is similar. The only difference is the method of support. Supports can be made:
- beam-cantilever method;
- beam-supported.
Diagram of types of balconies according to the method of construction in a private house.
In the first option, cantilever beams (logs) or simply extensions are located on the lower rims of the logs and are elements of the continuation of internal or external load-bearing walls. Among other things, such beams additionally decorate the facade of the house.
The cantilever method involves another option, in which the supports for the balcony are elongated beams of the interfloor floor, protruding to the required length beyond the facade. But many experts believe that this method does not comply with building codes and requirements, since moisture may enter the support beams, which will eventually lead to rotting of the wooden elements.
With the beam-support method of construction, the balcony is located above the veranda or terrace and serves as a roof for them. This option is much more often used in the construction of country wooden cottages.
The internal balcony is built mainly according to the French type, when it is arranged as a full-height window frame. That is, this is a small fenced area located immediately outside the door.
Let's take a closer look at each method.
Console method
When using beam-cantilever technology, it is necessary, when preparing the project, to determine the location and height of the loggia in order to release beams in this place during construction. For greater reliability, the other end of the beam should be attached to the main wall of the house. The fastening must be rigid.
Construction of a balcony in a private house on consoles.
The beams are usually released at 1.5-2 m. The beams themselves can be made of rounded logs or profiled timber
It is important that the outlet beams form a monolithic structure with the wall. If the width of the balcony is greater, then additional support pillars are erected
At the same time, a special screw mechanism is placed in the pillars to reduce the height of the supporting element by the size of the building's settlement.
To further strengthen the console, wooden or metal slopes are installed. The latter, made using forging, can serve as an additional element of facade decor. To strengthen the fastening of beams resting on the walls, battens are used.
The consoles, which are the basis of the design of a classic rectangular loggia, are connected by one beam, then a rough flooring is made and a finishing floor is laid on top of it. The outer floor beams are securely attached to the horizontal frame posts of the wall, and the rest are attached to the battens.
The canopy over the loggia is made separately, or is a continuation of the roof of the cottage.
If the balcony is purely decorative and has a width of no more than 1 m, then in this case you can use wooden trusses as a support. They are attached to the wall with special brackets. But there is a significant drawback. Over time, the fastening loses its appearance under the influence of precipitation and dirty rust stains appear in the fastening areas.
Construction of a balcony on racks
Owners of country cottages most often prefer to build balconies on racks that rest on the base of the veranda or terrace. In this case, the base of the balcony serves as a roof for them.
This method is used when the balcony is large, or it is not possible to use a ceiling under the base of the loggia. Of course, this option will require more significant costs, but the size of the balcony and, accordingly, the terrace under it can be any. You can place a parking lot under the balcony.
Attaching a balcony to a private house using the beam-support method.
Support posts with this method can be wooden, metal or brick. They are usually located along the outer edge or on both sides of the loggia. The inner part of the racks rests on a beam, which is rigidly attached to the wall.
Support posts are installed in accordance with the following technologies:
- The logs are taken slightly smaller than required. Initially, bars are placed under them, and after the house shrinks, they are removed, thus leveling the loggia. But, nevertheless, there should be an outward slope of about 2% so that the water does not stagnate, but flows freely.
- The racks are installed on jacks and then tightened as necessary.
- The beams or logs are set strictly according to size, and when the building shrinks, they are simply sawed down.
Glazing installation
For balconies, it is best to use PVC glazing or sliding systems. Extending the balcony with PVC glazing has better thermal insulation, but the inward opening doors block the window sill. This prevents it from being used to its full potential.
Sliding systems do not cover the window sill, since the sashes move along the plane of the window. But these windows have less thermal insulation compared to PVC windows.
Having installed the glazing frames, we install an external ebb and an internal window sill according to the extension design. Then we install double-glazed windows or sliding sashes, depending on the type of glazing.
Other details of balconies
It can be very difficult to find a table that requires a lot of space. If you don't have a regular set up, you can try this great folding table that conveniently attaches to your railing. When you're not using it, it folds down to maximize space.
Having a barbecue in your apartment is a huge advantage. There are small grills that you can attach to the railings. They are compact and convenient.
Plants add variety to the furniture in the cottage, add color accents, provide privacy and, if necessary, hide unsightly railings and walls.
Parapets
With railings that suit your home and surroundings, you can easily transform a boring cottage balcony house design into a modern and comfortable place to relax.
Wooden railings in private houses
Standard wood railings are the most commonly used railings. And there's a good reason for this. Wooden railings are an inexpensive option, they are comfortable and modern and give a wonderful view from the balcony in a country house. After some time, wooden railings need to be updated or changed. Often a wooden balcony in a country house is made with your own hands, which takes little time and helps make the house more individual.
Parapets made of polycarbonate and PVC in private houses
A polycarbonate canopy for a balcony in a private house is a popular alternative to wood. White has become a popular and classic color for such parapets. Available designs are the same as wood railings, but vinyl railings do not warp and do not require repainting or sealing.
Glazed parapets in the house
There's nothing better than clear glass railings. There are a variety of options available on the market, including solid panels or railings made of tempered glass or acrylic. Glass railings are quite expensive, but they are the best choice for cottages located on the seashore or near a lake.
Concrete parapets
Concrete railings are a durable and inexpensive option. You can use them in city buildings. Although there are not many designs available, these railings are durable and maintenance-free when compared to wood, glass or metal railings. If you want easy maintenance and durable parapets, choose this option.
Aluminum parapets
Aluminum railings are another option available in the market. Durable and lightweight aluminum is a suitable solution for many cottages with a balcony. This type is available in a variety of colors and styles, and you can definitely find a type that perfectly follows the design of your home.
Siding
The wide range of colors, ease of installation and durability of the siding have done their job. And now siding is a popular and convenient material for exterior cladding of balconies.
The fact is that siding installation proceeds from the bottom up, the boards engage with each other. But if the flashing is installed, it will be impossible to install the top siding board.
It is impossible to consider all the nuances of expanding a balcony in one article. But remember the main principles: measure seven times, cut once, be logical and do not violate safety precautions.
Kinds
A house project may involve very different design and construction solutions. The choice depends on the facade architecture and the purposes that they must fulfill. The article lists the most popular balconies in a private house - photos and detailed explanations.
Open
There are several benefits to having an outdoor balcony. One of the biggest is the ability to increase living space connected to the outside world. Another benefit is that an open plan above a home's porch provides more privacy than a porch or deck on the first floor. This is a good place to grow plants, as there is a lot of sun and oxygen at altitude.
It is convenient for those who want to enjoy the view without visual obstacles. Many people like to dine on their loggias. If there is enough free space, the open type will provide a good grilling area. There are many things you can add there - flower pots, flags, hanging toys, other accessories. This will enhance the personality of your property. There are many architectural designs that you can use to plan the layout of your outdoor space.
The balcony project in a confined space looks compressed and suffocating. There is little space for lighting and fresh air. It will save a huge amount of your time that you spend walking. This will ultimately benefit your health. You can get vitamin D, which is important for your productivity. There are always railings there to make outdoor recreation safer.
Closed
A closed balcony will create additional space for placing new furniture in the living room. This insulated space is suitable for storing items that should not be exposed to the elements. When you plan to enclose a loggia, you may gain additional storage space or additional usable area. However, an enclosed type will also destroy the space for comfort, as it pushes you away from the outside world of the street.
A home that has a high-quality enclosed loggia will bring you profits compared to a property without one. This is because the gallery property will look more aesthetically pleasing. Buyers always want a balcony with a stylish design that will provide them with more space. This type is safer than the open version. The height of the railing is not standard in relation to human height, so it becomes risky and unsafe to use. While the panel glass walls of a closed balcony will completely protect you and your child from falling. However, the closed type has a number of significant disadvantages:
- When you close the balcony, you have less space in the room for ventilation
- A covered balcony can prevent direct sunlight from entering the cottage. This may not be pleasant, especially during the winter season. A covered balcony is only necessary when you receive excess sunlight in your home.
- A house design with a beautiful balcony connects the homeowner with the outside world. The closed type blocks the view from the house. If your house has a park or/any open green area in front, then this balcony cover idea will disappoint you.
Balcony renovation - where to start?
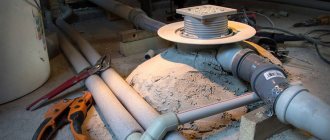
The work begins with the dismantling of the old railings and the gypsum boards attached to them. Next, the screed is removed and all foreign objects are removed, since the metal frame must rest on a solid base, namely a reinforced concrete slab.
After preliminary preparation, the condition of the load-bearing foundation is assessed. Due to time and lingering moisture, usually the edge of the slab is partially destroyed and needs to be framed with a metal corner with a 63 mm shelf, on which the entire metal frame of the balcony will subsequently rest. Extension elements made of a metal strip 40*20*5 are welded to the corner, which are attached with anchors to the slab at a distance of 15 cm from the edge and securely fix it around the perimeter.
The base is an important part of the greenhouse
The base of the plinth will be the MZFL shallow-depth strip concrete foundation (since the greenhouse is light). In principle, a columnar foundation with a grillage made of timber, or even a foundation made of cinder blocks, would be quite suitable, but as usual.
It should be cast directly into the trench (with formwork installed above it), correctly laid in it and tied with reinforcement wire.
The ratio of cement and sand in the solution is 3 to 1 or 4 to 1 by volume. The formwork above the ground does not have to be made high - 20-30 cm is quite enough, and the rest of the base can be made from a block (but again ask yourself the question - do you need a high base?).
Pouring the greenhouse foundation into formwork and trench (directly into the ground)
After the mortar has completely hardened, we lay out the first row of blocks (piping) along the perimeter of the foundation. Starting the next row, in one of any walls of the greenhouse, leave an opening for the door. During laying, it is necessary to constantly check the correctness and verticality of the corners.
To securely fasten the corners of the trim into the base, we embed pins or plates. We level the surface of the base with a layer of mortar, creating a slope to the outside to drain the water.
We are preparing new railings
New railings are placed on the already prepared base. To do this, you can use either a 40-mm corner or a profile pipe, which has a number of advantages, such as rigidity and an almost perfectly even shape.
The 40*20 pipe is cut into pieces equal to the distance from the floor to the planned level of the window sill (taking into account that the floor will rise by 5 - 15 cm during finishing, depending on the chosen material and design), usually this is about a meter and welded vertically using a level along the edge of the frame corner. The outer casing is attached to these pipes, so they are placed in increments of 40-60 cm.
Next, we carry out the upper trim of the railings, using the same profile pipe, which lies on top of the installed racks.
Unwelding the stem under the window sill
Since the balcony is not large, you can increase its usable area by moving the window sill forward. The stem size is usually 300 mm. In this option, the windows will be installed not along the edge of the slab, but along the edge of the external frame, that is, 30 cm further, thereby increasing the size of the balcony in the upper part.
The extension of the balcony under the window sill is made from the same 40*20 pipe and represents the upper contour of the frame around the perimeter on which the windows are placed. The “removal” is supported by inclined posts that transfer the load from the frames to the edge of the slab.
The operating procedure is as follows:
- We cut the pipe into 300 mm pieces.
- We weld them horizontally along the already standing railing posts, using a stretched thread between the pre-released pipes along the edges.
- We butt weld the front pipe. It is set according to level.
- We install support bevels, checking the horizontality of the front pipe.
At the corners, inclined elements can be made of galvanized wall profiles. It is smoother, has a larger flange width and is easier to attach the corners of the outer skin to. The bottom of the frame with the extension under the window sill is ready.
Removal of glazing - as an expansion option
This option is also called removal along the windowsill. The essence of this expansion is to extend the window structure beyond the balcony using heavy-duty special brackets. The design allows you to simultaneously get a comfortable wide window sill.
Stem installation
The general scheme of work is as follows.
Brackets treated with an anti-corrosion compound are attached to the parapet:
- welded fastening, in the case of a metal parapet;
- anchor bolts, with a concrete parapet.
Maximum rigidity of the structure is given with the help of a metal pipe, which strengthens the brackets together. In the future, it is used as a support profile for glazing frames.
If the condition of the balcony is unsatisfactory, there is a need to strengthen the structure of the parapet, which can be done by strengthening it with metal: welding profiles or steel corners, replacing metal fences. Another method is more popular: creating a welded structure that seems to “tie” the old parapet and rigidly attach it to the wall of the building. It is this design that bears the main load in the future.
Extended glazing can be done along the front (front) side of the balcony or along its perimeter, which allows for a maximum increase in its usable area.
A plastic window sill is placed on the fixed brackets, which performs two functions:
- decorative - for the interior;
- protective – for the external part (the remote structure protects from below from precipitation).
Tools and work procedure
Expanding the balcony undoubtedly presents a certain difficulty.
Tools and materials you will need:
- hammer;
- Bulgarian;
- slice or mount;
- drill and set of drills;
- building level;
- profile pipe (40x40);
- anchors (4 x 20-25cm);
- brush and primer;
- marker or chalk.
balcony with window sill
Work order
Calculation of the profile length: add the length of the side walls to the length of the parapet, the distance between the lintels and double it.
The old railings are cut off with a grinder, leaving the posts sticking out. Prepare a profile along the length of the balcony (if the length is large, you can work with two halves, which then need to be welded).
The rest of the work is performed together with the welder.
- — Having placed the profile on the edge of the balcony slab, they pinpoint it on one side by welding.
- - Having set it horizontally using a level, grab it in the same way on the other side.
- The profile must be even along its entire length (this is checked with a level and, if necessary, corrected with a hammer and pry bar).
- All elements are tightly welded (you need to monitor the quality of the seam on which the entire load will fall).
- The jumpers are cut (taking into account the width of both profiles), and they will then be butt welded.
- Use a marker or chalk to mark the attachment points of the jumpers.
- Having exposed the jumpers, spot weld them on the top, bottom and sides.
- Before finally welding the jumpers, check their evenness and adjust if necessary.
- Another piece of profile is needed for the outer part of the frame. Considering that it will be, one might say, “in weight,” it is not taken too long.
- Applying the cut piece to the ends of the jumpers, weld it.
- Two holes are drilled in the side lintels adjacent to the wall and secured to the wall with anchors.
- If there are no side walls, there should be small corner supports at the ends of the frame.
- Having completed the welding work, the slag is beaten off at the welding points and the structure is primed.
Please note: How to properly cover a balcony with vinyl siding inside and out?
Side racks
For blank walls, welding of the frame is also required. Vertical posts welded to the railing are connected at the top by a jumper, on which the visor will then rest.
In order to avoid overheating of the metal and distortion of the entire structure, welding work is carried out in two stages - first, the structure is assembled using tacks, then it is finally scalded.
To avoid rapid corrosion, the metal is primed.
In the photo, the frame of the balcony with extension under the window sill and glazing on both sides is ready for exterior finishing.
Related articles:
Many houses have an unheated room such as a balcony or loggia. How to insulate it and make it suitable for normal use in winter will help.
Residents of Khrushchevkas are familiar with the situation of disorder on the scanty balconies that these legendary buildings of the USSR are equipped with. In order to somehow organize it.
The article talks about the technology of covering the ceiling on a balcony with plastic panels, including preparatory work and installation of the ceiling.
Methods for restoring balcony slabs, their characteristics, and possible options for strengthening are considered using the example of repairing a balcony slab in a Khrushchev-era building.
We will show you how to arrange cabinets under the parapet on a balcony with a carry-out, mark and attach frame profiles under the sheathing, and sheathe the balcony parapet.
Two possible ways
To increase the size of the balcony, you can use one of two possible methods:
- Removal of glazing along the parapet. When using this method, the actual size of the room is increased, while the nominal area of the balcony remains unchanged, so there is no need to obtain a permit or redo documents for housing.
- Extension of the slab around the perimeter. This is a complex and responsible work, which requires drawing up a project and obtaining a permit. But by choosing this method, you can increase the area by about a third, which will make the balcony in the Khrushchev-era building much more spacious.
What is a balcony frame and why is it needed?
The frame is a special prefabricated structure. For its manufacture, pre-prepared individual elements are used. This structure is necessary to ensure the stability of the balcony room; in addition, it must withstand external loads.
The metal frame will give the balcony the necessary strength and the ability to withstand increased loads
If the owner of the apartment is planning to carry out renovation work on insulation, or it is necessary to install glazing, to achieve a high-quality result it is impossible to do without the use of a good frame.
Most people turn to professionals for help with such work. However, there is a small percentage of owners who make the frame themselves. Thanks to the clear use of specific instructions, the design is quite simple to install. But in addition to the frame, it is important to choose the right material for covering the balcony.
Article on the topic: We insulate the balcony with our own hands, step-by-step instructions
Main types of gates for country and country houses
- hinged - are two hinged doors that open inward or outward. They are simple and cheap to install, however, they can damage the car when entering, especially if there is strong wind. Also, a significant space needs to be cleared for them.
- sliding or sliding gates with a guide rail - the door moves on a roller mechanism along the fence line. The complex design and special expensive fittings make such gates not the most affordable. But they provide a higher level of comfort: an automated drive makes it possible to open them without leaving the car.
How to sheathe a balcony with your own hands, frame under corrugated sheeting
To cover a balcony, it is customary to use PVC siding, PVC lining or corrugated sheeting. Moreover, a metal frame is often used for outdoor work. And wooden ones are suitable for insulating walls from the inside.
Many craftsmen prefer corrugated sheets. This surface finishing option is the most rational.
After all, the material is made from light but durable sheet metal. Due to its positive characteristics, corrugated sheeting managed to achieve good resistance to external influences.
Corrugated sheeting is extremely popular due to its practicality and durability
When using profiled sheets, installation work is carried out quickly and easily. But to achieve this, it is important to correctly install the metal frame. To create it, profile pipes are used.
There are two types of design:
- Straight frame . It is placed parallel to the walls of the house. After this, the structure is insulated with mineral wool. Then it is necessary to sheathe the structure with corrugated sheets.
- Oblique frame . For its manufacture, special oblique extensions are used, which go in several directions. Some are located on the sides of the room, others in front. This design allows you to significantly expand the balcony.
There are two main types of frame: straight and oblique
A correctly installed frame will ensure quick and high-quality installation work on cladding and insulation of the balcony.
Characteristics of wood for finishing
When choosing a type of wood, take into account the technical characteristics and decorative properties of the material. Avoid conifers, as pine and spruce release resin when exposed to sunlight. Many people choose pine because it makes the cheapest panels. This option is possible if the loggia faces north - but even under this condition, the surfaces should be carefully treated with special impregnations.
Pine lining is an inexpensive finishing material
At a temperature of about 50ºС, which is possible in summer, even cedar (Far Eastern or Siberian) releases resin. The exception is the “extra” class panels. If you are not limited in finances, you can choose cladding from expensive white or red Canadian cedar. These types of wood do not emit resin, but have all the advantages of coniferous wood, for example, creating a pleasant atmosphere that is good for health.
We suggest considering linden. Pleasant yellow, slightly golden color that does not change over the years, beautiful texture and low thermal conductivity are perfect for finishing work. Linden is more expensive than pine, but lasts much longer. In the same price category are oak, larch, abashi (African oak). The interior, decorated with the listed species, can safely be called elite - due to the high cost and noble appearance.
>
Decorating the room with larch
It is possible to save money by choosing alder or aspen. However, over time, aspen acquires an unpleasant gray tint. To avoid an undesirable prospect, tinted impregnations or paint and varnish products will help, which not only protect against mold, but also give a fresh, natural look. Alder has high thermal conductivity, but this is not significant for a balcony.
Enlargement of the room with a frame on the balcony made of profile pipes
How to make the size of the balcony room larger? Not many people know that thanks to the use of special designs, it is quite possible to enlarge a balcony on your own.
To ensure a high-quality result, it is important to carry out installation work consistently:
- Preparation . You need to completely vacate the premises and ensure that you have the necessary materials in advance. In addition, the area located under the balcony should be blocked to avoid injury to passers-by.
- Welding work . To make the frame of the room you will need special profile pipes. First you need to take care of the base to which the frame will subsequently be attached. To do this, weld the base along the balcony perimeter and make sure that the horizontal parts of the structure are the same size. If the frame is higher than 50 cm, you need to add additional pipes to it. The profile pipes that will serve as fencing should be welded to the bottom of the frame. Experienced craftsmen recommend pre-assembling the fence, and only after that welding it in sections. After completing work with the lower part, you can begin to install the upper part of the structure, which should correspond in size to the lower one.
- Finishing work . This stage is considered the most labor-intensive. First you need to attach special wooden posts to the corners of the frame. After this, the same materials are attached to the balcony (along the entire perimeter of the room). Then the longitudinal logs should be fixed at the bottom and top. These installation works make the structure more durable and stable.
When increasing the area of the balcony, a durable metal frame is simply necessary
To achieve a good result, you need to take care to carefully carry out all stages of installation work to increase the room. Moreover, it is worth paying special attention to the creation of the frame. After all, the strength of the balcony depends on this design. And for covering the room, it is recommended to choose high-quality materials that are highly wear-resistant and will serve for many years.
Dimensions and calculation of the amount of material
In order to properly weld a greenhouse from a profile pipe, when drawing up a project you need to start from its length and the number of main elements. Since the arcs must be installed every 1 meter, then, for example, for a 6-meter structure, seven of them will be required. The standard length of the profile pipe is 6010 mm. It is easy to calculate that it can be bent into a semicircle with a radius of 1.9 meters. In order not to waste expensive material, you should choose a height of the arched structure of 1.85 - 1.9 m with a width at the bottom of 3.7 - 3.8 m. With these dimensions, there is no need to cut its sheets when covering with polycarbonate, the size of which is 6 ×2.1 m.
Drawing of a greenhouse with a gable roof
In order to use pipes to the maximum when building a gable greenhouse, the height of its wall at a roof slope angle of 30 - 45⁰ is chosen to be 1.7 - 2 m, and the width - 4 m. The length of the slope will be 2.25 - 2.45 m. Jumpers are installed at the top point of the arcs and in the middle part of the slopes. There are 2 pieces on each side. The rear wall is reinforced with two cross members. On the facade there is a frame (frame, transom) for the door. Based on its size, the number of auxiliary profiles is calculated.
Drawing of an arched greenhouse
Manufacturing a frame for a balcony roof and glazing system
When the balcony is on the top floor of the house, the owners have to build a roof for the balcony themselves. Special canopies provide protection from rain and sun. The most popular option for finishing work on a structure is metal corrugated sheeting.
If the balcony is on the top floor, you will have to take care of installing a frame under the roof
To make the roof base, professionals recommend using profiles (50-60 mm).
They are installed in the form of 2 triangles on both sides of the frame. It is better to use zinc-alumina material for coating. It is also important to ensure that the sheet protrudes 5 cm on the sides.
Preparing the room for glazing
Before carrying out work on glazing the balcony, you need to take care of making the frame. But before you begin installing it, you should decide on the choice of material for the structure. Wooden or metal materials are suitable for such work. Experienced craftsmen prefer metal frames. This choice can easily be explained by their high reliability and durability.
To carry out welding work, you can purchase special inverter machines. There is no specific order for welding parts of the structure, because the entire installation depends on the characteristics of the balcony railing.
For high-quality glazing you will also need a strong frame
But what to do if the fence protrudes noticeably beyond the concrete slab?
It is necessary to align the vertical fence at the same level with the surface of the slab and find the metal strips (balcony embeds) at the base of the room.
In cases where a slab protrudes beyond the balcony fencing, you need to remove the old structure and free access to the embeds. After strengthening them further, it is important to ensure that the slab does not protrude and then install a new frame. Before welding the horizontal, excess vertical protruding parts should be trimmed.
Hanging frame
The process of manufacturing a frame, regardless of the type of its design, can be divided into several stages:
The main stages of manufacturing a hanging frame
Below we will take a closer look at all the nuances of work at each of these stages.
Preparation of the drawing
So, first of all, create a diagram of the frame for the balcony with your own hands. The only thing is that you first need to decide on the following points:
- the dimensions of the balcony - its length, width, etc.;
- design - can be open or closed.
Diagram of the suspended frame structure
The suspended frame consists of several main components:
- struts - are triangular brackets that serve as the basis for the balcony;
- bottom dressing - connects the struts to each other, resulting in the formation of a floor area;
- racks - serve as supports for the roof and fence;
- fences with filling - the name of this element speaks for itself.
- top dressing - serves as the basis for the roof.
According to existing building codes, the height of the fence must be at least 100 cm.
It must be said that the frame diagram can even be drawn by hand. The main thing is that it displays in detail all the structural elements and their dimensions in millimeters . Thanks to this, you will simplify further work and be able to avoid errors during the assembly process.
Metal corner with a section of 50x50 mm
Preparation of materials and tools
As a rule, the frame for a balcony is made from a profile pipe with a cross-section of 50x50 mm and a thickness of at least 5 mm. It is used for racks, bottom dressing and fencing.
The struts can be made from corners with a section of 50x50 mm. In addition, you will need to use pipes of a smaller cross-section to fill the fence, make a cornice and some other parts.
Since we will have a metal frame, we should prepare metal tools for work:
- welding machine;
- grinder;
- electric drill;
- tape measure and pencil;
- metal files and sandpaper.
Strut layout diagram
Fabrication and assembly of the frame
Now that all the materials and tools are ready, you can begin to make the frame with your own hands using a drawing, simultaneously mounting it on the wall.
The work is performed in the following sequence:
- you should start with the manufacture of all parts, according to the drawing. Essentially, this procedure consists of cutting a profile pipe and angle into pieces of the required length;
- Next, you need to make struts, which are triangles made from corners. One side of the triangle, which is attached to the wall, should protrude 5 cm from above and below. The side perpendicular to the wall, which determines the width of the balcony, usually has a length of about 80 cm. It is not worth making the balcony wider, as this will lead to the transfer of the load to the wall . The number of struts depends on the length, and the step between them should be no more than 100 mm;
- Next, you need to mark the location of the struts on the wall. The most important thing is to align them in the horizontal plane, as well as relative to the window block;
In the photo - struts mounted on the wall
- then you need to secure the struts to the wall using anchors. To do this, you need to drill holes in the struts for them in increments of about 10-15 cm. On our portal you can find detailed information on how anchors are installed;
- Now the struts need to be tied into a single structure using the bottom strapping, which is mounted along the perimeter of the site of the future balcony. The long side of the strapping adjacent to the wall must also be secured with anchors;
- to increase the strength of the structure, stiffening ribs made of angles or profile pipes can be installed between the long sides of the lower trim. The distance between them should be about 40 cm. If the floor of the balcony is made of planks, then these ribs will serve as its basis;
- Four posts should be welded to the resulting balcony base. The rear pillars should be 20-25 centimeters higher than the front pillars, which will ensure the slope of the visor. In addition, they also need to be secured to the wall with anchors;
- at a distance of about a meter from the base of the post, you should tie it with a crossbar, which will serve as a fence;
- the upper part of the racks should be connected with the upper trim, as shown in the diagram above;
- To complete the work, you need to fill the fence. To do this, use vertical and horizontal strips. You can also arrange the slats diagonally;
- After making the frame, the welds should be cleaned and the structure painted.
Diagram of a similar wooden balcony
In a wooden cottage, you can make a similar frame from timber. The same anchors should be used to secure it. As for connecting wooden parts to each other, it is done using metal corners.
This completes the frame assembly process. Now all that remains is to sheathe it and, if desired, glaze it.
Balcony on supports
Conclusion
Decorating a balcony and covering cold concrete with warm and cozy wood is not as difficult as it seems at first glance, because the material is easy to process and install. The video in this article will help you understand even better some of the important nuances of the topic we discussed. If you want to clarify certain points, then write all your questions in the comments under this review.
Did you like the article? Subscribe to our Yandex.Zen channel
September 14, 2021
Balcony and loggia, Finishing materials
If you want to express gratitude, add a clarification or objection, or ask the author something, add a comment or say thank you!
Types of structures
Regardless of appearance and size, all balconies have mandatory structural elements. Among them:
- base plate, which bears the main load;
- fencing (parapet);
- additional elements (visor, wind screen).
The main structural element is a slab, which is made of reinforced concrete or wood. The first option is applicable only for buildings built from durable materials (stone, brick, reinforced concrete blocks). The wooden slab is lightweight, so it can be installed on the facade of any building.
Depending on the method of attaching the slab to the wall, balconies can be:
- with a cantilever beam clamped in the wall (the reinforced concrete slab is recessed into the wall during the construction stage, and the overhang of the structure cannot exceed 1 m);
- with a cantilever slab and support on beams (beams are recessed into the wall, on which a reinforced concrete or wooden slab is placed on top, while the width of the balcony can reach 1.2 m);
- with a slab supported on triangular brackets (this option is used when the balcony is attached to an existing building);
- with a slab on supports (an attached balcony rests on columns, walls, and beams standing near the facade).
The French balcony also belongs to the category of balconies, although, in fact, it is only a beautiful enclosure of a window opening.