- The height of the crossbar of the sports equipment should be such that you can touch it with your fingertips while rising on your toes.
- The distance from the ceiling to the crossbar should be at least 32 centimeters.
Formulas for correct installation of the horizontal bar
There are also two formulas that allow you to correctly calculate the distance from the floor to the crossbar:
Formula No. 1:
BAR HEIGHT = HEIGHT x 1.28
This height is optimal because it allows easy access to the crossbar. You can approach the sports equipment, easily reach and hang on it. At the same time, you can exercise on sports equipment without tucking your legs. In addition, this height ensures unobstructed passage under the crossbar without bending your head.
Formula No. 2:
MINIMUM ROOM HEIGHT = PROJECTILE BAR HEIGHT + 32 CENTIMETERS
This formula allows you to calculate the ceiling height when installing sports equipment indoors.
Frequently asked questions (FAQ)
Whatever the height of the ceiling, the distance from it to the crossbar should be 32 centimeters. And this is not affected by height, age, or body proportions. But there are some exceptions, which are described in paragraph 3.
If the distance between the crossbar and the ceiling is less than 32 centimeters, then when exercising on a sports apparatus you can hit your head on the ceiling, which can lead to not the most pleasant consequences.
That is why, no matter what the height of the ceiling in the room, the distance should still be 32 centimeters. In this case, if the ceiling is low, you will have to exercise on a sports apparatus with your legs tucked. Of course, this option is not very convenient, and it is recommended to avoid it if possible.
If you want to do pull-ups on a sports apparatus higher each time. What to do?
In some cases, as preparation before exercising on sports equipment, athletes use the “exit by force” technique. The peculiarity of this technique is that the chin turns out to be SIGNIFICANTLY higher than the crossbar.
In this case, it is recommended to increase the distance between the crossbar and the ceiling. It should be such that with the strongest pull, 2 centimeters remain from the head to the ceiling.
If I have hydrocephalus, a large head, what should I do?
No problem! Make the distance from the crossbar to the ceiling larger to avoid damaging the ceiling with your head and making expensive repairs in the future.
Fastening requirements. Important points
To ensure safety during exercise on sports equipment and the maximum level of comfort during exercise, you need to attach the sports equipment to supporting planes, for example, to a wall, ceiling, floor. At the same time, it must be fastened carefully and securely.
Basic requirements for fastening:
1. If the sports equipment is installed on a base, it must be strong and stable. Ceiling-type sports equipment, as a rule, should be attached to floor slabs or to a wooden beam; it all depends on the building and its design features. The wall-mounted version of the sports equipment is best mounted in a wall made of concrete, wood or thick brick. It is not recommended and under no circumstances should you mount sports equipment in gypsum concrete, foam concrete walls, plasterboard, plywood and surfaces made of not very durable materials.
2. To securely fasten sports equipment into a wall made of brick or concrete, it is best to use the through-mounting method. For this, an 80 mm long anchor is used, which is necessary for a hole with a diameter of 10 to 12 mm. The strength of the anchor depends not only on its recess into the wall, but also on the materials from which the wall itself is made. As a rule, the strength is 1500 kg/s. This anchor is capable of withstanding loads that significantly exceed the loads for a sports equipment. Do not use weak screws with plastic anchors in concrete or brick surfaces. If you need to fix sports equipment on a wooden surface, use screws of at least 8 mm.
3. To align the crossbar horizontally, use a building level. A crooked crossbar will cause the load to be distributed unevenly.
We hope that this information will help you decide on the correct height for attaching the horizontal bar at home!
The only thing I definitely understood in the process of thinking about it was that it should be hung on the balcony. The rest, I had no idea how or what to do. When I got down to business, I discovered some interesting details.
But first - in which I was again unfairly lucky.
- We managed to find almost everything we needed on sale.
- I didn’t say anything to anyone, and therefore no one dissuaded me or interfered with me.
- He put aside all his work and slowly, without wasting time, devoted several days (evenings) to this matter.
Well, Zarathustra. forgave me again.
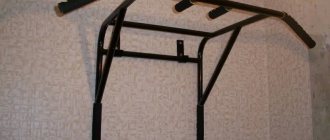
Horizontal bar
I chose for a long time, and for a long time I could not decide. There was an idea to make the horizontal bar itself with your own hands. It seems that there is not much work here - take a piece of water pipe and somehow fix it on the wall. Also, there was a chrome headboard from a metal bed lying in the garage - also, why not an option? I also had the idea of buying a barbell. I also thought about the Swedish ladder, etc., etc. When I finally realized that the horizontal bar should only be hung on the balcony (due to the high ceiling and fresh air, which is more important than many people think), a solution began to mature and I began to explore online stores.
Small FAQ
1. What to do if the ceiling height is less than what is obtained from the above formula?
In any case, the minimum acceptable distance from the crossbar to the ceiling is 32 cm (regardless of the athlete’s height, age and body proportions, except for the exception described in paragraph 3).
If this distance is made smaller, then during particularly vigorous lifts, the force of inertia can lead to contact of the head with the ceiling, which demoralizes the athlete and is unpleasant in itself.
Therefore, if the ceilings in the room are too low, then the crossbar is simply fixed at a distance of 32 centimeters from the ceiling, and the height from the floor is whatever it turns out to be. The hanging position will only be possible with the legs tucked at the knees. Of course, this option is not very convenient, so it is advisable to avoid it.
2. What if I want to pull myself higher and higher?
Sometimes, in preparation for the “pull-up” exercise, athletes perform a non-standard pull-up, when the chin rises SIGNIFICANTLY above the bar.
In this case, the distance between the ceiling and the crossbar must be increased accordingly so that at the highest point of lifting the distance between the top of the head and the ceiling is at least 2 cm.
3. What should I do if I have a hydrocephalic head (hello Medvedev)?
No problem! It is only necessary to proportionally increase the distance from the crossbar to the ceiling in order to eliminate the possibility of damage to the ceiling covering and avoid subsequent expensive repairs.
Attaching the horizontal bar - choosing a method
This was the most difficult thing, because... I was afraid that I wouldn’t calculate the fasteners correctly and the horizontal bar would rip out of the wall (and I’d get hurt). Therefore, I spent a long time studying all possible options. The situation was aggravated by the fact that the purchased horizontal bar had only two mounting holes in the upper part (right and left) - after all, the main load would fall on them. The lower holes play only a supporting role. The diameter of the holes is 10 mm, and it seemed to me that this was small. Moreover, when you are hanging, it would be nice to sway from side to side. In this case, at some moments almost all the weight will fall on one side (that is, essentially on one bolt/stud).
In addition, the wall where the horizontal bar was supposed to be fixed is made of hollow brick, and the lower holes rest against a concrete beam (which runs above the window and above the balcony door). Those. the main load falls on the hollow brick (which is on top), but the lower holes (which are in the concrete beam) can be made just shallow (later it became clear that drilling the lower holes into the beam will not work, but more on that below).
In general, having studied ordinary plastic dowels, I realized that I did not trust them, despite the fact that they can be quite long and are of fairly high quality. For much the same reason, I discarded the anchor bolts for the top holes. It is not known which part of the brick its end will fall into (what if it is into a cavity?), and it is not known how the brick will behave in general.
Although for lower, supporting mounts, a regular anchor seems to be the best option.
In the process of searching for options, I came across the so-called. « chemical anchor
”(it is also sometimes called “
chemical dowel
”, and in English it will be “
injection anchor
”). This is a very interesting option, especially for bricks with cavities. The hole is filled with a special mixture (the mixing nozzles “spouts” on the balloon are disposable!), which then envelops, for example, a pin inserted all the way into the hole, fills the entire hole, is squeezed out a little and, in this form, hardens. Later, I had the opportunity to touch this mixture after it had hardened - it became hard as a stone (more on this below). For bricks with cavities, a special mesh tube/sleeve (plugged at one end) is provided, which is pre-inserted into the hole before supplying the mixture and keeps the mixture from being pressed into the cavity inside the brick (although it is still partially pressed through the mesh cells, but only slightly, and this only further strengthens the entire structure). On the Internet you can find a lot of information, pictures and even videos dedicated to chemical anchors.
For some reason I couldn’t immediately find these mesh sleeves or retaining tubes for the chemical anchor (I found them later, when it was too late), and this influenced the final choice of the fastening method in another, even more reliable way.
So the decision was made
- the last option, which I settled on, was to break through the main wall (from the balcony into the room) and insert long
pins through the holes
(later I regretted that I gave up so easily, but in the end everything turned out for the better - more on that below).
By the way, my balcony is narrow, and the back of the drill with a hammer drill rested against the window opposite (just in the blind, as luck would have it) - it didn’t fit. I was about to disassemble the window and remove the glass, but then a brilliant idea dawned on me :), and I punched part of the hole with a short drill of the same diameter, after which I inserted the main long drill into this hole, put a hammer drill on it (there was just enough space, even there were still a couple of centimeters left between the hammer drill handle and the balcony glass) and finished the hole started with a short drill.
Hollow inter-apartment wall
I'm doing my own renovations. I was drilling a socket box with a crown, the crown suddenly falls through and I put aside a mountain of bricks. After a little searching for information, it turned out. There is a hollow inter-apartment wall
Now it’s clear why you can hear any whisper from the neighbors behind the wall. Question for experts - is it possible and what options are there to fill the void with soundproofing material? Thank you in advance.
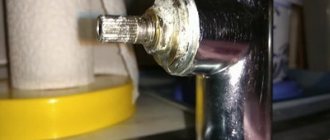
Hairpins
When I came to the nearest hardware store to see what they were, doubts began to overcome me again. Will a M10 threaded stud support the required load?
And then I went online again (copying the address of the supplier’s website from the store pin label).
It turns out almost everything
studs that are sold in hardware stores have
steel strength class
4.
Typically, the strength class is indicated by two numbers with a dot between them (for example, “4.8”). The first number is strength, the second is “fluidity”. I'll send you to a search engine for details :). I’ll just say that strength class 4 means that the ultimate tensile load is 40 kgf/mm 2 (to calculate the total ultimate strength, you may also need the formula for the area of a circle S = r 2, where = 3.14; r = radius from which you need not forget to subtract the thread).
I managed to find a company on the Internet that sold such studs, but made of steel with strength class 8 (twice as much as a regular stud!). Fortunately, they were even coated - galvanized. This pin has a special yellow mark on the end. Costs $4 (for 2 meters). That's what I bought.
BY THE WAY
At the same company where I got the stud, they told me that they have studs with strength class 10 (!), unfortunately without coating.
But they weren’t there at that moment, and I didn’t want to wait anymore. In addition, the seller assured me that such studs are used only where the loads are absolutely prohibitive. Later, when everything was done, I found out that I could look for such studs in auto stores
.
There I also bought huge wide washers with a 16 mm hole made of thick steel, and slightly smaller ones with a hole diameter of 10 mm.
To get started you will need:
- Partner - 1 pc. (preferably, but not required)
- Pencil - 1 pc.
- Construction level - 1 pc.
- Construction tape 2 m - 1 pc.
- Hammer - 1 pc.
- Drill - 1 pc.
- Carrying - 1 pc.
- Drills with Pobedite tip - 2 pcs: dia. 6 mm - for “rough” holes, the second drill is 10 mm - for anchor bolts, or 12 mm - for dowels.
- Wrench "13"
- Fine-grained file - 1 pc.
- Vacuum cleaner - 3 pcs. (joke).
- Machine/sunflower oil – 5 g.
- PVA glue - 20 g.
- Large sheet of paper (A1 format)
- Push pins - 5 pcs.
Finally, the long-awaited package with our product is at your home, and you are looking forward to testing your strength and our sports equipment. In order to do this, let's move on to the first stage.
Installation of the horizontal bar
Horizontal bar height
The height was selected according to street horizontal bars, which were not too high and not too low. It was important not to raise your horizontal bar too high, because if you suddenly want to pull yourself up (and not just hang), then it is advisable not to hit your head on the ceiling.
In practice, this resulted in something like the following. If you stand under the horizontal bar with full soles (in slippers) and raise your arms ( both!
) straight up without effort, then about 5 cm remains from the fingertips of open palms to the horizontal bar. If, while continuing to stand on the full sole, you begin to reach with your fingers towards the horizontal bar, then almost at the maximum of stretching your arms upward, you just touch the middle of the crossbar with your fingertips.
At the same time, if you rest your head against the ceiling opposite the horizontal bar, then the axis of the crossbar appears opposite the dimple under the Adam's apple at the bottom of the neck (at the top of the chest).
If pulling up is important to someone first of all, then you can hang the horizontal bar a little lower (by 5 centimeters, for example) in order to rise higher in the upper position, but then in the lower position you will have to bend your knees a little so as not to touch the floor. It was important for me to hang well :), without touching the floor, so as to stretch the spine as much as possible, so I chose the option as high as possible without compromising the case if I suddenly wanted to do a pull-up.
In numbers, my version looks like this: from the top edge of the crossbar (not the axis, but the edge!) to the ceiling - exactly 30 cm.
Top holes
The top holes are the most important. The top mounts essentially bear the entire load. That's why I was looking for a stud with a high strength class
, and that is why I played it safe by installing through studs across the entire wall. However, if I had chosen the option with a chemical anchor, then this would also be quite reliable.
I had to remove two planks of the clapboard to expose the main wall on the balcony side at the fastening points. The wall was crooked, and later on we had to place washers here and there.
On the side of the apartment there is plaster and wallpaper. Initially, my plans were to install a metal strip between the upper holes on the side of the apartment, but then I decided to make do with the huge washers I had purchased earlier. This made it possible to make small cuts on the wallpaper, carefully remove a small area of plaster down to the brick, insert the aforementioned huge thick washers and, turning the cut wallpaper back, hide the attachment point as much as possible, leaving only the protruding ends of the pins.
It is very important to set the inlet holes (on the side where the horizontal bar itself is) exactly level. I used a long level (1 m long). First, I marked one upper hole (drilling to a depth of about 10 cm), attached a horizontal bar, put a level on it, and with a felt-tip pen placed a dot opposite the second upper hole. Due to the fact that it is not easy to maintain accuracy with a hammer drill in crushing bricks, some tilt did occur - one hole turned out to be 2 mm lower. But hanging on the horizontal bar, fortunately, this was not felt.
Small FAQ
1. What to do if the ceiling height is less than what is obtained from the above formula?
In any case, the minimum acceptable distance from the crossbar to the ceiling is 32 cm (regardless of the athlete’s height, age and body proportions, except for the exception described in paragraph 3).
If this distance is made smaller, then during particularly vigorous lifts, the force of inertia can lead to contact of the head with the ceiling, which demoralizes the athlete and is unpleasant in itself.
Therefore, if the ceilings in the room are too low, then the crossbar is simply fixed at a distance of 32 centimeters from the ceiling, and the height from the floor is whatever it turns out to be. The hanging position will only be possible with the legs tucked at the knees. Of course, this option is not very convenient, so it is advisable to avoid it.
2. What if I want to pull myself higher and higher?
Sometimes, in preparation for the “pull-up” exercise, athletes perform a non-standard pull-up, when the chin rises SIGNIFICANTLY above the bar.
In this case, the distance between the ceiling and the crossbar must be increased accordingly so that at the highest point of lifting the distance between the top of the head and the ceiling is at least 2 cm.
3. What should I do if I have a hydrocephalic head (hello Medvedev)?
No problem! It is only necessary to proportionally increase the distance from the crossbar to the ceiling in order to eliminate the possibility of damage to the ceiling covering and avoid subsequent expensive repairs.
Winter is the time to set up a gym where you can swing right in front of the TV
Pull-ups on the horizontal bar are not such a difficult thing. To do this, you need to know how to do it correctly and constantly train. Well, if you’re too lazy to go to the gym and don’t want to freeze on outdoor equipment, we’ll tell you where you can hang it right in your apartment.
Horizontal bar in the doorway
The horizontal bar in the doorway is a classic of the home gym genre. If you haven't had one, you've obviously seen it on one of your friends. But often such exercises at home end in bumps on the forehead, since sometimes overzealous guys hit their foreheads on the top of the door frame. In such cases, hang the projectile in the corridor - not only the muscles, but also the head will be more intact. The maximum load weight on the crossbar fastenings is up to 150 kilograms.
Wall horizontal bar
A horizontal bar on the wall is another practical solution for those who decide to swing at home. This is a special apparatus that allows you to pull yourself up with a wide grip and is often equipped with eyes on which you can even hang a punching bag. The maximum load weight on the projectile is 200 kilograms.
Horizontal bar with parallel bars
Tired of exercises on the horizontal bar? Alternate them with pull-ups on the uneven bars. To do this, you will need a special structure that can be nailed to any of the free walls of your apartment. This way you will pump up not only your back, but also your shoulders, triceps, and even your chest. Important detail: the walls must be concrete or brick. If these are foam blocks or drywall, one day your training will end sadly.
Horizontal bar-ceiling
Are all the walls lined with cabinets? Then your horizontal bar for your home will have to be fixed directly to the ceiling. Important: hang the projectile so that there is at least 30 centimeters left from the highest point of the head to the ceiling. This will make it more comfortable to practice. Don't hang the bar too high. Jumping from a height onto a hard floor is not good for your joints. This is especially true for those who exercise with additional weight.
Another tip from the editors of MPORT: make sure that the horizontal bar for your home has a special anti-slip coating. And practice with special gloves so that your colleagues don’t think too much later when looking at the calluses on your palms.
And if you have already hung a horizontal bar in your apartment, try to repeat the following miracles on it:
Small FAQ
1. What to do if the ceiling height is less than what is obtained from the above formula?
In any case, the minimum acceptable distance from the crossbar to the ceiling is 32 cm (regardless of the athlete’s height, age and body proportions, except for the exception described in paragraph 3).
If this distance is made smaller, then during particularly vigorous lifts, the force of inertia can lead to contact of the head with the ceiling, which demoralizes the athlete and is unpleasant in itself.
Therefore, if the ceilings in the room are too low, then the crossbar is simply fixed at a distance of 32 centimeters from the ceiling, and the height from the floor is whatever it turns out to be. The hanging position will only be possible with the legs tucked at the knees. Of course, this option is not very convenient, so it is advisable to avoid it.
2. What if I want to pull myself higher and higher?
Sometimes, in preparation for the “pull-up” exercise, athletes perform a non-standard pull-up, when the chin rises SIGNIFICANTLY above the bar.
In this case, the distance between the ceiling and the crossbar must be increased accordingly so that at the highest point of lifting the distance between the top of the head and the ceiling is at least 2 cm.
3. What should I do if I have a hydrocephalic head (hello Medvedev)?
No problem! It is only necessary to proportionally increase the distance from the crossbar to the ceiling in order to eliminate the possibility of damage to the ceiling covering and avoid subsequent expensive repairs.
Characteristics
Characteristics of the horizontal bar in the opening
| Crossbar length | 100-120 cm |
| Crossbar diameter | 32 mm |
| Structure weight | 2 kg |
| Permissible load | 120 kg |
The crossbar is made of durable steel pipe, with a steel thickness of 3 mm. At the extreme points of the crossbar, wide nuts for spacer bolts are welded.
The diameter (thickness) of the crossbar at the grip points is 32 mm. The surface of the horizontal bar is covered with a special impact-resistant powder paint, which will retain its original appearance under any impact: impacts, chips, high abrasion from the metal fastening of hanging equipment - boxing bags, TRX loops, children's hanging accessories (swings, rings and bungees).
The horizontal bar is securely fixed in the opening due to the spacer mechanism and additional fixing plates, which are attached to the wall using dowels and self-tapping screws.
It is the spacer with the help of a threaded connection that provides reliable fixation of the horizontal bar in the opening and allows it to withstand loads of up to 120 kg. This horizontal bar is one of the most reliable and safe among the sports equipment we produce.
Interesting story
I want to share with you an unusual story that happened to me when I was just starting to play sports. Like all young people, I also walked with friends, drank beer and smoked. Just one day I decided to meet a beautiful girl. It was like a dream, although it sounds corny, but the truth is always like this.
God did not offend me with my height, and also with my intelligence, at least it seemed so to me. Oh, how wrong I was. So, I saw a girl at the stadium, she was running there. Ask what such an avid party-goer forgot at the stadium, it’s just that one of my friends played football, so we came to watch his training.
Seeing this beautiful creature lightly running along the path, I couldn’t help but get acquainted... I waited until she finished her run and followed her. As it turned out, the girl was going to the horizontal bars to practice. Well, I, emboldened after a couple of bottles of beer, decided to speak up. As I approached, she was just doing a stretch. And I casually say to her: does this angel have a name? Two blue eyes look up at me and look at me appraisingly. Although I am an order of magnitude taller, it feels like I was much shorter than her.
After looking, she replied that she did not meet dead people. This hurt me so much, and I asked her what criteria she used to evaluate my physical condition. She stood up and said that it is easy to check which of us is stronger. If I pull myself up more times than she does, she will not only say her name, but also agree to go on a date.
Guys, I’ll tell you right away, I lost, I didn’t think that a girl could be so resilient. Not every guy can boast of doing 20 pull-ups in three sets. I only lasted two approaches, beer was clearly too much, and I, of course, could not avoid shame. After all, all my friends came to watch us compete...
It was this incident that prompted me to quit drinking beer and take myself seriously. And by the way, I later met the girl again and even defeated her. Although it was not easy to admit, it was worth it.
Epilogue
If you carefully read everything 5 times, became imbued with this technology and did it one by one according to these instructions, then everything will be like in Vasnetsov’s fairy tale:
“The horizontal bar has been hanging for centuries - it doesn’t wobble! And it will stand for centuries without moving!”
Yes, we almost forgot. If you worked with a partner, do not forget to thank him - allow him to perform several simple exercises, and only after that test the strength of the product yourself.
: We will be sincerely and very grateful to you if you send us a short photo report to accompany this instruction when installing your products! Well, for a good, high-quality video with comments, we will definitely give you a GIFT!
Equipment
The horizontal bar kit includes a stop bar, crossbar and anchors for standard fastening using drilling. For comfortable training, it is also recommended to purchase neoprene handles that stretch over the horizontal bar and prevent the formation of calluses on the palms. If you plan to change your grips when practicing on a horizontal bar such as a home horizontal bar without drilling, then you can buy several pairs of neoprene handles, or rather 3, to install them in three grips: regular, wide and narrow. Combining grips during exercise will allow you to evenly swing various muscles of the back, shoulders and arms without the use of additional equipment.
Types of fasteners
Good fasteners are important for a horizontal bar. The durability of the unit depends on the strength of installation. Let's look at different types of fasteners and choose the appropriate design.
Interesting! Fastening elements can, even need to be combined. Naturally, without fanaticism. An excessive amount of bolts will damage the wall, will look unsightly, and may result in injury when performing exercises.
Universal mounts
Universal fastenings include metal hooks. They are used to install sports equipment.
The thickness of the hooks is 2 millimeters, made of metal. They are attached to the wall with anchor or dowel bolts; these will be discussed later. The product is “hung” on hooks.
This mount can withstand a load of 250 kilograms on a wall made of any material (concrete, brick).
Dowels
Dowels or dowel bolts are a favorite fastener for beginners. This is due to ease of use.
A dowel is a bolt with a diameter of 8-10 millimeters with a nylon plug. A hole a centimeter deep is drilled in the wall.
Dowel bolts allow installation on a surface of any material. Brick can withstand 200 kilograms of load, concrete - 300.
Anchors
The anchor is considered the most reliable fastening. A beginner cannot cope with it. To fasten a horizontal bar structure with anchor bolts, experience in construction is required.
Important! An error when fastening with anchors leads to instability of the structure. Operation as intended will be impossible - performing physical exercises on a fragile structure is life-threatening. Therefore, without the ability to handle anchors, it is better to use dowels.
Installation using anchors is “hardy” - it can withstand a weight load of 300-500 kilograms on a wall made of any material.
Homemade mounts
A homemade mount is any improvised installation option. This is an "alternative". You can use self-tapping bolts, glue, and other devices. For each solution, there are instructions and recommendations that are best followed. The glue must be allowed to dry completely.
Attention! When using any fastener, you must follow the instructions.
A few words about the assembly of products...
Before moving directly to the topic of fastening, let me say a few words about assembling structures. The fact is that many products are sent partially disassembled in order to reduce the cost of delivery.
As a rule, assembling the product is not difficult, however, many people have DIFFICULTIES IN PULLING the neoprene HANDLES onto the horizontal bar.
This problem can be solved very simply: take the most ordinary SOAP, wash one hand thoroughly, then with this soapy hand thoroughly wash the area where the handles shrink. Now everything “sits” into place without serious effort. As they say - “If you don’t apply it, you won’t go”!
DO NOT USE OIL for these purposes, especially machine oil, since the handles will then “fidget” for some time, in addition, some types of oils can have a destructive effect on neoprene.
PUT HANDLES ON THE ASSEMBLED PRODUCT.
Drill the holes very carefully!
Step 5: Now it's time to drill the "DRAFT HOLES"
. They are drilled with a drill diameter that is an order of magnitude smaller than the diameter of the dowel/anchor (for example, for a dowel with a diameter of 12 mm, the rough hole can be drilled with a drill with a diameter of 6-8 mm).
Tip: To drill walls made of concrete, cement, brick, it is advisable to have a hammer drill or a drill with an impact function. Drills for such purposes must be taken with Victory tip.
Try to keep the hammer drill as perpendicular to the wall as possible, and also be careful not to make the holes too deep. If everything went well, proceed to the stage of drilling FINAL HOLES
If during the drilling process the drill went far to the side, “fell” into the wall, or rested against something that cannot be drilled (like reinforcement), in this case, look at the circumstances and the number of holes already drilled - you may have to “move” a little to the side.
Drilling finishing holes must be approached very responsibly. Remember that dowels, like anchors, must fit into the finished hole very tightly - ideally, they are driven in there with light blows of a hammer. Therefore, try not to gouge a hole with a larger diameter than the diameter of the dowel/anchor
Be sure to pay attention to the depth of the holes - they should be deep enough, and at the same time, the fasteners should not “fall through”.
Hint: To make it easier to control the depth of the hole, measure the required distance from the end of the drill and make a mark with a marker.
Step 6: After the finishing holes are ready, turn on the vacuum cleaner and carefully pull out the remaining dust from them.