Those who are new to tiling work, especially when it comes to ceramic materials, often have questions about which trowel to use for laying tiles. After all, in reality there are quite a lot of them. And let some people think that laying tiles on a continuous layer of adhesive is of better quality, but in the meantime we will consider the choice of tool, and we will do everything correctly, observing reasonable savings on tile adhesive.
Reasons for use
First, the glue is applied to the tile or wall with a regular spatula, and then the excess is removed with a comb. This allows you to leave a certain amount of glue on the surface, which will be evenly distributed. After pressing the tile, the glue will be evenly distributed and fill the entire space. It is quite reliable enough to avoid getting holes when the pan falls, but the enamel will most likely get chipped.
This achieves:
- Quality of installation. Since the layer of glue will be the same, the tile will automatically lie flat (if you have a flat base).
- Speed of work. There will be no need to squeeze out or remove excess glue.
- Connection strength. If there is an excess, it gets worse.
- Economical. The amount of glue recommended by the manufacturer will be applied, and there will be no need to overpay for overuse.
It is more convenient to work with a toothed comb with a handle in which two sides are serrated and the other two are smooth. You don't have to constantly change between a regular spatula and a serrated one.
How to use it correctly?
If you have already chosen the tiles, adhesive and even the necessary tools, then it’s time to learn about the intricacies of applying the mixture.
Before you begin the installation itself, you need to prepare everything. The surface must be ready for use. The covering of a wall or floor must be completely cleaned of small and large debris, dust particles and other defects, otherwise it will prevent ideal installation.
In addition, if the base needs leveling, then this must be taken care of in advance, since the tiles must be laid exclusively on a flat surface.
Next you need to prepare the glue itself. If this is a dry mixture, then dilute it, taking into account all the recommendations indicated by the manufacturers on the packaging. Be sure to make sure that there are no lumps, otherwise such a composition will ruin the quality of the installation, and the tiles will not last as long as you would like.
Tooth shape
- To apply ridges from 6 to 10-12 mm, standard square teeth are used.
- For ridges over 12 mm when working with cement mounting mixtures, semicircular teeth are used. At this thickness, the track combs more evenly and does not fall off if it has a semicircle in cross-section rather than a square. They are also used for applying synthetic adhesives with strong spreadability, regardless of the layer thickness.
- There are also sometimes combs with triangular teeth. They are not suitable for laying tiles; they are used for applying elastic adhesive in a thin layer (up to 4 mm) for PVC tiles.
Depending on the shape of the teeth, the spatula may be marked with letters and numbers. The number indicates a group of size parameters, and the letter indicates the shape:
- A – triangular teeth, without large spaces between them;
- B – triangular with large intervals;
- S – triangular without gaps;
- C – square;
- R – rectangular (including irregular shape);
- M – semicircular.
Tooth sizes
The thickness of the applied glue can be adjusted by changing the angle of inclination. Also keep in mind that after pressing the tiles, the glue will distribute into the voids and settle.
The adhesive layer flattens out after pressing.
Approximate sizes of teeth depending on the area of the tile:
Tile area, cm2 Teeth size, mm Adhesive layer after pressing when applied at an angle of 45°, mm Adhesive layer after pressing when applied at an angle of 60°, mm
| 2500 | 12 | 4,2 | 5,2 |
For a floor or uneven base, the size of the teeth is selected larger.
Comb for tile adhesive
Recommendations for using a comb from the most popular manufacturers of adhesive mixtures. Recommendations may differ from generally accepted ones due to the different composition of the adhesive mixture, which affects shrinkage, setting time, mixture density, and viscosity. Carefully study the manufacturers' recommendations, which are indicated on the packaging of the mixture.
Ceresit CM11 Plus
| Tile size, cm. | 5 | 10 | 15 | 25 | 30 |
| Tooth size, mm. | 3 | 4 | 6 | 8 | 10 |
Ceresit CM12
| Tile size, cm. | up to 30 | 60 |
| Tooth size, mm. | 10 | 12 |
Ceresit CM 14 Extra
| Tile size, cm. | 15 | 25 | 30 | 45 |
| Tooth size, mm. | 6 | 8 | 10 | 12 |
VOLMA-Keramik+
| Tile size, cm. | up to 60×60 |
| Tooth size, mm. | 12 |
MOMENT
| Tile size, cm. | 5 | 10 | 20 | 30 |
| Tooth size, mm. | 3 | 4 | 6 | 8 |
KREPS reinforced
| Tile size, cm. | 5 | 10 | 20 | 30 | 40 | 60 |
| Tooth size, mm. | 3 | 4 | 6 | 8 | 10 | 12 |
BEERSMIX ceramics
| Tile size, cm. | 10 | 30 |
| Tooth size, mm. | 3 | 6 |
Rules for applying glue
When working with a notched trowel, it is important to understand how the adhesive will behave so that there are no voids left under the tiles.
An important rule: you need to apply straight parallel grooves with a spatula; you cannot make turns with it, as they will create voids.
The glue should be applied with a spatula at an angle of approximately 60 degrees to the base. Most often it is applied specifically to the base, but some do it separately for each tile, which reduces the speed of work.
Apply the glue with a smooth spatula at an angle of 30 degrees, and then go over it with a comb at an angle of 45-75 degrees.
Another method that some craftsmen use to increase adhesion is to lay the tiles “scrape”. This means that first, glue is applied to the base under the comb. Then glue is applied to the tile itself with an ordinary spatula, and then it is torn off. The remaining 1-2 mm of glue acts as a primer.
To ensure that the glue comes out from under the tiles less and the seams remain clean, some craftsmen file off the outermost tooth at the comb.
What does one cut tooth give?
Observations from practice and our experience
We admit that the technology for laying tiles given below will raise doubts among some readers, but nevertheless, the trial, rather risky experience withstood all sorts of tests, including a 4-year period after the completion of the renovation and finishing of the bathroom. We will talk about laying tiles made of natural marble, dimensions 305x305x10 mm, laid using the “comb” method on pre-plastered walls with Teplon gypsum plaster.
Once, during the work, we encountered the peculiarities of marble tiles, which were difficult to install even with special Knauf-MARBLE adhesive, since the back side of the marble was not treated with special water-repellent chemicals. During the drying period, the subsequent, almost perfectly leveled tiles “sank” in the plane in relation to the previously laid and dried row.
As it later became clear, the reverse side of the marble tile, like a sponge, actively absorbed moisture from the slowly setting solution, due to which unplanned “shrinkage” occurred.
There have been attempts to treat the working side of marble tiles with primers in order to prevent increased moisture consumption. However, the result was still unsatisfactory, and chemical spraying in that case was not possible.
Unusual experience of laying marble tiles
Everything worked out using Flizekleber
solution from gypsum putty
“Pufas”
, used exclusively for preparing plastered walls for wallpaper, leveling plasterboard surfaces, sealing joints, etc., that is, for painting work. But it was the putty’s ability to quickly harden that helped solve the problem with laying marble tiles - moisture was also absorbed, but the putty set faster, preventing the marble tiles from “sagging.”
Purpose of a notched trowel when laying tiles
A notched trowel evenly distributes the elastic adhesive over the surface and ensures economical consumption of the applied adhesive material. Hand tools are required to adjust the thickness of the tiles. Thanks to it, the speed of the master’s work increases several times. This effect cannot be achieved if the work is carried out with an ordinary scraper with a flat metal plate.
A selection of tile comb manufacturers
Below are the most popular manufacturers of notched spatulas.
Russia
- Polytech. Russian company - manufacturer. Among other things, also hand tools.
- Sibrtech . Siberian Technologies presents more than 5,000 types of hand-finishing tools.
- Bison Probably one of the most popular manufacturers on the Russian market.
Europe
- Forbo. Association of companies from Germany, Sweden and Switzerland. They work on flooring, as well as hand tools.
- COLOR EXPERT. The homeland of the brand is Germany. They produce professional hand tools. The company is confident that there is a professional in everyone, the main thing is to work with a quality tool!
- Hardy. The country of origin is Poland. They produce professional hand and painting tools at affordable prices.
- STANLEY. Not exactly a European manufacturer, but it was impossible not to mention! American company producing professional hand tools.
Type of combs
There is no universal tool for facing work. The notched trowel has triangular, square, rectangular and semicircular edges. Its width should match the tile or be larger than its size. This will provide the tiler with comfortable working conditions. The scraper is selected according to the thickness and area of the finishing material.
To cover the surface with a thin layer of adhesive, a comb with small triangular teeth 0.6 or 1.2 mm wide, with a small distance between them, is suitable.
A triangular scraper with large tooth spacing of 4 mm is convenient for laying mosaics and even tiles with an area of up to 100*100 mm, with an adhesive consumption of more than a kilogram per square meter. A smooth surface allows you to use less adhesive mass than a porous structure.
To lay tiles measuring 100*100, 150*200, 200*200 mm with an uneven surface, it is practical to choose a notched trowel with edges 6 mm thick. The volume of glue varies from one and a half to three kilograms per square meter.
Finishing work with 300*300 mm tiles requires a hand-held square tool with 8 mm teeth. The volume of glue applied reaches four and a half kilograms per square meter.
To lay large format tiles or 10 mm thick, it is advisable to use a large scraper with 10 mm square teeth or a 12.5 * 20 mm tool. The amount of material consumed will reach six kilograms per square meter.
For hollow-free installation of horizontal slabs, a semi-liquid adhesive solution and a 15*20 mm toothed comb are used.
Teeth shape
There are products with teeth of square, semicircular and triangular shape. Accordingly, depending on this aspect, each comb should be marked with a number:
- For example, the designation A1 indicates the triangular shape of the teeth and the small length of the spaces between them. You should choose such a tool if you have to work with moving mixtures or you need to apply a narrow layer of glue (less than 5 mm).
- comb is suitable for applying mortar up to 12mm high. This option is ideal for installing wall tiles.
- A tool with semicircular teeth is needed for working with synthetic substances or for applying an adhesive mass with a layer height of more than 12 mm.
It is better to lay PVC floor tiles using an A2 or B1 comb.
Also for facing work, the size of the teeth of the device used is also important. There are a number of standard options on sale:
- 4x4 mm. Such tools are only used for installing mosaic tiles or tiles with sides measuring less than 10 cm (and only with a smooth back side). This comb ensures low consumption of adhesive.
- 6x6 mm. This option is an ideal choice for covering surfaces with 20x20 cm tiles. A tool with this size of teeth is also suitable for lining work on floors and walls. It can also be used to lay 10x10 cm tiles if there are grooves on the back of the decorative material. When applying glue with such a spatula, 3 kg of connecting consistency is consumed per 1 m2.
- 10x10 mm and 12x12 mm. Such combs are purchased for laying facing slabs measuring 30x30 cm and less than 1 cm wide. Glue consumption in this case can be up to 4.5 kg per 1 m2.
- Combs with rounded recesses up to 20 mm in height are used when installing heavy, large-sized tiles or marble slabs. The glue consumption here reaches 9 kg per 1 m2.
Basic rules for choosing a notched trowel
When buying a hand tool, you need to pay attention not only to the shape, but also to the size of the teeth. Experts in facing work give some practical tips that may be useful to a novice master.
Determine whether it is convenient to work with such a tool. To do this, you need to pick up the device and imitate several professional movements typical for laying tiles. It is important to make sure that the handle is comfortable, strong, non-slip and securely fixed. It would be good if it was varnished. A special coating will eliminate possible scratches or splinters.
Large products are chosen with a light plastic handle, which will protect your hands from excessive fatigue.
Sometimes it is difficult to choose between flexible and rigid products. You need to choose the best option, since some models can quickly break down, while others will not give the expected result.
When choosing a tool, the volume of installation operations is taken into account. For small areas, a spatula of the same size is needed; for large products, a wide comb is selected; for laying small mosaic tiles, a medium option is suitable.
A high-quality styling comb is made of stainless steel. It has good performance characteristics. Modern models are made with a special coating, so it is practical to purchase several spatulas for work.
Varieties
Renovations in rooms such as a bathroom, kitchen or balcony are rarely done, so it is important to approach the choice of finishing material with special care. Changing tiles every year (like we change wallpaper) will not work, so everything needs to be done efficiently and reliably.
Many people believe that a notched trowel or comb are not the most important elements in facing work, that glue can be applied with a regular tool, because there is no fundamental difference in this. But here you can argue, since the quality of the work performed will vary greatly. Experts recommend not skimping and choosing the right tool.
Combs differ in shape and materials from which they are made.
- As a rule, a high-quality tool is made of stainless steel, due to which it does not deform during work, does not deteriorate over time, and also allows for high-quality application of the composition on the tile itself.
- Very often you can find tools made of plastic. Of course, it costs several times less, but it also breaks down very quickly. After a small amount of work, you will notice that there are simply not enough teeth on it, as they wear out very quickly. In addition, such a tool can easily break down in the middle of the work process.
In addition, such devices differ not only in material, but also in the shape and presence of a handle. There are specimens whose handle is fixed directly to the working surface, which is very convenient. Professionals note that it is easier and better to work with such a tool.
Additional recommendations
Price is not always an indicator of the quality of a product. Two identical-looking combs may differ in cost and have different technical data. It is important to consider that as a result of intensive work, the teeth first fail, as they wear out and lose height. It happens that the cheap option is more profitable in practice.
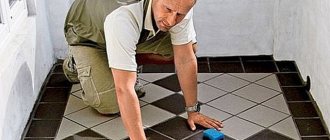
You can choose the right tool using a simple experiment. To do this, apply an adhesive solution to the back of the tile with a spatula. The facing material is laid on the surface using a rubber mallet. If the adhesive does not reach or leave the edge of the seam, the spatula size is correct. The glue should evenly cover the installed cladding base. Modern packaging of adhesive compositions contain recommendations to consumers on how to use this or that device.
Fibonacci numbers
Professional tilers use the numerical principle of the medieval Italian mathematician Leonardo Fibonacci to harmoniously assemble tiles of different sizes. Without going into mathematical subtleties, we note that its numerical sequences form the basis of many modern design and technological solutions.
Tool preparation
To lay tiles you will need not only a toothed comb, but also several available tools:
- at the preparatory stage - hammer, chisel, wire brush, terry brush;
- when priming - a roller or paint brush, a square, a building level, markings;
- for applying glue - a trowel, a rubber mallet, a ruler, a glass marker, a tape measure, a tile cutter or a special cutting machine;
- when finishing and cleaning seams - a grater, a foam sponge, a rubber spatula.
Before using glue, it must be diluted in a plastic container. The basic rule when working with a toothed scraper is that the glue is applied in straight lines, without curls. This will avoid the formation of voids. The choice of adhesive base depends on the operating conditions of the tile. The adhesive mass is intended:
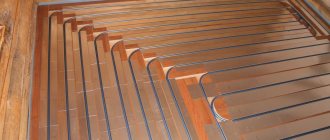
- for heated floors;
- for deformable surfaces and gypsum fiber sheets;
- The basic design is a conventional DSP screed.
Laying stages
Installation work involves the following procedure:
- The tool must be held at an angle of 45–70 0. For even installation, it is important to maintain the same angle.
- The solution is distributed on the wall surface to be treated or on each tile separately. It is advisable to use one method, not alternate.
- The facing material is pressed to the base.
- To ensure that the glue is evenly distributed over the surface, lightly hit the tiles with a mallet.
- To save glue and create clean seams, some specialists remove the outer teeth from the tool.
- Many craftsmen lay tiles using the “scraping” method. It is applicable in particularly important areas. To do this, apply a little glue to the tile with a tool and distribute it over the entire area. Excess is removed with a spatula perpendicular to the surface.
- The adhesive mass is removed from the front surface immediately. The seams are being cleaned.
- It is advisable to do grouting no earlier than after 5–7 days.
- After installation, the comb for laying the facing material must be immediately cleaned of glue for further use. To make it easier to clean the tool, place it in a container of water while working.
- Walking on floor tiles is allowed only after 24 hours.
Related video: Comb for laying tiles on the floor
Which comb to lay tiles: types and differences
Those who are new to tiling work, especially when it comes to ceramic materials, often have questions about which trowel to use for laying tiles. After all, in reality there are quite a lot of them. And let some people think that laying tiles on a continuous layer of adhesive is of better quality, but in the meantime we will consider the choice of tool, and we will do everything correctly, observing reasonable savings on tile adhesive.
Comb laying technology
This is the most effective method of laying tiles, used for leveled floors using a concrete screed (for floor tiles) and plastered walls under the “lighthouse” (for wall tiles). In this case, notched spatulas with a tooth depth of 6 to 8 mm are used, with the help of which the applied adhesive is “stretched” along the laying plane. The resulting uniform grooves allow you to quickly and accurately lay tiles without so-called “voids” in the adhesive mass, which is very important for flooring - tiles with mortar voids are most susceptible to damage, especially corners, in cases of accidental impacts and falls of even small objects.
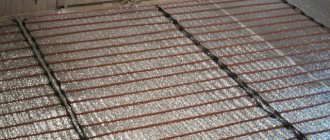
This is also justified on heated floors, where elevated temperatures cause natural evaporation of moisture, and, accordingly, expansion of air in the sinuses of the solution voids, which can also, for obvious reasons, play a cruel joke.
Laying method "slap"
Among serious tilers, the technology in question is considered unacceptable, as stated above, due to the possibility of voids appearing in the adhesive composition and low efficiency during leveling.
The adhesive is distributed before laying in even piles according to the size of the tiles, which are placed on top of the mortar, pressed down, tapping with a rubber hammer until the required vertical or horizontal levels are achieved. The adhesive under the tiles, in theory, should be distributed evenly, but in practice this result is rarely achieved, since the mortar is applied “by eye.”
However, the practice of "slaps"
has the right to exist in the conditions of laying wall and floor tiles on vertically “littered” walls or uneven concrete foundations, which occur when bypassing a number of rough stages of major repairs: in the absence of cement-sand screed and plastering work. This is often found in practice due to cost savings on building materials and work.
But it must be remembered that the glue under the tiles in such cases can reach over 2 cm, which in itself does not contribute to high-quality installation due to the ability of the mortar mass to “spread” with a large layer. Therefore, before saving on the work of pouring concrete screed or plastering, it is better to think about the possible consequences.
Glue solution
As for tile adhesive for tiles, porcelain tiles, marble, granite, and other artificial and natural materials, today the choice of products is very extensive. We can only highlight a series of adhesive mixtures that have been proven in many years of practice by most tilers:
The latter is especially recommended when laying tiles on heated floors.
Why do you need a special spatula?
First, let's figure out why you need a comb for laying tiles. Everything is quite simple here. When applying the adhesive mixture, it is leveled with a notched trowel, resulting in grooves being formed. They also determine the uniform distribution of the adhesive mixture over the surface of the tile.
Due to this we get the following advantages:
- High quality styling. This is due to the distribution of the adhesive mixture in an even layer over the entire area of the tile. Accordingly, the material itself will lie as smoothly as possible, of course, if the base is previously prepared and leveled.
- This approach also increases the speed of work, since in this case you do not have to press the tiles in and remove excess glue every time.
- The strength of the connection is ensured. In the case of a lack or excess of glue, on the contrary, it decreases, and using a tile spatula helps to apply exactly the required amount of the mixture.
- And the last thing is cost-effectiveness, since the spatula will help eliminate waste of material by applying exactly the required amount.
A little advice on which tile trowel to choose. It is most convenient to work with a tool that has two serrated sides, while the other two are smooth, which allows you to do all the work with one tool, without constantly changing one to the other.
Layout options
Wall layout for tiles is carried out according to a preliminary scheme, allowing to minimize the amount of non-business waste. Installation begins from the corner open for viewing and immediately from the second row, since the first is laid out from the trimmed material and glued last.
When completing a row, you have to fill non-standard gaps with fragments of cut tiles, which should be placed behind wall cabinets and other elements of hanging wall decor. The ventilation hatch located in the direct field of view creates more problems. It is necessary to use a scheme in which a solid tile will be located on the hatch cover.
Characteristics when choosing a comb
Different types of combs can be determined by the shape of the teeth, since it differs in different cases, and here it is important to know which trowel is needed for laying tiles.
Tooth shape
The difference in shape is due directly to the thickness of the layer, and differs as follows:
- When laying tiles on a layer of adhesive from 6 to 12 millimeters, square-tooth combs are used.
- For larger layers, over 12 millimeters, tools with semicircular teeth are used. Because when using square ones, the path is difficult to comb, and in addition, the furrows fall off. In the case of a round shape, this is not observed.
- Also, sometimes there are spatulas with triangular teeth; these are used when laying tiles on a layer of up to 5 mm, in particular for PVC tiles.
Like any other tool, spatulas also have their own markings, which indicate the size and shape of the teeth. It is written in a combination of letters and numbers. Examples of markings are shown in the table below:
And now a little about decoding:
- Small triangular teeth with small intervals are marked with the letter - A.
- Tool with large spaces between triangles - B.
- With no spaces - S.
- With square teeth – C.
- For rectangular ones, the designation becomes R.
- And lastly, semicircular - M.
We figured out what kind of comb for tiles is used, but that’s not all.
Teeth size
The size of the teeth is also an important factor, since this is what controls the layer of glue. Thus, which comb to choose for laying tiles will depend directly on the expected thickness of the tile adhesive layer.
Let's look at the approximate dimensions of the teeth, depending on the area of the tile, with the condition that the spatula itself will be slightly wider than the width of the tile.
In the case of laying tiles on the floor, the dimensions must be chosen slightly larger than those indicated. Now you can decide which spatula is needed for laying the tiles, depending on the size of the material itself and the thickness of the adhesive mixture layer. Tile adhesive consumption calculator.
What to look for when choosing?
There are different types of combs for laying tiles. So what should you pay attention to when purchasing so that the tool does not fail during operation?
In order to be able to lay tiles efficiently, you must take into account the size of the tool and the shape of its teeth:
- A product with square teeth is typically used to apply 5 to 10mm thick mixture.
- Semicircular teeth are perfect for working with mixtures that have a synthetic composition. In addition, they can be used for better glue distribution. It is best to apply a compound with a thickness of more than 12 mm using a tool with semicircular teeth.
- In stores there are also specimens with triangular teeth. This type of comb is perfect for working with very liquid mixtures. It can also be used if it is necessary to apply a layer of no more than 5 mm. Thanks to its triangular shape, this type of tool ideally distributes the liquid mixture over the surface.
- There are also universal spatulas on sale that are suitable for laying standard tiles and mosaics, so before you pay attention to the shape of the teeth and choose the right tool, you must know exactly the size and thickness of the tiles that you are going to use for finishing work.
- Consider another important fact: the width of the tool itself must correspond to the width of the tile or be slightly larger, otherwise installation difficulties will arise.
- It is important to pay attention to the size of the teeth. If this parameter is less than a millimeter (0.6-1.2 mm), then this option is perfect for applying a very thin layer of the mixture.
- The 0.3mm size is ideal for working with mosaics.
- For installation of various types of ceramics, a size of 0.4 mm is needed.
- Teeth measuring 6 mm are excellent for installing larger tiles and wall laying.
- To install large floor tiles (thickness more than 12 mm), you need a comb with teeth of at least 10 mm.
Often, several different tools are required for repairs, since the owners plan to install tiles on both the wall and the floor. Moreover, the material comes in different formats and thicknesses.
If you choose a tool solely for applying glue, be sure to read the instructions on the package. As a rule, manufacturers give clear recommendations on the selection of construction equipment. The size of the comb and its features will be indicated on the packaging, which will facilitate the selection process.
Before you decide on a particular tool, be sure to hold it in your hands to make sure that it is comfortable and that the handle is comfortable and holds securely. Professionals prefer varnished holders - they are practical, do not slip, and do not leave splinters.
Another important point to consider is the price. In fact, high cost is not a guarantee of high quality, so pay attention not to the cost, but to the quality of the product.
How to apply glue correctly
And the last question that requires consideration after choosing which comb to lay the tiles with is the distribution of the solution over the surface, or more precisely the technology of its application.
- First, you need to understand the behavior of the glue; depending on this, the level of its application will be selected to avoid voids.
- Direct application of the mixture becomes important; the result should be perfectly straight furrows, without any curls.
- The glue itself is applied to the base at an angle of 30-40 degrees.
- After this, the comb is created, which is performed at an angle of up to 75 degrees.
- The mixture must be applied directly to the base. Some, of course, apply it to the tiles, which significantly slows down the progress of work.
- After the mixture is applied, the tile is applied and pressed, and to distribute the adhesive more evenly, it is compacted using a rubber hammer. Find out in detail about the quick method of applying tile adhesive.
In some countries, this technique is used only for laying on semi-dry screed. In other cases, the tile is laid and then moved a tooth width apart, allowing voids to be completely eliminated.
Another option for increasing adhesion is stripping. This technology involves applying glue simultaneously to the base and to the tile itself, after which the mortar is peeled off the tile and applied.
To prevent mortar from protruding and to ensure clean joints, a trowel without the end tooth is used, which helps reduce the amount of adhesive that extends beyond the tile. By the way, this technique will help save tile adhesive.
Tile comb: subtleties of choice
High-quality tiles can delight owners with their beautiful appearance for many years to come. Therefore, it is important to lay the material according to all the rules so that the finishing does not become deformed in the future.
Finishing work usually does not take much time and physical effort, especially if done with the right tools. In addition to an ordinary spatula, you will need comb , the subtleties of choosing which you should know before purchasing it.
How to choose a tile?
When choosing tiles for walls, first of all pay attention to its decorative and aesthetic qualities. But for floor tiles, strength characteristics are very important:
In bathroom
the mechanical load on the floor is low. Therefore, here (as well as for wall decoration) you can take tiles with the lowest abrasion class. In addition, the technology for laying tiles in the bathroom involves choosing a material with a rough surface. This way you will provide yourself with additional safety by eliminating the risk of slipping on a glossy wet floor.
For kitchen
you need to choose tiles of the third class of abrasion, which well withstands impact loads, as well as chemically and thermally aggressive substances. Another plus is that such tiles are easy to clean. However, you should not place textured or porous tiles on the kitchen floor or walls.
In the hall
The strength of the floor covering is the most important parameter. Here, the optimal choice would be tiles with the fourth class of wear resistance.
To determine how many tiles you will need, measure the area you plan to decorate and divide that figure by the area of one tile. But there is one peculiarity - some tiles will have to be cut into pieces to cover corners and other “non-square” areas. Usually this takes another 10–15% of the total amount of material.
Tile comb: subtleties of choice
High-quality tiles can delight owners with their beautiful appearance for many years. Therefore, it is important to lay the material according to all the rules so that the finish does not become deformed in the future.
Finishing work, as a rule, does not take too much time and physical effort, especially if done with the right tools. In addition to a regular spatula, you will need comb , the subtleties of choosing which you need to know before purchasing it.
What work needs to be done before installation?
Preparing the base
Before gluing the tiles with glue, the floor should be thoroughly dried and cleaned with a broom and vacuum cleaner. It is necessary to get rid of any stains of paint and other contaminants, as they will interfere with the quality of adhesion of the glue to the surface. It is necessary to remove all uneven floors and eliminate differences in height by making a new screed.
The walls should also be cleaned of any old coatings, and then plastered under the beacons, reinforced with construction mesh. But you shouldn’t putty the walls and reduce their smoothness to “zero” - the rough surface of the plaster will ensure better adhesion of the adhesive.
Primer
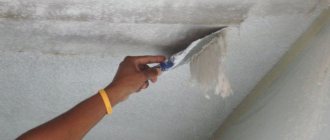
It is most convenient to use ready-made primers such as Sika ® Primer Pro. Before use, be sure to read the instructions on the package and follow them exactly. Apply the primer in an even, thin layer using a painting tool. If the base is highly absorbent, it may be necessary to re-apply the primer after the previous one has dried (approximately 3-6 hours). Gluing tiles to a primed surface can begin 3-6 hours after applying the last layer of primer.
Advice from professionals
During the process of laying tiles, the trowel handle does not take an active part, but the teeth may become deformed. During intensive work, the difference between the height of the outer and middle teeth can reach 3 mm or more.
Professionals prefer to work with varnished holders. According to master tilers, such handles are more practical. They do not slip and do not leave splinters in the skin, as can happen with wooden specimens.
Plastic holders can also be used, but if you work without gloves, such a handle can cause calluses.
To learn how to make a comb for quickly laying tiles with your own hands, see the following video.
Do-it-yourself technology for laying tiles on the floor and wall
First you need to make markings along which you will later install the tiles. In this case, plumb lines are used for the walls, and chalk cords for the floor. You should also install cross-shaped supports for the first row of tiles.
Apply tile adhesive using a notched trowel. The thickness of the layer should be approximately equal to the height of the teeth. Carefully place the tile on one side on the crosses, and then lay it on the floor or lean it against the wall, lightly pressing the mortar. Please note that removing a single tile after it has come into contact with the adhesive is quite difficult, so try to position it correctly immediately. You can rotate it slightly around its axis, adjusting the position and achieving maximum adhesion with the adhesive mixture.
Follow the correct order of laying tiles in the bathroom and other rooms: start filling corners and joints with cut fragments of ceramics only after all intact tiles are in place.
You need to work as quickly as possible until the glue begins to set. There is no point in laying tiles on dried mortar - the adhesion between the tile and the surface will be greatly weakened. The tiles that protrude upward must be leveled with a rubber mallet, and the recessed tiles must be removed and mixture added underneath.
Marking the tile laying pattern on the kitchen wall
- The laying diagram is drawn on the wall. The lower boundary of the installation is marked by level. It's better to use a laser level. If it is not available, use a long slat level of increased accuracy (with four marks in the bubble).
- Above the stove, under the hood, the tiles are laid higher than the rest of the apron. Draw the installation diagram directly on the wall.
We consider that the wall repair has been completed, the wall has been leveled and primed. You can start laying 10 by 10 tiles.
Related article: How to choose workwear for construction workers
Tile laying methods
A seam into a seam, or butt joint, is the most popular and simplest option, when the seams between all the tiles form straight lines.
Running
– when each next row of tiles is shifted relative to the previous one.
Diagonal masonry
– laying ceramic tiles on the floor diagonally means that they will be rotated 45˚ relative to the walls.
After 14-16 hours for walls and 18-24 hours for floors, the glue will gain sufficient strength so that the crosses can be removed and the seams can be rubbed.
With us you will get in one place all the necessary primers and adhesives for high-quality laying of tiles on the floor or wall. You can view this line of Sika products in the catalogue.
If you have any questions, we invite you to ask them in the cards for specific mixtures. There you will also find out from which dealers you can buy this or that product.
Tile comb dimensions
Comb sizes from 10 to 45 cm . When choosing a trowel, you need to take into account the size of the tile; the trowel should be the same size or slightly larger. Therefore, if you have tiles of different sizes in your project, you need to acquire spatulas of the appropriate sizes.
A notched trowel must be selected depending on the tile format and the composition of the adhesive mixture . The tool is selected according to a simple principle - the larger the tile, the larger the teeth . You can choose the right notched trowel by experiment.
Apply the adhesive mixture to the back side of the tile , remove excess glue with the comb of your choice, then lay it on the prepared base, tap lightly with a rubber mallet. With the correct selection of the comb, the glue should not go over the edges; it should evenly cover only the area of the tile .
- On the packaging with the adhesive mixture , the manufacturer usually indicates the composition of the adhesive and recommendations for a notched trowel .
- The notched trowel should not be too hard ; when pressed, the metal should bend slightly.
- that is too soft quickly fail , and a soft tool will not be able to remove the required amount of adhesive mixture at one time.