Before laying tiles in the bathroom, the wall surface must be carefully prepared. The strength and aesthetics of the coating will depend on proper preparation. But the preparatory stage is not exactly that easy; it is a whole job that requires a lot of effort and financial costs. To begin with, you need to calculate the area of future tile installation, what kind of tile it will be, what kind of tile will be used, and a huge number of other nuances. In order for everything to turn out beautifully and smoothly, you need to know certain rules on how to prepare the walls in the bathroom before laying tiles, which will be discussed below.
How to prepare a wall for tiles?
It is worth answering the question: why prepare the walls at all if they are covered with tiles? Wouldn't it be easier to just apply a large layer of adhesive cement? No, it's not easier. The fact is that the durability of the entire structure or surface depends on the quality of work at each stage.
Let's look more specifically:
- unevenness and pores. These empty volumes deteriorate the quality of adhesion and provoke detachment. Example: if there is a hole in the place where the tiles are installed, the adhesive-cement that will be in it will become a monolithic structure with the tiles and will tend to fall out under the influence of gravity;
- roll of the wall. Such a defect will not allow the installation of a flat surface and differences in levels will be visible;
- foreign objects. Wallpaper, sand, and other objects will come off along with the tiles, so they need to be removed.
All these little things will not ensure a professional surface quality. It will be noticeable that the tiles were installed by an amateur, but after a couple of months the tiles will have to be re-laid.
How long does it take to dry?
The drying speed depends on the composition of the primer, surface material, temperature and humidity in the room. The approximate drying speed is:
- Acrylic - 8-9 hours.
- Alkyd - at least 11 -13 hours.
- Concrete contact – over a day.
The drying speed of the primer mixture largely depends on the ability of the walls to absorb moisture. At the same time, it is impossible to determine externally whether the surface is ready for further work, so it is best to follow the instructions on the packaging.
Materials used
Let's consider the tools and consumables that will be useful when processing walls under tiles. In short, this is:
- wedge;
- rule;
- level;
- putty knife;
- mixer/perforator;
- Master OK;
- self-tapping screws;
- sandpaper (skin);
- construction thread;
- PPE (personal protective equipment).
Preparing the necessary tools
Before starting work you will need:
- Brush - for applying the primer mixture
- Level - for precise leveling
- Trowel - for applying glue to hard-to-reach areas
- Spatula - for plaster
- Rule - to level the surface
- Notched trowel - for glue
- Grater - for grouting applied plaster mortar
- Bucket - Safety Gloves
- Drill with attachment - for preparing the mixture
- Hydraulic level
- Roulette
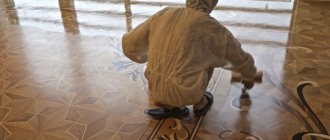
Wall cleaning
To obtain a smooth, even surface, the walls need to be sanded (popularly “sanded”). Before starting the process, you need to take a level or rule that is at least 150 cm in length, draw it along the wall and mark the places that sag or protrude excessively. You need to outline the areas with a pencil to refine them in more detail.
It is better to grind starting from 60 to 180. There is no need to process finer. After rough processing, you need to go through the rule again, checking problem areas.
This is how the walls are treated after moving into an apartment. Below we will look at how to treat walls in other conditions.
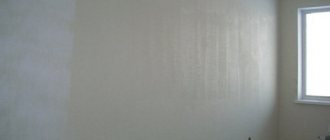
Plastered walls
If the wall contains a layer of starter plaster, you need to go through the rule, select sandpaper of the appropriate caliber and walk along the wall to find burrs and remove excess sand. After this, you need to apply a layer of primer on them.
The primer must dry completely. If you start laying tiles on wet ground, the cement will draw moisture out of it and it will not provide proper adhesion.
Walls with old wallpaper
You need to remove the wallpaper and sand the wall to get rid of paper and glue residue. First you need to go over it with a grinding wheel, then with sandpaper (it’s better to start with 60 grit and finish with 120 grit). Unlike ordinary walls, walls for wallpaper are already leveled and processed to some extent.
If the wallpaper looks normal and even, you don’t have to do much straightening, but if it’s crooked, you need to refer to the general instructions. If you do not remove the glue well, when it gets wet, it will become slippery and prevent the tile from attaching securely, and the entire structure will float.
Walls with old tiles
First of all, you need to remove the old tiles. You need to start from the bottom corner, carefully prying the tile with a pry bar or screwdriver. Ideally, the tiles should not crack. It should peel off freely so that no marks are left on the wall.
Breaking tiles with a hammer is a bad idea, although this is often done by beginners. This method has the disadvantage of a lot of holes and irregularities on the wall after removing the tiles.
Then you need to scrape off the old hardened glue-cement. This can be done with a grinding wheel or trowel. Check the surface with a wedge or rule and, if necessary, sand or apply a layer of gypsum. The final stage is applying a primer.
When the primer has dried, you can lay the tiles, but not the ones that were removed, but new ones.
ATTENTION! The old tiles are no longer suitable for use, since the particles of the old adhesive cement have already dried and will not react with the adhesive mixture.
In general, any foreign body on the surface of the tile or wall at the point of contact will worsen the quality of adhesion, because these places will not stick to each other.
Painted walls
Everything is simpler here. If the wall is painted with enamel, then you can lay the tiles directly on it. If it is ordinary water-based paint, it is better to remove it to improve adhesion. The walls for painting have been sufficiently treated, so that after removing the 180 and 220 paint, you can apply a layer of primer and lay the tiles.
The paint is a thin layer of powder that adheres to the wall, covering it tightly.
REFERENCE! If you glue the tiles to the paint, this thin layer will fall off under the influence of gravity.
This is a canonical situation, but a more realistic one is a local deterioration of adhesion in some places and moisture getting into these places. Any moisture leaves behind mold and dampness.
Wooden walls
As a rule, wood is not sanded. To improve the surface, you can apply a layer of wood plaster. A standard primer will do. If the tree is covered with paint and varnish, that’s good; if not, it needs to be coated so that the tree does not absorb moisture and become damp. The wood is strong and uniform enough to support a heavy layer of tile.
REFERENCE! The exception is wooden walls with decorative bark.
Such walls imply the presence of a thin layer of bark to give style and image to the room. If you do not remove the bark (which will still not be visible behind the tiles), it will serve as a weak link and make the adhesion very weak.
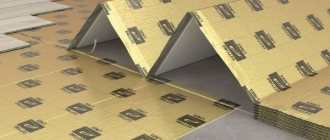
Plasterboard walls
There are two types of drywall - waterproof and ordinary. It is recommended to use a waterproof one, as it does not let moisture in and will not become damp. If there are foreign objects on the surface of the drywall, they must be carefully removed without tearing off the paper. Next you need to cover it with primer and let it dry. If the technician notices that the drywall is peeling, it needs to be replaced.
IMPORTANT! If the tile sticks to paper, it will come off faster than the adhesive-cement hardens.
It would be a good idea to glue the wall with reinforcing tape or perforated film, which will provide a smooth adhesive surface and hold the peeling elements together.
Types of primers with special performance properties
Not every material is suitable for bathroom renovations.
To choose a suitable soil mixture, you need to understand its properties.
Mixtures are divided into two types: strengthening and adhesion. When choosing them, it is better to contact a specialist. It will help you choose the right primer.
It is also worth paying attention to the finishing materials themselves.
primer for bathroom tiles is well suited to concrete walls Shellac and alkyd are used for wooden surfaces.
Alignment
If the walls are completely crooked, they need to be thoroughly leveled. For these purposes, a wedge (the longer the better), spatulas, plaster, and sandpaper will be useful. You need to apply a layer of drywall to the wall and tighten it with a wedge. It is better if the solution is a little liquid, it will be easier for them to work, but if it is too liquid, it will begin to flow down and it will not be possible to level the wall. The rough layer should harden.
IMPORTANT! The procedure must be repeated until the holes on the surface are filled. If, on the contrary, there are many protrusions on it, it is easier to grind them off. If the ledges are concrete, then it would be more rational to lay a layer on top of them rather than sand them off. You can get on the fittings, which are not so easy to remove. Moreover, working with a concrete wall is much more difficult.
Plaster
Plastered walls have a sufficient layer of gypsum, so you can work both “inside” and “outside”. In other words, you can level in both directions, finding that “golden mean”.
If the plaster crumbles or cracks, a new layer is unlikely to help. The fact is that the old layer will act as a binder, and everything that adheres to it will peel off along with it.
Drywall
If there is a dent or unevenness in the plaster, it is better to remove it and install a new sheet. It is unnecessary to sew several sheets on top, since a longer bolt will increase the thickness of the wall and, instead of one layer, hold back two. You'll be lucky if such a wall doesn't collapse in half a year.
Leveling walls with a high degree of deformation
There are very uneven walls that defy common sense and logic. It would be advisable to calculate the materials and roughly estimate what would be cheaper - to cover it with plasterboard or apply a layer of plaster.
Plaster
Before applying the plaster, it is necessary to treat the surface with a primer solution, which forms a protective film on the surface.
- The plaster mixture must be selected taking into account the high humidity in the room.
- If the difference in unevenness does not exceed one centimeter, the walls do not need to be leveled.
- Before laying tiles, the walls must be treated with an antiseptic solution.
- Beacons can be installed on special mounts, which are very convenient to use.
- When the wall is plastered, you need to clean it of dust to increase adhesion.
Waterproofing
Why is insulation needed at all?
- To prevent moisture from solutions and primers from getting inside.
- So that the wall does not become damp.
- To prevent the tiles from peeling off.
As a rule, many people omit this point, but in vain. According to statistics, 60% of all subsequent problems are due to moisture. This event is already inevitable, and if all the conditions are created, it will happen much faster. In addition, waterproofing will provide an additional protective protective layer.
Waterproofing solution can be purchased at any hardware store. Any brand will do, but experienced professionals recommend Ceresit. After it has been applied and hardened, you need to check the quality by pouring a little water on the wall. If water collects on it in the form of drops, everything is done correctly. If it is absorbed, the application technology is broken or the layer is not completely dry.
The rules for applying a specific brand should be clarified from the instructions for the product or from a consultant in the store.
Find out more - How is a bathroom waterproofed under tiles?
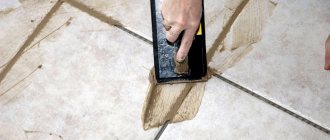
Getting rid of cracks and dents
After leveling the wall, you need to cover up small cracks and dents .
To do this, you can use ordinary concrete mortar and a “grater” - this is a special tool for a plasterer, which he uses to rub out cracks and depressions on the wall. This kind of work is done simply - use a “grater” or “poluter” (a shorter tool), apply plaster and rub the crack on the wall with smooth circular movements. Advice
Before grouting, deep cracks must be sealed with a masking net so that the crack does not later transfer to the tile. It’s better to embroider, that is, deepen and widen the crack to the brick and seal it properly with mortar.
Installation of beacons
Beacons are guides along which the wedge or rule will follow. How to do them?
- Screw self-tapping screws into the wall at several points.
- Install the wedge and check the level.
- Apply a small layer of plaster along the screed line.
- When it hardens, you will get two parallel slats that will serve as guides in your work.
- Upon completion of the work, you can unscrew them and plaster the holes (but this is not necessary).
Beacons will allow you to get a perfectly flat surface without drops.
An alternative way is to screw in the screws at the same level (measure the insertion depth with a ruler), and then stretch brightly colored threads between them. The threads should intersect exactly in the center. This way, all the differences and gaps in the wall will be visible.
In order to obtain such an intersection, you need to screw in screws in different corners of the wall and pull the thread crosswise (with an envelope), then adjust the height of the screws until the threads touch.
Advice from professionals
- Think about where the tiles will go end-to-end and where they will overlap (meaning corner joints).
- Use a level to check the surface quality of the corners. The more isometric the walls are, the longer the tiles will last. This is due to the rules of strength of strength, theoretical mechanics and string theory. All angles must be equal to 0, 90, 180. You need to round exactly to these values.
- Do not rush to lay the tiles; if the primer layer has not dried, it will not fulfill its functions, but will only prevent the adhesive-cement from setting.
- When mixing adhesive cement, you can add primer to it to make it more sticky and viscous. If you overdo it, it will take a long time to dry and the tiles may “float”.
The main advice that only a true professional will understand is to be able to improvise. If you think that this or that operation is inappropriate, cross it off the list; if you think that, on the contrary, you need to perform the same procedure twice, feel free to do it.
Moreover, the instructions suggest a wide choice. After each step, the master chooses an intermediate action (wait until the layer dries, apply another one, check) and only the correct combination of steps and choices determines whether the reconstruction of the surface will be successful or unsuccessful.
ATTENTION! This is what distinguishes a master from a beginner. A professional always knows how to approach the process creatively and apply all the knowledge in the process. Beginner – knows the instructions, but does not apply creativity or deviate from it.
The initial conditions are different everywhere - walls are made of different materials, different degrees of processing, different surface quality, tiles can also have different weights, structures, and relief patterns. However, everyone needs the same result - a smooth and structured surface that will last a long time and will be pleasing to the eye.
Surface options
Many people choose ceramic tiles. But it is worth considering other materials.
- Painting
The advantages of painting are low cost and ease of finishing.
It is worth considering that not every paint is suitable for the bathroom:
- Acrylic, water-based - suitable for rooms with high humidity, have a low price;
- Silicone paints - have a complete moisture-repellent effect, are often used for painting facades, but are not suitable for bathrooms;
- Latex, water-emulsion - form an additional protective layer when drying, which repels moisture;
- Chlorinated rubber - differs from others in its durability, is much more expensive, and can be used in swimming pools.
Among the disadvantages, one can highlight increased requirements for surface preparation: after coating with paint, even minor defects will stand out.
- Wallpaper
The positive aspects of wallpapering in the bathroom include:
- A wide range of wallpapers, a predominance of different colors;
- Possibility of saving time and money;
- The ability to easily change the interior.
Disadvantages: not being a durable material, wallpaper is susceptible to mechanical damage. Even waterproof wallpaper is not suitable for placement in a shower stall or above a bathtub. Here it is better to use a different material.
- Drywall
Today, few people use drywall to decorate bathroom walls. However , it is an excellent option if the walls in the room are uneven. This finish will reduce the time and cost of leveling.
The benefits include:
- Low price;
- Easy to install due to its low weight;
- Increased heat/sound insulation indoors.
Only moisture-proof plasterboard is used in the bathroom; it has a green tint.
The downside is the need for further decoration of the surface, which makes repairs more expensive.