The attractiveness of ceramic tiles as a modern wall finishing material is difficult to dispute. Among the countless options, you can choose the optimal one that fits perfectly into the design concept of your room (what can you use to decorate the walls in the bathroom except tiles). At the same time, the issue of wall decoration will be closed for many years to come, even decades - the service life of the tiles is one of the obvious advantages of its use. However, this is only true if the installation is done correctly. The question arises: should we start a tedious search for a master whose hands grow from the right place, or should we try to delve into the process ourselves and master these simple manipulations? The correct technology for laying tiles on a wall is not as scary and complicated as it seems at first. Yes, it's quite tedious. And yes, when laying it you will have to be extremely careful and attentive to any little details. But the reward for your efforts will be beautifully laid tiles, a harmonious interior and a feeling of deep satisfaction from the final result.
- What you will need. List of required materials and tools;
- Surface preparation;
- Inspection of tiles;
- How and with what to cut tiles;
- Laying process;
- Rubbing seams;
- What you should get;
- Conclusion.
What you will need. List of required materials and tools
The key to successful installation is not only the meticulous alignment of the tile fragments relative to each other. Of course, a lot also depends on the quality of preparation of the wall base. Therefore, we have also included in the recommended list of all necessary tools and materials those items that will help you achieve the ideal surface.
Tools
- chisel;
- sponge;
- brush;
- chisel;
- level;
- construction mixer with whisk;
- glue container;
- Master OK;
- tile cutter;
- spatula (notched);
- hammer (rubber);
- ceramic tile;
- crosses.
Materials
- primer;
- plaster or putty;
- tile adhesive;
- fugue.
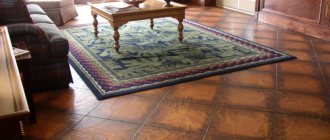
Features of laying wall tiles on the floor
Wall tiles laid on the floor, must have a sufficient thickness.
If you are going to perform a laying wall tiles on the floor, be sure to take into account that it is less vicious than the floor, because it has a soft texture and a fairly high rate of moisture absorption. Therefore, you need to choose a more solid can be, what you can do even visually:
- Firstly, it should be homogeneous and with a more compact structure;
- secondly, have a greater thickness.
We now turn to the process of its installation. It should be noted immediately that the tile for the walls can be laid on the floor. The main conditions are no voids and perfectly flat floor surface. This is usually achieved by making ties and made cement-sand mortar.
The second option is the use of water-resistant plywood or gypsum fiber board (gypsum fiber boards), which are much stronger than drywall and well suited to the base under floor tiles. If properly put on a floor tile for walls, then it will serve for a long time and is very reliable.
Surface preparation
Any surface preparation for the subsequent application of ceramic tiles traditionally includes 3 main stages:
- removal of old finishes;
- leveling walls;
- padding.
No matter how tedious it may be at times to get rid of old material, doing so is your sacred duty. If you are dealing with wallpaper, carefully scrape off all the fragments, trying to end up with a perfectly clean wall. Try not to damage the concrete base - the pieces scraped out of it will need to be compensated for later with plaster, otherwise it will not be possible to achieve a flat surface. After the last fragment of the old finish is safely in the waste bin, pay attention to the wall surface itself:
- are there any cracks, fungus or mold;
- what defects are present;
- Are there any irregularities?
If any of the above comes into your field of vision, you will have to deal with it (read about how to get rid of fungus on the walls in an apartment).
With cracks
- make their diameter larger by driving a chisel with a hammer;
- treat them with a deep penetration primer;
- seal with plaster;
- re-prime.
With fungus and mold
- treatment with a special chemical agent or one of the well-known “folk” ones (hydrogen peroxide, vinegar, borax, etc.);
- thoroughly dry the wall;
- primer treatment with antiseptic components.
With unevenness
- if irregularities of more than 1 centimeter
,
plaster
the entire wall surface, and on top - reinforcement with a metal mesh to improve the adhesion of the tiles to the wall; - if irregularities of less than 1 centimeter
,
priming is required
, and tile adhesive, due to the difference in layers, will help correct minor defects.
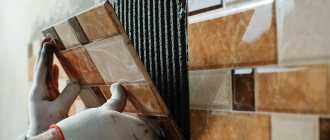
After successfully overcoming all the problems with the base, all that remains is to mix the glue. It is best to use a construction mixer with a whisk attachment for this. Then you will be able to prepare a mixture of ideal consistency.
Tooth shape
- To apply ridges from 6 to 10-12 mm, standard square teeth are used.
- For ridges over 12 mm when working with cement mounting mixtures, semicircular teeth are used. At this thickness, the track combs more evenly and does not fall off if it has a semicircle in cross-section rather than a square. They are also used for applying synthetic adhesives with strong spreadability, regardless of the layer thickness.
- There are also sometimes combs with triangular teeth. They are not suitable for laying tiles; they are used for applying elastic adhesive in a thin layer (up to 4 mm) for PVC tiles.
Depending on the shape of the teeth, the spatula may be marked with letters and numbers. The number indicates a group of size parameters, and the letter indicates the shape:
- A – triangular teeth, without large spaces between them;
- B – triangular with large intervals;
- S – triangular without gaps;
- C – square;
- R – rectangular (including irregular shape);
- M – semicircular.
Tooth sizes
The thickness of the applied glue can be adjusted by changing the angle of inclination. Also keep in mind that after pressing the tiles, the glue will distribute into the voids and settle.
The adhesive layer flattens out after pressing.
The width of the spatula should be equal to the width of the tile, or slightly larger for ease of work.
Approximate sizes of teeth depending on the area of the tile:
| Tile area, cm2 | Teeth size, mm | Adhesive layer after pressing when applied at an angle of 45°, mm | Adhesive layer after pressing when applied at an angle of 60°, mm |
| <49 | 3 | 1,1 | 1,3 |
| 49-100 | 4 | 1,4 | 1,7 |
| 100-400 | 6 | 2,1 | 2,6 |
| 400-900 | 8 | 2,8 | 3,5 |
| 900-2500 | 10 | 3,5 | 4,3 |
| >2500 | 12 | 4,2 | 5,2 |
For a floor or uneven base, the size of the teeth is selected larger.
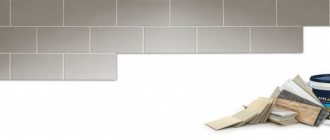
Tile inspection
Of course, if laying tiles on a wall is new to you, there are some things you may want to skip. One of the most common mistakes made by beginners is ignoring the inspection of the tiles. Therefore, carefully read the recommendations below and learn better from the mistakes of others, saving time, money and your nerves:
- make sure that the front part has a flat surface
- according to state standards, a deviation to the side of no more than 3 mm is allowed, but it will be very difficult for a person who has not previously dealt with tiles to cope with such a discrepancy; - check whether the corners are even
- if the tiles are as close to the perfect 90 degrees as the Moon, then it is best to look for alternative options - even experienced tilers do not accept such discrepancies, since the end result is very blurry, with clearly visible defects; - determine whether the tile fragments have the same thickness, height and length
- most often, in order for all these parameters to match, you just need to purchase tiles from one batch; information about it can be found on the box or inquired at the store where you purchase the material.
Floor covering requirements
A high-quality floor covering must meet the following requirements:
- wear resistance - under the influence of gravity and constant friction, a material that is not designed for such an impact can quickly lose its appearance;
- resistance to chemicals - floor coverings are washed much more often than wall tiles;
- increased strength - the floor covering has to withstand a significant level of load, which wall tiles in some cases may simply not be able to cope with;
- safety - the floor covering should not be slippery.
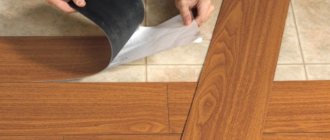
How and with what to cut tiles
No matter how hard you try, you still can’t do without trimming elements. The number of manipulations associated with trimming can be minimized by selecting ceramic tiles of a certain size for the room in which tiling is planned. For example, if your wall is exactly 3 meters long, then a tile with a length of 50 centimeters will fit perfectly. Of course, it is not always possible to find tiles on sale that meet all the parameters; in this case, you can always use tools for cutting tiles. Perhaps the best of them is a manual tile cutter
.
As for other ways to cut the desired fragment, neither a grinder nor a glass cutter with wire cutters will give you the required evenness. There is still an electric option for a manual glass cutter, but its cost often exceeds the cost of your repair. Do you need this?
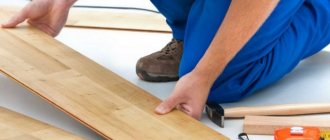
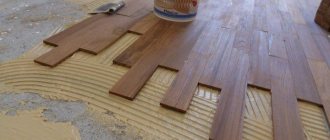
Important note: you should not cut the tiles in advance, but only during the laying process, because even the slightest miscalculations in millimeters may later prevent you from fitting an already recklessly prepared piece into an area on the wall.Laying process
The installation technology itself, if you look at it this way, is extremely simple. However, for the first time, some points may seem ambiguous, and slight excitement and responsibility for the result may prevent you from completing the task adequately.
in this case it is necessary. It should reflect the complete layout of the tiles, taking into account the trimming of all elements. All that remains to be done is to carefully transfer the plan onto the wall. Many specialty tile stores will complete these projects on site based on the size of your space. At the same time, designers take into account the wishes of clients regarding the placement of decorative elements.
- apply the prepared mixture to the wall, about 2 rows from the bottom;
- level the layer with a notched trowel;
- take the tile and lean it against the wall, pressing lightly;
- lay one row - and immediately check with a level whether the tiles lie evenly, whether they stick out or are too recessed in some areas;
- please note: it is not the last row from the floor that needs to be laid, but the second - the last, the lowest one, will be laid at the end of the work;
- in order to maintain even seams between the tiles, use crosses of a given width, but do not forget to remove them after gluing;
- if the tile sticks out, tap it with a rubber hammer so that it goes deeper into the adhesive layer;
- If the tile is too recessed, then it is best to remove the fragment and re-glue it.
Place the trimmed fragments on the wall at the last moment - this way you can avoid mistakes in trimming
, which we talked about a little higher. Finally, the tiles should be laid on the last row from the floor. This sequence is due to the fact that this way you hide the trimming, achieving a better visual effect.
If the room is large, then laying tiles on the wall will take quite a long time, up to several days.
Video that will help.
Main news
Modern designs have little in common with older models, which are fragile, brittle and difficult to install. Manufacturers strive for environmental friendliness, efficiency and practicality. Ceramic tile designs become more aesthetically pleasing.
Increase in size
The area of the elements increases. This allows for quick installation. The masonry looks more aesthetically pleasing due to the reduction in the number of joints. This same feature allows you to save on putty. Fewer gaps save time on cleaning the surface.
Increasing the size makes it possible to use large, bold patterns in modern tile design without fear of spoiling the integrity of the picture.
Thickness reduction
The finishing material becomes thinner and lighter. This makes laying easier and increases service life.
Increased service life
This is an excellent material for cladding surfaces in places with high humidity and strong temperature changes. Modern models can easily withstand the most intense heat. They don't break when hit.
Variety of textures
Unusual textures have become popular. They are artificially “aged” by adding cracks. This material looks great in retro and classic designs. New this season are “velvet” samples that imitate velor fabric. Interesting specimens with a combined surface.
Non-standard forms
In addition to the usual squares or rectangles of “bricks”, this year designers are actively using types made in the form of hexagons “honeycombs”. Arabesque tiles have received a second wind. In the photo of new tile designs for 2021, you can even see such a bold solution as ceramics in the shape of fish scales.
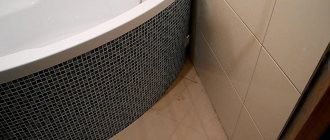
Rubbing seams
Once the tiles are laid, it's time to do the post-operations. So, after the tiles have dried well, the seams should be treated with a fugue. It is also called grout
. This procedure is very dirty and causes discomfort, but is required:
- protects seams from moisture;
- highlights the beauty of ceramic tiles.
Nowadays, there are enough grouts in a variety of shades and various decorative effects - you can match them to the tone of your tiles and significantly enhance the impression of installation. At the same time, it would be useful to know some secrets of successful jointing:
- do not rush to dilute the entire package of grout at once - the mixture hardens much faster than you can successfully handle the seams, and it is unlikely that you will be able to use already hardened lumps;
- In order to carry out the jointing process correctly, use a spatula - use it to apply the jointer into the seams, and the jointing should be done with a piece of cable.
We also recommend that you read the article for instructions on drilling tiles on a wall.
Important Note:
for wet rooms, use grout
with a water-repellent effect
.
Not every fugue can boast of the corresponding components in its composition, so pay attention to the specifications indicated on the packaging. Ceresit
brand have proven themselves to be excellent in various conditions . Take a look at the color palette this class=”aligncenter” width=”559″ height=”800″|fcw3qayjh5a| src=»https://stenaprofi.ru/uploads/posts/2018-01/medium/1516016170_1443607206-1418230607-13854516712-100008474.jpg» class=»aligncenter» width=»800″ height=»800″|fcw3qay jh5a| src=»https://stenaprofi.ru/uploads/posts/2018-01/medium/1516016172_c3d83d9b370c354c74572e353838fb406.jpg» class=»aligncenter» width=»800″ height=»800″|fcw3qayjh5a| src=»https://stenaprofi.ru/uploads/posts/2018-01/medium/1516016253_771146-851007.jpg» class=»aligncenter» width=»800″ height=»600″[/img]