Often, due to the addition of family members, owners of individual houses dream of additional space. But in order to expand a residential building, there is not always space on the site. To increase the number of square meters without sacrificing other objects, a second floor is being built. This task is quite feasible not only in a new, but also in an old building, if you follow the technology in the process and know the main nuances. All work can be done with your own hands, without involving professionals and special equipment.
Features and types of second floor superstructure. What is an attic floor
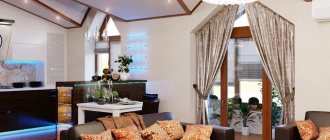
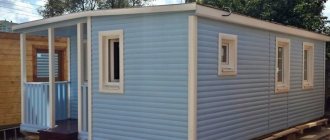
The advantage of living in a private house is the ability to increase the area of the house without constructing a separate building. Given the lack of free space on the site, owners prefer to build a second floor rather than build an extension to the house.
First of all, it is necessary to decide on the type of proposed superstructure: in the form of an attic floor - an attic space under the roof of the house, or in the form of a full second floor with the construction of permanent walls.
The choice remains with the home owners, taking into account the following factors:
- Add-on functionality. If you need high walls and a flat roof, then it is better to abandon the attic option and opt for the option of a full second floor. The fullest and most efficient use of internal space is achieved by building an additional floor.
- Design. To create interesting interior and exterior solutions, it is better to choose an attic floor. It allows you to make full use of non-standard shapes and proportions of the attic space.
- Expenses. The construction of an additional floor will be significantly more expensive than an attic due to the need to erect walls and roofing, as well as their insulation.
By cooperating with us you get
Guarantee of meeting deadlines
- Delivery of the project is always on time
- In case of delay, we incur a penalty of 3% per day
Transparent, fixed estimate
- No hidden extra work
- You pay only for what you need, and you choose what you need yourself!
Daily photo and video reports
- Work progress reports via WhatsApp or email
- You will be in the know, even if you cannot be present on site.
How to properly make a second floor on an old house
Adding a second floor to an old house is a responsible undertaking. The wrong choice of materials or non-compliance with technology when constructing walls can lead to deformations of the building itself.
Choice of materials and format. DIY second floor
How to build the second floor - with your own hands or hire a construction team - each home owner decides independently, based on the volume of planned work and available financial capabilities. As practice shows, it is possible to build a second floor with your own hands, with the participation of a couple of assistants, having with you all the necessary power tools and the necessary skills.
An inspection must be carried out before construction begins. Based on its results, experts must draw a conclusion about the fundamental possibility of building a second floor and the possible risks during its construction.
This takes into account factors such as:
- The condition of the building foundation and the maximum permissible load on the foundation of the house;
- Condition and material of the walls of the house.
Based on the assessment results, recommendations are given on measures to strengthen load-bearing structures (if necessary), calculations are provided and construction technology is determined. Next, you need to draw up a project for the future superstructure, taking into account the selected technology.
When constructing a superstructure, one of the following technologies is usually used:
- Frame construction. The lightest and most economical superstructure option in terms of the weight of the materials used. The frame is formed from timber, then sheathed with moisture-resistant OSB or chipboard.
- Construction made of profiled or laminated timber . The material involves an increased load on the foundation of the building and is used quite rarely.
- Use of foam concrete, aerated concrete or gas silicate blocks. With their relatively low weight and low acquisition costs, these blocks are often used in low-rise construction.
- Brickwork. Quite expensive and heavy material that requires a high-quality foundation.
- Construction of a reinforced concrete or metal frame resting on its own foundation. In this case, vertically located beams are installed on an independent foundation along the perimeter of the house, acting as load-bearing structures. Structurally, the second floor is in no way connected with the first and rests on its own pile supports.
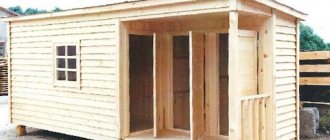
Options for using extensions
The most common uses for extensions are:
- Canopy . Support pillars are installed, and slate or polycarbonate is used for the roof. Fabric or lightweight railings will replace the walls, or they can be covered with polycarbonate.
- Porch . Foam blocks or wood are used for its construction. The roof, corrugated sheet or tile, is selected taking into account the appearance of the residential building. The height of the porch and the number of steps are determined separately based on the preferences of the home owner.
- Terrace . This room can be an excellent relaxation room. During its construction, the foundation is poured, choosing a strip or columnar version. The material for the walls is varied: slabs, timber, cinder block, gas block.
- Covered veranda . The room can be used as a living space even in the winter if a heating system is installed. It has a large number of windows and gives a lot of light. Brick or block walls and doors.
- Garage . An extension is cheaper than a separate structure. An important condition for construction is the presence of ventilation to prevent unnecessary odors in the house. Fireproof materials are used for wall cladding; slate, corrugated sheeting or metal tiles are used for roofing.
- Summer cuisine . In order for a room to be equipped as a kitchen, it is important to have ventilation, lighting, water, and sewerage. This is taken into account in the project, which should be approached with particular care in this case.
It is important that the extension be made in the style of the entire house.
Work to strengthen the foundation
The first stage in the construction of a superstructure is strengthening the foundation. It is especially important to strengthen the foundation before building the second floor on an old house with a worn-out foundation.
First you need to complete a series of preparatory work:
- Dismantling the floor and doors, emptying the house of furniture and interior items;
- Lifting a house using hydraulic jacks.
The foundation is strengthened with:
- Reinforced concrete belt around the perimeter of the existing foundation;
- By strengthening the corners of the house - during the construction of a lightweight second floor.
In the first case, a trench is dug, a cushion of sand and crushed stone is laid, then the old foundation is cleaned and covered with a deep penetration primer. The new foundation is connected to the old one by means of horizontally located pins, which must be driven into the base of the old foundation and welded to the reinforcement mounted in the trench. Then the entire structure is poured with concrete.
In the second case, the technology is similar. The difference is that only the corners of the house are dug in and the corners are filled with concrete.
Interfloor ceiling
To install interfloor ceilings, the roof and attic floors are dismantled.
In practice, the following types of interfloor ceilings are used:
- Wooden beams;
- Metal beams;
- Made of reinforced concrete slabs.
The choice of flooring material is determined by the material of the walls of the house and the permissible load on the foundation of the building. The most commonly used technology for the construction of interfloor floors during the construction of the second floor is the use of timber and boards. This choice is due to the relatively low cost of the material used and the possibility of using it in houses built from a wide variety of materials: brick, logs, foam concrete, etc.
The minimum permissible cross-section of wooden floor beams is determined based on the planned load, span length and beam installation pitch. So, with a load of 400 kg/sq.m. The cross-section of the beams is set according to the following table:
| Span length (in meters) / Slab installation pitch (in meters) | 2,5 | 3,0 | 3,5 | 4,0 | 4,5 | 5,0 | 6,0 |
| 0,6 | 75*100 | 75*150 | 75*200 | 100*200 | 100*200 | 125*200 | 150*225 |
| 1 | 75*150 | 100*150 | 100*175 | 125*200 | 150*200 | 150*225 | 175*225 |
The installation of a wooden floor includes the following steps:
- Installation of floor beams in special nests in the walls;
- Fastening the boards to the support beams nailed to the bottom of the support floors;
- Laying vapor barrier film on boards;
- Laying heat and sound insulation (for example, mineral wool);
- Laying waterproofing;
- Fastening the floorboards of the second floor to the floor beams.
Calculation of the rafter system
The rafters of a do-it-yourself attic must withstand the following loads throughout its entire service life:
- own weight;
- weight of roofing and insulation;
- maximum gusts of wind for a given area;
- snow cover pressure.
Reference. When the roof slope is more than 45°, snow practically does not stay on it, and at 60° it is not taken into account at all in the calculations. But wind pressure increases due to the height of the structure and its position, which is close to vertical.
The result of the calculations should be 2 parameters - the cross-section of the rafters with beams (otherwise known as tie rods) and the pitch of their installation. It is a mistake to think that the size of the wooden beams of the roof grows along with the loads on it. Maximum structural rigidity is achieved through the use of trusses made of logs with a diameter of 120-200 mm or lumber with a thickness of 40 to 200 mm, installed in increments of 50-120 cm. If you are not a civil engineer, you will not be able to determine these values more precisely, since the methodology quite complicated.
Online calculators posted on the Internet do not solve the issue, because their calculations still need to be checked. The solution is this: use ready-made data that has been calculated a long time ago. To do this, you will need table No. 1, which shows the cross-sections of rafter legs at different lengths and loads:
We will explain the calculation method with an example. Let’s assume that the snow load on a flat surface (projection of a pitched roof) in your area is 100 kg/m², the slope is 60°, the span length is 4.5 m (before the strut), the pitch of the rafters is 120 cm. The roofing is slate. We count:
- Real weight of snow cover: 100 x 0.32 = 32 kg/m². The slope coefficient of 0.32 is taken from Table 2 below.
- The specific gravity of a slate covering with a regular profile is 25 kg/m².
- Total specific gravity – 32 + 25 = 60 kg/m².
- We calculate the specific gravity per 1 linear meter of rafters, multiplying 60 kg/m² by an installation step of 1.2 m. We get 72 kg.
- We return to table No. 1 and select the cross-section of the beam according to the span length. We accept a load of 100 kg per 1 line of rafters (with a margin). A log with a diameter of 140 mm, a board 40 x 200 mm and other materials whose dimensions are in the same horizontal line are suitable.
Reference. When installing a sloping mansard roof, 2 types of rafters are used - layered and hanging. On a gable roof, only hanging roofs are used; the difference between them is shown in the diagram.
The last table No. 3 will help you correctly determine the installation interval of roof trusses:
The proposed method is suitable for small rectangular houses measuring 6 x 6 m. To build a mansard roof on a large cottage, it is strongly recommended to contact specialist designers for calculations.
Construction of the walls of the second floor
After installing the subfloor of the interfloor ceiling, we begin to create the walls. When constructing walls, a variety of materials can be used, but the most common option is frame technology using wooden beams, insulation and moisture-resistant OSB or chipboard boards as wall material. This is the most technologically advanced, economical and fastest method of construction. Frame building structures are also lightweight, which is very important for reducing the load on the foundation and walls of the first floor.
Stages of construction of frame walls of the second floor:
- Lifting all necessary material to the second floor using special lifting equipment;
- Installation of vertical longitudinal beams;
- Formation of walls from moisture-resistant chipboard or OSB panels. Insulation with insulating material;
- Arrangement of the sheathing, on which the roofing material will subsequently be applied.
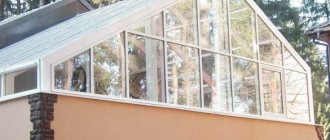
Attic insulation
Since the attic space is planned as a residential space, it should be well insulated. Of the thermal insulation materials, mineral wool works best with wood because it allows moisture to pass through and allows it to “breathe.” The layer thickness is at least 150 mm, and in the northern regions - up to 300 mm. Insulation is carried out in the following order:
- Cut the mineral wool slabs and insert them spaced between the rafters.
- To insulate the gables, nail additional posts and lay insulation between them in the same way.
- If the width of the rafter legs is not enough to create thermal insulation of the required thickness, after laying the first layer, nail horizontal counter-lattice bars to them. Insert the second layer slabs between them.
- Cover the insulation from the inside with a vapor barrier film, laying it with an overlap of 15 cm and gluing the joints with aluminum tape.
- Nail the sheathing strips on top for cladding with plasterboard or other finishing material.
Important point. When laying the insulation, make sure that there is a 3-5 cm ventilation duct between it and the windproof membrane. Moisture formed in the mineral wool due to the dew point will be removed through it.
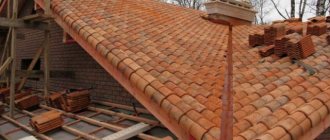
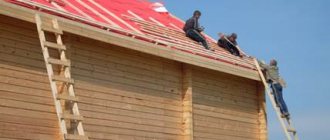
Roof
There are many types of roofs - single, double, hipped, etc. The type of roof is selected based on the specifics of the local climate and the design features of the house.
It is very important that the type of roof chosen matches the overall architecture of the building.
The roof installation includes the following main steps:
- Calculation of the amount of roofing materials, the required volume of lumber;
- Treatment of wooden structures with moisture and fire protection agents;
- Installation of the rafter system;
- Installation of vapor barrier, waterproofing and thermal insulation materials in the roofing “pie”;
- Direct installation of the roof.
Read also how to design a roof.
Frame making
The simplified method presented below involves the installation of an attic sloping roof in 2 stages: assembly of roof trusses on the ground and subsequent installation on the finished walls of a timber or log house. The structural material is boards with a section of 15 x 5 and 10 x 5 cm with a standard length of 6 m.
Start of assembly - formation of the upper chord of the rafter system
The technology looks like this step by step:
- Prepare the beams of the lower chord of the truss, taking into account roof overhangs of 25-27 cm on each side. If the length of the beam is not enough, it needs to be increased using an overlay of the same section, nailed.
- Lay the beam on the ground and attach vertical posts to it with corners, forming the walls of the attic room. Install the ceiling beam and the ridge support (headstock), then attach two hanging rafter boards to it and the corners of the frame for marking, as done in the photo.
- Cut the elements into place and secure them. From the remaining parts of the boards, make layered (lower) rafter legs in the same way and nail them to the frame. The farm is ready.
- Make the remaining trusses using the same method.
Advice. As a rule, windows or doors to the balcony are provided on the front gables. It is also convenient to make racks and belts for their installation on the ground, as well as to cover the openings with clapboard.
The finished frames are lifted onto the walls and fixed in place one by one, starting from the first gable. To prevent it from falling, install spacers and nail them to the walls of the log house. The second and subsequent trusses are placed in the design position and connected to each other with boards.
After placing the rafters, they must be secured to the walls in the following ways:
- staples to the second top crown of logs or beams;
- on steel corners and galvanized screws, as shown in the photo.
Note. Installation on brick and other solid walls is carried out using a mauerlat - a wooden beam laid on load-bearing structures along the entire perimeter of the building. In turn, the Mauerlat is mounted on studs or anchor bolts, and a waterproofing layer of roofing felt is placed between it and the stone wall. The mounting assembly looks like this:
The roofing covering is laid on top of the sheathing - slate, metal tiles, and so on. The technology of installation and fastening depends on the selected material.
Installation of stairs
The last stage in the construction of the superstructure is the installation of the stairs. Constructive solutions for the staircase and its location must be thought out in advance and formalized in the superstructure project.
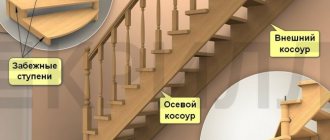
The main types of stairs used in the construction of private houses:
- Marching. In houses where the total area does not allow the use of stairs with a small angle of inclination, steep stairs with an inclination angle of 60 degrees or more are used;
- Marching turning staircases. They allow you to significantly reduce the length of the platform, but increase the width of the span;
- Spiral staircases. Compact, but at the same time the most traumatic and inconvenient.
Various extension options
We offer you a selection of photos of several options for extensions with different design solutions.
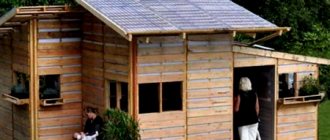
Extension to a wooden house
A veranda, garage, summer kitchen or terrace will look great near a wooden house . The extension can be made simply and beautifully with your own hands. The following materials are used for its construction:
- beam;
- brick;
- foam blocks.
A frame extension will also be beneficial and convenient , especially for the construction of a two-story extension . And most importantly, it is installed quickly and easily. It will require a foundation. Any material is suitable for cladding; here you can be guided by your budget. The assembled frame must be insulated with any heat-insulating materials. The extension with steps near the entrance to the house is also a frame structure on a concrete base.
If a timber extension will serve as a living room, it requires a separate foundation and connecting wall . An expansion joint made of polyurethane foam is laid between them so that the walls of the main building are not damaged when the extension shrinks. The depth of the foundation must match the same parameter of the house. Both bases are connected by reinforcement.
When building a structure from brick or foam blocks, you should also not forget about different shrinkage for different materials . Therefore, you need to think about how to attach the foam block extension to a wooden building. After laying the foundation, you need to provide a waterproofing layer to protect the walls from excess moisture. When laying the roof, use a common roof or a separate one. An important point is to calculate the angle of its inclination to remove sediment. Foam blocks are used more often than bricks, since they have a lower price with installation.
Extension to a house made of timber
Before starting construction, you need to think about the purpose of the added area . Usually they house a garage, workshop or bathroom. This dictates the number of windows, structural features and consumption of building materials. The construction budget and the duration of operation of the structure depend on the correct selection of building materials. The format of the walls should be determined: solid stone or wood, frame, frame-panel.
The foundation is laid similar to the one on which a residential building stands. They need to be tied into a single layer. A simple solution would be to install a pile foundation , which is possible without being tied to the existing one.
For the construction of additional premises, 200x200 mm timber is used. This is a heavy material with shrinkage. How to make sure that the wall does not move away from the house when shrinking? First, the extension beam is attached to the house wall beam with a bracket. Final strengthening occurs after shrinkage.
Extension to a house made of foam blocks
The foam block extension fits well into a house built from almost any material. The main thing is that the building is not dilapidated and has a solid foundation. An important point in attaching a foam block structure to a house is the so-called splicing. There are two docking options :
- rigid : this option requires a recently laid strong foundation that has already gone through a period of shrinkage;
- using an expansion joint : a more economical and affordable method, in which the foundation is laid with a columnar, pile-screw or strip foundation.
Roofing felt is used for insulation. Whatever the size of the additional area planned, a plan is needed to correctly calculate the required materials.
One person can lay foam blocks even without special skills. The process is simple and not long. The technical characteristics of foam blocks are an advantage of the material: it does not burn, it is lightweight , therefore it gives minimal shrinkage, it has a porous structure, is easy to cut, and has a durable structure. The convenient thing is that foam blocks can be used on any soil, and despite their lightness, they are very durable.
Frame extension to the house
Frame technology is very popular in European countries, and now here too. Construction is carried out in two directions :
- frame-framework : such work is used in a complex process;
- frame-panel : the panels used are completely ready for installation, have openings for windows and doors. The size of the panels must strictly correspond to the parameters of the foundation.
Sip panels, which are characterized by high mechanical strength, can be used in construction. A distinctive feature of frame structures is its high thermal insulation characteristics . Rooms retain heat much longer, and such a structure can be assembled in summer and winter. In addition, it is easier to attach additional structures of a similar type to it.
Immediately after finishing the work, you can begin finishing.
Second floor extension: how much does it cost?
The cost of adding a second floor depends on several factors. It is impossible to determine the required amount without relying on the design of a specific house. When calculating construction costs, you need to take into account the type of second floor, the materials used in the construction of walls (aerated concrete, brick, wood, etc.), the materials used for interior and exterior decoration, the area of the superstructure and some other factors.
Selecting material for the extension
Materials are selected in accordance with the preferences of the home owner and the construction budget. The most common materials are the following :
- timber: the most attractive - rounded, with thermal insulation properties - glued;
- moisture-resistant chipboard boards: used for frame buildings, with high heat and sound insulation;
- brick: strong, durable;
- foam blocks and aerated concrete: lightness, thermal insulation.
Regardless of the material chosen, the strength of the structure is determined primarily by the quality of the connection to the house .
Construction risk assessment and design
Before starting construction work, you need to contact professionals who can determine whether it is possible to additionally add a second floor to a particular old house.
Qualified construction agency employees will perform the following actions:
- They will evaluate the foundation and load-bearing walls of the old house. This is necessary to determine whether the building can withstand the additional load when adding a second floor.
- If after the extension the building can withstand the load, its amount is determined.
- They will also find out how to strengthen an old private house.
- They will calculate the exact safety factor and rigidity for the second floor superstructure.
After completing the above steps, the client is given documents on the technical condition of the building, and a verdict is made on whether it is possible to make an addition to the old house.
Roof
of roofs for extensions :
- single and double slope;
- ceiling and attic;
- steep and sloping;
- multi-pincer and flat.
It is important that one side is raised to allow water to drain away. Polycarbonate, metal tiles, corrugated sheets, and soft roofing are suitable for roof covering. It is better to use the same material as on the roof of the house, or choose compatible types. As one of the high-quality and affordable options, you can consider Ondulin or Ondulin Tile:. Thanks to the large selection of colors, this material will fit seamlessly even if the roof of the main house is made of a different roofing material.