20737 0 5
Kamila_Feodosya October 16, 2016Specialization: professional approach to architecture, design and construction of private houses and cottages, new products on the market of building materials and finishing. Hobbies: growing fruit trees and roses. Breeding rabbits for meat and decorative breeds.
Stucco decorative elements of the facade
The quality and durability of the finishing of the facade largely depends on the correctly selected window frames. The decor of window openings and slopes is also important, which can become the main accent of a spectacular facade. And finally, the design of façade windows depends on the chosen cladding and insulation option.
If the location and shape of the windows depends on the design of the cottage, then the finishing frame can be chosen at your discretion. It seems like such a small thing - stylish slopes and trim on window frames, but they can completely change the appearance of the facade.
Extraordinary solutions will decorate any, even the simplest cladding, for example, plaster with foam insulation.
Why do you need to highlight a window opening from the outside?
You can seal the joint between the frame and the opening on the street side with sealant. But it is better to further finish this part. This will give an aesthetic, finished look to the house. In addition to being decorative, the framing of window openings also performs a number of other functions. Among them it is worth highlighting the following:
- protection of the joint from moisture;
- hiding wall irregularities;
- creating a smooth transition from the window block to the facade;
- additional insulation, protection from drafts of the room.
Window edging on the facade of the house: popular methods
You can decorate the outside of a window in different ways. The modern market offers the use of various materials for this.
Popular options for framing windows on the facade of a house:
- Forged Products;
- mortar stucco;
- brick;
- moldings;
- wooden planks;
- stone.
Each of these design options has its own characteristics, advantages and disadvantages. They must be taken into account in order to make a beautiful and high-quality edging.
DIY brickwork: tools, order and features
Now that you have an idea of how to lay bricks with your own hands, you need to talk about the procedure as well as some technical nuances.
Sample list of tools for bricklaying
Let's start with the tool. You will need:
- mason's trowels - apply and level the mortar onto the bricks;
- concrete mixer or container for mixing mortar;
- mortar shovel - for kneading and periodic mixing;
- two or three buckets for the solution;
- plumb line - check the verticality of walls and corners,
- building level - to check the horizontality of the row of masonry;
- cord-mooring - for beating rows;
- jointing (for molding seams);
- hammer-pick for breaking incomplete bricks (halves, 3/4 and checks - 1/4);
- The rule is a flat metal or wooden strip to check the plane of the wall.
Next we will talk about the features of the technology. First: it is advisable to soak the brick before use. This is especially true in hot, dry weather. Then it will “pull” less moisture from the solution. If there is not enough moisture, the cement will not be able to gain the required strength, which will affect the strength of the building.
First, two corners are driven out, then they are connected with several rows of brickwork
Second: the corners are driven out first. First the first two. They are connected with 2-3 rows of bricks according to the chosen masonry pattern. Then the third corner is kicked out. The second and third are also connected in several full rows. Afterwards the fourth corner is placed and the perimeter is closed. This is how walls should be built, going around them around the perimeter, and not pushing walls out one by one. This is one of the most common mistakes.
Third: there are two row control technologies. The first is that nails are inserted into the seams of the corners, to which strings are tied. It needs to be pulled so that it marks the top edge of the brick, and also limits the outer (and, if necessary, inner) surface of the wall.
Procedure for attaching the mooring cord
The second way is to use wooden or metal orders. This is a flat strip or corner on which marks are applied every 77 mm - marks on wood or cuts on metal. They mark the required row thickness: brick height + seam. They are installed using flat mounting brackets that are inserted into the seam. If necessary, they are then simply removed and rearranged higher.
There is another way - a mason's corner. It has a slot on one side, into which there is a solution at an angle.
Breaking out a row using a mason's corner
The disadvantage of this method is the same as just using a nail in the seam: the height of the row must be controlled “manually” when drawing out the corners. If you lack experience (and where can you get it if you are doing bricklaying with your own hands for the first time), this is difficult. Having (having done it yourself) everything is easier.
Fourth: preparation of incomplete bricks. As you have seen, when laying, they use halves, three-quarter bricks and checks - 1/4 parts. To ensure that the work does not slow down, it is necessary to prepare them before starting masonry. This is done using a hammer-pick. When preparing, high precision in size is required, otherwise the dressing will go wrong. To make it easier to control the length, marks of the appropriate length are made on the handle. By placing the pen on the brick, marks are made on both sides of the spoon. Then, placing a pickaxe blade on the mark, they hit the reverse side with a hammer, making notches. Having made notches on both spoons, they break the brick with a strong blow of the pick.
Framing the windows of a private house with forging
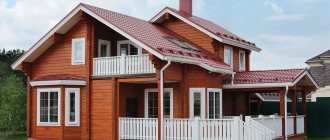
Forged products always look elegant and beautiful. Using the forging method, you can create any type of structure and place it around the window opening. For example, you can frame a window from the street with forged branches and flowers. Such edging will look beautiful on a house made of any material (foam block, brick, wood).
As a rule, such products are made to order. Mounted with bolts or welding. The advantages of forged edging are high decorativeness, strength and durability. If you make a wide product and install it over the entire opening, then you will be able to ensure the safety of the house.
Paper snowflakes
Snowflakes with paper are the most common way to decorate New Year's windows by hand.
Each of us at least once in childhood.
To make them we need:
- round plate.
- white or colored sheet of paper.
- pencil.
- scissors.
- Toilet soap.
The operating principle is as follows:
On a piece of paper, place a circle at the top of the size you want your snowflake to be. Draw an outline around the plate with a pencil, so that the same circle appears on the paper.
Cleaning the paper will make cutting the snowflakes easier and more sensitive.
- Shorten the circle and cross it in half three times.
- Make a pencil drawing on the resulting cone and then cut off the inside with scissors.
We opened the newspaper and received an original and beautiful snowflake.
If it turns out to be Minty, it can be ironed at a low temperature.
If you make these ornaments from thin porous paper, after cutting the snowflake, it can be painted with watercolors on both sides.
Finishing façade windows with mortar stucco
Stucco molding is often used in interior design. Suitable for exterior and interior use. Made from different components. Gypsum solutions are popular. The composition for facade work must be resistant to temperature changes, moisture, and mechanical damage. Special mixtures are sold in dry form in stores. To prepare the solution, it is important to follow the instructions, otherwise the decorative finish will harden for a long time and will not be durable. The solution is poured into the mold. The hardened product is pulled out. It is attached to the façade wall using special glue.
Stucco molding is used not only to decorate window openings. It is also suitable for decorating corners and the bottom of the house. She is always in fashion. She is able to transform even an old and dilapidated building into a work of art.
Curtains for children's room
The place where a child lives is the territory of play and fairy tales. Here you can do everything that is “not allowed” in a living room or bedroom: contrasting colors, unusual designs, bright children’s curtains with cords, flags, and images of cartoon characters. It is from this cheerful mosaic of color and pattern that a feeling of joy is created. That is why you need to buy curtains for a nursery, focusing on your own imagination and taste. Bows, ties, frills - all this is quite acceptable in the design of a nursery, especially if you are arranging a room for a girl. And the boy will most likely like fabrics with thematic patterns or appliqués
When ordering curtains for a children's room, pay attention to blue-blue and yellow-orange shades. But they cannot be black, gray, or brown - this is contraindicated for the baby
Brick window frames
This finishing option is suitable for a brick house. Decorative facing bricks are used. They can be used to decorate not only a rectangular or square, but also a round, arched opening. Attach the products to the solution.
The following decorative types of brick are suitable for framing a window on the facade:
- Glazed colored. It is highly decorative. May have a matte or glossy finish. This product allows you to add contrast to the finish.
- Clinker relief. Looks decent from the outside of the house. Has a relief surface. It is frost-resistant and durable.
- Decorative silicate. Characterized by high strength and affordable cost.
Selection of facing material
Today, brick cladding remains one of the most popular methods of facade design. You can use solid and hollow building materials. They have excellent thermal insulation characteristics. The most common design for the facade of a building is using double silicate bricks m150. This building material is considered economical in terms of consumption and effective in terms of thermal insulation of walls.
No less common is cladding the façade with ceramic cladding products. They are large in size compared to ordinary bricks. This building material imitates the appearance of a natural surface:
- wild stone;
- ceramic brick;
- rock texture;
- wood.
Before covering a frame house with facing bricks, it is necessary to take into account the climatic conditions of the area in which construction work is carried out. The selected facing brick must withstand climatic fluctuations, changes in humidity levels and the effects of precipitation typical for a given region. Ceramic facing bricks are considered a universal building material.
//www.youtube.com/watch?v=zmZ3W_EtFZE
To choose the right decor for your own home, you can study examples of already completed facade cladding work.
Framing windows on the facade with moldings
Moldings are sometimes used to decorate window openings from the street. This option is well suited for houses designed in a classic style. Molding is a decorative strip, baguette or border that imitates stucco molding or a column. Such products are several centimeters wide. They are usually made from polyurethane. They look elegant. Polyurethane moldings accurately imitate the texture of natural or artificial material. At the same time, they are inexpensive and easy to install. They are attached to the profile or glue.
Basic rules and possible problems associated with improper finishing of external slopes
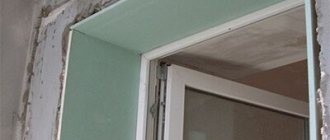
The main rule, the observance of which will allow you to avoid problems when operating plastic windows and doors, is timely finishing of external slopes.
Note! It is unacceptable to leave seams open for a long time. Under the influence of moisture and ultraviolet radiation, the foam crumbles, collapses and, as a result, loses its insulating properties.
There are a number of installation errors that can lead to undesirable consequences. The most common mistakes:
- excessive removal of polyurethane foam from the seam;
- too rigid fixation of panels to the profile;
- use of unsuitable materials for lining the opening.
What consequences might the above shortcomings entail?
Mistakes can cause foam destruction, wall shedding and, as a result, moisture penetration and fungus formation despite regular ventilation. Some problems may appear within a few days, while others may not become apparent until several months later.
It is impossible to determine the exact cause of their occurrence without violating the integrity of the slopes. But some signs that mistakes were made when finishing the opening can be determined by education:
- condensate;
- ice in winter;
- whistling and howling wind
Framing the facade window with wooden slats
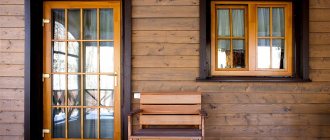
This design option is suitable for private houses designed in a rustic style. Dark brown strips around the perimeter of the window opening against the background of a light, smooth facade look beautiful and stylish. Additionally, you can emphasize the foundation line with a wooden belt for a harmonious look. Wood planks are nailed. They can be painted in the desired color or varnished. Instead of the usual rectangular planks, you can install openwork options. They are easy to make yourself. To do this you need to have wood cutting skills and tools.
The advantage of wood is its flexibility. The material is easy to process, giving it the desired shape. Also, wooden planks are environmentally friendly and safe. But they are characterized by low moisture resistance, susceptibility to rotting, and insect damage. Therefore, they must be treated with protective compounds.
Slope protection
Clinker tiles - durable and reliable
What are the main advantages and disadvantages of this or that slope finishing and how to choose the best option based on the chosen cladding of the cottage.
Option 1 – foam insulation
In the photo there is a beautiful facade with foam trim
Finishing with foam plastic is considered the most inexpensive and reliable option for insulating slopes. But if you calculate the costs, I would not say that this is a budget option. What are the advantages of such thermal insulation:
- The foam trim is lightweight and can be mounted on almost any cladding.
- The polyurethane frame provides additional thermal and waterproofing.
- You can create an original facade decor by painting the trim in any color.
This window frame looks very solid
- Decorative elements are inexpensive, and choosing the shape of the parts allows you to be creative in design.
- This decor is indispensable if, due to the poor architecture of the building, it is necessary to install a false window, foam plastic parts are mounted on any surface, and imitation glass can be made from moisture-resistant mirror film.
This window decoration looks good in combination with decorative plaster, but is completely incompatible with brick, stone or vinyl siding. In my opinion, this option can be chosen for a small country house. Still, foam plastic, no matter how you paint it, remains a budget option and looks the part.
Option 2 – plastic
Facing slopes with sheet plastic
Plastic panels are good for interior cladding of windows, as they are easy to clean, look beautiful and are quite durable. For the external decoration of window openings, you need to choose good quality frost-resistant vinyl siding.
It is not necessary to decorate the entire building with siding; decorative vinyl trims in combination with textured plaster and stone-like decor also look impressive.
You can't skimp on siding. Cheap types of this cladding quickly fade and crack. Slats made in China are especially prone to defects.
If you choose plastic, make sure it’s high quality!
Most often, plastic is chosen for external reinforcement of slopes in apartment buildings, since washing this cladding is not difficult.
If you do not want to make repairs every five years, then it is better to refuse any type of plastic for external window decoration. My observations lead to disappointing conclusions. Cottages with external siding already have a very unsightly appearance after five years.
The material gives unpleasant cracks precisely in the area of window openings. The deformation of the material depends on three reasons:
- natural shrinkage of the building,
- professionalism of the craftsmen,
- the quality of the material itself.
It is also important to note that in regions with winter temperatures below 20 degrees, the instructions do not recommend the use of plastic slats.
Option 3 - universal plaster
Facade decorative plaster
High-quality plastered slopes can be decorated with any decorative elements if desired. With the cost of one linear meter of slopes being 400 rubles, this is the most reliable and durable option:
- the only disadvantage of plastering is that it is difficult to find a professional craftsman who will perform the work efficiently;
- A great advantage is the ability to install an additional layer of foam insulation.
Plaster is a decent way to finish façade windows
Option 4 – metal
The most reliable and durable, but not the cheapest option. Nevertheless, metal-plastic windows and the same platbands look very harmonious. Brown wood-look frames with slopes two shades lighter immediately give the façade a special chic and presentability.
Spectacular design for a classic façade
The only negative is that high-quality thermal insulation and professional installation are required. Installing one window opening will cost about three thousand rubles.
This material is compatible with all decorative finishing options for a cottage, is easy to maintain and install, and does not require frequent expensive repairs.
Option 5 – sandwich panels
Sandwich panels installation diagram
A universal option for a cottage made of stone, brick or foam blocks. Provides high-quality insulation and waterproofing, looks great, is easy to install, and has a service life of more than 30 years.
Another big advantage of such panels is their resistance to temperature changes and lack of deformation. Therefore, this type of window decoration can also be recommended for buildings made of timber.
To install sandwich panels, you need to follow a certain sequence: the panels are mounted around the perimeter of the box on aluminum or PVC profiles. Installation begins from the top profile.
When installing a ventilated façade, the problem of voids under the ebbs often arises. The voids cause noise during rain and deformation of the coating under low tide. How to bypass windows on a ventilated façade correctly?
Installation diagram of a window opening in a ventilated facade
Installation should be carried out with standard units in a certain sequence: the lower connection, then the upper assembly, then the side connections and only after this the connections of the internal and external corners.
To strengthen the space under the flashing, you can replace the tin flashing with a ceramic tile coating or install it on a sheet of moisture-resistant plywood, at least 10 millimeters thick.
Option 6 – tile or stone finish
An effective combination of clinker tiles and decorative plaster
A reliable and durable option for designing slopes. Combines with any type of façade cladding. This finishing allows you to create a spectacular facade at low financial costs.
You should choose only frost-resistant tiles for finishing. Before laying, the slopes must be leveled and plastered at a certain angle.
I like the finishing with clinker tiles to look like wild stone or sandstone. This decor is durable and practical, goes well with plaster and brick, siding and wood.
Stone edging
This framing option should be chosen for brick houses. It will look organic and beautiful. You can use artificial or natural stone. The latest products are more expensive. Granite, gravel, and sandstone are suitable for the external cladding of a window opening. Stone tiles are attached with special glue to a previously leveled and cleaned surface.
The stone is characterized by frost resistance, high strength, heat resistance, and durability. Therefore, a frame made from it will last a long time and maintain an attractive appearance throughout the entire period of use.
Plastering
Another way to finish windows is to apply plaster. This method can be used only in cases where the surface of the slope is perfectly flat and smooth. The thickness of the application of the plaster composition should not exceed 2 cm, since thicker layers are susceptible to rapid cracking and crumbling. Plastering includes the following technological stages:
- removing dust, dirt, applying antiseptic;
- priming with special mixtures;
- applying the initial leveling layer;
- reinforcement of the slope surface;
- finishing plaster, painting.
Applying plaster
Examples of beautiful window framing on the facade with photos
In order for the decoration of the window opening on the outside of the building to look beautiful and harmonious, you need to think carefully about what to make it from. The same material can be used to frame the surface in different ways. Interesting window finishing options on the facade are shown in the photographs below.
Thus, it is recommended to trim the façade windows. This is necessary not only to make the house attractive, but also to protect the joint between the glass unit and the opening. Various materials are suitable for this: brick, stone, moldings, wooden planks, etc. It is important to select and attach the product correctly. Then the frame will look harmonious and last a long time.
Did you like the article? Tell your friends:
Decorative plaster
When carrying out renovations in a house, interior decorative plaster is often used as a finishing material for walls. This material will make the slopes on the windows unusual and spectacular.
Decorative plaster is often used for interior decoration of slopes
Decorative plaster may contain fillers of various fractions and origins - these can be natural wood fibers or stone chips or artificial granules of various sizes. Decorative plaster is used as a finishing layer, creating an unusual textured surface or an intricate pattern, like Venetian plaster.
As a material for interior finishing of slopes, decorative plaster has the following characteristics:
- effectively masks base unevenness;
- it can be applied to any base material: brick, concrete, plasterboard, wood;
- this material does not absorb odors;
- safe, non-flammable and environmentally friendly composite;
- has soundproofing qualities;
- in case of minor defects in the base, preliminary repairs are not required;
- when treated with wax or painting, the plaster layer becomes moisture-repellent;
- has breathability;
- Repairing the plaster layer is very simple, there is no need to remove all the finishing; finishing of arched window structures is possible.
Types of decorative plasters
Depending on the type of filler and main substance, decorative plasters are:
- textured plaster has a pronounced pattern that is known in advance;
Texture plaster creates a pre-known pattern - structural plaster has a less pronounced relief than textured plaster, but its pattern is unpredictable in advance;
Structural plaster creates an unknown pattern - Venetian plaster has many layers, resulting in an intricate pattern and smooth surface.
Venetian plaster creates a smooth, multi-layered surface
Surface preparation
The durability of the plaster layer depends on a well-prepared surface . Therefore, finishing window slopes inside with decorative plaster should begin with preparing the base.
- The surface of the slopes is cleaned of construction debris and dusted. If there are cracks, they are embroidered and puttied;
At the first stage, cracks are sealed and the surface is dust-free - The surface of the slope is primed, a starting layer of plaster is applied and the surface is leveled. At this stage, metal perforated corners are fixed to the corners of the slopes;
The prepared surface is primed and leveled - The plaster layer is rubbed down and allowed to dry. Then they are primed again;
After leveling the slope, the surface is rubbed and re-primed - apply a decorative layer.
At the final stage, decorative finishing of the slope is performed
