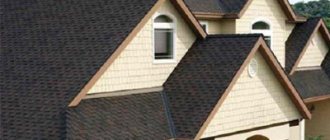
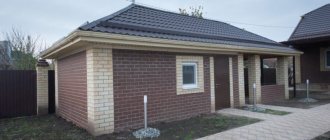
Covering a roof with your own hands is not that difficult, but first you need to choose the material. One of the roof covering options is corrugated sheeting (a durable, practical and affordable material). A corrugated sheet or metal profile is a sheet of metal with a protective coating. The ridges and grooves make it more rigid, which increases its service life. At the same time, the material turns out to be light, so that a roof made of corrugated sheets can be made even by one person.
Corrugated sheet roofing
Features of the material
At first glance, all types of metal profiles are the same and differ only in color. However, when purchasing roofing material, several parameters should be taken into account. Of great importance is the slope of the slopes, which determines the pitch of the sheathing and the brand of sheets.
The profile flooring is mounted on slopes with an inclination angle of 12 degrees. It is permissible to lay corrugated sheets on flatter roofs; in this case, you will have to strengthen the rafter structures, sheathing and additionally seal the joints of the sheets.
Choosing a corrugated sheet manufacturer
It should be understood that the service life and quality of the material depends not only on the correct installation process, but also on the good selection of the brand manufacturer of the material.
Among the highest quality are:
- Russian manufacturer Grand Line.
- Ukrainian manufacturer ZartMet.
- Russian manufacturer of the Ural Roofing Materials Plant.
Performance qualities of corrugated sheets
Profiled sheet C-10 and its dimensions.
The greater the height of the sheet profile, the stiffer the material. Roofers advise choosing corrugated sheeting with a height of 20 mm or more for the roof. Metal profiles of grade C10 can also be used, but you need to think about the unhindered flow of snow from the roof. Let's look at the main types of profiled sheets:
- Wall. Owners of private houses usually choose brands C10, C20 and C21. They optimally combine cost and characteristics.
- Load-bearing - wall. Brand NS35 is suitable for roofs with a minimum slope. Load-bearing wall sheets of this brand are used in areas with heavy snow load.
Profiled sheet NS35 and its dimensions
The corrugated sheets H60 and H75 have a high cost - their wave height exceeds 6 cm. They are not used for roofing private houses, but they are quite suitable for industrial facilities.
How to choose the angle of inclination
If the roof area is small, the load allows the use of corrugated sheeting grades C18-C21. For large spans the load-bearing capacity of such materials is not enough, so more powerful types of flooring NS35-NS60 are used.
The minimum tilt angle for residential buildings should not be less than 10°, for industrial facilities or sheds - 8°. But with such a slope, the sheathing boards should be laid almost flush together. In addition, if the angle is too small, there is a high probability of leaks, which requires additional sealing of the seams and laying corrugated sheets with an overlap of 2 waves.
The angle of inclination of the roof is selected based on the loads and the architectural design. It should be taken into account that the more snow falls in the region, the steeper the slopes should be.
Wind load is a risk factor for roofs with a steep slope. In strong winds it needs to be made flatter.
The wind tore off the roof
The optimal angle for pitched roofs is 20-45°. It allows you to lay the lathing in increments of 500-1000 mm without the risk of deformation under load.
Types of corrugated sheets (grades)
Sheets of corrugated sheets differ in color, the presence of a protective coating, and material. Non-ferrous metal profiles are used to cover the roofs of private houses. The polymer layer protects the metal from negative environmental factors, and the selected shade completes the appearance of the building. Although simple galvanized sheets are much cheaper, they are only suitable for temporary structures and the service life of such material is shorter.
By purpose
As already mentioned, metal profiles come in different thicknesses and have deep or minimal grooves. Sheets with small indentations (marked “C” on them) are used for walls or fences. Making a roof from a thin metal profile is not the best idea only if there is frequent sheathing and there is no heavy snow load.
Sheets made of thick metal (marked with the “H” code) are intended for roofing with high snow or wind loads. Universal corrugated sheeting is designated by two letters “NS” and is suitable for most homes.
When marking, you can notice the numbers - this is the wave height indicated in millimeters. For example, wall C10 is suitable for a fence, and HC30 is recommended for roofing. Additional grooves in the wave increase the rigidity of the corrugated sheet.
By type of coverage
Despite the same appearance, the price of two sheets of corrugated sheets may differ. For some reason, many take this as deception on the part of the store, but no. It's all about using different materials and technologies. The coating is:
- Tsinkov - the technology is well studied and put into production, so the cost of the sheets is lower;
- Alyumotsinkov is a relatively new technique, which means that the price of a metal profile reflects the costs of modern equipment, while this type of protection extends the service life of the product.
Waves on a profiled sheet are formed using cold rolling or emulsion.
In the first case, the metal is pressed through with a special roller without preparation. The work uses expensive equipment, otherwise there is a risk of damaging the applied protective layer on the sheets.
During the formation of a wave by an emulsion, the surface of the material is treated with oil or water and then pressed. It is very important not to violate the technology: first dry the sheets and then fix the paint by firing in an oven. If the manufacturer did not treat the work conscientiously, the material will soon rust.
Popular coatings include polyester, pural, PVDF, plastisol. The advantages and disadvantages of each are presented in the table.
| Type of polymer coating | pros | Minuses |
| Polyester | Low price, plastic layer, resistance to damage during installation of metal profiles | Glossy polyester glares and is susceptible to corrosion |
| Pural | Uniform and reliable coating, color protection for 10 years | High price |
| Plastisol | Resistant to environmental factors, does not rust, has an affordable price tag | Destroyed by exposure to ultraviolet radiation (fades) |
| PVDF | Tolerates any frost, sun and even aggressive environments. The coating is easily cleaned of dirt during rain, which returns the roof a beautiful shine | Expensive, not always available in small towns |
The best option for a country house is a roof made of corrugated sheets with a protective polyester coating. Corrosion can only occur if the installation technology is incorrect or the sheets are damaged during transportation.
Protective coatings for corrugated sheets
To increase corrosion resistance, the surface of the sheet is coated with zinc and polymer compounds. The durability of the material and its price largely depend on their type, thickness and quality.
Made of zinc or its alloy with aluminum
It is applied by dipping the workpiece into molten metal, and the layer thickness reaches 30 microns. Galvanized steel is supplied for further processing with polymer compounds or used for the construction of commercial facilities where there are no high requirements for decorativeness and durability.
Polyurethane PURAL
The most durable polymer that retains its properties for up to 70 years. To protect against fading, polyamide or acrylic is added to the composition. A thin film - only 50 microns - has high mechanical and chemical resistance, protects the corrugated sheet from aggressive environmental influences, even in areas with harsh climates.
Polyester
An inexpensive coating with a thickness of 25 microns can last up to 25 years if handled with care. Does not fade for a long time and is not afraid of temperature fluctuations. To obtain a matte surface with a metallic sheen, a Teflon additive is used. Such protection is much stronger and prevents the development of corrosion for up to 40 years.
Corrugated sheeting coated with a polymer protective coating Polyester
Plastisol
The plastisol film is quite thick - 200 microns. It is made with embossing to resemble leather, stone, or wood. It is made on the basis of PVC with the addition of modifiers. The coating is very resistant to mechanical and chemical influences, but is sensitive to ultraviolet radiation and temperature fluctuations.
Appearance of plastisol coating
PVDF
This abbreviation refers to the complex polymer polyvinylidene fluoride with an acrylic additive. The protective layer is only 27 microns thick and is resistant to scratches, UV radiation and critical temperatures. Its service life is 40 years.
How to lay corrugated sheets on a roof
Installation is often entrusted to craftsmen, although you can properly cover the roof with corrugated sheets yourself. The main thing is to prepare the necessary tools and follow the technology. To begin with, they construct a sheathing from boards with a pitch of no more than 60 cm. The thickness of the inch edged board is about three cm. The corrugated sheet should be laid on the roof in such a way that each layer overlaps the previous one by one wave. The short shelf should be at the bottom, and the long one should cover the short one. Only in this case a reliable coating without gaps is formed. By mixing up the shelves, a space of a couple of millimeters appears, but this is enough for water to leak.
What to cut
There is practically no such thing that the corrugated roofing does not need to be trimmed. Under no circumstances should you use an angle grinder! This is quick and easy, but when cut, the metal becomes very hot, and the high temperature causes the zinc to evaporate. In addition, the abrasive tool violates the integrity of the coating. Soon the sheet in these places will begin to rust.
Manufacturers advise using manual or electric metal shears. A drill with a “steel beaver” attachment, a cutter with a metal disc, and a jigsaw are suitable.
What tools will be needed for installation?
To install corrugated sheeting on the roof, you need a universal set of tools:
- Roulette with a length of 6 meters;
- Folding meter or laser rangefinder;
- Construction square - with the help of it you can check the corners of the sheathing;
- Metal ruler;
- Plumb line for setting up vertical posts;
- Building level.
To record measurements, it is enough to prepare a notepad and pencil. It is more convenient to mark metal sheets with a marker - it is not erased by your fingers while working.
In addition, you will need electric tools - they will make laying corrugated sheets faster. You definitely need to get a screwdriver, since even a small roof has many connections. It is very tedious to tighten screws with a screwdriver, and you won’t be able to apply enough clamping force.
A grinder with attachments will allow you to grind or grind down parts if necessary. Plus, you can take a circular saw and a jigsaw. Nozzles are selected separately for each tool. A hammer drill is often required to remove the chimney or ventilation pipes.
Do not forget about safety precautions when installing a roof made of corrugated sheets. You need to stock up on gloves, safety glasses and a respirator (for working with paint or impregnations).
Installation procedure
They begin laying the corrugated sheet on the roof after assembling the rafter system, installing hooks for the drainage system and a drip line. The waterproofing film is “hidden” under the edge of the drip edge and everything is secured with self-tapping screws. All that remains is to install the eaves strip, make the sheathing and only then place the metal profile on the roof.
Foundation construction and waterproofing
Installation of a vapor-waterproofing membrane
The procedure for installing a base under a corrugated sheet depends on whether you plan to make the attic warm or cold.
If the attic space is planned to be cold, then the sequence of the foundation installation will be as follows:
- A vapor-waterproofing film is stuffed from the lower edge of the rafters, which is secured with staples;
- The rows are laid overlapping (overlapping 15 cm) and taped;
- The film should sag slightly under the rafters - at low temperatures it can become very stretched and tear.
If the roof is insulated, then the scope of work increases and changes:
- Counter slats are installed on top of the rafters, which create space for ventilation between the roofing and waterproofing, which prevents moisture from accumulating;
- After this, a sheathing is constructed from the attic side, which will hold the insulation and vapor barrier;
- A roof made of metal profiles is laid on the counter-rails.
Installation of insulation under the roof covering
Installation of extensions and end boards
Varieties of additional roofing elements made from corrugated sheets
Before covering the roof with corrugated sheets, you should install a wind board. It blocks the access of air flows under the roof, and also serves as the basis for installing the wind strip. It is very important that the top cut is slightly further than the sheathing.
Now we mount the cornice strip along the lower edge of the slope. It remains to install a valley overlap of 10-15 cm in places where the roof breaks (direction from bottom to top).
Laying and fastening corrugated sheeting on the roof
Three-block scheme for laying corrugated sheets
Four-block scheme for laying corrugated sheets
First you need to decide on the installation method and fasteners. You can start laying metal profiles on single- and double-slope roofs from any end. The hip roof is covered only from the longitudinal central axis of each hip. In both cases, you need to pull the cord along the cornice - they are guided by it, aligning the corrugated sheet. The construction of a roof made of corrugated sheets over lathing depends on the chosen method:
- Three-block. Lay 2 corrugated sheets in the first row, align, and secure temporarily. Next put one sheet for the second row. Aligning all layers, finally fix the block. Continue laying the corrugated board according to the checkerboard pattern.
- Four-block. Lay one corrugated sheet for the first and second rows in turn. After that - the second sheet of the first and the second sheet of the second row. Everything is fixed with temporary fasteners to the sheathing. After leveling the block, you can attach the corrugated sheet to the screws.
The sheets must be overlapped so that there is no gap. The direction of the joints is any, but the same. It is better to immediately paint over scratches and defects if the coating is accidentally damaged during installation. This will prevent corrosion in the future.
For a roof with a small slope, it is recommended to lay the sheet with an overlap of 2 waves. Another option is to use a gasket seal.
The metal profile is secured with galvanized self-tapping screws of suitable length with a neoprene gasket. It is worth choosing fasteners with heads that match the color of the roof so that they are not noticeable. The absence of a gasket will negatively affect the roofing system - moisture will easily penetrate through the holes.
Installation of finishing panels
Installation of the ridge on the roof
Most of the work is behind us - it remains to complete a few important elements for the roof made of corrugated sheets. The ridge should be attached to the metal tile with roofing screws with an overlap (up to 15 cm), not forgetting about the seal.
The remaining elements are left to the discretion of the home owner. Many people install snow retention devices above the entrance or parking space.
Delivery and storage of corrugated sheets
If you decide to refuse the services of specialists and construction contractors, you will definitely encounter a rather unexpected problem - the need to organize the delivery, unloading and storage of corrugated sheets.
Please note that the service of unloading construction cargo is usually not included in the delivery cost and must be ordered separately from the seller. Moreover, not all companies provide such a service, since hiring loaders is not a cheap pleasure. You may have to order movers separately - in any case, decide the issue in advance so as not to be faced with the need to do this work yourself.
In addition, roofing a roof with corrugated sheets with your own hands is not the fastest process, especially if the installation of corrugated sheets is complicated by the shape or area of the roof. Therefore, it is necessary not only to deliver the profiled sheet to the site and unload it, but also to ensure the protection of the material until it takes its rightful place through your efforts. Do not leave it unattended out in the open! Even if “the neighbors are great people” or you have “a high and secure fence.” There is a high risk of not finding the profiled sheet the very next day.
Storing corrugated sheets on a wooden platform
As for the technical side of the issue, when transporting a profiled sheet to the construction site, you need to follow a few simple rules:
- It is necessary to load the corrugated sheet on a flat, solid base, placing a lining made of wooden blocks on it across the sheets of covering, no less than the width of the corrugated board;
- during transportation, the corrugated sheet should be tightly tied with soft slings or belts to avoid friction between the sheets;
- It is better to drive at a speed of no more than 80 km/h, while avoiding sudden jerks during braking and acceleration.
You need to unload corrugated sheets at the site one sheet at a time, carrying them in a vertical position, without bending. Store the profiled sheet indoors or under a canopy on wooden supports, 150-200 mm high.
Top ↑
Corrugated roofing: components
Difficult areas are called nodes - they require additional attention. Usually these are the junctions of different planes and parts of the structure.
Installation and sealing of the ridge
The principle of insulating the roof ridge
Under the roof, it is imperative to provide space for ventilation, since condensation accumulates there. When installing a profiled sheet at the top, the sheets do not meet each other - a gap is required. It is this that ensures the outflow of air and steam. The higher the wave on the sheets, the larger the hole. You can choose a special skate with ventilation.
A large gap is not always good. There is a high probability that the holes will become clogged with dust, snow or leaves, which will impair ventilation. Experts recommend reducing the gap by 2/3 by filling it with sealant, or using a sealant.
Finishing the overhang with corrugated sheets
Sheathing the roof overhang Sheathing
the roof overhang is quite simple by attaching a suitable profile with grooves to the front board. Pre-cut sheets of corrugated board of the desired width are inserted into them. After this, the second edge is hemmed to the board nailed to the rafters. Close the joints with droppers: one from below, the other from above. A hydrofilm is laid on top of it.
For drainage, gutter hooks are mounted after the bottom drip. The upper one in this case is attached after installing the hooks.
Connecting corrugated sheeting to the wall
The principle of arranging a corrugated sheet to a wall
If the corrugated sheet is adjacent to the wall of a structure, it is necessary to ensure sealing to avoid leaks. A corner strip of a certain length is used: for the roof - long, for mounting on the wall - short. You can choose nails, screws, or dowels as fasteners. The joints are treated with silicone sealant.
There is also an option: cut a groove in the wall, install a corner strip with curved shelves (inclination angle 45 degrees). Everything is secured to the roof, as in the previous version, with self-tapping screws with rubber gaskets.
Pipe passage
Pipe passage through the roof
Steel and polymer aprons ensure the passage of a round pipe through the roof. They have a simple design: a cone-shaped top (neck) and bottom (skirt), taking any shape due to elasticity. The apron is put on the pipe and lowered with a “skirt” onto the corrugated sheet. Use a hammer to shape the corrugations, coating the joints with sealant.
Having secured the “skirt”, all that remains is to secure the neck with a clamp. If the structure fits tightly to the pipe, you don’t have to do anything. However, it is more correct to cover the roof with corrugated sheeting and a pipe using sealant.
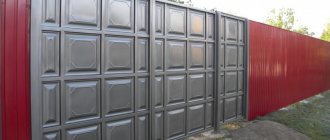
Canopy for a house made of metal profiles
A canopy attached to the house on one side is simpler and more functional than a free-standing canopy. It is not always possible to place a canopy supported by the main building, but this option is more profitable for several reasons:
- drainage of water from the foundation and walls;
- the cost of supports and frame can be safely divided into two;
- if this is a carport, then the car will almost be like in a garage.
The only difficulty may be tying the structure to the building, but if you figure it out, no difficulties will arise, the main thing is to do everything with a small margin of safety. The racks that stand at a distance from the house are dug into the ground and concreted, or you can simply strengthen them with butting if the canopy is not very bulky.
Pouring the foundation and installing load-bearing supports
The foundation for canopies made of metal profiles is made columnar. The holes are dug with a manual or mechanical drill to a depth of 50 cm. No reinforcement is made, the solution is mixed from 3 parts sand and 1 part cement. It will take three days for the foundation to harden, after which further work can begin.
“Heels” are welded to the bottom of the support pillars - mortgages, due to which the entire structure will be attached to the foundation. We drill holes in the corners of the mortgages and fasten the pillars with anchors to the concrete. We carry out this work by checking the building level.
Making a canopy from a metal profile with your own hands: photo
Canopy roof assembly
The answer to the question - how to weld a truss for a canopy is quite simple. This is made from side profiles and diagonal grilles. Usually the former have a cross-section 10 mm larger than the latter, but it can be the same. We start by splicing along the edges, then continuing to move towards the center:
- Spot baiting.
- Check the level and, if necessary, straighten with a sledgehammer.
- Complete welding of elements.
Usually the side and rafter trusses are assembled separately, then they are installed on supports in turn: first the side ones, and the rafters on them. However, if lifting equipment is available, the entire roof frame can be assembled on the ground, as shown in the photo below.
Building a metal canopy: photo of the assembled roof frame
We lift the trusses or the finished frame from the profile onto the supports - here you will need at least two pairs of working hands. Next are the standard steps: spot welding, level checking, and then permanent welding. After the entire frame structure has been assembled, we clean the welding areas from scale and treat them with an anti-corrosion compound. If the metal profile does not have a protective coating over the entire surface, we apply it ourselves. This stage should be treated very carefully, since the duration of operation of the canopy depends on it.
Canopies made of metal profiles: the photo shows the process of installing roof trusses on supports
Installation of polycarbonate
Polycarbonate sheets are laid on the frame as is, without removing the protective film. Using a drill, holes are drilled on them for the fasteners to fit in - 4 cm from the edge. We do not use ordinary hardware for metal, but special thermal washers with O-rings and plugs. We put a thermal washer on the hole, tighten it with a self-tapping screw and close its cap with a plug. The insertion of the fastener must be strictly perpendicular to the surface of the polycarbonate. We twist it tightly, but do not overtighten, to avoid damage to the surface of the material.
The figure shows how to attach polycarbonate to the metal frame of the canopy: we use special thermal washers
We join polycarbonate sheets using a split profile. Its lower part is screwed onto the frame sheathing before the roofing material is laid. The cover is “fastened” using a toothed lock, the “legs” of which are located on both parts of the profile. The figure shows that the cover is equipped with rubber gaskets that provide additional insulation of the joints.
Split profile
And the last step remains - we cover the side sections of the polycarbonate sheets with punched tape, and then with the end profile. This way we will protect the roof air ducts from the penetration of moisture and pollution. At this point, the construction of the metal canopy is completed, you can move on to finishing the area underneath it.
Fastening the structure to the building
Since there will be only two or three racks on one side, light rolling will no longer work. Here you need to use durable hollow steel 40x60 mm or similar, but no less. Winters are different. The truss is fixed to the building with anchors, and if the floor area is large, more than 6 square meters, then several additional wall racks are installed. The entire structure is fixed by welding, after which it is treated with primer and painted. The roof covering is fixed using self-tapping screws through sealing washers.
Among the options presented in the pictures, there will certainly be a canopy that will inspire you to build your own structure. We wish you good luck in realizing your wildest ideas!
Preparation and installation of sheathing
Schemes of continuous and step lathing
The laying of profiled sheets is carried out on the sheathing. The thickness of the boards should be approximately 2.5 cm, and the width should be up to 15 cm. The pitch must be determined as accurately as possible in order to achieve a reliable and strong foundation.
Calculation of sheathing pitch
Form for determining the pitch of the sheathing
First, it’s worth talking about the types of sheathing: solid and stepwise. The first type is suitable for roofs with a minimum slope (up to 15 degrees). The gap between the boards is only 0.5-10 cm - this is a necessary measure to prevent deformation.
With sparse (or step) sheathing, the boards are installed at a certain distance. As a rule, the step type is chosen for roofs with a slope of 15 degrees. The calculation should be entrusted to a professional who takes into account all factors (including load from snow, wind, etc.).
Installation of sheathing
Sheathing under corrugated sheeting
It’s quite easy to build a sheathing yourself. Step-by-step instruction:
- Make calculations and prepare materials;
- Treat the boards with antiseptic and fire-fighting impregnations;
- Fix slats (thickness 4-5 cm and width up to 5 cm) over the rafters and waterproofing film - a ventilation gap;
- Mark where the sheathing boards will be attached;
- Place the boards perpendicular to the rafters according to the markings;
- Secure the boards with self-tapping screws - their length should be 3 times greater than the thickness of the wood.
Boards often have to be spliced, but you need to make sure that the joints are on the counter battens. At the same time, identical joining places should not be allowed in adjacent rows - only a checkerboard order.
Calculation of materials
In order to correctly lay corrugated sheeting on the roof, you need to accurately calculate the amount of materials. For a simple gable roof, the calculations are easy. However, a complex structure consisting of several slopes and corners takes time. It is advisable to entrust this to professionals or use special programs.
The calculation of corrugated sheets for one row of one roof slope is done as follows: divide the width of the slope by the working width of the corrugated sheet. It is necessary to take into account releases from both sides. The result should be rounded up.
If the length of the sheet is enough to cover the slope completely, there is no need to count anything additional. Otherwise, simply calculate the number of horizontal rows, taking into account the overlap between the rows. It can be from 10 to 25 cm depending on the angle. The length of the roof overhang should also be added to the calculations. It is better to add about 10% to the obtained figures - this is a reserve in case some of the material is damaged during installation.
Additional elements of races
Our works
Reconstruction of the roof in Likino
Installation of metal tiles in the Ryazan region.
Replacement of the roof of an office building in Dzerzhinsky
Reconstruction of a country house in Rassudovo
We select high-quality screws
Approximately 6 screws are required per square meter. For wood, a size of 4.8 by 30-35 mm is used, and for additional elements - 4.8 by 50-60 mm. You need to tighten the screws with a screwdriver or electric drill. Why is it important to buy special products for profiled sheets:
- Provide water resistance;
- Allows for reliable fastening;
- Do not damage the protective coating.
As a rule, you can buy screws for metal profiles in the same place where you can buy sheets for roofing. Preference should be given to products made of carbon or stainless steel with a zinc coating. You need to check the sealing washers - they sometimes have defects.
Working with additional elements
Now let’s move on to our numerous additional elements. All of them, as a rule, are made in standard lengths: for polymer-coated roofing - 2 meters, for galvanized roofing - 2.5 meters. They complete the roofing work itself. The seal, which is traditionally placed between the roofing material and additional elements, allows them to fit more tightly to the sheets, further preventing moisture from entering under the roof and allowing it to “breathe.”
But to decorate ridges, cornices and other complex structures, you need to purchase special elements that are offered by the same manufacturer whose roofing material you purchased:
The additional elements must be fastened with the same 4.8 roofing screws as the base material. The only difference is that the metal roof is fastened with self-tapping screws 28-35 mm long, and the elements are fastened with self-tapping screws 50-60 mm long.
Valley and valley overlay
Now let’s look at such a mysterious name as “endova”. The valley and valley overlay are additional elements that duplicate each other, which are mounted at the internal convergence points of two differently directed slopes. The valley must be secured under the corrugated sheet.
Therefore, if the roof has a complex shape, with internal surface joints, then take a valley and a valley overlay as an additional element. This way you will give your roof a more neat and aesthetic appearance, additionally protecting complex transitions from moisture getting inside.
Aprons for pipes
The most critical stage of the roof is the removal of pipes. Such pipes consist of two conventional parts - the lower one, which runs along the roof profile, and the upper one, the pipe itself. And, if the through passage of the pipe is on the lower part of the roof, it makes sense to install a snow block above the passage.
For a sewer ventilation system, an uninsulated pipe of about 10 cm in diameter, without a head, is passed through the roof. And for radon they take the same pipe, but with a head. Remember that these pipes cannot be connected to ordinary ventilation pipes, because... for those, insulated elements with a diameter of 125 mm are already used.
The pipe itself can be installed both before the installation of the roof begins and after completion. If you chose the second option, then you will need to cut a hole in the finished roof for the pipe and temporarily cover it with some material. During the finishing work, pipe cuttings will need to be made from galvanized steel aprons or more modern materials like Wakaflex.
Here's a good tutorial on how to do it:
Dormer window
Now we are working with the dormer window. So, we cut the corrugated sheet into two parts at the lower end of the gutter, install the bottom sheet, then the bottom gutter strip, and only then the top roofing sheet.
Snow holder
The snow holder is mounted in places where there is a risk of snow rolling down. For corrugated sheeting, this is usually the second line at a distance of 30-40 cm from the eaves. For installation, use 4.8x50 self-tapping screws through 1-2 waves of the profile.
External and internal corner
If the slope changes its direction, then additional finishing elements such as internal and external corners and transition are used. Their main task is to create maximum tightness and give the joint of sheets an aesthetic appearance.
Adjacency
An abutment is an additional element that serves as a rim for a chimney or to protect the junction of the roof and the wall:
Cornice, end and joint strips
And here are your instructions:
- Install the end strips from the side of the roof overhang, towards the ridge.
- Just cut off the excess part of the end strip.
- Secure the plank to the end board and the corrugated sheets in the ridge with screws in increments of up to 1 meter. If you did everything correctly, the end strip will cover at least one wave of the roofing profile.
- Attach the end strip with wood screws 4.8x60 or 4.8x50, directly to the wooden base. Leave the step from 30 to 50 cm and make sure that the end strip completely covers the end of the outer wave of corrugated board.
Now we proceed to the installation of the joint connecting strip. Its length is 2 m, and the overlap of the planks cannot be less than 1 meter. The joint strip is taken 2 meters long, and the two strips are attached to each other with an overlap of at least 1 meter. The additional element should be attached to the wall in a groove, or hide everything under the wall sheathing.
The main purpose of the eaves strip is to protect the under-roof space from precipitation, especially in rain with strong winds. And the lower the roof slope, the more necessary this additional element is. But you need to attach the cornice strip before the corrugated sheets. Overlap – 100 mm.
Ridge installation
After all the roofing material has been laid, we attach the ridge. We line the junction of the ridge and the roof with a sealant in advance. Ridge elements for trapezoidal roofing sheets are usually smooth. It is advisable to place ventilated seals between them and the profiled sheets, and for small corrugations - special ridge seals.
We fasten the ridge with self-tapping screws on both sides at a distance of 2-3 waves. It is important that the ridge itself covers all the first screws that hold the sheets of roofing material. The ridge strips must overlap each other with an overlap of at least 1 meter, and we fasten the elements to the roofing sheets with self-drilling screws in increments of up to 3 meters.
An important point: the smaller the angle of inclination of the roof, the wider the ridge itself should be. So, the most standard sizes are 140x140 mm or 200x200 mm.
But today it is more fashionable and rational to order a figured skate, which comes in two parameters: 110x30x110 mm and 145x50x145 mm. There are also special types of ridge for complex roofing, when multidirectional slopes come together.
Common installation mistakes
It’s easier to learn from other people’s mistakes, so it’s worth learning about them before you start installing the roof. Let's look at the most common ones:
- The corrugated sheets are incorrectly fixed - they need to be fixed in a deflection (lower wave);
- The screws are screwed in too tightly or loosely - in both cases, moisture can leak into the under-roof space;
- Lack of seal under the ridge - again, water or snow will get under the roof;
- Ignoring defects - scratches and chips caused during installation must be painted over, otherwise rust will appear in a few months;
- There are few screws - the tiles do not fit tightly, in which case moisture easily penetrates inside (it is correct to attach corrugated sheets to the roof with 6-8 screws per 1 m2);
- Metal profiles from different manufacturers - they can differ not only in color, but also in the size of the waves;
- Lack of waterproofing - condensation accumulates under the roof and gets onto the floors;
- Improper storage of building materials - before installation, the sheets must be stored in their original packaging, laid on a flat surface;
- Failure to follow basic rules when working - you should walk on the roof only on the lower wave and in soft shoes;
- Refusal of additional elements.
Most often, when covering a roof, they make one mistake - they buy low-quality materials. Of course, this is a personal matter, but you still need to save wisely. The service life depends on the quality of the corrugated sheet.
What tools will you need?
When studying the instructions for installing corrugated sheeting for arranging a roof, it is impossible not to dwell on the list of necessary tools and materials, including:
- The corrugated sheet itself.
- Wooden material for making lathing.
- Antiseptics for treating wooden sheathing.
- Waterproofing products.
- Sound insulation products.
- Screwdrivers.
- Scissors for metal material.
- Hacksaws.
- Jigsaws.
- Hammers.
- Construction levels.
- Measuring instruments (rulers, tape measures).
It should be noted that this list is not exhaustive, since each roof requires an individual approach.