The construction of a wooden gazebo on a summer cottage has long become a de facto standard for owners of country residences. This is not only a unique element of landscape design, but also an opportunity to relax in the fresh air with almost home comfort. If you don’t want your plans to depend on sudden bad weather or to get dirty from the next “miracle of nature,” then building a roof and floor for a gazebo will be the ideal solution for you.
The use of wood as the main resource for the construction of a gazebo is considered a tradition - a structure made of natural wood fits best into the natural landscape without disturbing the overall harmony of the landscape. Besides visual consistency, this trend also has several obvious advantages over other technologies.
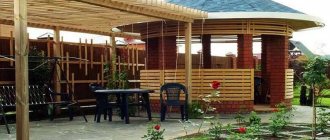
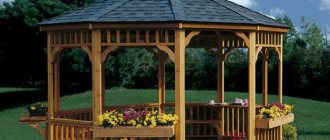
Wooden gazebo: photo
The first and, perhaps, the most tangible advantage of natural wood is the relatively low price of consumables. You can build a medium-sized timber structure without facing catastrophically high financial costs. Wood is also easy to process using simple tools - there is no need to purchase or rent specialized equipment or machinery.
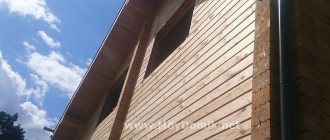
Rectangular gazebo made of edged boards
Wooden gazebos are lightweight structures that can be erected almost anywhere without serious soil preparation, which also significantly saves time and money. If you decide to build a wooden gazebo with your own hands, below you will be provided with step-by-step instructions that will help you carry out this process without the participation of specialists.
Do-it-yourself gazebo made of boards: construction technology
The construction of a wooden gazebo on a summer cottage has long become a de facto standard for owners of country residences.
This is not only a unique element of landscape design, but also an opportunity to relax in the fresh air with almost home comfort. If you don’t want your plans to depend on sudden bad weather or to get dirty from the next “miracle of nature,” then building a roof and floor for a gazebo will be the ideal solution for you. The use of wood as the main resource for the construction of a gazebo is considered a tradition - a structure made of natural wood fits best into the natural landscape without disturbing the overall harmony of the landscape. Besides visual consistency, this trend also has several obvious advantages over other technologies.
Wooden gazebo: photo
The first and, perhaps, the most tangible advantage of natural wood is the relatively low price of consumables. You can build a medium-sized timber structure without facing catastrophically high financial costs. Wood is also easy to process using simple tools - there is no need to purchase or rent specialized equipment or machinery.
Rectangular gazebo made of edged boards
Wooden gazebos are lightweight structures that can be erected almost anywhere without serious soil preparation, which also significantly saves time and money. If you decide to build a wooden gazebo with your own hands, below you will be provided with step-by-step instructions that will help you carry out this process without the participation of specialists.
Frame making
The manufacture of the grille should begin with a frame on which the crossed strips are attached. Thanks to the frame, the structure acquires the necessary rigidity. For work, prepare 20x45mm beams. Increasing the cross-section is impractical, since decorative grilles are not load-bearing elements. To ensure the required strength, it is best to use a dovetail or countersunk connection.
Dovetail technique
If you are building a gazebo with your own hands, then the easiest way is to use the “through tenon” method. Even a novice carpenter can master this type of fastening:
- Using a pencil, mark the bars into 3 equal parts in thickness;
- Use a chisel to select tenons in two beams, and grooves in the other two;
- connect the resulting cutouts with the protrusions, having previously lubricated them with glue;
- additionally fasten the lock with small nails, removing the caps when finished;
- To increase strength, screw a self-tapping screw into each connection.
Construction of a gazebo
Material selection
The technical characteristics of the future design largely depend on the quality of the consumable material. The board for the gazebo can be made of wood of various species and have a different structure - these parameters will, to one degree or another, affect the durability and appearance of the structure.
Boards for construction
To build a gazebo, it is preferable to use resinous wood species such as larch, spruce, etc. They contain a large amount of mineral resins that repel moisture and prevent rotting, acting as a natural antiseptic. Since the structure will be located in the open air, this property will come in very handy - the structure will remain in its original state an order of magnitude longer.
Note! The presence of natural resins is not critical in this case - the use of hard wood is also quite appropriate. However, giving them your preference, you need to think in advance about antiseptic water-repellent impregnation and applying a protective coating.
Structure assembled from uncut boards
The texture of the board is selected based on the chosen design - gazebos made from unedged boards will look good in a “rustic” style, where the main emphasis is on proximity to nature. While gazebos made from tongue-and-groove boards will look more neat and formal. By and large, you can use almost any material that is at hand, as long as it fits into your chosen design style.
Shape selection and marking
The shape of the future structure depends on your preferences - the optimal shapes are considered to be a rectangle and a hexagon. When marking and assembling the lower part of the structure, it is important to correctly construct the selected geometric figure, otherwise in the future you will not avoid difficulties. The lack of symmetry in the frame will look unsightly and will require inserts of a non-standard shape.
Comparing rectangle diagonals
You can check the correctness of the construction of the rectangle by comparing the diagonals. To do this, you need to check the ratio of the diagonals of the marked figure - if both segments are the same length, then the rectangle has the correct shape. If one of the diagonals is longer, this means that the figure is skewed and one of the sides needs to be shifted.
To mark a regular hexagon, you will have to use a geometric formula.
- First of all, a circle is marked, the area of which will approximately correspond to the size of the future gazebo;
- A similar circle with an equal radius is drawn nearby, so that the border of the first figure passes through the center of the second and vice versa;
- Straight lines are drawn through the intersection points of the circles and the center of the first figure;
After carrying out the measurements described above, you will receive the correct hexagram; all that remains is to connect the vertices of the future hexagon with each other.
Preparing the base
If you want to build a durable structure, then first of all you need to properly prepare the base to avoid shrinkage and distortions in the future.
- The site for the future structure must be leveled and compacted; the soil must be reliable, not crumble or collapse . If the top layer of soil is not reliable (the so-called fertile layer, which consists of humus, fallen leaves, etc.), then it must be removed and sand or gravel filled in its place;
Pouring strip foundation
- Both strip and pile foundations can be used as a foundation . In the first case, a shallow strip foundation is formed along the perimeter of the future structure;
Note! Depending on the shape and size of the structure, it may also be necessary to form intermediate load-bearing support sections - this circumstance is calculated individually.
- In the second case, solid concrete blocks of sufficient height are used, which are placed around the entire perimeter of the gazebo . The distance between the supports is determined depending on the size of the load-bearing logs - the more massive they are, the fewer supports you will need (in any case, the distance between them should not exceed 2 m). Also, blocks are placed inside the perimeter to install intermediate elements;
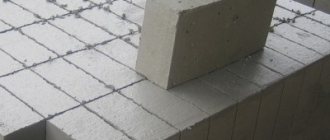
Blocks for columnar foundation
Floor assembly
- A frame for the future floor of the gazebo structure is assembled from timber - it will play the role of a supporting frame for the future floor and should be quite reliable. The individual elements are connected to each other using a tongue-and-groove system or similar technology.
- The frame, in addition to the outer perimeter, must contain internal ceilings - the distance between them may be different, but should not exceed one meter if additional logs are used for flooring. If the board will lie directly on the supporting frame, then the step between the supporting floors should not exceed half a meter;
Difference from swing
Doors with a sliding mechanism have many more advantages than similar swing models. Let us list the main differences between these two types:
- Space saving. This factor is the key difference. When planning the installation, you won't have to add a few extra square meters to ensure that the door can be opened freely, so this door option is ideal for small spaces. You will be able to use the space as rationally as possible.
- Guaranteed tightness. Sliding systems will not open due to a sudden gust of wind or strong draft. Such structures will be securely closed at any time of the year, regardless of the weather. The doors are securely fixed in any given position.
- Convenience and practicality. Unlike swing doors, doors with a sliding mechanism do not scratch the floor or nearby furniture. Even curtains and blinds will retain their original appearance much longer, since the material will not constantly touch structural elements when opened.
- Style and beauty. Of course, there are also attractive models among swing doors. However, sliding structures look much more modern. There are design options without frames and lintels, which means that nothing will block the view. Such doors add grace and lightness to the facade, making its appearance more attractive. They can be installed even on the second floor. The variety of models will also please buyers. On sale there are options made of polycarbonate, with glass, as well as aluminum and wooden doors and even soft PVC doors. You can easily find a design that suits your design.
Some may think that glass doors are very fragile and have a short service life. But this is absolutely not true. The structures are made of high-quality, thick impact-resistant glass. The design is resistant to temperature changes and mechanical stress. Do not be afraid of the established opinion that glass is a very fragile and impractical material.
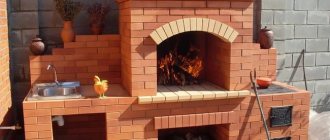
Do-it-yourself gazebo made from slab
Every summer resident has a favorite place on his property where he can sit and take a break from the scorching rays of the sun. Sooner or later, the need for a roof over your head appears, so at the first opportunity, zealous owners replace the boring bench with a comfortable and cozy gazebo made of boards and slabs. It is expensive to build a summer shelter from corrugated sheets, especially since the iron heats up like an oven, and a gazebo made from slab will only delight you with the resinous smell of heated pine.
Features of the design of a gazebo made of boards
There are as many different schemes and designs for arrangement as there are summer residents themselves, everyone was looking for the most convenient and simple option so that there would be enough space under the roof, and at the same time the gazebo would not take up half the plot.
To build a gazebo, you will need to solve several issues:
- Properly arrange the foundation. You cannot simply place a wooden building on the ground; you will still have to make a minimal foundation for a light gazebo from boards;
- Select material for vertical supports. The stronger and thicker the frame of the gazebo, the longer the construction will last; it is better if it is possible to use a profiled pipe or thick beam with a cross-section of at least 80x80 mm;
- The most difficult moment in building a gazebo is choosing the most suitable material for the vertical posts of the future construction made from boards.
The most common are quadrangular and hexagonal gazebos. The first option is most often used for relatively small gazebos, the second, the most comfortable and spacious, is installed next to the garden house and is often used as a summer veranda. Which gazebo made from boards with your own hands is best for you, you will have to decide based on your own capabilities and the availability of free space.
Building a metal pergola
The peculiarity of using metal as a building material is that it is more reliable and requires less maintenance. The metal is immediately primed and then painted. With a good coating of good paint, this will last for several years.
Popular articles Pruning hydrangea in the fall for beginners
Wood is more of a hassle. In our climate, we have to renew the coating every year. Therefore, it is better not to use varnishes: they crack, turn white, and come off in parts. To renew the coating, you need to clean everything off and then recoat it. Therefore, it is better not to use even the best varnishes for outdoor garden or outbuildings. To treat wood that is outdoors all year round, there are oils to which color is added. They do not provide shine, but perfectly protect the surface from climatic influences. The worst thing that can happen is that it will fade a little. To re-treat the surface, it must be cleaned of dirt and dried. Can be painted. Touch drying usually takes a couple of hours. Convenient, beautiful, reliable.
The difference between metal is also in the assembly method. This is either welding or bolted assembly. Everyone chooses the method themselves. Due to the fact that the corrosion resistance of painted metal is quite high, it can simply be concreted. Therefore, there are fewer difficulties with installing pillars. It is only more difficult to work with it because of its mass. But everywhere has its drawbacks.
And the variety of metal pergolas is, perhaps, even greater than wooden ones: they can be forged and bent into bent shapes. Metal is combined with stone, brick, wood. An awning is pulled over a metal frame, wicker mats are laid, and roller blinds are secured. See examples in the photo gallery (it opens to full faucet if you need it).
Under this carpet the pergola itself is not visible. It is built like a gazebo: the frame is welded from pipes, the rest is plants. Using the same principle, you can make a gazebo under grapes. How to combine metal and wood. Rolls of mats were secured to a metal pergola. You can adjust the degree of openness at your discretion. Another arch for roses is a garden pergola, which we see most often. This is the pergola that we call “an arch for flowers or grapes.” Another example of using an awning. The main highlight is the contrast. Another combination of wood and metal, but the design is different, the feeling is different. Such a pergola can be arranged on an open balcony. Forging elements are always relevant. Plants that will grow over time will turn this pergola into the most comfortable place. A combination of metal and polycarbonate. Both materials allow for curved shapes. Even a slight nonlinearity turns a banal canopy into an interesting addition Light pergola over the entrance - an awning is stretched over a metal frame Clear geometric lines, powerful columns, simple and stylish Racks and main beams made of metal, auxiliary beams made of woodRead how to make a metal gazebo here.
We build a gazebo from pine boards and slabs
Pine is one of the most beloved and common wood species in our climate zone. They are happy to buy it for business and auxiliary wood, for firewood and formwork, so if you wish, you can buy a slab relatively inexpensively, and if you’re lucky, an inexpensive board.
In this case, it is best to use the following method:
- In early spring, when prices for edged boards fall, you can relatively inexpensively buy raw sawlogs, sort them and lay them out in the shade to dry;
- The dried board and slab are discarded and cut to the required size, treated twice with solutions of fire retardants and antiseptics.
- Boards for the roof, floors and frame are selected separately. Floorboards should be treated with concentrated iron sulfate for several days, and after drying, soaked in Tikkurila.
Construction of a gazebo does not present any particular problems if you do not rush when assembling the frame and arranging the foundation and do not skimp on the essentials. If you plan to build a frame structure only from wood, you will need to choose the location of the gazebo so that all elements of the building, from the roof to the foundation, remain in the sun for several hours during the day, and at the same time the gazebo is blown through with a slight draft. Under these conditions, even on wet ground, a gazebo made of wooden boards will last quite a long time.
Making the foundation of the building
For garden buildings, the ideal foundation option would be to build a columnar base of eight to nine concrete pillars. For a home gazebo adjacent to the house, where the load on the floor of the gazebo is an order of magnitude higher than in the garden version, it is best to use a slab foundation, divided into squares using wooden planks. This design of the slab makes the foundation flexible and at the same time resistant to cracking.
Before arranging a columnar foundation, the turf is initially removed, covered with a layer of wet sand, and the area for the future gazebo is compacted. Next, the position of the concrete piles is marked, a pit is dug under each leg to a depth of at least 50 cm. A layer of crushed stone is poured onto the bottom, compacted, followed by sand, roofing felt insulation is laid, formwork boards are installed from 300x300 cm boards, 170-200 mm high. After pouring concrete, anchor bolts or pieces of reinforcement are placed in the center of the formwork, to which the frame of the future gazebo will be tied. Until the concrete has completely hardened, after 5-6 hours, using a long building level strip, we cut the supports at the same level.
Required Tools
- The building level will help position all the racks in a strictly vertical position.
- Using a hacksaw or any other cutting tool, you can cut materials.
- A hammer may be needed to knock down structural fragments for leveling.
- Using an electric drill, holes will be made for the metal studs.
- A chisel can be useful for chiseling out pieces of wood that are interfering with the installation process.
- A screwdriver will be needed to screw in the self-tapping screws that are necessary to secure the strip under the handrail.
On what basis to install a gazebo
Since the gazebo is a lightweight, non-permanent building, the foundation for it is purely symbolic. However, the foundation must be reliable enough so that over time the structure does not warp due to uneven subsidence. And, of course, the subfloor of the gazebo must be well ventilated, otherwise the boards will quickly become unusable. At the installation site, it is advisable to remove the turf and level the area with a layer of crushed stone about 10 cm.
For the most part, gazebo foundations are some kind of pile-grillage foundation. Piles themselves are used only on soft soils or with a significant surface slope. On reliable soil, piles can be replaced with shallowly buried pillars, including those made of brickwork. Or even just pave the gazebo on large building blocks.
As for the grillage, it is almost always wooden and also serves as the lower crown of the gazebo. The pillars (pedestals) are located strictly under the joints of the crown: on the outer corners and in the center. Ultimately, the gazebo can be moved relatively easily by digging out the supports and moving them to a new location.
Important points
Despite the obvious advantages of wood, do not forget about:
- the need for full treatment of the material with antiseptic compounds, without which roofs or gazebo railings will not last long. Surfaces must be treated during construction and after it;
- the likelihood of changes in the linear dimensional characteristics of posts and fences during the drying process of building materials. This may degrade the visual appearance of the building. You will have to use varnish and paint to restore the structure to its beauty.
Reference! The quality of the purchased material can affect the service life of the terrace, veranda or gazebo. It is advisable to use bars without serious defects.
Grillage and floor frame
First, we will build a floor frame with a grillage: we cut 100x100 mm pine timber blanks in accordance with the length of the walls and their number. Next, the work on the hexagonal gazebo will be described, but it can always be made more difficult or simpler.
At the ends of the workpieces, we mark cuts inward at an angle corresponding to the number of vertices in the base figure. According to the markings, we cut the timber with a hacksaw to 2/3 of the thickness and chop off the hem with an ax.
Inside the base we place rays connecting the corners to the center. They can be made from the same timber, or from 50 mm edge-to-edge boards. If the gazebo is small (up to 6 meters diagonally), it is better not to tear the boards into beams in the center, but to join them by hemming them in thirds. If the arbor is tetrahedral, then the hemming, accordingly, is done in half the tree. You can do it differently by preparing a wider base for the convergence of the beams, and then fasten them with small scarves placed underneath.
Choosing good building materials
To avoid problems with the finished floor, you should take a responsible approach to the choice of tongue and groove boards and the method of storing them.
Aspect #1 - wood type
The first thing people pay attention to is the quality and type of wood. Tongue and groove boards are made from:
- Spruce and pine are inexpensive, easy-to-process species. Their main advantage is their low price. In addition, they have excellent heat capacity, so spruce and pine floors always seem warm. However, it is better not to use them for floors in high traffic areas. Women's heels, furniture legs, fallen objects - all this can leave noticeable dents on the wooden surface. Varnishing is required.
- Larch is a hard coniferous species characterized by moisture resistance and durability. Larch boards have a beautiful, clear structure and rich color. Thanks to this, it is not necessary to cover it with stains and varnish.
- Oak and ash are durable, hard woods. Their wood has a clearly defined texture and rich shade. Ash and oak boards are considered the most reliable and durable. However, they are also the most expensive.
Aspect #2 - board sizes
The dimensions of the tongue and groove boards should also be taken into account. They can vary significantly
Ideally, the length of the boards should match (or be slightly less than) the length of the wall along which they will be laid. The thickness of the coating determines the reliability of the coating and the price. The standard sizes of tongue and groove boards are as follows:
- length – 1-6 m;
- width – 70-200 mm;
- thickness – 18-45 mm.
Aspect #3 - quality class
Tongue and groove boards are sorted by quality class. There are 4 classes in total:
- Extra - the highest class or, as it is also called, euro sheet pile. This is the most expensive material, without knots, cracks, with a uniform structure and shade.
- A – material without cracks or knots, some inhomogeneity of shade is allowed.
- B – single stains and cracks are allowed.
- C – economy class, with the presence of multiple knots, single through holes, and cracks. Typically, class C boards are used for subfloor installation.
This is what it looks like:
Wall base
The basis for the walls can be timber 150x150 or 100x100 mm, and also, if a special color is required, debarked logs. We cut the pillars 2.2–2.7 meters in height, and the quality of the trimming of the logs is very important for their reliable fastening without distortion. The lower connection of the pillars does not experience significant load; it is only enough to prevent shifting, making the connection as inconspicuous as possible.
Therefore, we screw a pair of steel corner brackets into the lower end of each column. We position them so that the reverse edge is turned down and fits snugly against the side surface of the grillage when the post is installed in place. Next, the frame is tightened with an upper crown: 40 mm boards are placed flat on top, cut, like the grillage parts, at a certain angle. The outside sides of the crown are covered with the same board, forming a frame with an L-shaped profile.
How to make a polycarbonate sliding door
Polycarbonate material is good because it can be used to make any type of portal - sliding, hinged, frameless and framed. Having selected the desired option, you can begin to create it.
The construction of sliding doors made of polycarbonate material itself is divided into a number of simple steps:
- Cutting sheets. Can be done with a circular saw or a regular construction knife. The main thing is to correctly measure the desired piece of fabric and cover it along the edges with adhesive tape in order to avoid contamination.
- Drilling . This work can be done with a regular metal drill. But it must be new or practically unused. Holes should be made between the stiffeners. It is also necessary that they are at least 0.5 cm away from the edges.
- Fasteners . The polycarbonate material is fastened with ordinary self-tapping screws or thermal washers. The latter are more preferable, as they have a latch, which improves the tightness during fastening.
- Sealing . Produced with perforation tape or aluminum self-adhesive. It must be done at the ends of the sheet to prevent contamination and condensation.
Required materials and tools
The standard set of tools and materials for creating polycarbonate sliding doors includes:
- self-tapping screws and thermal washers;
- electric drill with a set of drills;
- polycarbonate sheet;
- metal corners;
- level and tape measure;
- awnings;
- wooden beam;
- device for cutting polycarbonate.
Creation technology
To create a sliding door, you must follow a certain algorithm:
- Measure the material and doorway.
- Mount the frame.
- Cover the door leaf.
- Install awnings.
- Install the portal.
Work on measuring the entrance opening is mandatory, since the main canvas is created using them. Its corners should be even to avoid distortions during further use. Before sheathing the canvas, you can paint it, but before that you should sand the surface.
Fencing - shape and material
Let's conventionally call the gazebo's fencing its external walls, based on corner columns. They may not be walls at all; most often, craftsmen limit themselves to a parapet up to a meter high or some kind of transom 20–25 cm from the roof, or even leave the openings through.
Choose the type of walls based on the characteristics of everyday life, the presence of gusty winds, the improvement of the location, the presence of a green curtain on the gazebo and pets in the yard. It is safe to say, however, that the best material for filling walls is a lattice made of wooden shingles.
It’s quite easy to make it yourself by cutting 2-meter inch boards into strips 1.5–2.5 mm thick. In the space between the pillars we insert two horizontal crossbars made of thin boards about 70–100 mm wide. One lintel is located at the very bottom, the second - at the height of the parapet. They can be attached to the posts in pre-dug out grooves 10–15 mm deep, using self-tapping screws or nails. It is important that the plank is nailed no closer than 30–40 mm from the front plane formed by the pillars.
First, we nail the first shingles along the edges, connecting the diagonals of the formed rectangle from left to right. We nail the second crosswise to the first; the connection in the center is not yet strengthened in any way. The upper edge of the third plank is nailed with an indentation of 50–80 mm to the right of the first. The shingles are arranged in parallel, but the second one is inserted into the crosshairs on the other side. All strips, except the first two, are attached to either the upper or lower support bar.
When the entire mesh is completely assembled, it should be visually aligned, and then hammer another nail into the edges of each slat. Intersections should be reinforced only for large openings. This can be done with an ordinary nail, the edges of which are then ground down and sanded, or with a drop of hot-melt glue. It will also not be superfluous to go along the vertical edges of the mesh with a hand-held circular saw to trim the strips along a common line.
Railing installation steps
Check the gazebo: there should be no defects. Make sure there are no chips on the steps. Remember that when building a gazebo, the final stage is the installation of the railings.
Install along the edges of the support. To do this, buy 10x10 cm bars. Mount the supports at previously designated points. Pull the cord between the outer supports, focusing on the desired height of the handrails.
Mark the location of the vertical supports, leaving 20 cm between them. Take the dimensions, install the racks, taking into account the angle of the handrails.
There is no need to fasten the balusters with nails; self-tapping screws will allow you to achieve greater stability.
Place a number of parts on glue or attach them with tenons, making them from the end part of the baluster.
Installing handrails with your own hands is considered the most difficult stage; even experienced specialists often have difficulties. Use transition pieces for fastening; for the most accurate connection, they should be sawn down.
What should be the floor in the gazebo?
There are only two flooring options worth seriously considering. The first and simplest is an edged board, which is simply nailed to the grillage and diagonal ribs. This option is recommended if the base of the gazebo is not connected rigidly enough: the floor will add additional strength.
The second option is good if the floor system can be assembled independently of the gazebo frame. The flooring is done with decking boards on tubular posts. This floor will last much longer, and it is not afraid of moisture and high operating loads.
It is highly not recommended to pave the floor with bricks or paving slabs; it will be damp and cold in the off-season.
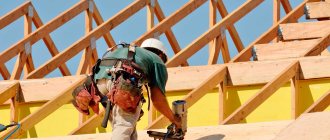
Roof and ceiling
The upper part of the gazebo is represented by a hip roof - one slope on each edge. Usually the rafters are assembled to form a rosette at the top, but this requires an appropriate level of carpentry.
When assembled into a socket, the logs are arranged in a pseudo-spiral: each subsequent one covers the previous one and fits into a pre-prepared notch. The good thing about this option is that a ventilation vent is formed under the ceiling.
A roof without a rosette is assembled as follows. The rafters need to be knocked together in an A shape, but without a connection at the top - just two inclined beams and a crossbar. You need to make one truss for each pair of corners, that is, two for a rectangular and three for a hexagonal arbor. The gap at the top of the rafters should correspond to their thickness.
The dimensions of all trusses are the same, but the crossbars must be nailed at different levels. To plant on the upper crown, which serves as a mauerlat for the roof, 30 mm oblique notches must be made on the beams. The assembly diagram is as follows: first, a truss with the lowest crossbar is installed, and another one is inserted on top through a slot. If the arbor is hexagonal, the third truss is inserted after the second, but the gap in this case should correspond to the rotation of the rafters.
The trusses are tied together with a sheathing of unedged boards. A roofing covering can be immediately laid on top of it, or a continuous base can be prepared for bitumen shingles.
The question of lining the ceiling depends on whether the roof will heat up, that is, whether the gazebo is standing in the sun and how hot the roofing material is. If the ceiling still needs to be hemmed, the trusses are pulled together by horizontal crossbars, to which clapboard or PVC panels are attached. In this case, there is no need to refine the ends, because they will be hidden by the upper crown, a rather thin wooden fillet around the perimeter.
vote
Article rating
Assembly sequence
The algorithm for assembling the railings for the gazebo is as follows:
- First you need to decide on the distance between the support posts. When the gap is established, you can begin to drill holes for special studs on the floor plane. This will allow you to install load-bearing elements.
- After this, you need to stretch a rope or strong thread between the pillars to create a guideline for the even placement of the balusters. They should stand straight, strictly in a row and have equal spaces between them. The installation locations are marked on the floor plane, and a hole for the studs should be made at each marked point. In this case, they will be smaller than they were when installing the support posts. The wooden elements are placed on the pins one by one.
- At the end, it is necessary to install horizontal elements - transverse crossbars. The handrail is fixed to the balusters.