- Calculation of materials for construction
- Option 1 – for two cars with a residential attic floor
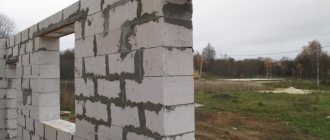
Aerated concrete as a wall material has many advantages. But there are also disadvantages. They are mainly associated with the low compressive strength of the porous material, which limits the number of storeys in buildings. High vapor permeability also creates difficulties, especially if heated rooms are improperly finished. However, in the case of outbuildings there are no such problems; here aerated concrete can show its best qualities. What is its advantage, and how to build a garage from aerated concrete with your own hands, will be discussed in this publication.
Characteristics of aerated concrete
The experience of garage owners says that aerated concrete blocks are no worse in their characteristics than foam concrete ones . Easy to use and inexpensive, aerated concrete retains heat well. It is made by foaming concrete, which makes it possible to obtain blocks with tiny voids filled with air. This feature of the material guarantees good protection from external noise and effective thermal insulation of the internal volume of the building.
When producing blocks, in addition to the usual components, special components are introduced into the solution - foaming agents. Various additives and differences in foaming technology make it possible to produce foam concrete or aerated concrete.
- If chemical components are used to react with cement components, aerated concrete is produced. The resulting gases, when leaving the liquid solution, form many large pores.
- Foam concrete is made by adding neutral substances to the solution; foam appears when the composition is vigorously mixed. At the same time, the mixture is aerated - it is saturated with air. The result is a closed-cell material.
I cut the produced material into blocks of different sizes. Walls are mainly built using products with dimensions of 600 × 300 × 200 mm.
Depending on the brand of material used in construction, its composition, in addition to cement, components for producing bubbles, water and sand, may contain lime and gypsum. They are needed to protect the blocks from mold and increase the strength of the blocks.
Block requirements
The standard size of foam blocks is 588x188x300 mm.
are divided into 3 groups:
- D200-D. They are used for thermal insulation, but they are not durable.
- D500-D. Used in the construction of residential buildings. High strength and low thermal conductivity are the 2 main characteristics of this type.
- D900-D. Used for the construction of high-rise buildings. The blocks are very strong and reliable.
When building a garage from foam blocks, it is best to purchase blocks of the second group. They are the optimal solution for such buildings.
Important characteristics of foam concrete material:
- Color. Should be gray with shades from light to dark tones. If the blocks are too white, it means that lime was added to the composition instead of cement. Such an additive will affect the quality and strength of the structure, and will also reduce the technical properties of the finished blocks.
- Form. The blocks must be smooth, without bends or differences. The permissible error is 2 mm. To check this parameter, you need to place several blocks next to and on top of each other. If they are tightly connected, there are no gaps between them, which means the material is of the highest quality.
- Bubbles. They should not be a single whole; there must be a slight separation between them so that moisture is not absorbed into the block. If the bubbles are not separated from each other, then it is no longer a foam block, but a gas block.
Tips for choosing material
In different regions, depending on the climate zone, interior and exterior decoration, and the method and material for insulating the building, you need to select the brand of aerated concrete. It is important to take into account the mass of the blocks - this directly affects the cost of building the foundation.
There are several brands of material for constructing a garage, they differ:
- In terms of strength and density - this characteristic depends on the size of the internal voids. If there are 40-55% of the total volume in a block, then the blocks are designated with a grade of more than 600. Their compressive strength reaches 4.5 MPa;
- Material grade 500 - have a strength in the range of 2.7-4 MPa, this characteristic varies depending on the percentage of porosity (within 55-75%) and the additives used in the manufacture;
- Material grade 400 is fragile, the compressive strength does not exceed 1.5 MPa, but you can build a garage from them if you cannot pour a reliable foundation. The material has about 75% internal voids, which significantly improves its thermal insulation properties and allows the use of a lightweight base. The cost of such material is 15% less than that of average blocks, which significantly reduces the cost of building a garage.
Please note that when laying walls from 400 grade blocks, you need to buy a lightweight roofing covering; for this material, a large load is unacceptable;
- Aerated concrete grade 300-350 is an inexpensive but very fragile material; it can withstand a load of no more than 1 MPa. Of course, you can build a garage from these blocks, but you need to remember about the fragile structure of the material.
Aerated concrete blocks are easy to cut with a regular hacksaw, so you don’t have to look for special devices and tools for construction . It is most convenient to use dimensions of 2x3x6 m - such dimensions allow you to build a garage with a minimum amount of scraps.
Construction process
Our customers already had a site in Sennaya Pad. There was a forest on the site, which the customer cut down. Before construction began, we uprooted the stumps using special equipment.⠀Before the work began, we tied the house to the site. Next, we began foundation work. The foundation under this house is strip with a widened base. This foundation is suitable for non-heaving soil and allows you to evenly distribute the weight of the house.⠀The plot is sloping, therefore, on the back side of the house the foundation is slightly higher than on the front side. This is done in order to avoid unnecessary consumption of concrete.
The house is built of aerated concrete. Aerated concrete is a good material, but it is fragile and has low bending strength. If the walls are subjected to an uneven load, for example, soil movements, a crack will appear along them. To avoid this, we reinforce the walls.⠀Most often, finishing is done after construction is completed. In this case, we did the work almost in parallel. This way we saved time⠀
Another decoration of the house is the hip roof.⠀Such a roof is more difficult to calculate and install. When making calculations, it is necessary to take into account the wind load, the amount of precipitation, the type of roofing material and the need for insulation.⠀The complexity of working with such a roof is justified not only by its beautiful appearance, but also by its usefulness. The wind does not create destructive pressure on the gables of a hip roof, unlike a gable roof. The house itself can be protected from precipitation due to longer overhangs.⠀
Positive properties and disadvantages of the material
Thanks to its properties, aerated concrete meets all the requirements for a building material:
- Effectively retains heat in the room, significantly reducing the cost of heating and insulating the garage;
- Porous blocks guarantee reliable protection from low temperatures and vapor permeability of the building;
- Walls made of aerated concrete blocks last a long time and are durable;
- Aerated blocks are environmentally safe, they are completely safe for humans;
- External walls are folded 1 layer wide and do not require thermal insulation;
- The correct shape of the blocks, their flat and smooth surface allows you to reduce material consumption when building a garage;
- No special tools or equipment are required for cutting blocks and trimming protrusions;
- Dimensions, weight, as well as the presence of grooves and grips on the material speed up work during the construction of a garage;
- To build from this material, seasonal maintenance and repair work is not required.
Aerated concrete has the same disadvantages as brick (it absorbs moisture well, and if the walls become icy, the room can freeze), which must be taken into account during construction.
Negative properties of aerated concrete blocks
The disadvantages of aerated concrete include: fragility, high moisture capacity. Low deformability means increased requirements for foundations and masonry. Swelling of the soil and failure to maintain the level will lead to destruction and cracking of the building materials from which the garage is built.
The porous material, when the temperature changes from the outside and inside of the garage, becomes covered with condensation at the border with colder air. Damp blocks will deteriorate over time, deteriorating the appearance of the garage.
Drawing up a project and cost estimate
The construction of a garage from aerated concrete blocks begins with the creation of a building design, taking into account the individual requirements of the site and the owner.
The garage project is created taking into account several parameters:
- Characteristics of the soil on the site;
- The height of moisture in the soil;
- Features of the climatic conditions of the region.
You can design in several ways:
- Create a project and working sketch yourself;
- Choose a ready-made project that is suitable for you;
- Order design documentation from a special organization.
It’s not too difficult to prepare a project yourself and save money on it. It is necessary to review existing projects of similar buildings made of aerated concrete or change the finished project to suit your conditions.
You need to collect certain information:
- Required garage dimensions;
- Design features of the building;
- Required bearing capacity of the foundation;
- Garage roof structure;
- Decoration of the premises.
You need to decide which garage design and size is right for you, taking into account the planned number of cars to be parked, the need to build an inspection pit and a basement. After creating the project, you need to calculate the amount of materials required for the work.
Built-in garage
A built-in garage is one that is located on the same foundation as the house and is its structural part. This architectural solution has its advantages and disadvantages. For example, a separate foundation for a garage made of aerated concrete may be less complex and expensive than the foundation of a house. Therefore, the extension is cheaper. On the other hand, the garage as part of the cottage turns out to be warmer, it is easier to connect all communications to it, and it is initially included in the layout of the first floor.
Layout of the first floor of a cottage with a built-in garage Source stroydom-taldom.ru
Calculation
Accurate calculations of the required materials will allow you to save additional money due to the fact that you will not buy extra material.
Calculations need to start with the following:
- Have a ready-made building project;
- Find out the actual dimensions of the garage (height and length of load-bearing walls, dimensions of the gate opening);
- Select aerated concrete blocks of the appropriate size.
These figures differ for each garage.
To understand the calculation sequence, it is advisable to start with a building with average characteristics: a rectangular garage with dimensions of 4 m wide and 6 m long with a height of 2.4 m.
For this structure, taking into account the parameters of the blocks, it is better to use material with dimensions of 20/30/60 cm.
Volume of required material
Those who do not want to perform detailed calculations for all walls can use a special formula: (L x H - Sp) x 1.05 x B = V, where in meters L is the length along the perimeter of the walls, H is the height of the walls, Sp is the area of all openings of the building, 1.05 is a special coefficient, B is the thickness of the blocks, V is the volume of aerated concrete blocks.
The calculation result is increased to an integer. This is suitable both for calculating the piecemeal quantity of material and for calculating the volume of blocks for construction.
The volume is calculated using a simple scheme:
- Calculate the volume of 1 block;
- The resulting value is multiplied by the number of blocks required for the building.
As a result, we get 0.2 × 0.3 × 0.6 = 0.036 m3 (volume of gypsum block), after which we calculate the volume of building material for the entire garage with dimensions of 4x6 m 0.036 × 232 = 8.352 m3.
Detailed material calculation
For 1 row of a wall 6 meters long, taking into account the block dimensions of 20/30/60 cm, only 10 pieces are required. To lay 1 row of a 4 m long wall, you will need 7 blocks (rounding up).
The height of the future building affects the required number of rows. Lay the building material around the garage, achieving a wall thickness of about 20 cm. A building with walls 2.4 m high will require laying out 8 rows of material. The last stage is to calculate the total number of blocks.
This will require previously obtained data, the result is:
- A long wall will require laying 80 blocks;
- A short wall will require 56 blocks;
- The wall in which the gate opening is made will require laying 16 blocks.
When calculating the total amount of required material, the number of blocks for a long wall is multiplied by 2. The subsequent calculation is carried out simply - all the numbers are added: 160 + 56 + 16 = 232 blocks. The resulting value needs to be increased to 235 pieces for insurance purposes (accidental breakage of several blocks during transportation is possible). Based on this principle, calculations are made for a garage of any size required for your conditions.
Garage size
A garage can be designed for one or more cars. Usually a garage for one car is built and an open parking space with a canopy is installed next to it. However, recently, two-car garages are being built more and more often. If it is necessary to build a garage for three or more cars, individual projects are used.
To determine the room parameters for one car, it is necessary to take into account the dimensions of the car, as well as the dimensions of all equipment and inventory that will need to be placed next to the car.
The minimum garage size is calculated based on the vehicle parameters and without taking into account the placement of equipment. In this case, 0.5 meters are added to the length, width and height of the car, and thus a minimum size is obtained. However, such small buildings are usually built from lightweight materials. The result is cost-effective portable structures. But solid buildings are erected from aerated concrete, in which everything is provided for comfortable operation.
Dimensions of a garage for 1 car Source drevolog.ru
The standard dimensions of a garage for one car are as follows: 6 meters long, 4 meters wide, 2.3 meters high. This standard is used in the construction of standard garages and satisfies the needs of all car enthusiasts. In any case, for convenient use you need to have a height of about 40 cm above the head of a standing person and 50 cm on all sides from the car to the walls or shelves.
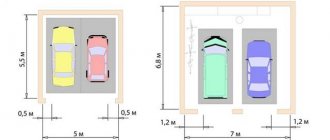
For two cars, calculations are made in the same way. In this case, it is necessary to provide a distance between two cars of at least 1 meter. When designing a double garage, there is often a separate entry for each vehicle. In some cases, a general entrance and one wide gate are provided.
Dimensions of a garage for 2 cars Source moydom.net.ua
Tools and materials needed for work
After creating or purchasing an individual project and calculating building materials, you need to prepare everything necessary for the work.
Tools:
- Hacksaw suitable for cutting aerated concrete;
- Brushes of different sizes;
- Wall chaser;
- Notched trowel suitable for applying glue;
- Trowel;
- Shovels;
- Plumb;
- Rubber mallet;
- Level;
- Dishes for preparing and possibly storing the working solution.
Materials:
- Aerated concrete blocks;
- Coarse sand;
- Cement not lower than grade 400;
- Crushed stone;
- Boards for making formwork;
- Reinforcing mesh;
- Reinforcement (used to create strapping);
- Adhesive intended for aerated concrete blocks.
Attention! In any preparation for construction and the availability of the necessary tools, it is necessary to take into account the timing of the start of garage construction.
It is advisable to start building a structure in warm weather . In addition, possible completion dates for construction work are taken into account. The construction period depends on the qualifications of the master. For experienced specialists, the required time takes on average about 2 months (this period does not include the period of interior finishing of the building).
Insulation of walls and roofing
The roof can be either single-pitch or gable, it all depends on the topography of the site and the characteristics of storm water drainage. The roof is installed as follows:
- We install a reinforced concrete screed on top of the masonry walls, on which we mount wooden floors and roof rafters;
- Be sure to lay a layer of waterproofing - Mauerlat - before installing the wooden rafters.
For aerated concrete, lightweight roofing material - corrugated sheeting or roofing felt - is better suited. If there is a monolithic foundation and reliable reinforcement of the walls, then the roof can be covered with both tiles and slate.
Insulation and waterproofing
The disadvantage of aerated concrete blocks is that they are susceptible to the destructive effects of moisture. Therefore, it is imperative to carry out external wall decoration so that the garage serves you for many years:
- Aerated concrete can be insulated with foam plastic, followed by plastering of the walls, or you can opt for a ventilated façade made of a layer of mineral wool and a protective finish;
- do not choose flammable materials for insulation, and be sure to cover the foam finishing with a layer of plaster over the reinforcing mesh.
If the garage has high-quality ventilation, then internal insulation is not necessary to prevent the appearance of cold bridges. It is enough to simply plaster and paint the walls.
Foundation preparation
Creating a foundation for a garage is the initial stage in the independent construction of an aerated concrete building. To decide what type of foundation to use, you need to analyze several parameters:
- The height of groundwater on the site. If the moisture rises no higher than 2 meters from the soil surface, the soil is dense and homogeneous, then you can use a light strip base, laying it no deeper than 50 cm;
- A monolithic foundation is necessary if the soil on your site is heaving. The reason is that gas blocks are not able to withstand bending loads - in this case they begin to crack and collapse;
- A pile-strip or deep strip foundation will allow you to build a garage with a cellar or inspection pit on soft soil. When using a monolithic base, their installation is impossible.
Work on the foundation is carried out in the following sequence:
- Using pegs and a cord, marking the base of the garage for future construction sites;
- Preparing a foundation pit;
- Creating a sand cushion at the bottom of the trench. After filling the sand, the layer is spilled with water and compacted;
- Installation of reinforcement cage (use a rod 6-8 mm thick);
- Installation of formwork;
- Pouring the formwork with concrete mortar;
- Moistening of poured concrete for 1.5 months.
Sequence of work
The construction of a garage is carried out in a certain sequence:
- construction project, calculation of materials and marking of the territory;
- foundation installation;
- walling;
- roof installation;
- installation of window and door openings;
- gate installation;
- insulation, waterproofing;
- final protective and decorative finish.
Let's look at all the stages in more detail.
Frame installation
Walls made of aerated concrete blocks are laid with a special adhesive composition designed specifically for this material - this composition replaces conventional masonry mortar. It allows you to get perfectly even rows of blocks, the seam between them is about 1 mm, in contrast to cement mortar seams that are more than 3 mm thick.
To increase the strength of the masonry, a special layer of reinforcing material is laid, creating a reinforcing frame right inside the seams. The correct placement of the reinforcement is checked using small rods protruding beyond the boundaries of the masonry. Before starting to lay the blocks, strapping is done. For one-story buildings, wooden frames are made.
We build walls
When laying aerated concrete, ordinary mortar is not used; a special adhesive mixture is required, which ensures smooth and thin seams - from one millimeter. Ordinary cement mortar is used only when laying the first row of garage walls (the ratio of cement and sifted sand is 1 to 3).
The advantages of the adhesive solution are that it reduces heat loss and guarantees high-quality waterproofing of seams.
Sequence of wall construction:
- we lay out the first row, taking into account that the masonry seam is at least one centimeter;
- We start laying from the highest corner. It is easy to check the height of the corners using a water level;
- We begin to lay out the second row of walls on the second day, after the mortar in the first row has set well;
- first we lay out the corners and determine the level of the next row of masonry with a stretched twine;
- every two rows we reinforce with reinforcing mesh, this will ensure better adhesion and stability of the building;
- do not forget about the ventilation holes, which are important to be located at different heights so that there is unhindered air circulation in the room and the removal of excess moisture in the winter is ensured;
- We close the ventilation passages on the outside with mesh, and on the inside with plastic ventilation grilles;
- strapping belts intended for roofing and ceilings can be installed from wood or reinforced concrete;
- do not forget that metal lintel beams must be installed above the gate opening, which will compensate for the weight of the metal gate and evenly distribute the load on the walls;
- It’s not difficult to make a jumper with your own hands from two profile metal corners (width 100 mm). We install the corners along the edges of the block and fasten them with metal strips, you can also fasten them with reinforcement if you have welding, the fastening step is 50 cm;
- the edges of the metal beam on both sides must be embedded in the pier at least 20 cm (calculation for a standard gate width of 2500 cm).
Window openings can also be strengthened with reinforcement or small metal strips.
Inspection hole
It’s not difficult to build a convenient inspection hole if you prepare before work:
- Prepare a hole of the required depth and width - most often 1.8-2 m long, 80 cm wide and 1.5 meters deep are enough;
- Pour and compact a layer of clay onto the bottom, and make a sand cushion 10-15 cm thick on top of it. Cover the resulting layer with rolled roofing felt and make a concrete screed about 10 cm thick on top of it;
- Lay out the walls of the pit from brick, it is advisable to use a material suitable for arranging damp rooms (make masonry half a brick thick);
- A waterproofing layer is created on the walls of the inspection pit using bitumen mastic. Before work, the material must be heated and the walls treated with a roller or wide brush;
- After creating a waterproofing layer, electrical wiring is carried out along the surface of the walls (if necessary) and plastered;
- If desired, the walls are painted with oil paint;
- Place a frame welded from the corners along the upper edge of the pit. Reinforcement or thick wire is welded to it - it is needed to secure this fence into the concrete floor screed;
- Make and attach a cover to the pit; it will save people from accidental falls. Additionally, it will protect the pit from moisture and prevent the loss of small objects in the pit;
- Build a convenient staircase out of brick or wood.
Information on the purpose of the calculator
The online calculator for aerated concrete blocks is designed to perform calculations of the building materials needed for the construction of walls of houses, garages, utility and other premises. The calculations can take into account the dimensions of the building's gables, door and window openings, as well as related materials, such as mortar and masonry mesh.
Be careful when filling out the data, pay special attention to the units of measurement
Aerated concrete blocks are one of the types of cellular concrete, with air pores evenly distributed throughout the volume. The more evenly distributed such pores are, the higher the quality of the concrete itself.
The production of aerated concrete in a factory is a rather complex process. In addition to cement and sand, chemical gas-forming additives are used in production, the amount of which must be calculated with very high accuracy. After all the components are mixed, the whole mass of aerated concrete is poured into special forms, in which it increases in volume due to the release of gases.
The main feature of the production of cellular concrete is the hardening of poured concrete under pressure in special autoclave chambers. This is necessary so that the air pores are distributed evenly throughout the entire volume. The production of high-quality aerated concrete without such chambers is impossible. After gaining the required strength, the entire array is cut into blocks of the required sizes.
Just like other types of blocks, aerated concrete blocks are divided according to density into:
- structural - for the construction of load-bearing walls
- structural and thermal insulation - for the construction of load-bearing walls of low-rise buildings
- thermal insulation - for the construction of self-supporting walls
Thanks to their characteristics, such as light weight, good thermal insulation, ease of mechanical processing, aerated concrete blocks are a very popular building material, and continue to rapidly gain popularity. But do not forget that good thermal insulation of this material is achieved only if all the rules of construction from aerated concrete blocks are observed, such as masonry with special masonry adhesive, additional protection from precipitation, good waterproofing and vapor barrier, as well as correct calculation of the required wall thickness, in depending on the weather conditions of each specific region.
The disadvantages of this material include:
- High fragility
- The need to use special devices for attaching hanging objects to walls
- High water absorption, resulting in an increase in the declared thermal conductivity
- Strong dependence of thermal insulation characteristics on the strength of the blocks
- Using relative characteristics for advertising purposes
Below is a complete list of calculations performed with a brief description of each item. If you have not found the answer to your question, you can contact us using the feedback located in the right block.
The online calculator for calculating aerated concrete blocks is designed to determine the required number of aerated concrete blocks and additional materials for building a house. Also, when calculating online aerated concrete blocks, you can take into account the dimensions of gables, window and door openings. Correctly carried out calculations will allow you to avoid unnecessary costs for the purchase of excess building materials and avoid problems with their shortage during the construction of a house.
Important points when laying aerated concrete
- The vertical edge of the block must also be coated with a solution of aerated concrete adhesive, after which it is distributed over the entire surface, creating a seam no more than 20 mm thick;
- The first row of the block is placed on the mastic, first lubricating the horizontal plane of the material, and then the vertical;
- In order for the glue to better adhere to aerated concrete, the blocks are moistened with plain water;
- The masonry often needs to be checked for level and tension of the cord;
- Possible block distortions must be corrected immediately.
How to build with your own hands - technology
After drawing up the project and purchasing the material, building a garage consists of the following steps:
- Marking the future garage.
- Pouring the foundation. If the soil characteristics allow, then it will be enough to make a foundation up to 0.8 m deep.
- Laying foam blocks after the foundation has hardened.
Blocks must be laid from the corner using a building level, rule and plumb line. The first row is mounted on sealant on the horizontal and vertical sides of the blocks. To better bond the blocks together, they can be sprayed with water. To strengthen the walls, you can additionally reinforce foam blocks by cutting holes for reinforcement in them with a grinder, or laying a mesh every 3-4 rows. - Installation of doors, windows and gates.
- Roof installation.
- Floor screed with concrete.
- Wall finishing with plaster or facade paint.
Setting up a cellar in the garage
A spacious cellar will allow you to store fresh vegetables and preserves during the winter. It is advisable that the construction of the cellar be planned before the construction of the garage.
Pouring the base
First you need to prepare the base for the cellar:
- Prepare a foundation pit, choose its dimensions taking into account your needs;
- Place medium-fraction crushed stone at the bottom of the pit in a layer of 3 cm; it is permissible to replace it with broken bricks;
- A 5-8 cm thick screed is poured on top of this pillow. Allow the concrete to harden before continuing work;
- Spread roofing felt in 2 layers on the poured screed. It is necessary to position it so that the material protrudes beyond the walls by 15 cm.
Cellar ceiling and walls
The sequence of creating basement walls depends on the material chosen for them. Brickwork is made using simple technology; it is only important that the walls are positioned vertically. Also, do not forget to sand the masonry seams well.
It’s even easier to build basement walls using monolithic concrete. The work is carried out in 3 stages:
- Use strong and even boards to knock down the formwork;
- Hammer pipes or steel rods around the perimeter of the base and tie the formwork to them;
- Mix the solution and fill the formwork.
To save effort and time, it is advisable to purchase ready-made reinforced concrete slabs and use them to build the walls of the cellar. All concrete elements must be treated with resin and then insulated. The finishing is done at the request of the garage owner; it is most convenient to use lining for this.
Waterproofing
Without protecting your cellar from moisture, you will have many problems. The room is located underground, for this reason moisture protection should be more effective than that of above-ground buildings.
For good waterproofing of walls, it is enough to simply treat their outer surface with hot bitumen. If there is too much moisture in the area, then it is advisable to cover the walls with roofing felt in addition to bitumen. A water castle is created on top of it from well-compacted clay. It is advisable to find fatty clay for this purpose.
Ventilation
Good air exchange in the basement is of great importance. Without it, everything you want to save will spoil very quickly.
The easiest way is to do natural ventilation - this method does not require a lot of labor and financial costs. First, prepare ventilation or plastic sewer pipes to create exhaust and supply openings.
Punch a hole under the ceiling and route the exhaust pipe into it. The upper edge of the hood should be placed 40-50 cm above the garage roof; warm and humid air from the cellar will be removed through it.
Another hole is made 7-10 cm from the floor surface and the supply pipe is led into it. She is also taken outside 30 cm above the soil surface.
Metal mesh is placed on the pipes to protect them from debris. In addition, they will block the path to the basement for insects and rodents. To regulate the air flow, flaps are installed on the ventilation holes.
The disadvantage of natural ventilation is that this design can only work effectively during the cold period. In summer, the temperature outside and indoors is the same, and ventilation functions poorly. For this reason, it is more rational to use forced ventilation.
At the end of the basement construction, you will only need to make a manhole cover and a sturdy ladder. Racks and shelves are made according to the convenience of the owner. The cellar must be disinfected and thoroughly dried before use. You can use an inexpensive way to dry the cellar for this - burn 10 tablets of dry alcohol in it.
Construction technology from scratch
Without a project, it is impossible to build a garage from aerated concrete blocks. Therefore, drawings are created, all dimensions are calculated, and the shape of the roof is selected. Simply put, the project must contain all the little things related to the construction of the building. And also do not forget about the estimate containing prices for glue, cement, crushed stone, sand and other materials. This will help avoid overspending.
In order not to buy extra material, the total area of the walls is calculated and the entrance opening and window openings are subtracted. For example: the total area of the walls of a garage with parameters 8*5*3 m will be 78 sq. m. Now the entrance opening (2*3 m) and at least one window (1*1 m) are subtracted. The result will be 71 square meters. material. The resulting number is divided by the side area of the block and you can find out exactly how much you need to buy. However, it is recommended to add a few percent for defects.
Foundation structure
After drawing up the project and calculating financial costs, the material is purchased. The first step is to build the foundation for the building. If the soil does not contain a high level of groundwater, then, as a rule, a strip type is chosen. Otherwise, the foundation for a garage made of gas silicate blocks is done as follows:
- First, the perimeter of the future structure is marked. Pegs are mounted in the corners and the cord is pulled.
- Take a shovel and dig a ditch 50 cm wide and 70-80 cm deep.
- A cushion of sand and crushed stone is laid at the bottom of the trench, layers of 10 cm each. Then the layer is spilled with water and compacted.
- A reinforcing frame is made from reinforcement with a diameter of 8 mm. Along the entire length of the ditch, closer to the walls, rods are installed parallel to each other in increments of 50 cm. They are connected by jumpers. Then long pieces of reinforcement are taken and laid along the pit, secured to the installed rods. The second and third tier are made in this way. Several elements can be connected using wire and hook or welding.
- Now the formwork is assembled from panels, timber and boards. The structure should protrude 10-15 cm above the ground. This will protect the aerated blocks from water flows during rain. It is preferable to attach plastic film to the inner walls of the formwork.
- Concrete is created from sand, crushed stone of medium fraction M400 and water. The proportions are standard 1 to 4. The solution is brought to a semi-liquid state. If it is thick, it will not be able to penetrate into all the voids, and if it is too liquid, it will seep into the soil. For greater effect, a detergent or plasticizer is added to the mixture to provide viscosity.
The mixture is poured to the edges of the formwork sides and leveled with a trowel. The foundation for a garage made of gas silicate blocks will dry out only after 30 days, and during this time it is periodically spilled with water. If you do not water, the base will stop absorbing moisture and cracks will appear.
Walling
Proper laying of aerated concrete walls will prevent deformation and the formation of cracks. Often, novice builders neglect seemingly unnecessary little things; as a result, defects appear on the garage box. Procedure:
- Two layers of built-up roll waterproofing are laid on the dried surface of the foundation. The first one is glued to the base, and the second one is glued to the insulator itself. This will protect the gas silicate from absorbing moisture.
- Metal rods are installed at the corners to install the control thread. As the walls grow, the cord gradually rises. It is located at the level of the top edge of the block. A 2 cm layer of cement mortar is laid on the surface of the roofing material, and gas silicate is installed on it. Irregularities are corrected by tapping with a rubber mallet. This is how the first row is made, which must be extremely even, because it will form the entire box.
- Next, the gas blocks will be laid in the corners using special glue. One is installed in one direction of the wall, and the second in the other. This will be followed by ligation of the vertical suture. This is how all corners are made.
- Then the 5th row is reinforced with thin metal wire. It is enough to place 3 pieces. along the surface of the wall being built. Its thickness should not exceed 3 mm. Reinforcement will follow after another 5 rows and so on until the box is made.
- Metal guides are installed at the openings. When the masonry reaches the surface of the gate or window opening, a lintel is mounted on top of the blocks. It needs to be strong as there will be some pressure on it. If thin-walled metal is used, the product will bend.
To get around the unpleasant situation when the seams between the rows look like sea waves, it is recommended to control the evenness of each stacked block. The cord will help adjust the gas silicate in a horizontal position and control the height between the materials, and the building level will ensure vertical evenness on the sides. However, with crooked seams, deformation of the box may occur. Therefore, we must try to build the walls evenly.
Attention! After several rows, the inner corners of the box are periodically checked diagonally using a tape measure. From the corner of one wall, the length is measured to the opposite corner. This way you can view the symmetry of the structure.
Reinforced belt
The corners of the box may become deformed over time. In addition, the rafters should not be installed on aerated concrete, since it is not durable and the reliability of fixing the fasteners will become questionable. For these purposes , a reinforced belt is made that will hold the corners of the garage , preventing them from moving, and will serve as the basis for the construction of the roof:
- First of all, the formwork is constructed. It is enough to take plywood sheets and fasten them to the wall. The height of the reinforced belt is 20-25 cm, therefore, the formwork is also constructed according to these parameters. It is important to make the upper edges of the product even and symmetrical to each other - they will form the surface of the concrete structure. To prevent the sides of the formwork from being squeezed out, they are secured with wire every 100 cm closer to the top.
- Now a frame of rods is constructed inside the formwork. The technology is similar to foundation reinforcement. To adhere the entire belt to the wall surface, the reinforcement is driven into blocks at intervals of 60 cm. Jumpers are attached and longitudinal rods are laid. There should be 2 tiers.
- When mixing concrete, expanded clay is added to the mixture. The material is porous and lightweight. The solution is created of medium thickness. It is advisable to pour concrete into the formwork at one time. Then the product will turn out monolithic.
A reinforced expanded clay belt will be lightweight and will not push through aerated concrete blocks. It will be an excellent basis for a rafter system.
Roof structure
Another difficult stage is installing the roof. The car enthusiast must decide on the shape of the structure: single-slope, gable or hip. Typically, garages are equipped with single or double slope options; they are cheaper and quick to construct. Construction process:
- Before pouring the reinforced belt, you should select the type of rafters. Will it be metal or wood? If the choice fell on iron, then before pouring the box frame, the corners are mounted. The rafters will be welded to them. And for wooden beams you will have to build a Mauerlat.
- The strapping beam is fixed to the surface of the concrete belt with anchors. The distance between the rafters is 80 cm.
- All frame elements are secured with metal corners and screws.
- The rafter leg should extend beyond the aerated concrete box by at least 20 cm.
- The skeleton is sheathed inside and outside with boards 2 cm thick.
- Mineral wool or polystyrene foam is placed in the cells between the rafters.
- A sheathing is constructed from bars.
- All that remains is to choose the type of roofing: slate, ondulin or metal tiles.
In principle, small-sized roofing structures are made very quickly. At the end, the edges of the rafter legs are cut at an angle of 90 degrees. Next, boxes are constructed under the roof.
Finishing work
The final stage of building a garage from aerated concrete with your own hands will be the installation of garage doors, window installation, insulation and finishing. Channels are installed around the perimeter of the opening. The sashes are purchased or made independently. They are attached to hinges that were previously welded to the supports.
Then a plastic or glass window is installed. The first option is more convenient to use. It is enough to disassemble the window and screw the frame along the edges of the opening. All cracks are sealed with polyurethane foam and then plastered. Then the plastic window is assembled to its previous state.
The outdoor walls of the garage must be insulated with foam plastic. The material is secured with special umbrellas and glue. A painting mesh is attached to the surface of the insulation. A primary layer of putty is made, and then a secondary one. Irregularities are cleaned off with a trowel. At the end, the finished garage walls made of aerated blocks are painted in a suitable color. If possible, the room is equipped with an inspection hole.
Roof
For garages, shed roofs are mainly made. This is the simplest roofing design, and it is advisable for novice craftsmen to start with it.
The walls are laid with a slope towards the back side of the building. Per linear meter of the wall you need to make it lower by 5 cm. This is simple to implement: aerated concrete is easily trimmed, sawed and cut in any direction with a regular saw.
Types of roofs
Structurally, there are several types of roofs, depending on the number of slopes they can be:
- Flat;
- Pitched.
A roof with a flat surface requires the creation of an elastic continuous layer of bituminous materials - the roof must withstand temperature changes. This design uses the walls of the building as support. The ceiling is made by screeding on pre-laid beams or slabs.
A pitched roof is formed by surfaces located at an angle of 10-60 degrees to each other, they rest on the rafters.
There are several types of roofs for garages:
- With one ramp.
In this design, the slope rests on load-bearing walls. The front side of the building is made higher than the back side so that there is a slope and moisture from the roof drains from behind the garage. The height difference is calculated using the formula - H = tg α xs, in which s is taken as the width of the building, tg α is the tangent of the angle, it is calculated on a calculator or data is obtained from Bradis tables. The slope of the roof depends on the climate in your area - wind speed and the amount of snow falling; - With two slopes.
This design is often used in the construction of garages; it is made both with and without ceilings. The roof must be installed on a mauerlat - a horizontal perimeter frame made of wooden beams. It reliably connects the truss structure and the walls of the building; - Hip roof.
Rarely used in the construction of garages. It is mainly used so that the garage does not stand out from the general style of the building. The rafters are not connected using a ridge run, because the roof is formed by 4 identical slopes. - Attic.
Makes it possible to arrange a room in the attic, used at the discretion of the owner. The difference with a regular attic is the height of the ceiling - it exceeds 1.5 meters. This design is expensive because it is necessary to create heat, hydro- and vapor barrier layers. In addition, you will have to install unusual double-glazed windows. The rafter pair is made with a sharp break, which reduces the strength of the roof.
Roofing materials
You need to choose a suitable slope for a pitched roof taking into account:
- The climate in the area where the garage is being built. Roofs with a slope of up to 5-7 degrees cannot be used in snowy regions, but they are convenient in places with strong winds. Roofs with slopes of 20-25 degrees should not be built over garages that stand separately on the site in places with moderate winds. This roof can only be used for a garage attached to the house.
- Materials for slopes with different slopes:
- For slopes of no more than 15 degrees, roll materials are used;
- For slopes of no more than 10 degrees, roll materials are used, laying them in 2 layers;
- For slopes of 17-20 degrees, slate or thin metal is laid;
- For slopes of more than 25 degrees, metal tiles or profiled sheets are laid.
- The design of the surrounding area and architectural features require a roof of the same shape and color as the buildings located nearby.
The calculation of the roof area is carried out taking into account the installation of overhangs that protect the walls from rain moisture.
Building a roof for a garage
When creating a roof, you need to make several required elements:
- Rafters. Necessary as a basis for installation of the remaining components of the roof; all loads are transferred to them;
- Lathing. It is necessary for the installation of roofing; it is filled at intervals of a certain size;
- Heat, steam and waterproofing materials. Necessary to protect the room from moisture and cold;
- Finish coating. Its installation is the last stage of roofing;
If you are building a room with a pitched roof, then lay identical logs or mauerlats made of timber at the upper ends of the wall. They are necessary to support the elements of the rafter system. You need to attach the Mauerlat to the walls with anchors to the wall.
The main elements of the rafter system are the rafters, they are:
- Suspended (rest against the Mauerlat only with the edges);
- Layered (supported not only by the edges, but also by special intermediate elements).
Video description
Houses with attached garages:
It is advisable to have an attached garage in a cottage project. However, it is possible to add a room for a car to an already built house. To do this, a lightweight foundation is built next to the façade, which according to the design has no windows.
Houses with attached garages are designed according to certain rules. The garage extension in most cases is adjacent to the right or left facade of the cottage. Sometimes, when a house is designed for a narrow plot, the garage can become an element of the main facade. Often the entrance to the garage and the entrance to the house are combined by a single porch with a common canopy. In many projects, an internal entrance to the garage is planned from the house. For maximum security, the entrance to the garage from the residential part of the building is decorated with a protective buffer zone. This could be a walk-through boiler room or pantry, or simply a separation vestibule.
It is very important to take into account building codes in the project. It is mandatory to maintain a distance of 5 meters from the attached garage to the neighboring area. There must be at least 2.5 meters from the entrance to the garage to the nearest window or door. There must be at least 2 meters from the ridge of the garage roof to the window of the house.
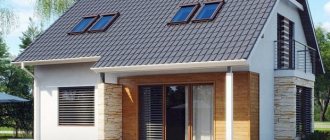
Option for a house project with an attached garage Source ukrasheniyedoma.com
Sheathing technology
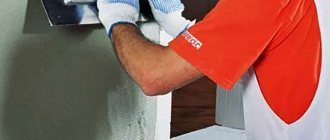
The interior surfaces of the garage are finished when the plastering work is completed. What to sheathe and how to do it is decided by the owner, taking into account his preferences. Walls made of aerated concrete must be protected from external influences . Do not believe people who claim that this material does not need to be sheathed - this is a lie. Rain in summer, snow in winter and gusts of wind destroy the structure of aerated concrete. For cladding, the surface is first plastered - the coating is applied by attaching a special mesh to the wall.
You can protect the material by covering it with brickwork. But be sure to leave an air gap - the air permeability of gypsum concrete and brick is very different. If the materials are in close contact, moisture vapor will be unable to quickly escape through the brick. They will begin to flow along a simpler route - through aerated concrete and collect in the garage.
The walls of the garage are sometimes lined with thermal panels; this material allows you not to spend money on additional thermal insulation of the building, while simultaneously improving the appearance of the room. Thermal panels are made with imitation of natural stone or brick. Often a frame is created from a metal profile, followed by finishing with sheet facing materials.
Is it much cheaper to make an attic floor instead of a full second floor?
To answer this question, we will take one of the popular projects from our catalog 155-001-L. Below is a plan of the second floor, the height of the walls of which will vary at the eaves of the roof (from 0.5 m to 3.0 m).
Let's consider four options for the height of the attic floor:
- Full floor;
- Attic floor, wall height at the eaves 500 mm;
- Attic floor, wall height at the eaves 1000 mm;
- Attic floor, wall height at the eaves 1500 mm;
- Attic floor, wall height at the eaves 2000 mm;
When calculating, we did not take into account the internal partitions; the external walls are made of foam blocks 400 mm thick.
| Height of the wall at the roof overhang | Masonry volume (foam block 400 mm) | Facade area |
| 500 mm | 22.51 m3 | 56.28 m2 |
| 1000 mm | 29.14 m3 | 72.85 m2 |
| 1500 mm | 37.86 m3 | 94.64 m2 |
| 2000 mm | 45.66 m3 | 114.14 m2 |
| 3000 mm (full floor) | 72.84 m3 | 182.10 m2 |
Approximate prices for the specified types of work and materials (the cost of work and materials may vary significantly and depends on the region of construction)
Based on the data provided, you can decide whether to build a house with an attic, and if so, what minimum height of the wall at the roof overhang to choose.
Gates
For a garage, gates are selected taking into account the dimensions of the building and the free space near it. If you have a large area, it is convenient and inexpensive to install swing gates. If there is little space, it is better to buy roller, roller shutter or overhead sectional doors.
Swing
Swing gates have been installed for several decades; they are good for many reasons:
- Simplicity of design. The gate is made of 2 leaves and a frame welded from a reliable channel. There are no complex mechanisms, so the device requires almost no maintenance;
- Reliability. They can serve for decades without much maintenance or repair. But the quality of the materials used matters. The strength of the hinges is especially important; they are subject to high loads;
- Any gate size. There are no restrictions on width and height for this design. Swing gates can be installed in an opening of any size; they are made individually;
- Possibility of installing a door. A door can be installed in the door leaf, this creates additional comfort. In addition, in winter heat loss is significantly reduced;
- Low price;
Sectional
Pros:
- Sectional doors are easy to use, they are easy to close or open, they do not have heavy leaves like swing systems;
- Space saving. When opened, the gate moves along the ceiling; it does not require additional space for the leaves. There are models in which sections move along the walls. This mechanism is best suited for wide gate openings;
- Appearance. To finish such gates, different finishing materials are used - from natural wood to metal with different coatings;
- Thermal insulation. Often such gates are made from 40 mm thick sandwich panels installed tightly in guides. This allows you to keep the room warm;
- Suitable for installation in large openings. There are designs that are used in openings up to 7 m wide and up to 6 m high.
Minuses:
- Difficult to install. It is not easy to install this system yourself; for this reason, you will have to hire professionals. During use, you need to monitor the condition of the system and maintain it regularly to avoid breakdowns;
- Attentiveness to the quality of ingredients. Many times there have been cases in which sectional doors, purchased cheaply, broke 1-2 years after installation. Wear of the mechanism, the spread of corrosion processes are the most common troubles with inexpensive products;
- Poor resistance to burglary. This structure is easier to open than sliding or swing structures;
- Expensive. A high-quality product will be expensive, but it is advisable not to save too much - cheap products will not provide you with reliable protection.
Roller shutters
When choosing a suitable garage door, you need to pay attention to this design.
Main advantages:
- Compactness. The gate is made of lamellas connected into one leaf and a shaft placed above the opening. They are easy to place in any garage; this does not require free space along the walls and on the ceiling, it is only important to find 30-40 cm of space above the opening;
- Versatility. It is permissible to install the drive shaft of roller shutter gates both outside and inside the premises. When placed outside, the shaft is installed in a closed box that prevents access to the mechanism;
- Simple automation. It is acceptable to install automatic devices to increase comfort, but this will be expensive;
- Diversity. During manufacturing, gates are painted in different colors, and copies of the appearance of stone, wood and other materials are created on the surface of the canvas. There are options with small plastic windows that allow you to illuminate the garage without windows;
- Many sizes. Gates are made up to 7 m wide and up to 6 m high.
The cost of these products depends on the area of the canvas. Among the disadvantages, we should mention poor resistance to burglary. It is easier to pull out the lock on this gate than on other designs. For this reason, it is advisable to use them in a protected area.
Options for aerated concrete garage projects
Aerated concrete blocks are a universal building material from which you can build a warm and reliable garage, complemented by a full-fledged utility block. Often, aerated concrete garages are built with terraces, summer kitchens or bathhouses. In addition, this material makes it easy to construct garages attached to the house.
Garage project with utility room
Below is a project for the simplest garage for one car. The building is complemented by a convenient utility room. Such a garage can be built as a separate structure. But it can be attached to the house. The second option involves an internal entrance to the house from the garage itself and from the utility room. When choosing such a project, you should pay attention to the fact that the utility room is designed separately from the garage, with a remote entrance. It can be used as a boiler room, pantry or storage for garden tools. At the same time, the parameters of the car room allow you to install racks along the walls on which you can place all the tools for servicing the car.
Garage with separate utility room Source foamin.ru
Spacious garage project
The next project is the basis for a car room that is as easy to build as possible. There is no separate storage, but there is enough free space to accommodate everything you need. This type of garage is ideal for motorists who spend a lot of time in the garage. Free space can be equipped with comfortable furniture.
Spacious garage for one car Source drevolog.ru
Two car garage project
The following project is designed to accommodate two cars. There is a utility block here, which is connected to the car room by an internal entrance. In addition, the utility room in this development is a walk-through, and if you attach such a garage to the house, you can turn it into an entrance to the house. The drawing shows a carport for one car to the left of the utility room. It can be located to the right of the building or just before entering the garage. In any case, the canopy increases the functionality of the entire structure.
Garage for two cars with utility room Source tr.decorexpro.com
Project of a garage with a bathhouse
Aerated concrete blocks allow the construction of buildings of any complexity. Therefore, some homeowners, having enough space on their site and a little additional funds, build not just garages, but entire multifunctional complexes from aerated concrete. The garage can be combined with a summer kitchen, a terrace for relaxation or, as in this example, with a bathhouse.
In the presented version, the garage room along with the utility unit occupies the right wing of the building. In addition to the bathhouse, the building will include a boiler room. It is worth paying attention to the fact that in this project the exit from the garage leads through the rest room of the bathhouse. For more convenient use and increased safety of the bathhouse part of the building, it is better to consider an exit to the street through the boiler room, and not to create a door from the garage to the recreation room at all.
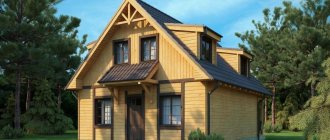
Garage with bath complex Source medike.ru
Project of a cottage with an attached garage
The following example demonstrates the most common design option for an attached garage with an internal entrance. The house is connected to the car room through a buffer zone, the role of which in this case is played by a compact laundry room. Instead, a boiler room or simply a walk-through pantry can be installed. For maximum protection of the residential part of the house, the exit from the garage is also separated by a hallway. If separating buffer rooms are not designed, then car odors and fumes from flammable substances, which are often stored next to the car, will penetrate into living rooms.
The garage must be reliably isolated from the main room Source tuzhizhijia.com
Foundation - reliable support and integrity
We decide on the type of foundation.
A strip foundation is the most popular and reliable foundation option for any “motorhome”, garage with a basement or semi-basement, a proven type of foundation for building two-story car garages. If we are talking about stable soil, then due to the lightness of aerated concrete, it is enough to lay a shallow strip base.
For simple, one-story garages made of gas silicate blocks, the optimal, inexpensive option would be a columnar type of foundation.
The base of the foundations (columns) is laid at the same depth as the strip foundation - to the depth of soil freezing in the given area.
For those car owners who have an area with unstable, heaving soil for a garage, the depth of freezing is not important; they need to get to a layer of solid soil.
In this case, the optimal “price-quality” solution to the problem is a pile foundation.
A distinctive feature of this type of foundation is the presence of piles extending several meters into the ground, on which the visible part of the garage rests. It is this underground part of the base that protects the entire structure from seasonal soil fluctuations and neutralizes the destructive effects of heaving soil.
On the surface, piles are connected in various ways, forming hybrid types of foundations. The most common hybrid option is a pile-grillage foundation.
Inspection hole
The presence of an inspection pit in the garage allows you to comfortably carry out the necessary inspections and repairs for your car. Essentially, this is your own car service in a garage.
At the stage of designing a garage and drawing up working diagrams, it is necessary to clearly define the design features of the inspection pit. GOSTs do not regulate standard dimensions, but there are general recommendations taking into account the dimensions of the car and the height of the car owner, based on which an individual project is obtained.
Read more about how to waterproof a viewing hole here.
The first stage is design
The first stage is to create a personal representation of the project. You form the main characteristics of the future building and then choose a plan. When making projects out of brick, you need to consider the following points:
- Size (its area);
- Size of the land plot (construction is planned on an existing land plot, or the land will have to be purchased);
- Additional buildings (additional veranda, garage, sauna, attic or swimming pool);
- Number of rooms (how exactly the functional space will be divided);
- Type of water supply (is there a central water supply in the area or is there a need for a well on the site);
- Heating (to install a boiler for heating and water heating, you need to allocate a room for the boiler room);
- Sewerage (is it possible to connect to a centralized sewerage system or is your own system required);
- Location (distance from city limits or highway).
- Order a plan or do it yourself?
There is always the opportunity to develop a plan yourself. But you need to understand that this requires at least basic knowledge in construction. This will cost much less, but you need to be able to correctly calculate the load, the consumption of building materials, understand the difference between different categories of building materials, take into account the electricity supply, water supply, sewerage, etc. in the plan. Building a house with your own hands will not be easy; for this you need to have:
- Construction knowledge;
- Have patience;
- Be able to work independently on a construction site;
- Distinguish between building materials according to their properties and characteristics;
- Know the principles of masonry and have certain work skills.
On the other hand, projects of one-story brick houses today can be ordered in a standard form. Such brick house designs are much cheaper compared to a unique project. If you need an original building, then carefully consider all the necessary features of the future house, for example, whether you need a brick building with an attic, the number of rooms or the size and type of garage.
Difficulties and errors
Difficulties and errors during construction include:
Purchase of low-quality material (without marking, license or quality certificate) - aerated blocks, cement, glue, fittings, waterproofing, fasteners, etc.- Incorrectly drawn up project, without taking into account groundwater, refusal of ventilation, drainage system, insulation and communications. To draw up a schematic construction plan, it is better to turn to professionals.
- Using low density blocks (very large cells). The density value D should be as high as possible, especially for structural walls.
- Refusal to comply with technological rules for the construction of walls, which relate to digging a foundation pit for a building, pouring the foundation, backfilling cavities, installing walls, laying the roof, as well as the sequence of actions performed.
- Operation at temperatures below +5 °C. Maintaining temperature conditions is an important point in construction, according to technology.
- Construction of walls immediately after pouring the foundation. You need to know that you need to lay the walls on the foundation only 12 months after it is ready.
- Wrong type of foundation. The garage must be built only on a monolithic foundation.
The color of the block is also of great importance . It has a light gray tint. If it is yellowish in color, it means that the technology was violated during its manufacture, and more sand was added than normal - this will indicate that the material has lost its strength qualities, and there is no point in building a garage from it.
When purchasing aerated concrete products, you must have proof of quality in your hands in the form of a certificate, markings and product line number from the manufacturer.