I recently renovated my kitchen. I decided to assemble the furniture myself. Two factors prompted me to assemble furniture myself. The first is the price tag for assembly: 18 rubles. The second is the proverb: “If you want something done well, do it yourself!”
There is nothing complicated in assembling furniture; there are, so to speak, nuances... One of which I will try to describe in this part. In this part I want to tell you how to install the front on a box yourself. It seems nothing complicated... But in fact, this is not the easiest job.
We take a thin drill and drill 4 through holes in the box.
To install the facade we need a four-hinged hinge. This is the most common type of loop. And since we are talking about updating the kitchen set, we will consider the option of installing a hinge with a built-in closer.
There is nothing complicated about installing a furniture hinge. But immediately before installation, you need to have an idea of how this is done, so as not to spoil the new facade.
Adjusting the hinges
After we have installed the hinges and hung the facades, we need to adjust the gaps so that the doors do not cling to each other.
The design of the hinges with a closer allows for horizontal, height and depth adjustments.
First, you need to visually determine the unevenness of the facade in relation to the body and whether the gap is even in relation to the adjacent door.
"Vertical adjustment"
We loosen the hinge screws, align the door and tighten it again. (Fig.1)
"Depth adjustment"
That is, we adjust the gap between the body and the facade. We loosen the eccentric on the hinge arm and adjust it back and forth, then tighten it back. (Fig.2)
"Horizontal adjustment"
If the door is skewed, then using the adjusting screw we can adjust the position of the sash by turning it in different directions. (Fig.3)
To adjust, you will need a little patience, and you will achieve smooth and smooth closing and opening of your facades.
Types of kitchen facades
The front panels of the kitchen set are made of solid wood, laminated chipboard (chipboard), MDF, glass, aluminum or plastic.
Door Style for Kitchen Cabinets
Chipboard facade
For facades, laminated chipboard is used, both with
the sides of which are covered with durable decorative film. This option for decorating the front elements of the kitchen is considered the cheapest, due to the comparative ease of processing and the affordable price of the material.
Laminated chipboard comes in different colors, textures, imitates valuable types of wood, artificial and natural stone. Laminated decorative coating is not destroyed by household detergents and is relatively easy to clean.
Wood particle board for kitchen doors
However, in addition to the strengths, there are many weaknesses:
- It is impossible to make laminated chipboard facades in relief, which is why the kitchen interior turns out monotonously flat.
- Contact with moisture, even insignificant, over time leads to swelling of the slab and after two to three years the deformation of the elements of the set becomes very noticeable. The edges peel off at the ends and the aluminum linings shift.
- Proximity to the oven also negatively affects the thermoplastic adhesive of chipboard and plastic edging.
It is quite easy to make folding structures like a book facade from it, but it will not be possible to make any curved elements. Despite the fact that this material is currently considered the cheapest, it is not as popular as MDF.
MDF facade
MDF is a modified analogue of fibreboard (fibreboard). As a binder for wood fibers, natural raw materials are used - lignin, which is also of plant origin.
MDF kitchen drawer doors
Advantages:
- MDF is comparable in strength to solid wood, but much cheaper.
- It tolerates contact with moisture better than chipboard.
- Resistant to temperature fluctuations.
- It can be easily processed, including milling, which makes it possible to produce radius elements and relief surfaces.
The main disadvantage of MDF facades is the high price, when compared with laminated chipboard, the difference is approximately two times.
Solid wood facade
The most expensive option available among modern furniture. Most often, valuable hard wood species that are resistant to variable humidity are used: oak, ash, maple, walnut, mahogany, acacia.
Doors made of natural wood
Advantages:
- Solid wood facades are more durable than similar ones made from wood derivatives (chipboard, MDF). The service life (at least 30 years) depends on the material used, the strength of the coating and operating conditions.
- Made from natural raw materials, without the use of polymer adhesives. Often this advantage is offset by dyes, but the harm from them is significantly lower than from coating MDF, laminated chipboard or plastic linings.
- Classic wooden facades look original in any interior, creating an atmosphere of warmth and comfort.
What are the advantages of homemade headsets
Why are purchased options not suitable for everyone?
- There are kitchens of non-standard sizes; installing ready-made furniture in them is very difficult, and sometimes impossible. Remaking furniture to new sizes is a long and thankless task.
- Every housewife wants to have a unique set of furniture, tailored to her personal needs and desires. This is due not only to design preferences, but also to physiological characteristics, habits and traditions.
- Kitchen sets even in the cheapest segment are only relatively inexpensive. Not everyone can afford to buy them due to their difficult financial situation.
The factory-made set you like may not fit into the dimensions of the kitchen
There is only one way out - to make a kitchen set with your own hands. The advantages of this solution are obvious: the dimensions of the product will exactly correspond to the parameters of the kitchen, and such pleasure will cost several times less. Let’s say right away that for this you need to have not only desire, but also professional skills, as well as a full set of special tools.
Instructions for mounting on a mounting rail
If necessary, level the walls and corners. The latter should be clearly below 900. Different materials are used to level the walls - putty, plywood, drywall, etc.
Required Tools
To fasten kitchen furniture we need a minimum set of tools:
- perforator;
- building level;
- roulette;
- pencil or marker;
- dowel-nails, self-tapping screws;
- wrench;
- set of drills for wood and concrete;
- clamp;
- screwdriver;
- hammer;
- fastening accessories (depending on the chosen installation method): screws, rails, canopies, corners, mounting “ears”, etc.
Determining the hanging height
The height is selected individually depending on the height of family members. If we take into account the standard parameters, then the average location level should start at about 130-155 cm from the floor.
Making markings on the wall
Having determined the height of the mounted modules, you can begin to apply markings. Using a building level, it is necessary to draw horizontally the upper and lower boundaries of the location of the modules, starting from the corner. The upper level is determined by the height of the mounted headset modules. Depending on the chosen fastening method, the location for fastening is marked.
The mounting rail is located 3-4 cm below the top edge of the cabinets.
Installing fasteners
Holes are made at the fastening points with a hammer drill and fasteners are installed depending on the chosen method.
If the wall crumbles at the drilling site, then start with a thinner drill and only then use a thick one of the required diameter.
Decoration
At the end of the work, you need to secure the handles to the slats and doors.
There are quite a lot of paint options on the market, but not every composition is suitable for treating facades.
How to transform an old set
When the furniture has lost its visual appeal, but is still strong, without defects or breakages, you can decoratively update old facades without replacing them.
The film will decorate the facade of the kitchen.
- Pasting with film is the most common option for updating old furniture. To perform the work efficiently, the facades must be dismantled, washed, treated with degreasers and dried well, and then a film must be applied to the surface. It is important to do this correctly, otherwise bubbles under the film, distortion, and sloppy joints on visible surfaces will give a sloppy appearance.
- Old trims and doors can be painted. Preparation for work is the same as in the previous version. The paint must match the material to which it is applied, and its selection must be approached carefully. Solid wood can be varnished.
A spray bottle will help you quickly paint facades.
Design and drawing development
Before you take on cabinet drawings, you need to understand how to take measurements correctly. The niche in which you plan to install a wardrobe will not always have the correct geometric shape. That is why measurements in a niche must be carried out according to the following rules:
- first, measurements are taken along the back wall: at the top, at the middle level, at the bottom;
- then we also measure the “front part” with an indentation;
- height measurement also occurs in three positions from the “rear” and from the “front”.
Installing a built-in wardrobe without such measurements can lead to the fact that the body, made without taking into account errors and differences, either will not fit, or when trying to assemble the structure, serious gaps will be discovered. It will be a shame if the cut shelf turns out to be smaller than the required size and simply falls through. Before installing, carefully calculate all errors in order to leave allowance for installation. Sometimes it happens that the end drawing of the shelves resembles a trapezoid rather than the expected rectangle. It all depends on the quality of the walls, the density of the plaster on the inner corners of the niche.
Next we move on to the drawing. If you do not have drawing skills, it is better to contact a designer. Based on your data and wishes regarding the material, they will make a drawing of your future wardrobe in a niche. In such work, you need to remember to take into account the thickness of the material, the edges, if you want to thoroughly cover the cut points, and the margin for the mechanism of the compartment itself, which also needs to be about 10 cm.
Having detailed diagrams on hand, you can be sure that the manufacture of cabinet parts will be more accurate. Allowances left when taking into account wall errors will make the installation more accurate.
Now, as for the design of the future cabinet: without much experience in drawing up drawings and installation, give up complex radial facade designs. Here you need not just skills, but good professional experience in order to calculate and then competently assemble such a structure. Limit yourself to a simpler cabinet option that you are guaranteed to be able to control during assembly. Order all decorative elements strictly in accordance with the drawing.
What about drywall?
For various reasons, fastening can be done on a plasterboard structure. The material is very fragile and therefore requires special installation technology. Here are a few basic points that are important to know when working with this material.
- Drywall has its own fasteners - butterfly dowels (pictured below).
- The cabinets are hung on a special strip, which is attached to as large an area as possible to ensure even distribution of the load.
- It is better to strengthen the fastening with anchor bolts.
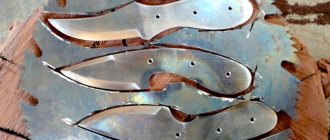
Production of solid facades
Solid front panels for the kitchen are made either from furniture board (chipboard) or wood. With slab materials, everything is simple: you need to measure the openings of the kitchen cabinets and order blanks of the appropriate size. Chipboard cutting companies will glue the edges for an additional fee; if you wish, you can perform this operation yourself.
At home, you will need an iron, a sharp knife, a block of felt, and a paper edge (the plastic edge will not stick with the iron). The edge strip is cut along the length of the side with a margin, applied and glued by running a hot iron along it. While the edge has not cooled down, pressing it, smooth it with a felt block, then cut it from the sides and ends with a knife, then go through the edges with a fine abrasive.
Solid wooden facades
For successful work, you will need a dry edged board (it is better if the material is calibrated in thickness, otherwise you will need a jointer with a thicknesser), PVA glue, stain, and varnish. Tools also needed:
Some more useful information
- Do you want to turn a minimalist kitchen with solid fronts into a classic one? This is possible by gluing moldings or carved parts onto them and then painting them following our instructions.
Also, before painting, the headset and wall cabinets can be supplemented with shaped brackets (they can be purchased ready-made or cut out yourself), and the base can be supplemented with baluster legs.
- For the best result, it is worth approaching the “update” of the kitchen in a comprehensive manner and, if necessary, changing not only the color of the facades, but also the countertop with an apron, curtains, dining table and chairs.
- Sometimes the thirst for change can only be satisfied by replacing/painting furniture handles.
- Of course, before painting the kitchen or covering it with vinyl, it needs to be repaired: tighten/change the fittings, glue and iron the peeling film a little, polish the scratches, and fill the chips, cracks and holes from furniture handles with furniture putty.
Support the project - share the material with your friends on social networks:
Tools and materials
The list of tools required for hanging kitchen cabinets is standard:
- Drill and/or hammer drill;
- Screwdriver (it takes a long time to use a regular screwdriver);
- Jigsaw;
- Clamps;
- Level, plumb line, tape measure.
But the choice of hardware used to secure the cabinets will depend on the material of the internal partition in your kitchen:
- For wood, hardened screws with a countersunk head and a double-start thread with a large pitch are suitable.
- Concrete or brick - anchor bolts or hooks with plastic, metal dowels or wooden plugs (plugs).
- Cellular concrete - long bolts with the possibility of fixing on the back side of the wall or capsule himankeras.
If the kitchen is lined with plasterboard, you will have to find long enough studs that will fit securely into the main part of the wall, going right through the thin sheets. Otherwise, heavy cabinets will not be supported by any fasteners.
We update old facades
If making new facades for an old kitchen seems too complicated, you can try to restore the surface of the existing ones. Wooden elements can be painted - it is better to cover chipboard with self-adhesive film.
Painting
To do this you will need stain, varnish, putty, solvent, fine-grained sandpaper, and a set of screwdrivers.
Sequencing:
- We remove all removable parts from the doors (glass, decor, fittings).
- Using sandpaper, a spatula or a hairdryer, remove the remaining old paint (preferably until the wood is clean).
- We sweep with a brush, putty potholes and chips, if any.
- We prime.
- After complete polymerization of the soil, we grind it again.
- We apply a paint coating.
Paint or alkyd stain is applied in at least two layers. If the desired tone was obtained in one go, the finishing coat is done with a protective varnish.
Self-adhesive film
Old chipboard furniture cannot be painted; it is better to use self-adhesive film to tidy it up.
Procedure:
- Clean and degrease the surface.
- We try on the film and cut it out with a small margin.
- Peel off part of the protective layer along the edge and gradually straighten the film on the surface of the door.
It is convenient to smooth with a rubber spatula or a clean cloth; if air bubbles appear, pierce or cut them and immediately smooth them out.
Decorative self-adhesive film
"Ear", or furniture hinge
The most common and budget method. With this installation method, cabinets are hung on a screwed-in screw using a special suspension (the so-called “ear”)
- Helper needed.
- A budget option
- Can be used for minor uneven walls.
- It is more difficult to fix on one horizontal line, the process will be long and labor-intensive, it is necessary to constantly try on the mounted modules and check the level. Even a minor mistake of a fraction of a centimeter will be costly.
- There is no way to adjust or change the position of an already installed module.
- The cabinets will fit tightly to the wall without gaps.