Manufacturing options
Before you start manufacturing, you should decide on its purpose. Depending on this, in the future you can decide on the manufacturing technology. Based on this characteristic, the following manufacturing options are distinguished:
- without hardening . This method is suitable for making kitchen and household knives, the blade of which can be easily straightened using musat or a whetstone;
- using hardening . The use of metal hardening improves the strength characteristics of the blade, allowing the user to cut almost any material. The metal holds an edge longer, so this method is more acceptable when making camping and hunting knives.
A knife is a type of cold piercing and cutting weapon. Therefore, in order to avoid problems with the law, when manufacturing it is worth remembering that the length of the blade should not exceed 90 mm, and its thickness should not exceed 2 mm.
Knife from a chainsaw chain
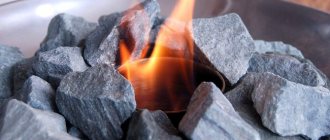
Saw chains are made of high-quality alloy, which perfectly withstands prolonged friction and high temperature. The blade manufacturing process is long and labor-intensive, but the result is a beautiful, unique and very durable knife. To work you will need a heavy anvil, barbecue and charcoal. To make it easier to handle a hot workpiece, you need to purchase blacksmith tongs.
Making a blade from a chainsaw chain should be carried out in the following sequence:
- Prepare clothes and gloves made of thick fabric and a protective mask. Pour charcoal into the fireplace and light it with a special liquid.
- Fold the workpiece from a single piece of chain. In the place where the handle will be, you can add several pieces of chain. It should be remembered that the result of the work should be a single monolithic product. The handle for the knife is not made separately.
- Place the workpiece on the coals. Provide air flow to raise temperature. Wait until the steel turns dark red. In this state, it becomes forgeable without losing its quality characteristics.
- Remove the hot chain from the fire and place it on the anvil. Flatten it with several strong blows so that the links melt together, turning into a single monolithic part.
- Step by step, by heating the workpiece in the oven and giving it the desired shape with a hammer, forge a knife with a designated handle and blade. After the workpiece has cooled, sharpen and polish it.
- Harden the product. To do this, you need to heat it red-hot again and put it in cold water. After this, you can finish the knife. For this purpose, acid and an engraving machine are used. The finished blade is polished again and washed in a warm soapy solution.
When making a blade yourself, you must adhere to certain parameters so that the finished product does not fall under the category of edged weapons.
How to make it yourself
Making a knife from a circular saw blade is not as difficult as it seems at first glance. Its manufacture does not require special technical skills or the use of special equipment. If you wish, you can do all the work yourself.
Deciding what we will do
First of all, you need to decide on the purpose, shape and size of the future product. The size of the saw blade used and the required set of tools for manufacturing will depend on these parameters.
For example, to make a hunting knife, it is best to use a 16-inch long concrete cutting blade. For the kitchen, a 12-inch wood saw blade is suitable.
What is needed for making
In addition to the drawing of the future product, to make a knife you will need the following materials and tools:
- saw blade;
- angle grinder with a set of discs;
- drill press or drill;
- drills for wood and metal;
- wooden block;
- sandpaper of various grain sizes;
- sanding block.
Disk selection
Almost all modern saw blades are made from high-carbon steel 9ХФМ. Products made from such material are practically resistant to corrosion and have a long service life. Therefore, choosing a saw blade for making a knife comes down only to the correct placement of the workpiece layout on the disk.
When choosing a high-quality disc, you can check its quality by ear. A good quality disc rings when you tap it, a dull sound is produced by a disc with internal defects.
Step-by-step manufacturing instructions
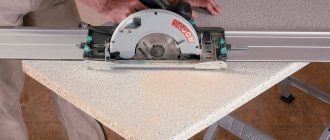
Before starting work, it is necessary to cut out a template for the future knife and clean the surface of the saw blade from dirt and traces of possible corrosion. In order to make a homemade knife, you must perform the following steps:
- Place the template on the surface of the saw blade and, securing it with magnets, apply markings.
- Using a grinder, cut out the workpiece. The cut must be made along the outer edge of the marking. To prevent overheating and changes in the properties of the metal, the saw blade should be watered with water during operation.
- Using a grinder with a grinding disc, rough the workpiece.
- Place 36-grit sandpaper on a belt sander and give the workpiece the required shape. Periodically it is necessary to dip the workpiece in a bucket of water to cool.
- Place 80 grit sandpaper on the machine and finish the workpiece.
- Clamp the workpiece between two wooden blocks and secure them with a clamp. One of the ends of the block should be at the beginning of the future butt.
- Without removing the stops, sharpen the knife blade.
- Periodically it is necessary to check the difference between the upper and lower ends of the future knife. If the butt thickness is 2 mm, the difference between them should not exceed 1 mm.
- After removing the wooden blocks, polish the shank of the knife by first moistening it with water.
- By installing a grinding wheel with a grain fraction of 240 on the grinder, polish the blade.
- Secure the workpiece to a wooden board using a clamp.
- After securing 400 and 1000 grit sandpaper to a wooden block, use a back-and-forth motion to finely polish the blade.
- Cut 7 mm thick wooden plates to make handles. Their length should correspond to the length of the knife shank.
- Mark the handles.
- Apply two-component epoxy resin to the inner surface of the wooden plates and attach them to the shank of the knife. After this, press them with a clamp.
- After the glue has dried, drill two through holes in the handle to install aluminum rivets.
- Install the rivets into the mounting holes and rivet them with a hammer.
- On a grinding machine, and then manually shape the handle into the desired shape.
- Cover the handles with stain and let it dry completely.
After this, you can dip the knife blade in a 5% nitric acid solution for several minutes to coat it with a protective oxide film. Then you need to thoroughly rinse the blade with running water and sharpen it.
After watching the video, you can see all the subtleties and nuances of making homemade knives from a saw blade, and also learn some ways to protect blades from corrosion.
A step-by-step guide to creating a wood cutter
Creation of semi-finished products for a cutter blade
The elements for the cutter blade are made from a used circular disk. To do this, the disk is cut according to the markings using an angle grinder into several rectangular strips measuring approximately 20x80 millimeters. Each stripe is a cutter in the future.
We give an outline to the main incisors
Each cutter must be machined to the required configuration. The process can be implemented in 2 ways: by sharpening on a machine and by forging. Forging is necessary to form a deflection, and turning is necessary to form a single blade configuration.
Sharpening
To sharpen the blade, you need an emery machine with a small-grain stone. Sharpening is performed at an angle of approximately 45 degrees, and the length of the pointed part is somewhere around 20-35 millimeters, taking into account the total length of the cutter. The blade itself can be sharpened either by hand or using a tool.
Creating a handle for comfortable carving
To make using the tool extremely comfortable, you will need to make a wooden handle. The handle is made using special equipment or by hand, by planing and subsequent grinding using sandpaper.
Joining the blade with the handle
The steel blade is inserted inside the wood handle. To do this, a hole is drilled inside the handle up to 20-30 millimeters deep. The blade of the cutter will be located outside, and the base itself will be hammered into the cavity of the handle.
Mounting the crown
A steel retaining ring is installed to secure the blade. A specialized contour is cut into the wooden handle exactly to the size of the ring. Then the thread is cut and the crown ring itself is fixed onto the already made thread. As a result, the wooden handle should be compressed on all sides, and the blade should be tightly fixed in the “body” of the product.
Blade grinding
In order for wood carving to be of the highest quality, the blade needs to be fine-tuned. To do this, use a small sharpening stone or ordinary ceramics. A little oil is poured onto the plane of the blade (you can use motor oil), and then the cutter is sharpened at an angle of 90 degrees.
To learn how to make a knife from a circular disk with your own hands, see the following video.
Does such a blade need hardening or can it be done without it?
The blade is hardened depending on the application of the knife. If it is used at home for cutting food, then hardening is not necessary. In this case, the strength characteristics of the metal are quite sufficient.
If the knife will be used on hikes for chopping trees and cutting other materials, it is necessary to harden the blade. This will improve the strength and hardness of the blade, and it will also hold an edge better.
We also recommend reading an interesting article on how to make a hole drill from a circular saw disc.
Sanding and varnishing a knife handle
Final sanding is done using sandpaper. Gradually increasing the grain size, it is necessary to remove all rough marks from paper of a larger grain size. It is enough to complete the process of sanding the knife handle with 600 grit paper. The last step in making the handle will be its impregnation.
There are several ways to impregnate a handle to better preserve it. This is oil impregnation, wax impregnation or varnish coating.
Each method has its own advantages and disadvantages. For example, wax must first be melted by heating it, and heating has a detrimental effect on the strength of the glue that glues the handle. Oils must be updated periodically. And the varnish serves only the function of surface protection.
Example drawings
On the Internet you can find a huge number of different drawings of blades of the most varied shapes and different purposes.
The diagram below shows a popular knife model with a long blade. It is suitable for lovers of active recreation, hunting and fishing.
In addition, from the saw blade of a circular saw you can make a kitchen knife with a long blade, which is ideal for cutting meat and offal and will become an indispensable assistant in the kitchen.
Working tools and materials
The raw material for creating a handicraft knife can be any used or new cutting component made of hardened steel. As a semi-finished product, it is advisable to use saw wheels for metal, concrete, saw wheels for pendulum end saws and hand saws. A decent material would be a used gasoline saw. From its chain it is possible to forge and make a blade, which in its properties and appearance will be no worse than the legendary Damascus blades.
To create a knife from a circular disk with your own hands, you will need the following equipment and materials:
- angle grinder;
- emery machine;
- electric drill;
- ruler;
- hammer;
- sandpaper;
- whetstones for sharpening;
- files;
- center punch;
- epoxy;
- copper wire;
- felt-tip pen;
- container with water.
To create a handle, it is preferable to use:
- non-ferrous alloys (silver, brass, bronze, copper);
- wood (birch, alder, oak);
- plexiglass (polycarbonate, plexiglass).
The material for the handle must be solid, without cracking, rottenness or other defects.