Metal entrance doors have two main tasks: to reliably protect owners from intruders and to create comfortable living conditions. Comfort, in turn, is always associated with warmth in an apartment or house. Therefore, insulating the doorway of the front door is the owners’ primary goal after installing a new door block. After all, it, along with windows, is the main conductor of cold into the room. It is necessary to insulate the frame, door leaf and slopes.
In this work, we will consider in detail all the stages of thermal insulation of the frame and door leaf. The nuances of the process of insulating slopes are discussed in detail in the material “Finishing the slopes of the front door,” which makes it possible not to touch on this topic here.
What causes heat loss?
A modern metal entrance door is actually a complex structure, where iron is just a shell. The cavities of the leaf can be filled with insulation, since the main function of the door is to retain heat. But there are often heat leaks, not only in private houses, but also in apartments. In addition, inexpensive metal doors have ordinary tin as a body, and cardboard honeycomb instead of insulation.
Reasons for heat loss in the house:
- Thin walls. Walls built in the classical way several decades ago, which do not have insulation, begin to freeze over time. As a result, the thermal insulation of the house deteriorates.
- Cracks and crevices. When a heavy structure shrinks, cracks form on the walls, which over time, if you do not pay attention to them, turn into huge gaps. Such gaps are also called cold bridges.
- Technical openings (old doors and windows). Over time, the wood dries out, thereby forming colossal gaps where the boxes are installed. Windows that are not properly insulated are one of the key sources of heat loss. And a door, if it is made of sheet metal and does not have the necessary insulation, or is of poor quality Chinese construction, with cardboard inside instead of a heat insulator, this is the direct cause of colossal heat loss.
A metal door that does not have proper insulation is a direct source of cold in the house.
Therefore, door insulation is an important component of the thermal protection of the entire house. But before you implement your idea, find out the exact reasons for the loss of heat, so that you don’t end up wasting time and energy on insulating the doors, and the reason for the uncomfortable microclimate lies in the cold bridges formed through the cracks in the house.
Important! The thickness of the iron door leaf is not an indicator of the thermal insulation of the door. A thick layer of metal is, first of all, protection against penetrations and only then a heat insulator (provided that there are no cracks in the structure).
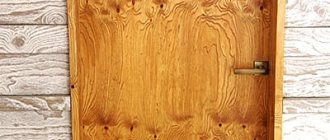
Sometimes heat can be lost not through the leaf, but through the cracks of the iron door frame
How to insulate a door frame?
Many people think that to insulate a metal entrance door it is enough to insulate only the leaf. But in fact, the box also needs insulation. If it is made of a metal corner, then insulation can be done only along the perimeter where it adjoins the opening. To do this, just blow out all the cracks with foam. When the substance hardens, the excess can be cut off with a knife.
In the case when the box is made of a square or round pipe, then insulation can be placed inside it.
Suitable for these purposes:
- Polyurethane foam. It is convenient to seal the gaps between the wall and the frame, as well as fill all the cavities of the door frame.
- Bulk materials. This could be expanded clay, sawdust. To do this, make a hole in the profile and fill it with filler. If you perform this procedure yourself, then not all voids can be filled with material. Thorough insulation is only possible when the box is manufactured in a factory.
But you can try to do the insulation yourself. To do this, you will need a drill and suitable metal drills, the insulation itself (spray foam), and a knife.
Completing of the work:
- Holes are made every 50 cm.
- Using them, the cavity inside the box is filled with foam.
- All of its excess that has emerged through the holes is cut off with a knife.
- The gaps between the opening and the box are also filled with foam.
- When the substance becomes hard, it is cut and puttied.
Internal and external insulation of a metal door will reliably protect the room not only from thieves, but also from frost. You can carry out insulation work on your own by placing suitable material on the outside or inside of the sash. You should also take care of insulating the box and gluing the seal. Only a set of measures will prevent heat loss.
Choosing insulation
The insulation on the door not only protects the room from the cold, but also insulates the rooms from extraneous noise, which is quite important in apartment buildings. Therefore, when choosing a ready-made door structure, you should inquire about its contents.
Penofol
Penofol is equipped with a foil layer with reflectivity, thanks to which all the heat remains indoors. But, as a rule, it is used only as an auxiliary insulating material.
Rigid (sheet) insulation
Sheet heat insulators (penoplex, polystyrene foam, etc.) are easy to install and low in cost. Since the material is not hygroscopic, it is not necessary to attach a vapor barrier and moisture-proof membrane when installing it.
When choosing rigid insulation, give preference to expanded polystyrene (penoplex). It is much denser and stronger than polystyrene foam, and also insulates more effectively.
Soft (rolled) insulation materials
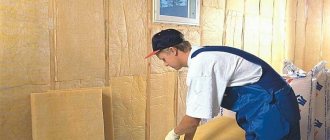
Rolled or sheet soft thermal insulators include glass wool and mineral wool. They differ only in the base; their thermal insulation characteristics are approximately the same. The material is environmentally friendly, non-flammable, and allows you to independently choose the installation height, eliminating additional trimming. These advantages make cotton insulation especially popular.
Illustrative examples of heat loss
The material is sold in rolls or slabs. Elements of any shape and size can be cut out of rolled wool, and to reduce the thickness of the insulating layer, simply press and fix the material.
The disadvantage of cotton wool is its high hygroscopicity. The material is afraid of moisture and if the insulation absorbs water, it loses its heat-protective properties. Experts do not recommend using this insulation for doors, since with a high contrast of external and internal temperatures, the likelihood of the insulation getting wet is extremely high. However, the option is quite acceptable for the entrance door to an apartment.
Inflatable (sprayed) insulation
Polyurethane foam fills all the cracks without being particularly expensive. You can spray it yourself, using a foam gun or inviting the help of a specialist using a special sprayer.
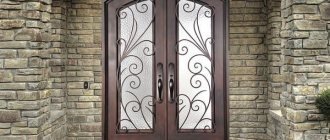
Luxury entrance doors
doors are insulated with three types of heat insulators:
- key insulation – polystyrene foam;
- penofol is an auxiliary protection;
- The cavities of the door frame and stiffeners are filled with polyurethane foam
In construction markets you can often see insulation kits for entrance doors. The insulation and finishing material have already been measured and cut according to the standard, but such sets are of little use, since they include thin-layer padding polyester or foam rubber and leatherette.
Beautiful ideas
The appearance of the front door always emphasizes the status of the owner. Therefore, in a private home the requirements are especially high. Here it is important to take care of a decent image. The market for metal doors is saturated with a variety of products. Another good thing is that doors can be ordered according to a personal project.
And yet, how nice it is to work on the design yourself! We offer several ideas for decorating metal doors with your own hands. The design of a door in an apartment is interesting because the outside can be decorated so as not to attract other people's attention. The simplest, most affordable way is to decorate a metal door with bright fittings. You can attach new numbers to the outside, add stylized handles, hinges, and locks.
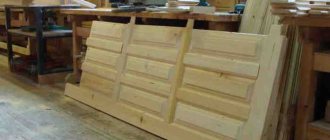
For those who prefer natural materials, we can recommend covering the inside of the door with MDF panels or simple wooden slats. The design and color of the metal door of a private house, as well as the shape, depend on the style in which the house or cottage is built. For fittings, you can use forged parts, stained glass windows, glass inclusions. And instead of a modern bell, you can hang a knocker or gong.
Tools and materials
In addition to insulation - the main material, you also need fasteners, cladding, etc.
Polymer seal for entrance door
Table 1. All necessary materials and tools
| Materials | Tool |
| Any selected insulation | Mounting tape |
| Polyurethane foam | Square |
| Hardware, liquid nails or polyurethane foam (for installing rigid insulation) | Pencil |
| Wood-based sheet materials or lining (for covering a non-removable door) | Long ruler or rule |
| Scotch tape, hydro- and vapor barrier membrane (in the case of using soft insulation) | Jigsaw or saw |
| Dermantin, MDF or plastic (as a decorative finish) | Screwdriver |
| Rubber or silicone polymer seal | Spatula and container for putty mixture |
| Universal assembly adhesive (has good ability to adhere to surfaces of different textures) | Foam gun |
| Putty for insulating door frames | Stapler |
| Staples or furniture nails | Hammer |
| Dry wood beams for making the internal frame of the door leaf in case of its absence | Construction knife |
Prices for popular models of screwdrivers
Screwdrivers
Important! If glass wool is chosen as the main insulation, do not forget to take care of protecting the skin of your hands, eyes and breathing organs by using glasses, gloves and a respirator. When working with the material, dangerous microparticles (fiber fragments) are released, which, penetrating into the respiratory tract, can cause long-term irritation of organs.
Video - A simple process of insulating a non-removable Chinese door
Step-by-step instructions for insulating a wooden door in a private house
The work is carried out taking into account the characteristics of the entrance group and the installation technology of the selected insulation.
Tools and materials
In the process of working, the following set of tools, devices and materials is required:
- nail puller, pliers;
- screwdriver, hammer;
- hacksaw, jigsaw;
- tape measure, stationery knife, scissors;
- construction stapler.
It is also necessary to prepare the estimated amount of insulation, sealant, sheathing material and fasteners.
Preparatory work
At the preliminary stage, the following work is performed:
- remove the door leaf;
- unscrew door fittings and hinges;
- remove the casing, if present;
- remove old insulation and sealant residues.
Next, the canvas and box are checked for structural defects, distortions and other defects are eliminated.
Cutting and laying insulation
Based on the measurements, blanks of the required sizes are made. When arranging a frame structure, the voids are tightly filled with layers of insulation. The material is fixed using a construction stapler.
Door trim
Dermantin is mainly used as a finishing layer. The upholstery fabric should be cut taking into account a margin of 10 cm on the sides in order to create the necessary thickening around the perimeter. The upholstery is secured with decorative nails and cord to form a distinctive raised pattern. Next, install the door hardware.
The surface of the door leaf is lined with artificial leather from the inside
Seal installation
To eliminate gaps, use self-adhesive strips or install a harpoon seal. Thanks to the special shape, the product fits as tightly as possible to the base, ultimately eliminating the risk of drafts and reducing the level of heat leakage from the room.
Additional measures and means of hydro- and thermal insulation
For maximum quality insulation of a street door in a private house, the joint around the perimeter of the frame is equipped with dermantine rollers with a foam insert inside. It is recommended to line the surface of the entrance sheet with artificial leather from the inside. From the outside, the structure is sheathed with a material that is highly resistant to aggressive atmospheric influences.
We insulate the door frame
The frame of the metal door leaf is made from an iron angle, which is secured in the opening with anchors. After removing the old door structure, large gaps often remain between the mounted door frame and the load-bearing wall or partition. When installing, builders blow them with polyurethane foam, but it has a certain drawback: the material is afraid of sunlight. If sections of the foam are not protected from ultraviolet radiation in time, it will crumble into dust over time.
If the foam on any surface turns yellow or brown, the material is beginning to deteriorate.
The old deteriorating foam from the box must be removed and insulated again
How to do it correctly:
- We clean the wall adjacent to the doorway from the remnants of the polyurethane foam, spread the plaster down to the brick or concrete and remove the dust.
- Spray the surface with plain water and foam the visible indentations. The foam will stick better to the wetted wall.
- When the material hardens, cut off the excess.
Prices for polyurethane sealant
Polyurethane sealant
After this, plaster and paint or whitewash can be applied around the box.
Improving the characteristics of Chinese products
The Chinese-made door is a non-demountable structure. To insulate it, remove the door and place it horizontally. We remove the handles, peephole, locks. Then we begin to attach the frame and stiffeners to it, both from the inside and from the outside. Therefore, we choose a wooden beam with a thickness of 20 * 20 mm, or more (we start from the thickness of the insulation material). If desired, you can weld a metal base, attach it with self-tapping screws or weld it to the door leaf, and fill the joints with polyurethane foam.
The next step is laying insulation. If fibrous materials are selected (mineral wool, stone wool), we lay out a water-repellent material larger in size than the base cavities, approximately 200 mm, secure with glue (liquid nails) and line the wool, having previously cut out a canvas slightly larger than the size of the base cells, and cover with another layer of water-repellent material. We fold the edges of the film tightly onto the top layer and secure with tape.
We cover the insulation with foil isolon or penofol with the foil side facing the room. This will improve the soundproofing qualities of the door. Polystyrene foam, expanded polystyrene, polystyrene, foil-coated isolon do not need waterproofing, since they themselves have water-repellent properties. Next, use a tape measure to measure the distance between the stiffeners, cut the insulation a little larger than necessary to avoid the formation of a cavity between the insulation and the base of the door. We glue the insulation into the cavity with glue (liquid nails).
We coat the base attached to the surface with mounting foam at the joints. The next step is to decorate the structure with an MDF sheet, panel or alternative material. It is important to remember that the decorative panel must be attached from the bottom up. We secure it, install locks, a peephole and handles, and hang the door. Now the door keeps the house warm and also protects from noise.
We insulate the door leaf
Before insulating an iron door, the structure must be disassembled. To do this, remove the peephole, door handles, locks and linings.
Before insulation, the iron door must be prepared by dismantling all unnecessary
When the canvas is completely prepared, do not forget to wipe it from dirt and dust before starting work.
Step-by-step algorithm for door insulation
Table 2. We insulate the door
| Steps, description | Photo |
| Step 1. If the canvas does not have additional stiffeners creating an internal frame, the skeleton must be assembled from wooden slats. The frame is attached around the perimeter of the door and along the crossbars using self-tapping screws. It is important to choose the thickness of the beams so that they are not wider than the protruding elements of the door leaf. |
|
| Step 2. We put insulation between the frame beams in the resulting cells. Consider the characteristics of the material and the need for additional membrane insulators. |
|
| Step 3. You can attach the insulation with glue directly to the door or directly to the bars. The most reliable fastening will be provided by combining both methods. We lubricate the door leaf with adhesive, apply insulation to it and press it tightly. If the insulation fits tightly into the frame cell, it means that it will be securely fixed in place. |
|
When the glue dries, do not forget to check the door for cold bridges. the gaps formed between the insulation and the frame with foam, not forgetting to cut it off after hardening.
When insulating a metal door, it is important to cut the insulating material in such a way that the gaps between the heat insulator and the frame elements are minimal or completely absent
Prices for mineral wool
Minvata
Stages of plating an iron model
The sequence of actions when covering an old door depends on its design. If the design is more modern and the metal panels are attached to the base with screws, the insulation is done internally. When starting internal insulation, we remove the metal structure and place it on a work surface. Unscrew the screws and remove the metal panel (to ensure that the screws unscrew well, lubricate them with machine oil). Using a tape measure, take the dimensions of the internal cells of the door.
Carefully measure the insulation material and cut it off. Be sure to cut out a place for the door lock and peephole. For old doors, polystyrene foam or foil-lined stone wool are great. We treat the inner surface of the old structure with glue (liquid nails) and glue the prepared insulation. If there are any gaps between the old door and the insulation, fill them with foam. You must work carefully, squeezing out the mounting foam in small portions. It is important to ensure that it does not get on the bolt lock mechanism. For additional sound insulation, we lay foil insulation between the insulation and the metal sheet. We cover the structure with a metal sheet and screw in the screws.
If the old door is made by fixing metal panels by welding, then we proceed to insulate the old door using the external method. We prepare wooden blocks 20 (30) x 20 mm. We measure the parameters and cut the slats to the required length. Using a drill, we make holes for future fastening in the metal sheet. We assemble the base from prepared wooden blocks and fasten it to a metal sheet with self-tapping screws.
We prepare insulation according to the specified dimensions. We line and glue the insulation into the cells between the slats. We fix the MDF panel or board with screws. Additionally, for sound insulation, the door can be treated with leatherette from the outside or inside. To do this, we bend the leatherette and fix it with staples. Lubricate the lining and hem of the leatherette with glue (liquid nails) and press firmly against the metal sheet. This work is painstaking. At the last stage, we install door locks, handles, and a peephole. We return the finished door to its place.
When covering a single-layer metal door, it is necessary to measure the cells between the stiffeners. We cut the inner material to the specified size. We quickly glue the insulation into the cavity. We eliminate cracks and small gaps using polyurethane foam. We decorate with MDF panel.
Clearance seal and door interior trim
Decorating the front door from the inside performs several functions. This is protection of insulation from mechanical influences and other damage, additional heat and noise insulation, as well as a decorative component.
An example of a metal entrance door trimmed with clapboard after insulation
There are a number of requirements for the interior decoration of the door leaf:
- strength,
- moisture resistance,
- durability,
- density,
- external attractiveness.
In most cases, a metal door is sheathed from the inside with laminated chipboard or MDF, plastic or lining, wood or metal, plywood or OSB in combination with leather or dermantine.
External view of the interior decoration of a metal door with plywood and dermantine
Let's consider the algorithm for the internal design of an insulated iron door using the example of using solid sheet materials:
- We cut out a fragment from the sheet to the size of the perimeter of the door leaf frame. It is important that the material does not protrude beyond the sheathing.
- We cut out holes for the peephole, handles and lock secrets in the resulting fragment.
- If you plan to additionally cover the sheet with leather or dermantine, then it is recommended to first upholster the sheet, and then attach it to the door. It is more convenient to carry out upholstery work when the base is in a horizontal position.
- We cut out a solid piece of leather fabric to the size of the base, adding 10 cm on each side.
- We bend the allowances inward and thus attach the material to the base using a stapler. In addition, you can secure the leather with beautiful furniture nails.
- When attaching the fabric to the base, it is important to stretch it well so that unsightly folds do not form. For additional thermal insulation, a small layer of foam rubber or synthetic padding can be placed under the skin. It will also fill the void between the skin and the base and add more appeal to the design.
- When the plywood fragment is completely formed, we coat the door frame with universal glue, apply the plywood to it and fasten it with self-tapping screws with decorative heads (it is important that the self-tapping heads are harmoniously combined with furniture nails).
- We install door handles, locks, peepholes and plugs.
Insulated metal door, covered with plastic after insulation
The final stage is the installation of a polymer seal to prevent drafts from penetrating through the cracks around the perimeter of the door. To do this, the surface of the door leaf and frame is degreased, the protection from the adhesive layer of the seal is carefully removed, the material is applied to the door and pressed. It is important to be careful when installing the seal, as the material is very thin and requires patience during installation.
Video - A budget way to insulate a cheap Chinese door
Insulation of the vestibule
If it blows at the point of contact of the door leaf with the frame, you will need to insulate the vestibule. Drafts can occur when the edge of the canvas does not fit tightly to the jamb due to deviations from the specified dimensions.
The better to insulate
The insulation of the vestibule is carried out by gluing the inside of the door leaf adjacent to the jamb with special self-adhesive tapes with different sections.
Most often, tape with a round or oval cross-section is used, but for gaps over 3 mm in size, it is recommended to use a sealant with a cross-section in the shape of the letter P.
Materials and tools
To insulate an iron door around the perimeter of the vestibule, you will need the following materials and tools:
- tape insulation of the required section;
- liquid solvent for degreasing the surface;
- scissors.
Insulation instructions
Before you start gluing the tape insulation, you need to degrease the metal surface, for which you use a liquid solvent and a piece of foam rubber.
Tape insulation is glued along the entire height of the door leaf, 3-5 mm away from the outer edge. When installing insulation, it should be pressed firmly against the surface of the door leaf to obtain a reliable connection.
It is not recommended to tighten the seal during installation, since tension will not allow obtaining high-quality gluing of surfaces.
Features of insulation of a metal split door
The algorithm for insulating a metal split door is not much different from the process of thermal insulation of a conventional iron door leaf. The design feature of the door plays a key role here.
Sectional view of a metal split door
The door is removed from its hinges, laid on a horizontal surface, all functional and decorative elements in the form of a peephole, handles, locks and plugs are dismantled, then the internal lining is dismantled (if the product is not monolithic, then the trim is attached with self-tapping screws). In the case of insulation of a non-removable door, the inner lining can be carefully cut with a grinder. When the product is disassembled, cardboard is removed from the cavities and the door is cleaned of any remaining debris and dust.
If there are stiffeners inside the door leaf, drill holes in them at a short distance from each other and fill the voids with foam.
Next, a water barrier is installed, the insulation is cut and attached (remember that some materials do not require moisture protection). The insulation process itself is as simple as in the example with a one-piece door.
The overlay is installed in place. If it becomes unusable after dismantling, the interior design of the door can be replaced. Then the peephole, locks and handles are put in place and the product is installed in the box.
In order not to spoil the integrity of a non-removable Chinese door, it is insulated over the skin
In the case of a monolithic door, if there is no particular desire to spoil its integrity, you can insulate it on top of the existing casing. To do this, a lathing made of timber is attached to the demonstrated and disassembled door leaf from the inside and outside. All further actions are practically no different from the previous algorithms.
Insulation of the technological gap
The source of heat loss is often a technological gap that appears when installing the door frame. Carrying out work only on insulating a metal door with your own hands, without eliminating heat leaks from the gap, will not bring the desired effect.
The better to insulate
The technological gap is usually 20-25 mm - this is the distance from the wall to the outer edge of the box. It is best to fill this gap with polyurethane foam.
In some cases, door installers immediately cover up the technological gap with an ordinary solution of cement and sand, but this option cannot be considered as insulation.
Cement is not an insulator, but on the contrary, it allows the cold to penetrate into the apartment. At the same time, due to uneven shrinkage, cracks may appear in the technological gap.
Materials and tools
To insulate the gap you will need the following materials and tools:
- polyurethane foam;
- scotch;
- polyethylene film;
- scissors;
- mounting gun (spraying foam using a standard nozzle will be inconvenient);
- construction knife.
Insulation instructions
Thermal insulation of the technological gap is carried out in the following sequence:
- From the side of the apartment, the platband is removed at the point of contact between the wall and the frame.
- From the inside, where the box adjoins the wall, a plastic film is attached using tape.
- Remove the casing from the outside.
- The outside of the technological gap must be moistened using a thin brush or spray bottle. A humidified environment will speed up the hardening reaction of the polyurethane foam.
- The foam container is installed in the mounting gun and shaken thoroughly.
- The first layer is applied with a thin tape. When squeezing out the foam, you need to make sure that the path is not interrupted.
- After the expansion of the first layer, after 20 minutes, they begin to apply the second layer, taking into account that during expansion the foam does not extend beyond the perimeter of the box.
- After the insulation has completely hardened, the protective film on the inside of the door is removed.
- The platbands are returned to their place.
If, when the insulation expands, part of the foam extends beyond the box, it is cut off with a construction knife.
Things to consider
In addition to the thermal insulation of the door leaf itself, the process of door insulation includes other important nuances.
For a better fit of the door leaf to the steel frame, use rubber seals
Polymer sealing tape will help improve the quality of thermal protection of the door. This material is supplied in rolls and sold by the meter. Installing the tape is extremely simple: the seal has an adhesive edge, which attaches it to the door and frame.
Important! Before gluing the tape, do not forget to degrease the surface for better adhesion of the material to the surface.
If the design of the door frame allows, the seal can be glued in several layers
Insulating the doorway itself with polyurethane foam is also very effective. This can be done even if the cavities show no signs of material degradation. Blowing out the voids with foam and then plastering the wall will not be difficult, but will significantly increase the efficiency of insulation.
Also consider the weight of the structure. The weight of a metal door is quite large, and if you add additional insulation and cladding to it, the hinges may not withstand it
The thickness of the door insulated from the outside, as a rule, increases. Take this fact into account when installing locks: they may need to be replaced with designs with extended keys.
The slopes of the metal entrance door also need insulation
Another source of heat loss is indoor door slopes. If they are not completed or sewn up “in a hurry,” they should be given attention. Remove the old finish and fill the cavities with foam. If the space is large enough, fill it with other insulation and secure the trim.
Prices for entrance doors
Entrance doors
Seal installation
Another weak point in the design in terms of heat loss is the area where the sash comes into contact with the frame. If it does not fit very tightly, a draft will appear. This problem can be eliminated by installing a seal. It is produced in the form of a self-adhesive tape, which can have a different profile (section).
If the gap is small, then an oval or round seal will be useful.
If the gap is more than 3 mm, then it is worth buying a tape with a cross-section in the shape of the letter P.
Before insulating a metal entrance door, in addition to the seal itself, for insulation work you will need to acquire scissors and some kind of solvent to degrease the door.
The scheme of work is as follows:
- If an old seal was installed on the door, it must be removed and the surface thoroughly cleaned.
- Degrease the area for the tape using a solvent.
- Glue the seal around the perimeter of the sash, retreating approximately 3 mm from the outer edge. In this case, the tape must be pressed well to ensure good adhesion (without waves).
Do not pull the tape too tightly while gluing. Otherwise, it will not adhere well to the surface of the door and may come off. It is not recommended to purchase a seal that is too thick, as this may cause the door to open and close poorly.
Common Mistakes
Anyone can stumble: both an experienced installer and a novice home craftsman. When insulating a metal entrance door, there are a number of common mistakes that are most often made.
It is better to insulate a metal door that can be easily opened with a can opener without disassembling it, on top of the inner lining
What to watch out for:
- Season. During the cold period, it is better to postpone door insulation until later, even if there is a very warm entrance or dressing room.
- Ignoring details. The gaps between the frame and the material during insulation, the door frame and slopes also need thermal protection, just like the canvas. If you only insulate the door, the room will not become much warmer.
- Saving. When using natural insulation, you should not ignore membrane films, because otherwise the cotton wool will get wet and become useless. In addition, wet insulation will significantly increase the weight of the door, which can lead to deformation of the fasteners.
A metal door insulated in accordance with all the rules, in addition to providing armor against evildoers, will also reliably protect the house from extraneous noise and pervasive cold. In addition, insulation protects the canvas itself from corrosion and, accordingly, increases its service life. Use the materials that are available to you and don’t be afraid to make mistakes, because only those who do nothing make no mistakes.
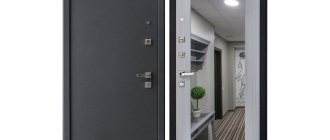
Some models of metal entrance doors are already insulated from the factory
Note! If your door has already used up its lifespan, instead of insulation, you should think about a modern solution in the form of a door with a thermal break.
Tips and tricks
The following recommendations should be followed:
- It is best to insulate a plastic door with glass, using an additional double-glazed window;
- it is necessary to pay equal attention to both the insulation of the canvas and the thresholds and the perimeter of the doorway;
- standard Chinese metal doors immediately need to replace the insulation.
The front door requires special attention when protecting from the cold. The entire perimeter should be insulated, and the door should be closed tightly and quietly using a seal. The insulation process for doors made of plastic and metal with wood is different.
Choosing a method
The entrance iron door is insulated in two main ways:
- internal filling with a heat insulator, when steel sheets (panels) are attached separately to the frame;
- external insulation - if the fabric is monolithic and it is impossible to disassemble it into its component elements.
The first method is more preferable from an aesthetic point of view. In this case, insulated metal entrance doors for the house in the apartment will look as beautiful as they do from the inside. The second option - with external works - is more a measure of necessity, although they can be decorated beautifully. For this, additional finishing is used - wooden or plastic strips, non-woven materials, etc.
Materials and tools
Regardless of whether you decide to insulate the front door from the inside or on both sides, you will need:
- screwdriver (you can also use a screwdriver, but it’s faster with a power tool);
- drill with metal drill bit;
- stationery knife;
- a hacksaw with the smallest teeth;
- awl;
- fine to medium grit sandpaper.
Next comes the turn to choosing insulation. For this purpose, you can choose one of the following:
- Mineral wool
The porous structure of the material retains heat well and does not give rise to condensation, that is, the metal does not rust on the inside, but is gradually knocked down, due to which voids are formed. To avoid such “dripping” down, you need to fill grates with a side of 15-20 cm on the canvas and fill them with mineral wool.
- Basalt slabs
The advantage of this material is the stability of its structure; it retains its shape even after 10 years, and when ignited, it does not emit toxic substances.
- Expanded polystyrene
It costs a little more than polystyrene foam, but at the end it gives an excellent thermal break, since it has zero thermal conductivity. A door with a thermal break is essentially a thermal bridge that reliably separates both layers of the door and completely isolates the access of cold.
You can mention synthetic winterizer, foam rubber or wool batting as insulation, but these are, say, exotic options that give minimal effect. There is no point in dismantling the door to insulate it with padding polyester. As a last resort, you can upholster it from the inside with this material, but, we repeat, this will not fundamentally solve the problem of heat loss.
- a sheet of fiberboard or fiberboard for decorating the interior fabric;
- isolon strips 7-10 cm wide;
- liquid nails for fixing the insulator;
- screws;
- one cylinder with polyurethane foam;
- sealant.
How to insulate a metal entrance door
Here we will tell you how to insulate a metal collapsible entrance door.
- To do this, it is first removed from the hinges, laid horizontally and the sheet is unscrewed from the inside (usually it is secured with screws).
It is easier to insulate entrance street structures in a horizontal position
If the screws do not unscrew after a long time, drop some machine oil on them, after which the process will go much easier. There is no point in tearing off the caps; then you will have to drill out the body.
If it is not possible to remove it from the hinges, the sheet is unscrewed gradually, starting from the bottom side and gradually rising up. The order of work will be exactly the same, you will just need one more person to support and help.
- Next, cut the insulation to size. If it is polystyrene foam or polystyrene foam, it is better to cut it with a fine-toothed hacksaw. Mineral wool or basalt slabs are cut with a stationery knife.
Entrance door filled with mineral wool
You cut the mineral wool 3-4 mm larger than the required size - it is literally pushed inside so that it covers the corners perfectly accurately.
- Apply liquid nails to the inside of the canvas and the insulation around the perimeter and lay it tightly into the frame, simultaneously pressing the edges and the central part.
When preparing the insulator, take into account the need for space for the bolt system and the lock - this part does not close and remains free.
- Blow out all voids and irregularities with polyurethane foam. But again, be careful not to touch the working area of the crossbar system. When squeezed out, the foam expands greatly and can move the working mechanism, and at the same time squeeze out part of the insulation. After hardening, cut off all excess with a knife.
The voids are filled with foam
- Along the perimeter, degrease the edge, squeeze out liquid nails or sealant and glue the isolon to move the dew point inward.
- Next, mark the size of the canvas and cut off the required part of the fiberboard or laminate sheet, depending on how exactly the canvas will be decorated from the inside. Use a thin drill to make holes in the same place where the screws were previously attached.
- Degrease the surface again and place the laminate on the sealant. Screw it loosely around the entire perimeter.
- Return the metal door to the opening on its hinges and tighten all the screws. Separately, the edge should be treated with an adhesive-based rubber seal. This is a guarantee that the door will close softly, tightly and keep the cold out.
High-quality joints are ensured by a rubber seal
This is the simplest and most convenient method, on which you will spend at most 2 hours, and the result will be an insulated metal street entrance door.
VIDEO: It is clearly shown exactly how the front door is insulated from the inside
The situation is somewhat different with a non-demountable structure, but even here you can manage it on your own in a few hours.
How to properly insulate a non-demountable structure
In this case, you can choose one of two options:
- pouring dry insulator into the cavity.
- external internal or external insulation;
For the first option, granular foam is perfect - it is sold in most hardware stores. This method cannot be called ideal, since a private house requires a door with a thermal break, and in this case, cold bridges are preserved, but in any case it is better than just an empty sheet.
Work process
You need to remove all the overhead elements from the door (handle, peephole, cash) and remove it from the hinges. The inner panel is removed - what remains is the outer panel on the metal profile frame. To insulate the frame, which tends to freeze in winter, you can fill it with polyurethane foam.
To do this, holes are drilled in the metal profile every 40-50 cm. They must be large enough to insert the mounting gun into the tube. Each hole is then filled with foam. This procedure is enough to prevent the metal frame from freezing. Most often, a small layer of thermal insulation is already placed inside the door leaf.
Before starting work, it must be removed. Depending on the type of frame, additional stiffening ribs from timber are added. For example, if a metal frame is welded around the perimeter of a steel sheet, then horizontal and vertical jumpers are created from the timber in the center of the sheet. Thus, several segments are formed for laying insulation.
Level device
Let's look at what a regular optical level consists of and how it works.
The main part of the device is an optical tube with a lens system capable of zooming in on observed objects with a magnification of twenty times or more. The pipe is mounted on a special rotating frame, necessary for the following functions:
- tripod mounts;
- setting the optical axis of the level to a strictly horizontal position, for which the frame has three height-adjustable “legs” and one or two (in models without automatic adjustment) bubble levels;
- precise horizontal aiming, which is carried out with paired or single handwheels.
On the right side of the pipe there is a handwheel designed to adjust image sharpness.
Adjustment to the operator's vision is made by rotating the adjustment ring on the eyepiece.
When looking through the eyepiece of a level telescope, we will see that in addition to bringing the object observed through the device closer, the level superimposes a system of thin lines on its image, called a reticle or reticle. It forms a cross-shaped pattern of vertical and horizontal lines (see Figure 1).
Why does condensation, frost and ice appear on the door?
To answer this question, we must turn to a science called physics. Condensate (derived from the Latin word condensate - condensed, compacted) is the product of the transition of a substance from a gaseous state to a liquid state upon cooling. That is, we can say that it is a liquid that is formed when gas or steam is cooled.
Dew point
The formation of condensation is closely related to the term dew point.
- This is the temperature value of the cooled air at which the steam contained in it reaches a state of saturation and begins to condense into dew.
- To make it clear to you, let's try to say it differently: the dew point is the maximum possible surface temperature on which condensation falls. It turns out that if any surface is colder or corresponds to the dew point, then condensation will fall on it.
- Here is a table for determining the dew point depending on temperature and relative humidity.
Condensation on the door frame
Let's try to understand the reasons for the appearance of condensation on the door frame using a specific example using our table. Let's say the air temperature in the house is +20°C and the relative humidity is 50%. Accordingly, in this case, the dew point will be +8.7°C. That is, when the temperature of the inner surface of the box is equal to or below +8.7°C, condensation will form on it. If the air temperature outside is -10°C, then the temperature of the door frame of a metal door will be clearly below our dew point. After all, metal has very high thermal conductivity (more than 200 times higher than wood!). Even though the manufacturer assured you that the door frame is insulated. After all, the so-called metal cold bridges have not disappeared after insulation of the internal cavity. This means that, no matter what, the door frame will still remain cold in winter, becoming covered from the inside with moisture, frost and ice.
We insulate from the outside
Now let's figure out how to insulate a metal door from the outside. Having completed internal insulation, you can enhance the insulating effect by attaching, for example, foam boards to the outer surface of the door leaf. In this way, you can insulate the door, or rather, its outer surface, and avoid freezing of the door leaf when the thermometer outside shows zero or below.
To cover a door with foam plastic, it is not necessary to take too thick slabs of this material - 10-15 mm thick is enough. This is also advisable because if the layer of foam plastic boards is too thick, upholstering a metal door with dermantine with your own hands becomes a very difficult task.
We have already read about how to sheathe the front door in another article of our project. I would just like to mention that it is prudent to cover doors with dermantine yourself, not only for decorative reasons. In addition to the fact that the cladding material makes the door leaf more beautiful and stylish in appearance, the outer layer of cladding is also additional protection from external noise and cold air. Thanks to this, the comfort of home becomes even more tangible.
Suitable insulation materials
Their choice is determined by the requirements for throughput. It depends on the thickness of the layer. The more massive the structure, the heavier it is, but the better it works. For a dacha, lightweight structures are suitable; for a cottage with strong walls and reinforced openings, a multi-layer insulating cake with a large weight is used. In both cases, the exterior decoration should look beautiful.
Products with a fibrous and porous internal structure are used as fillers.
Mineral wool
It consists of fibers of molten rocks, glass and blast furnace slag. They are not afraid of moisture, do not burn, and do not emit harmful substances. They are produced in the form of slabs or an amorphous mass, which is evenly filled with the skin. When wet, it loses volume and begins to conduct cold, so it must be placed in the cells of the sheathing, protected from moisture. Mineral wool has good thermal performance. One of its differences is that the coating cannot be damaged by rodents.
Izolon or foam rubber
You need to apply glue to the outside of the door, and insulation or foam rubber on top. Also, such materials can be glued to liquid nails. Glue is used to prevent the insulation from moving during work. Foam rubber is not toxic.
Styrofoam
Polystyrene foam is interconnected bubbles with thin polymer walls. Available in slab form. It has excellent technical characteristics, but is hazardous to health. Even at room temperature, the surface releases toxic substances. Polystyrene foam belongs to the class of fire hazardous materials. After impregnation with fire retardants, it cannot burn on its own, but under the influence of an open flame it burns and melts. To create an effective layer, you will need less thickness than mineral wool.
Dermantin
It is necessary to place it on the door leaf and secure it with nails or regular staples. Place dermantine on top and attach it with decorative nails. You can tuck it in and thereby form protective cushions against drafts.
Polyurethane foam
Polyurethane foam (PPU) is sprayed onto the surface from a can. He fills all the voids. To secure the material, it is not necessary to install a lath. Installation does not require fasteners that are in contact with the cooled surface and easily conduct temperature inside. PU foam does not support combustion. When exposed to an open flame, it melts, releasing carbon dioxide and carbon dioxide.
Foamed polyethylene
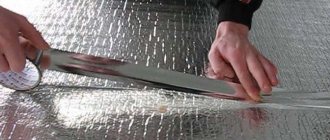
Foamed polyethylene differs from its analogues in that it does not allow moisture to pass through. An example is isolon. It is produced in rolls and has a thickness of 1-1.5 cm. With such a thickness, it does not provide the necessary protection and is used as an addition to the main layer.
Sealers for cracks
To prevent the cold from penetrating into the cracks between the sash and the frame, this space is sheathed with seals. They are attached to the inside of the opening.
- The foam strip has an adhesive base on the back side. Works efficiently, but wears out within a few months.
- Silicone gasket - provides a tighter seal. It is short-lived, but lasts longer than foam rubber.
- Tubular rubber seal does not absorb moisture, is resistant to mechanical stress and can last for several years without losing its properties.
- Adhesive tape based on polyurethane - technical characteristics do not differ from rubber.
- Thermoplastic products have the highest resistance to mechanical loads, but are difficult to install.
Doors and partitions
How to deal with condensation on a metal door
Moisture settles on a material with high thermal conductivity due to the large temperature difference between inside and outside the room. In order to defeat condensation, you can install a second, wooden door, that is, construct a mini vestibule.
That is, a thermal break is necessary: an organized space between the door and the room, or even better, between the inner and outer layers of the door leaf (so as not to block additional doors). Thus, the function of equalizing temperatures is taken over by the thermal insulation layer, and not by the door itself.
Entrance metal doors with a thermal break can be ordered ready-made. They are called “thermal doors”. Essentially, this is a standard door, supplemented with inserts made of PVC (but plastic is not suitable for a sharply continental climate), glass wool, polystyrene foam or wood. In other words, when you insulate a steel door yourself, as described above, you create the necessary thermal break.