One of the most important conditions for living in an apartment is a good heat supply, for which either a centralized heating system or autonomous equipment installed by residents is responsible. However, the efficiency of heating directly depends on the correct thermal insulation of the premises.
Let's look at how to insulate a wall in an apartment to increase the air temperature and at the same time reduce energy costs for heating. For this purpose, we provide two detailed instructions on thermal insulation with popular types of insulation, in which each step is illustrated with photographs.
Also in this material we will consider less popular methods that can be used to insulate walls from the inside.
Insulating walls from the inside: how and with what
If you look at the picture from a thermal imager, it becomes clear that the lion's share of heat loss from heated rooms occurs through the outer walls. The required level of heat transfer resistance is obtained using insulation materials, which, during the construction of a house, are installed inside multi-layer enclosing structures - between frame posts, on the facade, in the form of layered masonry, etc.
Many of our compatriots lived in buildings built in an era of cheap heating and low energy efficiency standards. This applies to both multi-apartment buildings and houses in the private sector. In both cases, additional thermal insulation needs to be done, but this cannot always be done from the “correct” street side. In private houses, difficulties arise with insulating basements and recessed “basement” floors. Behind the cold wall of the apartment there may be a staircase, a shaft, a temperature gap... or the authorities may simply not allow facades to be insulated.
Entrance door
Not such a problem area as windows or walls, but insulation is also required. The most correct solution is to replace the old door leaf with a jamb with a new, insulated door structure. It is better to contact a specialized organization.
A company employee will come to the site, determine the strength of the partition where the door is planned to be installed, and take the dimensions of the doorway. Then a team of installers will deliver and install a new door.
You need to know all the intricacies of installing a door structure in order to control the work:
- If the wall is thin, then it needs to be insulated. Otherwise, the effect of the new door will be reduced.
- It is necessary to ensure that all joints between the door and the wall are carefully sealed with polyurethane foam.
- It is necessary to check the position of the door in two planes. If the canvas is skewed, then gaps will appear between the canvas and the jamb.
Why should you avoid insulating walls from the inside?
All written and unwritten rules say that in external walls, the “warmer” layers should be located closer to the street, and the “cooler” layers should be closer to the room. Additional thermal insulation of walls on the side of the rooms is not recommended, but... acceptable. The Code of Rules “Design of Thermal Protection of Buildings” (SP 23-101-2004) says the following:
How to insulate walls from the inside?
“It is not recommended to use thermal insulation on the inside due to the possible accumulation of moisture in the thermal insulation layer, however, if such use is necessary, the surface on the room side must have a continuous and durable vapor barrier layer.” Please note: Continuous and durable vapor barrier layer !
Indirect prohibiting factors are called: loss of usable space, labor intensity and high cost of this enterprise. However, the main problem of internal insulation lies in the subsequent incorrect operation of the enclosing structures.
After installing insulating materials on the inside of the wall, we artificially move the line of demarcation between the cold outside and the energy generated by the heating system. Under such conditions in winter, our insulation becomes a barrier to warm air, so the rest of the wall freezes quite quickly.
Wall without insulation
Insulation of walls from the inside
Insulation of walls outside
If the air is saturated with water vapor to a certain level, then droplets of moisture in the form of condensation may appear on cold surfaces. It is this effect that we can observe when bad PVC windows “cry”. Condensation is possible if the temperature of the problem surface matches the air temperature in the room and the specific relative humidity. This dependence (like the process itself) is called the term “DEW POINT”.
The current Code of Practice for the design of thermal insulation of houses contains tables with exact figures.
In our case, the cold surface is located very close to the room. When implementing internal insulation, the dew point zone usually falls directly between the load-bearing wall and the insulation. Therefore, very often, under the heat-insulating layer, the wall begins to get wet, as a result of which the structures gradually collapse; the insulation, saturated with water, stops working; Mold develops in the nutrient medium and fungi grow. The only option to avoid this would be maximum vapor barrier to prevent moisture from reaching the cooled wall.
In the Manual (PZ-2000) to SNiP 3.03.01-87 “Design and installation of thermal insulation of enclosing structures of residential buildings” there is paragraph 7.2.2, which states:
Dew point determination table
“Insulation systems should be installed on the outer (cold) surface of the wall. Internal insulation of external walls can be carried out in individual apartments of multi-storey buildings, the safety of the facades of which is subject to special requirements of state authorities of architecture and urban planning. At the same time, constructive measures must be developed to prevent condensation from forming at the junction of the insulating layers and the wall material, at the intersection of the insulating layer with floor slabs and internal transverse walls, as well as on the edges of openings, which must be confirmed by calculating temperature fields.”
This quote is especially interesting because the developers pay attention to the need to protect not only the plane itself, but also the edges of the insulation, joints, abutments from moisture...
Video description
The advantages of stone wool are described in this video:
- Ecowool.
The basis of this insulation is made up of cellulose waste, treated with substances that prevent rotting and burning, damage by microorganisms and insects. Subject to the production technology, its composition does not contain toxic substances. Internal insulation of the walls of a house with ecowool is carried out by spraying using special equipment, and floors and ceilings can be covered manually with dry material.
- Warm plaster.
Plaster with perlite or vermiculite not only helps retain heat, but is also an excellent finishing material, which allows you to solve several problems at once: insulate, level and decorate walls. The material is non-flammable, non-toxic, and resistant to moisture, mold, and insects.
This category of insulation also includes liquid ceramic insulation - an acrylic-based material filled with small expanded clay granules.
A thin layer of liquid thermal insulation allows you to save the usable area of the room Source kraski-net.ru
Which method of thermal insulation to choose and which insulation to buy
Additional thermal insulation on the premises can be done in two ways:
- As on the facade, sometimes they use the method of bonded thermal insulation, when dense insulation is glued to the base, drilled into the wall with disc dowels, then a reinforcing mesh is applied to the surface and everything is covered with a final protective and decorative layer on top (this should be a vapor-proof layer - polymer plaster, tiles and the like).
- A wall frame is assembled next to the enclosing structure. Insulation materials are placed in the cavity of the resulting false wall.
The second option is more popular, since, despite the greater thickness of the finished cake, we get a wall that is more resistant to mechanical damage, and we have the opportunity to use any finishing, including painting with interior paints or wallpapering. When using insulation inside a wall frame, there is no need to rely on the highest density of thermal insulation materials, but in any case these should be PLATES (for example ISOROC P-75). You can only work with materials that were designed for use in a vertical position without direct load on them. That is, rolled mineral wool models should be immediately excluded.
Basalt wool and fiberglass insulation are convenient due to their elasticity and elasticity. They are easy to adjust to size and stay in place well when fastened between the racks by surprise. But since insulating walls from the inside is associated with the possibility of moistening the mass due to condensation, fibrous cotton materials will not be the best option here. They have the ability to absorb water, which is why they become thermally conductive after getting wet. Against this background, more preferable are: polystyrene foam and EPPS (Penoplex-comfort).
Penoplex COMFORT - for insulation from the inside
Foamed polyurethane is a new product on the Russian market
The heat-insulating layer on the room side is exactly the place where the usual disadvantage of slab polystyrene turns into a plus for the user. EPPS, perhaps, has no competition here.
- Firstly, extruded polystyrene foam has almost zero water absorption due to its closed pore structure.
- Secondly, EPS is a vapor-proof material. It will not allow moisture to pass through to the area where the “dew point” is located.
- Thirdly, EPS boards with a thickness of more than 30 mm can usually be purchased with a stepped edge design, which helps to better seal the seams in the thermal insulation.
- Fourthly, extruded polystyrene foam shows some of the best figures for thermal conductivity among other insulation materials.
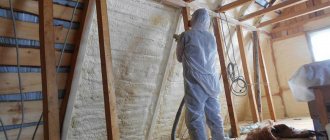
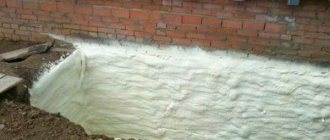
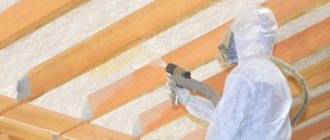
Another option that is especially worthy of consideration is sprayed types of thermal insulation. Polyurethane foams applied under pressure create an insulating layer without seams, they fill unevenness well, are tightly bonded to the base and to adjacent structures, and seal (by themselves) the junctions. If the sprayed insulation is not damaged further, its pores will remain closed, and it will not allow water vapor to pass through and will not become saturated with moisture.
Briefly about the main thing
Internal wall insulation is carried out only in cases where it is not possible to do it outside or when external thermal insulation is not enough to maintain a comfortable temperature in the house. Not all materials are suitable for this. Thermal insulation for walls from the inside must be selected taking into account the basic requirements: to be safe for health, preferably non-flammable and durable, so that in a few years you will not have to make major repairs. These requirements are best met by basalt wool, ecowool, cork and warm plaster coatings.
Ratings 0
Procedure for insulating walls from the inside
Preparing the base
The load-bearing wall must be cleaned before starting work. Afterwards, all possible cracks and through holes should be sealed. When insulating from the side of the room, it is recommended to treat the base with antifungal agents. For a house made of wood, the “Nortex”-Lux composition is well suited. There is an antiseptic with the same name intended for treating other types of concrete and stone walls.
Hanging the wall
Before installing the frame, it is necessary to determine possible irregularities on the load-bearing wall.
Inside the room, this can be done using a long rule 2.5-3 meters long, into which bubble levels are integrated. If the wall is too long, then differences can be easily found by pulling control cords. The cord is pulled along the base being examined near the floor, near the ceiling and diagonally. When identifying localized “bulging” zones, the frame indentation must be taken from them. In some cases, if the base defect is small, it is easier to knock it down than to extend the false wall too far into the room.
Bracket installation
When insulating from the room side, the frames are assembled from galvanized “ceiling” profiles. In a wooden house, these can be dry edged bars with a cross section of 50x50 mm, which have been thoroughly antiseptic. In both cases, perforated “direct suspension” brackets are used.
To install brackets on the wall, you must first mark their location. Since the profiles will be spaced at intervals of 400 or 600 mm (a multiple of the width of the plasterboard slabs), the rows of fasteners will be located along the axes at precisely these distances. In each vertical row, the distance between the U-shaped brackets should be about 600-750 mm.
Fixation of direct hangers on the wall is carried out using “quick installation” dowels measuring 6x40 mm (for concrete), 6x60 or 6x80 for brick. The “pawns” are attached to the wooden wall with stainless self-tapping screws with a large flat head of 45 mm in length. There are two hardware for each bracket; they must pass through the side eyes.
Important! It is recommended to install direct hangers on the wall through a thermal insulating gasket, then it will be possible to interrupt heat transfer through the metal and minimize cold bridges.
Laying insulation
Very often, thermal insulation is installed after the entire frame has been assembled. That is, mineral wool, polystyrene foam or EPS expands between the racks, but there is no insulation behind the profiles. In this case, it is better to lose the extra 3-5 centimeters, but reliably insulate the wall with a continuous layer. To do this, the insulation boards are “pinned” onto brackets and attached to the wall.
Obviously, some kind of fixation of the insulating material will be required. For this, it is best to use the adhesive method. Among the different types of adhesives, the most preferable is polyurethane glue in cylinders, but you can also use water-mixed dry mixtures intended for the method of bonded thermal insulation.
Important! When installing insulation on the wall, we recommend pressing it as much as possible to eliminate the gap through which moist air could circulate. For the same reason, it is better to apply glue to the beacons using a notched trowel-comb. If you use glue from a balloon, then it is advisable to make a continuous strip of it in the form of a closed contour around the perimeter of the slabs.
It is better to foam the gaps between polystyrene foam or EPS boards. It makes sense to use foam to seal the gaps near the passage of the brackets, as well as the gaps where the insulation joins the floor, ceiling and other structures.
Installation of vapor barrier
As you remember, our important task is to prevent moisture (in any of its manifestations) from penetrating to the dew point. Therefore, it is necessary to hang a vapor barrier construction fabric on top of the insulation; it can be either ordinary reinforced polyethylene, or more technologically advanced membranes or foil-foamed polyethylene foam.
The canvas can be pre-secured using double-sided tape. It doesn’t matter how the strips will be positioned (vertically or horizontally), but they must be hung with an overlap of at least 100 mm relative to each other.
Important! The vapor barrier must extend to adjacent structures so that the insulating layer is reliably protected, including at the ends. The joints of the strips and the places where the vapor barrier adjoins other structures must be taped with waterproof construction tape.
Installation of frame profiles
Now you can install profiles on top of the thermal insulation layer. In any case, we need a combination of CD and UD. First, the UD guide profiles are fixed in place along the perimeter of the wall using dowels. Then the outer wall profiles are placed in the brackets and fixed strictly vertically with LN 9 mm self-tapping screws.
When the outermost profiles of the CD are set, several control cords are pulled into alignment with their front surfaces. These will be beacon cords, along which the remaining subsystem profiles are set one by one.
If the height of the ceilings is greater than the height of the cladding panels, then you will need to assemble jumpers to ensure reliable joining of the plasterboard sheets on the short side. The jumpers are made from CD profile scraps, and they are secured in place with “single-level” brackets (these are the so-called “crabs” and the like).
Fastening drywall boards
It would be possible to use materials like blockhouse, imitation timber or lining here. But slab materials are better suited for creating tightness. When insulating the walls of a house/apartment from the inside, it is highly advisable to buy moisture-resistant plasterboard with a thickness of 12.5 mm. These are green slabs marked GKLV.
Installation of brackets
Checking the plane with a cord
Installation of vapor barrier
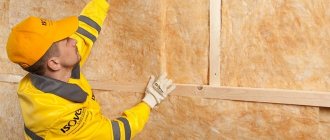
Laying mineral wool insulation
Bonding EPS
The slabs are mounted on the frame according to the general rules for plasterboard systems. Fixation occurs with self-tapping screws 25 mm long for metal, with a traditional spacing between the screws and with a traditional indentation from the edge of the slab.
Important! After installing all sheets of drywall, the gaps between the cladding and other structures must be filled with water-resistant sealants. It can be a silicone or acrylic based material.
There are no special requirements for puttying and finishing; here you only need to comply with standard general construction requirements. But if there are options to choose from, then it is better to give preference to vapor-permeable materials with better moisture resistance.
Window
Up to 30% of the heat escapes through them. The most correct solution is to replace wooden window structures with plastic double-glazed windows. To do this, it is recommended to contact a specialized organization. Specialists will visit the site and accurately measure the size of the window. Then the team will deliver it and install it.
You need to know a few subtleties about window installation in order to check the work of the installers:
- The window frame itself and the glass unit must comply with the characteristics stated in the order. This is the thickness of the profile and the number of glasses.
Double-glazed windows with three or four glasses are suitable for an apartment.
- The problem area in windows is the joint between the frame and the wall. It is necessary to ensure that the installers thoroughly foam all the cracks. They must cover the seams with waterproofing tape on the outside and inside.
What else to pay attention to
It would not be superfluous to say that insulation must be carried out comprehensively. In our case, when performing work on the indoor side, it is recommended to insulate (with good vapor barrier) also the floors and ceiling, at least in small areas near the problem wall. If there is a window on the wall, then it is very important to make good thermal insulation of the slopes and the area around the window sill.
In order to maximally preserve the integrity of the insulation and especially the vapor barrier sheets, it is better not to place sockets, plumbing outlets, built-in lamps and other mortise elements on this wall.
Sealing a wall insulated in this way (and there may be several of them in a room) sometimes causes a sharp increase in air humidity in the home. Therefore, care must be taken to ensure ventilation. The solution is to install an exhaust fan on the exhaust duct, install supply valves on the wall or on a window, and maintain the required gap under the interior door leaves, which will ensure normal air flow.
How to properly insulate a corner apartment of an apartment panel building
A corner apartment has a big disadvantage - its walls freeze more strongly and the room is always damp and cold. Condensation collects in the corners, which contributes to the appearance of fungus, so the corner room requires more insulation than other rooms.
It is, of course, better to insulate it from the outside, but this is not always possible.
In such an apartment, 2 walls at once are exposed to atmospheric influences, and especially carefully it is necessary to insulate their junction points.
Before laying the insulator, the walls are treated with antifungal drugs, allowed to soak well, after which the main work begins. The material is chosen with a vapor barrier film so that condensation does not accumulate in the corner.
Is it possible to insulate with outdoor materials?
Materials that are intended for external work cannot be used for internal thermal insulation; they can pose a danger to the health of people and animals.
When exposed to temperature, they release toxic substances that accumulate in the human body and cause chronic diseases. For example, while in a room insulated with foam plastic, people began to experience headaches and cramps.
In addition, some materials for outdoor work are flammable.
