The most common technology for leveling floors and creating a reliable foundation for their subsequent finishing is screed. The process itself is quite understandable and accessible to almost any home owner who is engaged in independent construction or renovation. And with the advent of ready-made dry construction mixtures on the free market, this stage of work has become even easier, significantly reduced in time, and labor costs have sharply decreased.
Self-leveling floor Volma
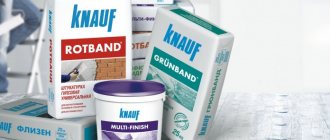
Many companies, domestic and foreign, offer consumers a very wide range of dry mixtures for pouring floors. It’s easy to get confused in this variety, so it always makes sense to first study the available information about a particular material, compare it with the performance of similar compositions of other brands, both in terms of characteristics and price level. This article will present the Volma self-leveling floor, a product of one of the leaders in the Russian segment of the production of dry building mixtures.
Dry mixture for final leveling of floors “Nivelir Express”
Self-leveling floor "Volma" is used to form a finishing coating before laying floor finishing materials. The mixture is based on gypsum with quartz sand as a filler. The composition also includes polymer, binder and modifying components that give the solution plasticity. The mixture is used only indoors. The layer thickness can vary from 7 to 100 mm.
Technical characteristics of Volma-Nivelir Express:
- Setting time is from 4 to 6 hours. Varies depending on ambient temperature and indoor humidity levels.
- The adhesion strength to the rough surface is 2 MPa.
- The floors mature completely in a week and a half maximum (depending on the thickness of the layer).
- The finished base can withstand loads of up to 16 MPa.
The price of one package is small - about 100-200 rubles for 20 kg of Volma-Nivelir Express dry mixture. The consumption is also low: with a layer thickness of 10 mm, such mass is enough for 4-4.5 m2 of surface. Compared to similar formulations of other brands, Volgograd products are much more profitable. At the same time, its characteristics are similar, and in some cases even higher.
Execution of work
Preparing the base
Before making Volma Level Comfort self-leveling floor, you should clean the base from dirt, dust, oils, lime, wax, grease, paint residues and other contaminants. Remove loose and loose parts of the floor, and along columns and walls in places where the floor adjoins, damping pads (tape or thin strips of polystyrene foam) should be laid. It is also necessary to seal all cracks and large recesses using a mixture that will be filled with a small amount of water at least 24 hours before pouring.
Care should also be taken to protect steel elements from corrosion, namely those that come into contact with the self-leveling mixture solution. On very dirty and damp substrates on which machine oil or bitumen mastic remains, as well as with low strength, it is recommended to install floors on a separating layer.
The thickness of the layer can be noted if you install level templates with a leveling ruler and a portable benchmark. It is also important to note the technological type areas for pouring the floor. According to the size of the area, which is more than 50 m2 and has a diagonal of more than 10 meters, an expansion joint should be installed in the floor, but only above the existing joints in the load-bearing base.
Next, we prime the entire prepared surface and part of the walls that will come into contact with the self-leveling floor. Porous surfaces should be primed a couple of times at intervals of 240 minutes. Laying the floor should be done only after the primer has completely dried. We do not recommend using other primers without consulting with specialists.
How to prepare the solution
Solution for manual application: the dry mixture should be poured into a clean liquid at a temperature of +5 to +20 degrees, in a proportion of 0.3 to 0.35 liters of water per 1 kg of mixture, and mix everything using a drill with an attachment or a professional construction mixer until smooth mass for 6 minutes. Let the solution sit for 3 minutes and then mix everything again. Don't pour too much water!
For application by machine: pour the dry mixture into the unit’s hopper and adjust the addition of water, and then select the required consistency.
Work order
So, here are the step-by-step instructions:
To begin with, the finished mixture should be poured onto the floor evenly to the thickness that you set, and avoid technological breaks.- Mark the technological area and fill it in 2/3 or 1 hour. When pouring the floor manually, the area of the area should be from 20 to 25 m2 or correspond to the area of one room.
- Next, after pouring the solution, you should remove the levels and remove air bubbles from the mass using a needle roller, brush or squeegee, and also make translational movements across and along the pouring surface, and start with areas that are adjacent to columns and walls.
- When the self-leveling floor begins to harden, during the first couple of days, avoid direct exposure to the sun's rays and drafts, and also create natural ventilation and keep the rooms well ventilated.
- The drying time of the floor will depend on the thickness of the layer, as well as on the humidity and temperature inside the room.
- Work on laying the coating on a leveled floor can be carried out no less than a week after pouring. The residual moisture content of the floor for laying the next coating should not exceed 1.5%.
Heated floor system
Volma Leveling Comfort self-leveling floor is perfect for working in a heated floor system. In this case, the minimum layer for pouring is 4 cm. If such a system is installed in the base base, then the thickness of the pour is from 0.05 to 10 cm. The first heating of the floor is permissible no earlier than a week after pouring, and the temperature should be from +25 to +27 degrees from 2 to 4 days.
Preparing the work surface
For the most part, leveling mixtures, including Volma self-leveling floor, are intended for leveling cement-sand or concrete screeds.
Preliminary preparation of such surfaces includes:
- Cleaning the base from construction debris, dust and dirt.
- Existing cracks are expanded, deformed areas and remnants of the old coating are removed.
- Secondary cleaning of the surface from dust is carried out.
- A layer of deep impregnation primer is applied. This is done only once. It is advisable to purchase a primer from the same manufacturer. The composition is applied using a paint roller.
- After the primer layer has dried, a damper tape is placed around the perimeter of the room.
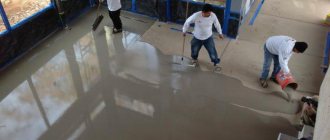
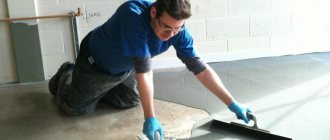
Pouring technology
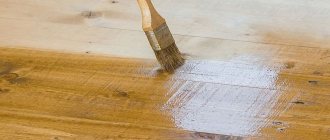
If you have already decided which self-leveling leveler is best for the floor, then without proper filling you will not get an ideal surface. The process of pouring a self-leveling self-leveling floor involves two stages: preparatory operations and direct pouring. Preparation involves activities that include cleaning the base, sealing cracks and applying primer. Thanks to the priming solution, it is possible to penetrate into the pores of the screed and slightly level the surface. Next, the finishing coating will spread over the primed surface, forming an even, smooth outer layer.
In the article you can find out what are the pros and cons of dry floor screed.
The video shows a self-leveling self-leveling floor with your own hands:
To fill the floor, you need to dilute the mixture with water in the proportion indicated on the package. Liquid self-leveling floors are characterized by rapid hardening, so you need to prepare no more than 1-2 buckets of solution. To determine the solution consumption, it is necessary to know the thickness of the coating. If the layer is 10 mm, then the material consumption is 14-16 kg per m2. A bag weighing 25 mg will cover 2 m2 of floor.
Before stirring the solution, you need to install beacons for the self-leveling floor. Thanks to them, you will be able to know the level and height of the finished floor. Now you can pour the solution onto the floor and use a wide spatula to thoroughly level everything. To remove all air bubbles, you must use a needle spatula.
The video explains which self-leveling self-leveling floor is better:
Preparation of the solution
Volma-Nivelir Express dry mix is supplied in 20 kg packages. In order to prepare the solution, this volume of material requires about 6 liters of clean water. It is advisable to use cold liquid. The viability of the finished Volma-Nivelir Express solution lasts about 60 minutes. The characteristics of the mixture do not deteriorate after this time, but it becomes more difficult to work with. It is advisable to distribute the prepared solution over the surface within an hour. If you plan to process a large area, then initially it needs to be divided into several technological sections.
The volume of water indicated on the packaging of the mixture is poured into a pre-prepared container. Then, gradually and in small portions, dry material is poured from the bag. The resulting mixture must be stirred after 3-5 minutes. During this time, the powder should have time to be saturated with water. Mix the components using a construction mixer or a drill with a special attachment. After the first “shuffle,” the mixture is left to brew for 5-10 minutes, after which it is stirred again. After preparing the solution, you can begin leveling the floors.
How to work with Volma dry screed?
Leveling dry Volma screed using beacons
To work, you need to prepare the surface. The process is no different from that described above. The mixture is also prepared with a construction mixer according to the same principle as self-leveling flooring. However, there are some differences. The main one is the proportions of water and dry matter. For this solution, 0.14 liters of cool water is taken per 1 kg of bulk mixture. That is, to seal the contents of the bag, you will need 3.5-3.6 liters of water.
- After preparing the base for pouring, guide beacons should be installed. To do this, prepare a thicker solution, which is laid out in slides along one line, the distance between them is about 60 cm. The plaster beacon is gradually pressed into the laid out solution until it reaches the intended level. When installing the beacon, you should carefully monitor its evenness (it may bend) and horizontality.
- After the solution has set, you can begin arranging the screed. The prepared working mixture is poured between the beacons, leveled with a trowel and pulled along the guides using a trapezoidal rule.
- When the material has partially set (after 6-8 hours), the surface, after wetting it, must be rubbed with a plaster float. Leveler consumption for a layer thickness of 5 cm is approximately 50 kg per m2. That is, for a standard balcony you need to buy only 4-5 bags of dry product.
Finally, watch the video, which clearly displays all the technological aspects associated with the use of the Volma brand products discussed above. After watching the video below, there should be no questions left about the working nuances and quality of the described building mixtures.
Working with solution on the surface
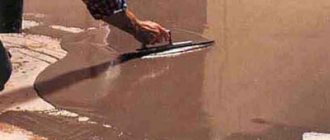
Pour the finished mixture first into deeper potholes and cracks with a gradual transition to hills. It is advisable to do all the work by two people. One will prepare the solution, the second will pour it. To level the composition, a needle roller on a telescopic handle and a spatula are usually used. The length of the spikes should not be less than 30 mm.
The solution poured onto the surface is leveled using a spatula so that the resulting strips overlap each other. Upon reaching the edge of a limited area or one of the sides of the room, the composition is passed several times with a needle roller. This is done to eliminate air bubbles from the mixture, forming a flat surface due to the movement of the solution and vibrations.
Before you start pouring the Volma-Nivelir Express solution, you must close the doors, windows and vents so as not to create drafts. If left unaddressed, they can cause surface cracks and reduce the strength of finished floors.
After four hours have passed since the floor was poured, you can move on it; after two days you can begin laying ceramic tiles. Laminate or linoleum is laid only after the surface has completely dried.
Advantages and disadvantages
Today, the technology, originally developed for the needs of industrial enterprises, is of interest to specialists involved in the construction and repair of office buildings, residential buildings, medical complexes, various institutions... It has confirmed its effectiveness wherever:
- The ability to withstand mechanical loads and the effects of substances of various chemical compositions. It is important for industrial facilities, scientific laboratories and warehouses.
- Resistance to abrasion, mandatory for floor coverings used in high-traffic areas and transport facilities.
- A satisfactory level of fire safety, achieved by complying with the requirements for flammability, combustibility, smoke generation and toxicity of combustion products, which apply to building and finishing materials.
- Hygienic properties. Reviews of the Volma self-leveling floor confirm that ordinary detergents are sufficient to maintain cleanliness in the rooms where such floor coverings are installed.
- Maintainability. Using the same materials and technologies as for pouring floors, it is possible to quickly eliminate even complex damage.
Flaws:
If we add to this durability and affordable cost, it becomes clear why the Volma self-leveling self-leveling floor attracts consumers. For the sake of obvious advantages, users are willing to put up with the existing disadvantages:
- Significant expenditure of effort and money required to prepare the base, laying thermal insulation and sound insulation.
- The high cost of equipment used during the work.
- Specific heat transfer characteristics. No matter how good the Volma self-leveling floor is, comfort in living quarters can only be ensured if heating systems are installed under the floor covering.
- Prices several times higher than the cost of linoleum or laminate floors.
Customers are not even afraid of the complexity of dismantling, the need for which arises for a variety of reasons. The pros outweigh the cons. But there are some nuances.
Advantages of Volma self-leveling floors
Products manufactured by the Volgograd company have the following advantages compared to other brands:
- When the dry mixture is diluted correctly, the finished solution has a liquid consistency. The density of the composition can be controlled by adding clean water. Working with the solution is greatly facilitated due to the fact that it is independently distributed over the surface.
- Low price of dry mixture compared to imported brands. Despite this, the composition has proven itself at a fairly high level and has earned popularity among consumers.
- The composition includes polymer components that increase the service life of the coating and increase its strength. After 7-14 days - the full period of hardening of the mixture - the coating can withstand loads of 12 MPa.
- Processing of Volma mixtures is carried out both manually and automatically. Other self-leveling floors are only suitable for one treatment method.
Optimal drying conditions
The rules for all types of self-leveling floors are very similar:
- Sudden temperature changes in the room should not be allowed.
- Avoid exposure to ultraviolet radiation.
- Avoid drafts.
- Maintain air humidity within 60-65%, for polyurethane - 80-85%.
- Fill only on a prepared and dried surface.
- Make as even a layer of the mixture as possible, otherwise the hardening time will increase by 20-30%.
Protection from ultraviolet radiation will be provided by ordinary foil and a screen on the windows. It is also practiced to cover the floor with film for construction work. The heated floor is not turned on until the filler has completely dried. Heating radiators should simply maintain the optimal temperature in the room:
- Gypsum mixtures – 40-46°C.
- Cement - 20-25°C.
- Polyurethane – 10-25°C.
In this case, heating above the specified temperatures will lead to stopping drying or deformation and damage to the coating.
You can check whether moisture remains in the filling field in the following ways:
- A special device.
- Using film and tape.
- A bowl of hot water.
Not all builders have a device for measuring humidity levels. Therefore, it is advisable to use improvised means
This is important when laying parquet, laminate, linoleum and other similar coatings. They do not tolerate excess moisture, which will appear over time.
Two methods are used:
- A piece of film measuring 100 mm by 100 mm is fixed on any part of the floor. If the poured mixture darkens over time, then the screed is not ready for loads. Drops on the film indicate slow evaporation.
- Hot water is poured into a basin and placed on the floor. A darkened area under the bottom indicates the presence of moisture in the screed. The outside of the basin should be completely dry.
There are many reasons for the slow process. The main ones are improper preparation of the mixture and non-compliance with conditions and technology.
What else to read on the topic?
Consumer reviews of products
Dry mixtures of the brand are one of the most popular and widespread among similar products. Many consumer reviews about the Volma-Nivelir Express self-leveling floor emphasize only the positive qualities of the solution - low price, ease of use, average consumption of the composition per square meter of surface, the ability to self-level on the base, high strength of the finished coating. However, many consumers also note that one of the advantages of the composition - fast hardening time - can be classified as a disadvantage. Especially for those who cannot carry out all the work in a short time. Despite this, the finished surface is perfectly flat and suitable for subsequent finishing and laying of floor coverings.
Varieties of consistencies from the Volma company
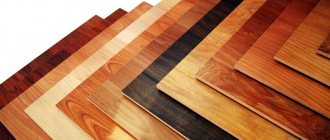
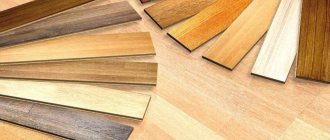
The demand for ready-made dry mixtures is growing from year to year, as workers appreciate the convenience of dissolving ready-made components without selecting them in suitable proportions. Different types of work have different consistency requirements. Therefore, manufactured products differ in certain main indicators. There are two main types of consistencies for self-leveling floors:
- With a cement base. This type of consistency has become very widespread, as it corresponds to the traditional recipe for floor screed, which has been used for decades. The advantage of cement screed is that it smoothes even the most complex surfaces and is used as a preliminary layer for the purpose of repairs.
- With a plaster base. It is on this basis that self-leveling floors are made. Consistencies with a gypsum base are used for final finishing of the floor. Its advantage is that during the work there is no need to do difficult preliminary work and lay the coating on the base.
Consistencies from the Volma company are presented in a wide range, among them two brands stand out in particular - “Rovnitel Rough” and “Nivelir Express”.