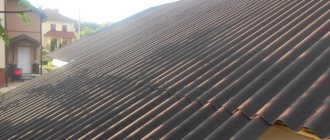
Probably everyone knows the saying “Water wears away stones.” Indeed, when it flows from the roofs, it destroys the walls and foundation. To get rid of this unpleasant fact, drainage systems are used. Essentially, a gutter is a channel that is the main element of drainage. Serves to collect rain and melt water from the roof of the structure and drain it in the right direction. Designed to protect the foundation of a building and its walls from damage by water.
Very often, when ordering a project for a building, as well as when renovating a private house, homeowners and repair teams focus on building reliable walls, thermal insulation, and a heating system, leaving stormwater drainage unattended. The absence or faulty condition of the system leads to the destruction of the thermal insulation cladding of the façade. There is a risk of basement flooding, a violation of the strength and reliability of the foundation, which leads to its subsidence and fracture.
It is more convenient to install the drainage system before landscaping the roof. However, if necessary, this can be done after completing the roofing work. This article describes the design of drainage systems and step-by-step installation.
Elements of the drainage system
The entire design of the drainage system includes a small list of elements:
- ebb and flow gutters;
- pipes;
- water intake funnels;
- elbows 900 and 450;
- transitions;
- connectors;
- brackets for mounting on a load-bearing surface;
- plugs for gutters and funnels.
Gutters that receive water from the roof are divided into:
- semicircular;
- rectangular;
- curly.
It is necessary to note the differences in diameter, material, and color.
Price overview
Let's consider how much a wall-mounted white drainage gutter PLD-02-9010-0.5 (plastic) costs in different cities of Russia:
| City | Cost of model D125 3m, cu. e. | Volgograd | 10 |
| Voronezh | 10 | Ekaterinburg | 10 |
| Krasnodar | 10 | Krasnoyarsk | 10 |
| Minsk | 13 | Samara | 10 |
| Permian | 10 |
You can buy a gutter in branded stores and construction markets; their price depends on the material from which it is made, its diameter and type.
13 November 2015 Author: Vladimir Bakaev
Sizing the drainage system
It is very important to correctly calculate the dimensions of the pipes and gutters used. If the drainage capacity is underestimated, then during a good rainfall the water will not be drained in full and will begin to overflow. A gutter, the dimensions of which are correctly selected, will fulfill its purpose and pass the required amount of wastewater.
To simplify the task of selecting the required sizes, you need to know the standards on which the choice depends. Knowing the surface area of the roof, it is not difficult to choose the diameter of the gutter and pipe. According to experts, the optimal dimensions are those indicated in the table of used water intake trays based on the roof area.
| Pipe diameter | Gutter diameter | Roof area |
| 75 mm | 90-100 mm | up to 30 m2 |
| 87 mm | 100-120 mm | from 30 m2 to 50 m2 |
| 100 mm | 120-150 mm | from 50 m2 to 125 m2 |
| 110 mm | 150-190 mm | over 125 m2 |
As for the length, it is necessary to take into account that the gutters must cover the entire perimeter of the building along the roof slopes. Considering the standard dimensions of the gutter - 3 meters, and drainage pipes - 3-4 meters, they will have to be installed from separate elements: trays, connectors, corner bends. The exception is made-to-order systems. In this case, the sizes will not be standard.
Having decided on the parameters, it is not very difficult to calculate the required number of pipes and gutters along the length. To calculate you will need:
- The height of the building (distance from the ground to the eaves). This is necessary to calculate the length of the pipe, taking into account that the total height must be reduced by 30 cm. This is the distance from the ground to the drain elbow.
- The length of the trays for each individual roof slope.
- Surface area of individual slopes. For different areas, you can use different sizes of drainage elements, which will save money. Each area can be easily calculated by multiplying the length by the width. For a roof with a composite configuration, you will need to calculate the area of each figure and add up the results. It must be remembered that correctly calculated parameters of the elements used will give a positive result when operating the system.
Construction of low-cost drainage and drainage of wetlands
Not everyone gets the “right” plots. In SNT or in new cuts, the land may be very swampy, or the developer may have a peat bog. To build a normal house for permanent residence on such land, and not a light summer cottage, is both difficult and expensive. There are two ways out of this situation - sell/exchange the plot or start draining and putting the plot in order.
In order not to deal with various expensive alterations in the future, users of our portal offer budget options for drainage and drainage of the territory based on car tires. This option allows you to save your family budget.
Yuri PodymakhinForumHouse Member
Peat soil is characterized by a high groundwater level. On my site, the water is almost level with the surface, and after rain it does not go into the ground. To drain the top water, it must be thrown outside the site. I didn’t spend money on buying special pipes for drainage, but made drainage from car tires.
The system is installed as follows: a ditch is dug, tires are placed in it, and the tires are covered with polyethylene on top so that the earth from above does not fall in. Polyethylene can also be additionally pressed with pieces of slate that are “unnecessary” in the household. This will increase the overall rigidity of the structure. Water enters the “tire” pipeline and is then discharged outside the site.
But there are also “harder” places where much more needs to be done.
Seryoga567 FORUMHOUSE Member
I have a plot in SNT with a total area of 8 acres. There is a building on the site that I plan to complete and expand. The place is very low. Because The drainage grooves for water disposal in SNT are in a deplorable state, where they are buried, littered or clogged, the water does not go anywhere. The water level is so high that you can draw water from the well with a bucket, holding it by the handle. In the spring, the water in the dacha sits for a long time, the area actually turns into a swamp and, if it dries out, it is only in the summer when it is very hot. Nobody wants to put the drainage ditches in order, so everyone floats. Therefore, I decided that it was useless to fight with my neighbors. You need to raise your site and find a way to dispose of all the “unnecessary” water from the site.
The matter was complicated by the fact that the village is inhabited, and it is impossible to drive the necessary heavy equipment onto the site to fill the perimeter. Digging an absorption well to go through the water-resistant layer and drain water into it, which then goes into the lower water-absorbing layers, is too expensive.
Moreover, for this you need to do a hydrogeological survey on the site, and there are no guarantees that this will help. There is simply no “extra” money for all the work. Therefore, Seryoga567 decided to manually enclose the site with a retaining wall made from used truck tires filled with sand. Then raise the already fortified area with the help of tires and create an embankment “island” and, thereby, cut off the area from the water that floods it.
The work ahead was titanic, but the user, working “with one helmet,” coped with it.
Seryoga567
I remember when they dug a well for me before raising the level of the site, the layers of soil went like this. First a fertile layer, about a meter, then loam, which is heterogeneous, viscous and damp, but not clay. At the end of the work, liquid mud of unknown composition and silt began to appear. In short, it’s just a disorder, not a soil, so the water has nowhere to go, and the area is always damp. Now that I've surrounded the perimeter of the property with a tire retaining wall and raised it, things have changed. As soon as the sun warms the earth, the water disappears before our eyes. In the spring, neighbors continue to walk around their properties in boots, but we, one might say, move around in simple slippers.
Let us add that the user made the foundation for a house and outbuildings, as well as a fence, based on tires.
From a small stack of tires (basically, waste material that would be given away for free at a tire shop), stacked on top of each other, you can make an inexpensive drainage well.
Plastic drainage systems
Plastic guttering is available in a wide variety of polymers. These are unplasticized polyvinyl chloride (uPVC), polyvinyl chloride (PVC), polyethylene (PE), polypropylene (PP). These types are characterized by the following qualities:
- good resistance to mechanical stress (bending, stretching, twisting);
- high resistance to color loss (fading);
- corrosion resistance;
- resistance to aggressive environments (exposure to alkalis, acids, salts)
Elements made from such materials do not require additional or periodic painting. Many manufacturers guarantee a service life of ≈ 50 years.
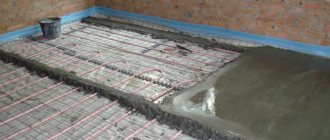
Raising the site as the most radical method of solving the problem
Sometimes, even if the drainage system is properly arranged, groundwater will still flood the area. If the methods described above do not solve the problem, you should plan the area and fill it. The cost of the necessary work is quite high, but the effectiveness of this method is high. How to raise the site?
It is necessary to make a plan of the territory, indicate on it the level of heights, as well as how the surface aquifer is located. In addition, the thickness of the fertile layer is noted. This information is necessary to understand how to make bedding. To carry out this work, you should contact a professional, especially if the site has geological features.
This is interesting!
Equipment of a well in a private house: stages, types, secrets Read more
After this, it is necessary to demolish the old structures, remove vegetation from the territory, garden and household waste, stumps. Next, a drainage system is laid.
Then backfilling is done again. A foundation is installed along the site, which will protect the backfill soil and sand from the harmful effects of precipitation.
It is important that the filling is carried out in layers; the soil must be covered by 10–15 cm. Using a vibrating rammer, the filling must be compacted. The lower layers should be kept for 14–21 days to allow them to shrink. Next, you can fill the area with fertile soil.
How to prevent layers from mixing? Geotextiles are used for this. To secure the fill, it is necessary to plant cereal crops with a branched root system. To increase the efficiency of such a system, moisture-loving shrubs and trees are planted, as well as grasses that will absorb excess water. For example, birch, willow, rose hip, hawthorn, game, spirea are suitable.
Gutter (galvanized)
Until recently, galvanizing was widely used due to its affordable price and ease of execution. These elements can be manufactured not only in industrial conditions. Tinsmith specialists, popularly called tinsmiths, easily produce such structures in their workshops and garages from galvanized steel sheets of various thicknesses. In this case, fairly simple home-made equipment is used: metal shears, rollers, a bending machine, a rolling machine for making stiffeners on products. Galvanized gutter was in great demand.
But this material has a number of disadvantages. Zinc coating is easily damaged if handled carelessly. Scratches, possible damage due to bending, in the place of drilling holes for screws, rivets or fastenings. When the zinc layer is damaged, the base metal becomes easily vulnerable to environmental influences. Corrodes and rots. There is a need for replacement. Over time, paints appeared, the use of which not only improved the appearance, but also increased the anti-corrosion properties. The color range has expanded. Metal guttering is significantly inferior to plastic ones.
Construction of ponds, sewage pits or ditches
Owners of country houses are often interested in how to dry a plot of water with their own hands without drainage. This is also possible, but it is best to use such methods in the country, and not in a country house. This is digging ditches, sewage pits or decorative ponds. They can become not only a means of draining water, but also an element of landscape design. The choice of method depends on the characteristics of the site and the reason for the accumulation of moisture.
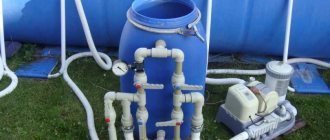
Wells
The easiest way is to dig holes in the lowest flooded areas. They should be cone-shaped, tapering downwards. The diameter at the surface is 2 m, the depth is at least 80-100 cm. Such pits can be decorated by turning them into decorative ponds. To avoid shedding and silting, their bottom is covered with gravel.
Ditches
Ditches are more difficult to dig, but such a system will drain excess water more efficiently. They are organized around the perimeter of the site. To prevent the walls from crumbling, they are reinforced with boards or concrete slabs. You can put a metal box on the bottom.
Drainage ditch beautifully designed to look like an artificial streamSource kndlandscaping.com
A variant of this drainage method is the installation of decorative streams. This is appropriate if the site is located on a slope. The bottom of the artificial stream is laid out with pebbles, pebbles or geotextiles. It is recommended to arrange streams under trees, as in a sunny place the water will bloom.
Polymer-coated steel
This material is used more than others in the manufacture of parts for drainage systems. It has better strength characteristics (than plastic) and has a longer service life (compared to galvanizing) due to the many protective layers available. Modern systems are produced on the basis of steel, which is used in the manufacture of metal tiles. The raw material is hot-zinc-coated, cold-rolled steel, coated on both sides with plastisol and painted in a RAL color palette. An interesting fact is that among the many different colors, manufacturers gave preference to brown and white, but upon personal order they are ready to produce in another color. The new types of dyes used provide color saturation, brightness, and resistance to fading and discoloration.
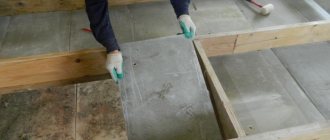
How to properly install a drainage tray?
Before starting work on installing trays, it is necessary to dig a pit.
Reinforced concrete gutters must be installed on a sand bed or concrete surface. Trays must be laid using special hooks and a crane. Special lids or grilles are installed on top of the trays. In a suburban area, it is best to use gratings, which can be made in different shapes and materials. The grates are chosen so that no debris or leaves get inside the gutters.
Installation of drainage trays
Before installing a drainage system, you need to prepare a design according to which the installation will take place. It is worth remembering that sand and small pebbles can get into the drainage system, which can clog the drains; to prevent this from happening, it is recommended to install sand traps. It is recommended to clean such sand traps approximately once a season.
Copper
The durability and uniqueness of copper is undeniable. It is a high-quality roofing material. It has also found application in the manufacture of drainage systems. Roofing manufacturers claim that copper-clad roofs can last more than 400 years. Working with such products is allowed at all times of the year, regardless of temperature conditions. But at the same time, a condition must be observed: the gutter fastening, like other parts, must be copper or made of stainless steel. This precaution prevents the formation of electrolytic vapors, leading to oxidation of copper and its destruction. Contact with galvanized surfaces and zinc-titanium is unacceptable for copper. Over time, copper products change their color. In the first ≈ 5 years they become black, then green and after 30 years they acquire a stable green color. All changes in color do not affect durability in any way.
Since zinc-titanium and copper are considered very expensive materials, maximum care must be taken when working with them. Therefore, it is better to entrust this work to professionals.
Heating
One of the most pressing topics for owners of private houses is ensuring thermal insulation of the drainage system. There are several options to solve this problem:
- Cover the entire surface of the pipes with special material. For example, geotextile fiber. This solution is suitable for closed drains that need to be provided not with heating, but with good thermal insulation;
- Install a heating wire or board into the drain. This option is convenient and simple, but can be used exclusively for iron bends.
To heat a plastic gutter with your own hands, you will need a self-regulating cable and a casing for it. This is the simplest and most affordable method that will help combat icing of systems even in difficult weather conditions. The wire is installed in the sheath and then connected to the power supply. During operation, it regulates the temperature itself (these parameters can be configured).
Gutter heating
Why do you need a heating installation:
- PVC and steel drains can become clogged due to sudden temperature changes. Ice interferes with the normal operation of the system, causing its efficiency to be significantly reduced;
- Installing heating for gutters protects the system from cracking;
- Heating is very important not only for pipes, but also for the roof surface. This provides a good level of safety and protection of premises from freezing (especially in houses with a residential attic).
Attaching the drainage system
To fasten pipes to the wall of a building, clamps with pins are used. A hole is drilled in the load-bearing wall for the dowel, the pin is screwed in and the pipe is secured using a clamp. Mounted on the wall at a distance of ≈ 2 m.
The gutter can be attached in several ways. The simplest is fixation on the front board, previously mounted and lined (for example, with plastic) using a bracket. Another method is to attach a long tray hook to the rafter beam. But this must be done first, before covering the roof with roofing material. During installation, it is necessary to make a slope for drainage within 2-5 mm per 1 linear meter.
How to drain groundwater from the foundation of a private house with your own hands?
The foundation of any house, and especially a private one, is subject to the negative influence of ground water. They contain components that can destroy the concrete base. Even if the house is carefully waterproofed and equipped with supports, this does not guarantee protection from the influence of groundwater and further destruction. Only foundation drainage can provide such protection and ensure drainage.
Drainage installation around the foundation of the house
The main stages of creating a closed drainage with your own hands:
- Digging a trench half a meter wide and half to one and a half meters deep. You should dig with an inclination towards the ditch into which the water will drain.
- Filling the trench bottom with sand and further compacting it, taking into account the angle of inclination of the bottom.
- Laying drainage pipes on the sand (if there are no special perforated ones, you can make them yourself: by drilling holes in ordinary plumbing pipes in a 180-degree sector).
- Sprinkling the pipes first with large and then small crushed stone and compacting a layer of earth on top of the crushed stone.
- An inspection well must be installed in the bend of the drainage system, to which pipes with holes for drainage are attached. The pipes must lead to the very boundaries of the site.
Now we need to organize water drainage outside private property:
- we dig a trench again;
- we make a slope and cover it with sand;
- we install pipes without holes (here there is no need to collect water from the lawn);
- we fill up the pipes and put the soil and turf in place.
Thus, foundation drainage is an operation, before which it is not recommended to engage in the actual construction of the house. Drainage provides protection around the foundation, removal of excess moisture from it and, therefore, long-term operation of the building.
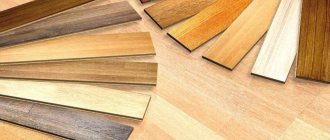
Gutter materials
Manufacturers make gutters from various materials: PVC, metal, zinc, aluminum, copper, etc.
The choice of one or the other determines the quality and service life of the entire system. Plastic. Installation of a plastic drainage system is the most popular and attracts owners due to its cost. The use of modern high-strength polyvinyl chloride in the production allowed the gutters to withstand significant mechanical and chemical loads and the influence of UV rays. The advantages also include:
- Variety of colors;
- Possibility of manufacturing pipes of various sections (square, round, etc.);
- Poor adhesion of plastic to ice.
PVC products react quite significantly to temperature, changing their volume; at low temperatures they shrink and harden, and at hot temperatures they expand. However, this does not mean that the gutter will not function normally for its intended purpose.
Metal. Most often made of stainless steel, they are extremely durable; the effect of water on the material is not noticeable even after many years. A significant design disadvantage is weight. Therefore, installing such a gutter will be more difficult and more expensive than PVC models.
Galvanized. Proponents of galvanized gutter systems (often containing titanium, copper and aluminum) praise their sophisticated aesthetics. In addition, they can be used for up to 100 years and during this period do not require painting or repairs. Unfortunately, these models are quite expensive.
Aluminum. They are cheaper than metal and galvanized ones. A positive feature of the material is that it ensures a high water flow rate due to the slight roughness of the pipes. However, they are not recommended for use in buildings located near the sea due to their lack of salt resistance.
Copper. They have an unusual appearance and an impressive price, despite this they are durable - their service life is up to 300 years. Disadvantages include a limited color palette and easy corrosion.
Installation rules
Regardless of the material used, gutters are laid according to the same pattern:
- Prepare a trench for installation of a storm drain. It is immediately made with a bias towards the receiver. At the same time, the depth and width of the channel are increased by 15-20 cm in order to further strengthen the gutters.
- The bottom of the trench is thoroughly compacted and covered with a 10 cm layer of sand. It is slightly moistened and also compacted.
- Concrete mortar is poured onto the sand bed. It will serve as the basis for the trays. For greater strength, the filling can be reinforced.
- Once the concrete has dried, you can begin laying the gutters. They are carefully joined together. Seals are used in polymer trays. For concrete channels, bitumen or acrylic mastic is used.
- Once the trays are laid, you can install a special mesh along their edges from the outside and fill the gutters from the ground side with concrete mixture. It will act as a limiting factor in case of possible soil heaving.
- Lastly, protective grilles are installed. It is important to ensure that they are located slightly below the site from which rainwater will be drained.
It is better to lay trays along the control thread. This way the evenness of the channel will be perfect.
What it is?
These are complex measures for collecting surface water. This means the manufacture of bends from special pipes, gutters, siphons, sand traps, plugs, storm water inlets and other elements. Its main task is to collect and drain rainwater, melted snow and similar precipitation from the house. Discharge can be carried out into a septic tank or a special container.
Advice! If a ground drainage system is being constructed on a site, then stormwater runoff cannot be directed to one place. As a rule, drainage and stormwater are laid in one trench in parallel, but water is collected in different places. Moreover, the stormwater system is located higher in level.
SNiP
Mandatory compliance with SNiP and similar standards according to GOST for its manufacture in a small area. Failure to comply with basic requirements will lead to malfunctions in its operation. Thus, the main provisions are set out in SNiP 2.04.03-85 “Sewerage. External networks and structures.”
To achieve the greatest effect, it is extremely important to have the following information at hand, preferably documented:
- Plan of the existing sewer system.
- Working drawings.
- A network profile is made in a longitudinal section.
- A statement of the work that will be carried out.