The market offers a wide range of different doors. But sometimes it is difficult to choose a model that fully meets the owner’s needs. There are plenty of reasons - a significant difference in dimensions (block/opening), low quality products, poor external design, high cost, and so on. For a person who is familiar with household tools, making interior doors with your own hands is not a problem. In many cases, this solution is the most rational.
Features and models
Entrance doors are installed both in apartments and in private houses.
Regardless of the location of this structure, its direct purpose is considered to be reliable protection of housing from cold, noise and burglary. Therefore, when choosing this or that front door model, you need to take into account many nuances. Recently, homemade structures made of metal and wood have become extremely popular, while metal doors are distinguished by their functionality and design features; they are resistant to explosions, burglaries, fireproof and bulletproof. Today there are many types of entrance doors. According to their purpose they are:
- Fireproof and bulletproof. Such products are made of high-strength metal. In addition, these types of doors are additionally treated with reinforcing compounds.
- Shockproof. They are the most reliable option for protecting your home.
- Soundproofing. Prevents noise and sounds from entering the house.
- Sealed. Often installed in outbuildings.
Entrance doors can open in different ways. There are swing and sliding models of structures. In addition, doors are classified by the number of leaves and are:
- Single leaf. Made from solid fabric.
- One and a half. They are a structure consisting of two parts, where only one opens.
- Bivalve. Large doors with two opening leaves.
All entrance doors differ in appearance and shape, so a distinction is made between rectangular and arched products. Designs with a blind transom are also popular.
Painting
At the next stage, the finished structure is processed and decorated. It is recommended to adhere to the following plan:
- processing the coating with sandpaper or a grinding machine;
- impregnation of wood with antiseptic. The first layer should dry well. The processing is then repeated;
- the canvas is covered with a special putty, which can be replaced with a primer. In this case, the canvas is processed 2 times. But each applied layer must dry well. This will take about 2 days;
- Paint, varnish, and stain are used to finish the coating. The stain must be applied over the primer. Taking into account the desired shade, the appropriate number of layers of stain is applied. Each layer will take 4 hours to dry. To fix the result, the stain is coated with two layers of varnish.
To finish the door, paint, varnish, and stain are used
Experts advise treating the door with special protective agents against moisture and pests . If the door leaf will be installed in an apartment, then it is coated with a fire retardant. To perform a more complex decoration option, you will need the help of a specialist. Read more about painting and treating doors in the article “Painting wooden doors.”
Installation of an insulated wooden entrance door
Models designed for installation from the street can withstand temperature changes and retain their original characteristics and appearance throughout their entire service life. In addition to the fact that insulated wooden doors do not allow heat to pass through, modern processing technologies ensure a long service life of such structures.
A wooden entrance door has the following advantages:
- minimal heat loss - due to the low thermal conductivity of wood and the presence of a layer of insulation, the optimal temperature is maintained in the house, saving money on heating costs;
- no condensation - there is no large temperature difference on the door surface. And the absence of moisture on the door leaf and on the wall allows you to increase their service life;
- good sound insulation;
- beautiful appearance.
Insulated door structure
Modern technologies make it possible to create high-quality and reliable wooden doors. They are installed both at the entrance to the house and to the apartment. An insulated wooden door consists of the following elements:
- frame - made of solid wood or wooden blocks;
- insulation - applied to the outside or inside of the finished door, and covered with decorative material on top of it. In wooden houses, the insulation on the door is covered with slats. There are factory options, when a layer of insulation is placed inside the door. If the door is framed independently, then the insulation is spread between sheets of chipboard or MDF;
seal - attached around the perimeter of the canvas or box, or in both places at once. This is done with glue, double-sided tape or furniture nails. The thickness of the seal must correspond to the gap between the frame and the door leaf, so it is selected individually in each case. - The seal ensures a tight fit of the leaf to the door frame
A small lunge is made on the door leaves to close the gap between the frame and the leaf.
Classification of insulation
The construction market offers the following types of insulation:
- Felt is processed animal wool. It has excellent properties to retain heat and is absolutely safe for human or animal health.
- Polystyrene foam - it is sold in sheets. Easily cut and fixed on the door leaf. Does not slip, does not absorb moisture. It is both insulation and soundproofing material. Can only be used for insulating metal doors. When installing foam plastic, the gaps are closed with mounting foam or using liquid nails.
- Foam rubber is a soft material. The main disadvantage of this material is that if it is used to insulate a wooden street door (private house), it will soon crumble due to temperature changes. Foam rubber is produced either in rolls or in sheets.
- Mineral wool is a soft insulation with positive characteristics. It has high thermal insulation properties and also creates sound insulation. The material has its drawbacks - moisture absorption. If you insulate the door from the street side, then you need to use polyethylene. When moisture is absorbed by the cotton wool, the door will become heavy, which will lead to deformation and improper operation of the door leaf.
- Isolon is sold in rolls. One of the most expensive materials. The base of the insulation is foamed polyethylene. The disadvantage of this material is the pricing policy. But, given his qualities, this can not be taken into account.
- Polyurethane foam is foam that can be pumped into the door cavity. The hardening time is less than a day. The only drawback of this material is that it is not possible to pump the foam yourself. You should call the experts who will do this carefully and quickly. The insulation retains heat, creates silence, and is not poisonous.
Selecting insulation thickness
The thickness of the material depends on the size of the door. Let’s say if the door is empty inside, then you should simply put insulation there and cover it with the top layer of the door leaf.
If the door does not have voids, then you need to stuff an additional frame on the inside of the door, which is filled with material and then sewn up with upholstery (leather substitute). The nuance here is the fact that the thickness of the insulation should not exceed the thickness of the door leaf.
Installation
First, install the box using polyurethane foam. After hardening, begin installing the canvas. For wooden structures, it is better to choose removable hinges. They can withstand heavy weight and are easy to install. Such hinges are suitable for a barn door, entrance or interior structure.
Adjustment
If the door cannot be closed due to the frame being skewed, you should remove the panel and check the joints of the beams. An angle of 90° must be maintained. If necessary, the box is corrected. When hinges become the cause, the attachment point is deepened or completely changed. The last option is suitable when there is no way to correct the current location of the loops.
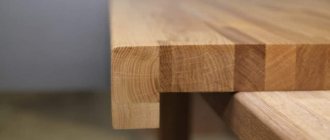
What type of wood to choose
One of the most critical stages is the choice of source material. Each type of wood is endowed with special mechanical and physical qualities. It is necessary to know the features of different types in order to determine which one is ideal for solving a particular problem. All wood can be divided into two categories - deciduous and coniferous.
Hardwood
This series contains the most valuable species, endowed with extraordinary strength, high density, expressive texture and attractive natural shades.
Wood has the highest value:
- beech;
- nut;
- mahogany.
If there is no reason to spend money on expensive raw materials, you can get by with more affordable ones. Pay attention to the advantages:
- cherries;
- oak;
- ash
These rocks also have high strength, but will not require such significant costs as representatives of the first category.
Oak wood is very durable and resistant to rotting. Due to the content of tannins, which react with dyes during etching, it allows you to achieve intense color effects. Processing the material is not difficult - it lends itself well to simple tools. Making parts of unusual, curved shapes from it is not a problem.
Ash is as hard and durable as oak. However, this material requires regular treatment with antiseptic compounds. Otherwise, when the first wet season arrives, it will begin to rot.
Conifers
Coniferous wood never loses its popularity. This is explained by its availability and a wide range of positive qualities. The most popular materials are those made from pine, followed by spruce.
The strength characteristics of pine are slightly lower than those of deciduous trees. This disadvantage is more than offset by high resistance to biodegradation, mold and mildew, excellent thermal conductivity and extraordinary flexibility during processing. High air and moisture permeability guarantees decent quality of treatment with protective compounds.
Spruce is more susceptible to rotting compared to pine, but has less hygroscopicity and thermal conductivity. Products made from this material retain their original shape much longer.
If you choose between these two species, you should give preference to pine.
Deciduous tree wood is ideal for making interior doors. And for entrance structures, pine would be the best choice.
Types of doors by design
Doors are classified according to various criteria - the design of the door leaf, the method of opening.
The following types of door leaves are distinguished:
- massive;
- paneled;
- panel;
Groups of door structures by opening method
- hinged - with one or two doors;
- sliding – so-called compartments, equipped with a guide system;
- folding - doors resemble an accordion or a book;
- radial.
To make wooden doors, boards, beams, and furniture panels are used. To decide on the choice of material, you need to understand the pros and cons of each of them. Let's look at the characteristics of the various options.
Massive doors
To make doors from solid wood, planed or grooved boards of large thickness are suitable. The latter are convenient because they are easily combined into a single fabric without forming cracks. This becomes possible thanks to the locking system, which consists of a longitudinal protrusion and a corresponding slot on the edges of the board. The canvas, made up of boards, is fastened with transverse or diagonal jumpers.
When making a front door, you should give preference to more expensive breeds. Oak, larch or cedar are suitable. For outbuildings, budget options are quite suitable - pine, linden or spruce.
Panel doors
This is a separate category of doors with its own design features. Their canvases consist of a frame and rectangular inserts - panels.
The main load-bearing element of this structure is the frame, which is otherwise called the frame. The remaining elements are attached to it - wooden inserts. The harness is usually made from solid wood. Glued laminated timber will also work. Four parts connected to each other form a frame. The bottom element is wider than the top and side panels. This provides the structure with additional strength. You can further strengthen the bottom of the door by covering it with sheet metal. Galvanized steel or aluminum will do. This is especially true for strengthening entrance panels.
No less important elements are the transverse strips - in other words - the middle ones. They are bars that are attached horizontally in the middle of the future canvas.
And finally, the details that gave the name to the entire structure - panels. These fragments are inserted into the frame, resulting in the formation of a single piece. Special grooves are provided for their installation. The panels are attached using a tongue-and-groove system or decorative beads, which allow you to quickly and without damaging the door replace the damaged element. Panels can be made from chipboard, MDF, plywood and even glass. They are installed in the door frame, and in addition to their main purpose, they also have a decorative function. They are given interesting shapes and decorated with carvings or paintings.
Panel doors
The design of the panel door is much simpler than the previous version. It consists of a box and the main part - the shield itself. Fiberboard, veneer or laminate are suitable for making the box. The frame is first made from boards. It is advisable to use sheets of chipboard, MDF or fiberboard as a shield.
Panel sheets can be:
- solid - made from interconnected bars;
- hollow - a frame of connected beams is sheathed with lamellas;
- small-hollow - have a variety of fillings, for example, honeycomb.
Requirements for entrance doors
Entrance doors that can be installed in a country house must have the following qualities:
- low thermal conductivity;
- resistance to the negative effects of environmental factors;
- resistance to mechanical loads;
- attractive appearance;
- reliability of fittings;
- affordable price of production materials and, as a result, low cost of the finished product.
Now we know what wooden entrance doors can be made with our own hands, it remains to find out what materials these products can be assembled from.
Re-sheathing
Before you figure out how to insulate an iron door with your own hands, you need to think about the exterior finishing. We're talking about upholstery. So, leatherette or leather substitute is perfect for these purposes. Next we do this:
- We lay the material on the door.
- We cut off the canvas, leaving a margin of 10-20 centimeters on each side.
- Fold leatherette or leatherette beautifully.
- Secure with special decorative nails.
- We return hinges and fittings
Once the door is insulated and finished, we return the hinges and fittings to their places. To do everything right, it is better to photograph their location in advance. It is better to choose new handles - to match the color and style of the new design.
Preparation stage
Personally designing or assembling something requires careful analysis of many factors and selection of the most appropriate option.
Material
Considering the organization of production at home, the best option is wooden doors. There are interior models on sale made from different materials - plastics, glass, aluminum - but working with them requires not only experience, but also special tools. In addition, wood has an undeniable advantage - it is able to “breathe”, which has a beneficial effect on the microclimate in the house.
Engineering solution
Interior doors are divided into several types - hinged, folding, sliding (compartment). The models also differ in design - single-leaf, double-leaf, and one-and-a-half-leaf. Some of them have an upper extension - a transom. What is it advisable to focus on? Without professional skills, special tools, or machine equipment, you should choose a swing interior door with one leaf.
These are the most popular varieties installed inside apartments and private houses. If you study the step-by-step instructions for constructing doors of all types, then it is the swing “one-room doors” that are easier to manufacture. In addition, preparing the opening for their installation does not require complex technological operations.
Blade type
- Paneled. The advantage of interior doors in this category is their relatively light weight. The canvases consist of a wooden frame and inserts, which differ in size, material, and shape. The difficulty is that the panels will have to be fixed to it, and for this you need to select quarters in the tree. Even with professional tools (equipment) at hand, independent production of interior doors of this type (if we mean quality) is a big question. To achieve the desired result, you will have to spend a lot of time and material, the consumption of which will be significant, since the volume of rejection will increase.
- Shield. This solution is optimal. The only downside is the weight. But this problem can also be solved if you choose boards of small thickness. Since we are talking about interior doors and not entrance doors, the strength of the door leaf is not a primary factor. But there are many more advantages: ease of assembly, the possibility of any finishing (varnishing, tinting, brushing, lining with plastic, decorative film, natural veneer - different design styles are practiced), high maintainability.
In addition, the door dampens noise well and is characterized by low thermal conductivity. There is another factor that many people overlook. Wood is prone to deformation (it “plays” under the influence of changes in humidity and temperature in the house). A solid door is less susceptible to this than a paneled model, especially if the inserts are made of a different material. For example, glass, plastic.
Lumber
- The type of wood does not play a big role if subsequent finishing of the canvas and frame is planned. You can partially save on this by choosing inexpensive products. But if you decide to make a door from boards while maintaining their texture, then the answer to the question of what to buy is obvious.
- Degree of wood drying. According to SNiP, lumber with a moisture content exceeding 22% cannot be used in construction. When applied to doors, experts advise focusing on 10 - 12. Wet wood will shrink and the structure will “lead.” If the samples are thoroughly dried, then, firstly, they will cost more, and secondly, there will be difficulties with cutting them. In addition, excessively dry wood easily splits, and this will cause problems with fastening fittings and inserting locking devices.
Varieties and dimensions
- Frame. A beam with a side of 40 - 50 mm is sufficient for the frame of the canvas. It is necessary to take into account the installation location of the door, that is, how intensively it will be used. Plus - the specifics of the room at the entrance to which it is installed; Is the door supposed to be equipped with a lock, and if so, what type. The latter fully applies to canopies.
- Canvas. To reduce the weight of the interior door and facilitate the manufacturing process, it is advisable to use MDF for covering the frame. Another argument in favor of this solution is that the slab material (if it is of high quality and carefully processed) is inert to humidity and temperature. If you want to make a door from solid wood, 10 boards with a width of 150 are suitable.
- Box Rarely does anyone leave an old joint in place. If a new door is being assembled, it must be completely complete. When choosing timber, you need to take into account the thickness of the wall (partition) at the installation site. There is no other recommendation for this item other than sufficient strength of the jamb.
The choice of material is largely determined by the door drawing. The interior door leaf is made in different ways; it can be solid, hollow or “cellular”. The last option is called small-hollow.
Door diagram
- Dimensions. The initial data for calculations are the dimensions of the opening. For accuracy of calculations, its width is measured at 3 levels; similarly with height - at three points (on the sides and in the center). It is worth considering that a technological gap of 4±1 mm is left between it and the box around the perimeter. This is the outer contour of the jamb. Provided that the width of the canvas is of decisive importance, then everything else is calculated based on its required dimensions. In this case, the gap between it and the jamb (within 1 mm) is also taken into account.
In practice, it is difficult to make wooden doors with your own hands, without experience, in exact accordance with the specified values, but it is advisable to adhere to these values. And the main thing is the correct shape (rectangle) of the door frame. The slightest curvatures, distortions - and problems with a tight fit of the canvas are guaranteed.
- The direction of opening the canvas. When determining it, the location of the opening in the room is taken into account; The pictures explain this well.
Manufacturing procedure
The assembly of an interior door is carried out using different methods. But if the meaning of all operations is clear, then developing your own technology is not difficult.
Box
It’s quite simple with it - assemble a rectangular structure, and only then place it in the opening. But installation is recommended only after the fabric has been manufactured. This makes it easier to mark the places where the awnings and latch (lock) are attached. Doing this on a jamb already installed in the opening is much more difficult. In addition, it is necessary to select the grooves for the door. Therefore, after the box is knocked down, you still have to return to it.
Canvas
It all depends on the chosen design, and therefore where to start - with tying or cutting MDF boards - is decided based on the door drawing.
Frame making
The technology is simple - a rectangular shape is assembled according to the size of the sash. But there are options for filling it.
- Stiffening ribs are installed in the form of vertical posts. This solution is advisable if the frame is planned to be sheathed with MDF or plywood - the strength of the coating will be ensured.
- One horizontal jumper in the center. A good solution for insulating an interior door. For example, installed in a passage leading to a cold room (utility room). The canvas is filled with expanded polystyrene, and its slabs are foamed around the perimeter.
- Leave one frame without additional elements (small-hollow design). How to fill it and whether to do it is decided depending on the specifics of the room. But this frame option is only suitable for interior doors that are covered with boards. Otherwise, there can be no talk of strength.
Fabrication
- Its dimensions are known; All that remains is to cut the MDF into 2 - 3 fragments, according to the drawn up drawing.
- The second stage is assembling the harness. That is, the frame is assembled using a ready-made canvas.
Advice. To make work easier, it is recommended to mark all workpieces. On individual samples (according to the diagram), cuts, cuts, and drillings are first made for installing door hardware elements. This is much easier than doing such work on an assembled large structure. The difficulty is that the marking must be extremely accurate.
Door processing
- It is advisable to use the antiseptic again. Since material sampling and drilling were done, individual areas may be “exposed.” Secondary use of the anti-rot composition eliminates this disadvantage.
- Surface design. Options are marked: stain, varnish, veneer, film - depending on the design concept.
Preparation for installation
At this stage, latches, eyes, handles and hinges are installed on the canvas. The box is placed in the opening, aligned and securely fixed.
All that remains is to hang the door, align the second half of the canopy with the mounting holes and secure it with self-tapping screws (included in the kit).
“Finishing chord” - checking the correct operation of the canvas, tightness, absence of distortions; If deficiencies are identified, eliminate them. All further measures - insulation of the opening, installation of platbands, decorative design - are a slightly different topic.
Making an interior door at home is quite possible. Success largely depends on proper work planning, choosing the optimal design scheme and your own diligence. And quality is ensured by a good tool, the purchase of which is not worth regretting.
Do-it-yourself wooden door: step-by-step instructions
Having dealt with the tools, we proceed to the step-by-step creation of a solid wood structure. Next, we’ll look at the simplest option, how to make wooden doors with your own hands (video).
Preparing the boards
The future canvas should be smooth and beautiful, so before making a wooden door with your own hands, sand the purchased boards. Put a circle on the grinder, turn on the equipment and walk along the wide surfaces of the boards. The ends do not require such processing.
Milling
If you don’t have a machine, a hand tool and a set of cutters with it are quite suitable for making wooden doors with your own hands. The treatment needs to be done just at the ends of the wooden boards. You should go around the corners, slightly rounding them. The main thing is not to overdo it and not remove them completely. Select a suitable cutter, take a long board and make a groove along the entire length of the end. It should pass clearly through the center of the end, and the depth should be no more than 2 cm.
Trimming the ends of the boards
Using a circular hand saw, the ends of the four main boards should be cut at a 45-degree angle. To get a clear angle, use a protractor. The length of the stand must be 2 meters. If the height of the future structure should be of a different size, then everything can be selected individually.
We cut fiberboard
If you have chosen the material of the desired size, then you will not have to cut it. If it is larger than the required standard, then, before making a door from fiberboard with your own hands, cut according to the following scheme: from the width of the door leaf, subtract twice the width of the prepared boards, and then add two depths of the cut groove to the value.
Test assembly of the structure
So, we make wooden doors with our own hands. We take the prepared fiberboard element and put boards on it. Next, we connect all the other parts of the fiberboard door with our own hands, without glue for now. The main thing is to make sure that the elements fit and are in place. When everything is as it should be, mechanical fasteners are installed. At the same stage, you should decide on the fittings and prepare a place for them.
Interior systems can have different designs:
- Panel. A paneled wooden door is created with your own hands using the designer method: the frame is made of thick wood, inside which a thinner panel is inserted. In order for the canvas to fit into the base, grooves are made in the base, and the materials are secured at the joints with glue. Sometimes paneled doors are created not from a single piece, but from glued parts.
- Sliding structures. It is based on a wooden frame, thin fabric, which is upholstered with other materials.
- With glass inserts. It consists of a base into which glass is inserted (it can be of various shapes, textures and sizes). The glass is fixed with glazing beads and inserted into the grooves.
Covering the door leaf, attaching hinges and installing fittings
Before final finishing (coating with decorative film), it is necessary to prepare samples for hinges and latch. Accurate measurements are taken and the location of the loops is determined. Hinges are placed on the side edge of the door leaf at the required distance from the end and their contours are traced. The boundaries are cut with a chisel, after which a sample is made: a layer of material is removed to a depth equal to the thickness of the loop map.
Next, mark the places for the handles and drill holes. A latch is inserted into the previously prepared slot and the contours of the fastening strip are marked with a pencil. They cut a recess under it.
Having completed the preparatory work, they begin to cover the door leaf. To create a perfectly smooth surface, the plywood is sanded with fine-grained sandpaper, wiped and coated with a layer of varnish. It is more convenient to paste with an assistant who will hold the free part of the film and separate the paper backing. If you don’t have experience working with self-adhesive film, you can watch the video and learn the nuances. To avoid the appearance of wrinkles and small bubbles, the film should be glued evenly across its entire width, carefully smoothing it out, but not allowing it to stretch. The film is folded over the side edges of the door leaf and overlapped. After completing this important process, screw the hinges with screws and install the latch with handles. They hang the door.
One of the methods for manufacturing a panel door is presented. You can choose a “lightweight” version of the canvas and not fill the voids with polystyrene foam, but use MDF instead of plywood.
Installing a latch on an interior door
How to insulate?
One of the purposes of the entrance structure is considered to be good thermal insulation, so the canvas should be well insulated. Various technologies are used for this. If the box is made of metal, then first of all you need to fill its internal unused cavity. In this case, it is filled with a special insulating material in the form of mineral wool or polystyrene foam. Also, to keep the door warm, it can be covered with wooden beams. The only drawback of this technology is the formation of cold bridges.
The front door is well insulated with dermantine. With this technology, the door leaf is upholstered on only one side, and a thin layer of insulation is applied to two openings. Thermal insulation is glued directly to the door, and then it is decorated with dermantine or genuine leather.
Equally important is protecting the structure from drafts. There are two ways to do this:
- Insulating the gaps between the frame and the canvas. A rubber or foam seal works well as thermal insulation. It is attached using a self-adhesive base and applied both to the box itself and to the canvas.
- Opening the door frame. The outer and inner sides of the slopes are upholstered, and the gaps between the opening and the structure are filled with insulating material.
If none of the types of thermal insulation are suitable, an alternative solution may be to install a second entrance door.
We insulate the door frame
And now the most important stage begins - insulating the front door. The first step is to eliminate all the cracks through which air gets in from the outside. They can be different - from noticeable to the smallest gaps between parts.
Your task is to place a seal around the entire perimeter of the box to block the cold bridges. It should be secured with the edges of the ribbon from the frame to the very edge of the door. Then the holes need to be filled with insulation. How to choose insulation for the front door was already discussed in the article.
Foam rubber or tow will work as a material, which needs to be pushed as deep as possible, creating a large layer. If the space is more than 5 mm wide, then polyurethane foam will be most effective.
Using a special nozzle, you can easily treat hard-to-reach places. But do not fill more than 50% of the free space with it, as the foam will grow over time and fill the void.
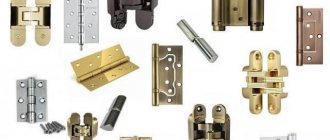
How to weld awnings?
Before installing the entrance doors, it is necessary to weld the hinges (canopies). As a rule, to hold a standard structure you will need two hinges, the distance between them should not exceed 20 cm. Before work begins, the canopies are thoroughly cleaned and treated with a special solution. It is advisable to weld the hinges horizontally in relation to the door frame. In the event that the opening is already installed, the welding seam is carried out vertically.
The hinges are welded according to the following scheme:
- The prepared blanks are divided into two components, one of which is welded to the canvas, and the second to the box.
- First, the lower loop is attached, it is welded in several places.
- The location of the loop is checked using a building level.
- A final check is being carried out.
As for the upper hinge, the work on its installation is carried out in the same way; the only thing worth considering is the location of both canopies in the same plane. They must be placed clearly on top of each other. At the end of the work, it is important to thoroughly clean the seams from plaque, then weld the fittings themselves.
Installation of door frame and door
The next step is to install the frame and hang the door.
- We install the formed box in the opening and fix one side with long self-tapping screws in places that will be closed with hinges.
- We attach the hinges to the door leaf and frame and hang the door.
- We close the door and mark a place for the locking plate. Drill a hole to fit the latch.
- We secure the second side of the box. Before this, you need to close the door and adjust the gap, making it the same over the entire height of the door.
- We install a wooden wedge between the frame and the doorway at the latch level and fix it with a self-tapping screw through the hole provided for the locking hardware.
- We install the locking plate and secure the box with wooden wedges.
How to treat wood
Now we need to make the structure resistant to various external factors - atmosphere, moisture, cold. At this stage, it acquires not only reliability, but also its complete individual appearance.
Coloring
Preparation for painting begins with sanding. You need to sand in the direction along the grain. Then treat the surface with an antiseptic. Dents and chips should be filled with putty. As you apply the putty, you need to let it dry and then sand it again.
Before painting, you need to clean the surface from dust. To obtain a high-quality painted door, apply 2-3 layers of paint and avoid smudges.
Cladding with decorative panels
Decorative panels for cladding can be made of plastic, siding, veneer, laminate and other materials. They are solid massive canvases. They are mounted on a wooden surface using glue or self-tapping screws.
Ideas and options for processing and decoration
Before decorating a wooden door, you need to thoroughly sand its surface. The next very important stage is treating the product with an antiseptic solution. After the product has dried, you can begin decorating.
First, cover the door with primer or putty in two layers. After this, the door can be painted or a couple of layers of varnish applied to the surface. If you have the necessary available tools, minimal artistic abilities and decorating skills, you can decorate the canvas with carvings, polyurethane stucco molding, stencils, and mosaics.
Interior doors can be “revitalized” with wallpaper, fabric, and vinyl stickers.
Eliminating gaps using a sealant
When choosing how to insulate a wooden entrance door, you should not ignore different types of sealing elements, but to determine the best one, it is better to consult with the seller. Seals are specially designed products whose function is to maximally fill the gaps and cracks between the door elements: the frame and the wooden leaf. In addition to thermal protection, the insulation serves as soundproofing for the entrance door to an apartment or house.
Installing a seal and sealing reduces the overall heat loss through a wooden door, solving the insulation issue by about 60%.
Types intended for wooden doors
To insulate wooden entrance doors, different types of doorway seals are used:
- tubular made of porous rubber;
- silicone;
- foam rubber.
There are options for attaching the seal: to the adhesive layer applied by the manufacturer or using small nails with your own hands. When choosing sealing strips for a wooden door, you should take into account the performance characteristics and durability of the material. The best choice is a rubber seal.
Seal installation
Installing frost-resistant insulation on the door leaf is only half the battle in eliminating the penetration of cold air into the living space. Even with the door closed, there remains a small gap between it and the frame, through which the cold will penetrate. Eliminating drafts is the next task for the home handyman.
To do this job, you should choose the optimal type of seal. Today, manufacturers can offer the following types of this material:
- Foam seals;
- Silicone seals;
- Rubber seals.
The first type of seal allows you to quickly and inexpensively solve the problem of drafts. It is ideal for the doorway of a structure such as a dacha, where there is no high intensity of opening and closing doors.
Foam rubber seal is inexpensive, but also short-lived.
Using a silicone door seal will allow you to get rid of drafts for a longer time than a foam rubber analogue can do. The shape of the product ensures that the canvas is pressed tightly against the box, which will not allow air masses to move inside the room.
For intensive use of doors, a rubber seal is used.
Having chosen the desired seal option, all that remains is to install it in place. There are two main installation options:
- Using an adhesive strip.
- Using a harpoon in the groove.
The fastest way to install a new door seal is to use self-adhesive products. But this type cannot please you with its durability, so many experts recommend harpoon mounting in a groove.
We invite you to familiarize yourself with: Tbilisi sulfur baths in the old city
It will be quite difficult to select a small groove in the quarter without disassembling the boxes. Therefore, it is permissible to carefully nail the seal with small nails. Fastening must be done in the very corner of the quarter. This will allow the canvas to take its position in the door block without difficulty and provide reliable protection from drafts.
Features of operation
When buying an entrance door, it is important to pay attention to what materials it is made of and how high quality it is. And if the door is installed correctly, then during its operation it remains to adhere to the following recommendations:
- protect from rain and direct sunlight by installing a canopy over it;
- monitor the integrity of the surface. If damage occurs, restoration work must be carried out immediately. If the damage is serious, you will have to turn to restorers, but even this will be cheaper than buying a new door;
- properly care for the door: periodically wipe off dust, stains and other contaminants (depending on the type of door covering). This can be done in several ways: with a 10% alcohol solution;
- water;
- soap solution.
Necessary materials and tools for making doors
Before you start, make sure you have all the tools available. If something is missing, it is better to purchase the necessary tools in advance than to discover their absence during the manufacturing process.
So, for work you will need:
- a workbench or large, durable table;
- hand router for wood - with its help you can easily form grooves, holes, grind the surface and trim the corners of the product;
- plane - it will be an excellent assistant in leveling and grinding the ends;
- regular hacksaw;
- different-sized chisels;
- rubber hammer;
- regular hammer;
- sandpaper, or even better, a sanding machine;
- building level, tape measure, pencil;
- screwdriver or Phillips screwdriver;
- self-tapping screws of various calibers;
- wood glue.
Materials are purchased depending on the type of door chosen and its manufacturing technology. It can be:
- grooved or planed boards;
- particle boards;
- plywood;
- glass;
- laminated timber.
What to do if the wood is swollen?
Many novice carpenters use wet boards when making doors or perform these operations in a damp room. In this case, the wood picks up moisture and begins to increase in size, which will render the door leaf itself unusable in the future. Therefore, before starting work, you must thoroughly dry the boards, but without using powerful hair dryers.
The best option would be special drying or fresh air (in the shade).
If the door begins to swell after its installation, then this situation can be corrected in several ways:
- First of all, you need to create a normal temperature and minimum humidity in the room. After some time, the boards may dry out and “return” to their place.
- If the structure cannot be restored, then you should try to reinstall or adjust the hinges so that the canvas fits easily into the box.
- The most common option is to change its shape using a plane. To do this, the place where the canvas does not close is slightly undercut. Sometimes you can perform such an operation not only with the door, but also with the frame itself. But it is advisable to remove a minimum layer, since the wood may dry out over time and cracks will form in these places.
- Forced drying of the door leaf. But this operation should be performed only at low temperatures and for a long time. If this is done abruptly, then cracks will simply appear on the boards and the door will become unusable.
Tools for work
Tools you will need:
- to create grooves and holes, you will need a router;
- hacksaw;
- to sand the ends of the doors, you will need a plane;
- chisels;
- hammer;
- screwdriver
Standard set of tools for making doors
To assemble doors you will need the following materials:
- tongue and groove boards;
- self-tapping screws;
- glue.
The purchased wood is additionally dried. The boards are laid so that they do not touch each other.
How to avoid mistakes?
To prevent unforeseen situations from taking you by surprise, you must:
- take correct measurements;
- create a drawing of an object;
- carefully measure angles and parallels;
- adjust the frame and canvas;
- treat materials with protective compounds.
Making a front door takes time and patience. Only by carefully following all the recommendations can you achieve a good result. Accuracy is important in the work, so you need to measure the doorway in several places. If it is uneven, it should be strengthened with cement mortar.
Insulation and sound insulation
Insulation is used to carry out thermal insulation work. With its help, the part of the canvas that is covered with fiberboard is pasted over. If the foam extends beyond the frame, it is cut off with a knife. The finishing material is fixed on top - fabric or leatherette. A stapler is used to secure the material.
Door insulation scheme
Reviews
If you install a good wooden entrance door made of solid wood on ridges, and not a paneled one for 1200 rubles, and cover it 5 times with a good varnish, and not some crap “Pinotex”, then you won’t have to bother with any metal . Besides, what is the point of installing a metal door in a wooden house? If they don’t open the door, they’ll cut out a piece of the wall and climb in (as one of my friends did at her dacha).
Sources
- https://USA-dba.ru/sdelat-tpluyu-dver-svoimi-rukami/
- https://legkovmeste.ru/stroitelstvo-i-remont/dveri/dveri-vhodnyie-derevyannyie-uteplennyie.html
- https://odstroy.ru/dveri-vhodnye-derevannye-uteplennye-kak-sdelat-samostoatelno/
- https://roomester.ru/dekor/dveri/derevyannaya-dver-svoimi-rukami.html
- https://gorodverey.ru/derevyannaya-dver-svoimi-rukami-chertezhi.html
- https://BestDoor.guru/izgotovlenie/mezhkomnatnye-dveri-svoimi-rukami.html
- https://dveri365.house/po-materialam/derevyannye/derevyannaya-dver-svoimi-rukami.html
- https://dekoriko.ru/dveri/vhodnye/svoimi-rukami-kak-sdelat/
- https://vitdoors.ru/dveri/poshagovaya-instrukciya-izgotovleniya-derevyannoy-dveri-svoimi-rukami-kakie-instrumenty-potrebuyutsya-7.html
- https://ODveryah.ru/uluchshenie/uteplit-vhodnuyu-derevyannuyu-dver-svoimi-rukami-v-chastnom-dome
- https://stroy-podskazka.ru/dveri/mezhkomnatnye/izgotovlenie-derevyannoy/
- https://VseoDveri.ru/vhodnye-dveri/vhodnaya-dver-svoimi-rukami/