Cement serves as the basis for creating a wide range of mortars intended for installation and finishing work. Gypsum is also used for the production of building mixtures, primarily plaster.
Cement mortars take a long time to gain strength, and gypsum hardens quickly, so there is a great temptation to mix these binders to obtain a composition that is convenient for installation. Let's figure out whether it is possible to mix gypsum with cement.
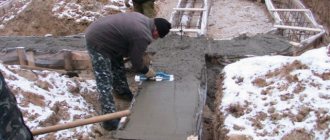
Description of preparation of semi-dry solution
The half-dry mixture method for leveling the floor surface involves the use of a dense semi-dry sand-cement mixture and reinforcing structures.
According to this technology, the solution is prepared using a semi-dry method. At the same time, the proportions of sand and cement in it are the same as in the traditional screed composition, but the amount of water is much less.
Mixture for screed grade 150: mix M400 cement with clean, washed and sifted sand without clay in a ratio of 1 (a bucket of cement) to 3 (a bucket of sand). These proportions are always indicated on the packaging of a specific brand of cement. Fiber (fibre) 800 grams per 1 m3 of screed is also added to the solution.
| Screed thickness, cm. | Weight 1 sq. m., kg. |
| 1 | 20-22 |
| 2 | 40-44 |
| 3 | 60-65 |
| 4 | 80-86 |
| 5 | 100-108 |
| 6 | 120-130 |
| 7 | 140-152 |
| 8 | 160-175 |
Weight of semi-dry screed depending on thickness
- First, cement and sand are mixed.
- Mix water and fiberglass separately.
- Add sand and cement to the finished mixture and add water and fiber.
The solution is kneaded until balls can be formed. Due to their consistency, such component compositions are not poured, but poured onto the base. The building mixture gains strength through the use of metallized mesh or polyethylene fiber.
The solution for semi-dry leveling is prepared using special machines, which are similar in design and principle of operation to traditional concrete mixers.
What is good about semi-dry screed and what are its disadvantages?
This technology has many advantages compared to liquid solutions:
- The main advantage of this technology is that the preparation of the solution requires a minimum volume of water during the mixing process. Thanks to this, there is no need to use rubber gloves and come into contact with the solution.
- Another advantage of the mixture is its consistency. Since the solution does not flow, the possibility of flooding the floors below is practically zero. When pouring a liquid mixture, moisture often penetrates into the ceilings between floors, which can cause dissatisfaction with neighbors on the lower floors.
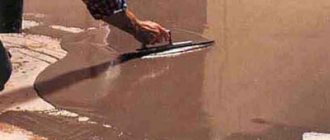
- In addition, the drying time of the screed is significantly reduced, thereby reducing the time required to complete the work. At the same time, ideal smoothness of the surface is achieved, which makes it possible to lay finishing materials (laminate, carpet, parquet, linoleum, ceramic and vinyl tiles) without preliminary preparation. Voids and cracks on the surface are removed using a trowel.
- Another undeniable advantage of semi-dry screed is that there is no need for a waterproofing layer. The structure of the material is such that it creates a waterproof layer on the floor surface, completely eliminating leaks.
- The mass fraction of liquid in a semi-dry solution is one third of the total volume. This amount of water is quite sufficient for the cement hydration process, while the surface dries very quickly. After just four days, the screed is ready for laying the final floor covering.
- It is also worth considering that, despite the relatively small thickness, semi-dry leveling is highly resistant to impacts and other mechanical damage. This is due to the presence of reinforcing fiber in the mixture. A comparative analysis of semi-dry and classic screeds made of cement and sand shows that the traditional mixture puts a significantly greater load on building structures, since there are no light reinforcing elements in it.
There were also some downsides:
- A disadvantage, which is also an advantage, is the consistency of the building mixture. Therefore, it will not be possible to prepare a semi-dry solution without the use of special equipment.
- Also, the novelty of this technology makes it difficult to find qualified craftsmen who can perform high-quality installation of semi-dry screed.
- In addition, expensive brands of Portland cement can easily be spoiled by adding water in the usual way in an effort to achieve a perfectly level base.
- After installation of the dry screed is completed, it is strictly forbidden to water the surface. This will inevitably lead to cracks and deformations in the coating. Therefore, without sufficient practical skills, it will not be possible to complete the work efficiently.
Technology for preparing plaster mortar
In the construction industry, different types of plaster mixtures are used. Based on this, the solution manufacturing technology may differ slightly. Ready-made dry mixtures need to be diluted with water in a certain proportion (usually indicated in the instructions). Some features are still present.
How to make a cement-sand mixture
Some inexperienced finishers, when mixing a solution for plastering walls with their own hands, although they observe the proportions, first pour water into the container, then the rest of the components. In this case, it will not be possible to dilute the solution evenly, since when cement gets into the water, lumps will form and become overgrown with sand.
To prepare a high-quality solution, it is enough to follow a simple and uncomplicated algorithm:
- Sand is poured first, which is pre-sifted. If large particles remain, during leveling they will roll over the surface, leaving grooves.
- Cement is poured second and thoroughly mixed with sand - it must be dry so that the composition mixes easily.
- Only then is water added to the dry mixture. In this case, the entire volume cannot be poured out - first, 2/3 and stir. Then gradually add until the solution reaches the desired consistency.
A sieve for sifting is taken with different cells, based on the layer of plaster:
- primer - 2-3 mm;
- cover - 1 mm.
The lifespan of cement-sand mortar is 60 minutes. During this period you need to use it completely, otherwise it thickens. It can be diluted with water, but the composition already loses its properties.
Selection of sand and cement
River and quarry sand is used in the construction industry. The materials differ in the size and shape of the granules:
- The river variety has round grains because they are driven by water. Due to this, the sand does not contain impurities (clay).
- The quarry type is based on granules with sharp and uneven edges, which increases the reinforcing qualities. However, such soil contains clay, which reduces the rigidity of the frozen “monolith”.
It is optimal to create the first leveling layers using quarry sand. It should be pre-rinsed. The final smooth surface is obtained by adding river sand.
It is important to understand which sand is better
The proportions of the plaster mortar depend on the brand of cement. And the higher the brand of binder, the more sand you need to add.
It is highly not recommended to use expired cement, as the quality deteriorates and you will have to increase its quantity, which may result in a violation of the proportions.
When using grade M400, 4 parts of sand are added to one part of cement. The material is suitable for covering indoor walls. Another brand M500 requires 5 parts of sand. This is an ideal option for treating external surfaces.
Preparation of cement-lime composition
The solution is mixed according to the same recipe as a cement-sand mixture, only lime dough is added in an amount of 0.2-0.3 m3.
Self-dilution of gypsum mortar
To make a mixture without lumps, you need to add dry powder to a bucket of water in a certain ratio. For 1 kg of powder there are from 0.5 to 0.7 liters of liquid. If you take 1 bag (30 kg), then this amount requires 15-21 liters.
The mass is thoroughly stirred until the composition is homogeneous. This can be done manually, but if you use a construction mixer or a drill with an attachment, the process will be faster and easier.
After mixing, leave the plaster for 5 minutes and mix again. The finished mixture must be applied within 30 minutes, then it will be unusable. Therefore, it is necessary to work quickly and also prepare small portions.
The gypsum solution should be used in half an hour
Budget supplements
Experienced craftsmen add various components to the plaster for specific purposes:
- Milk - reduces the setting time of plaster based on gypsum and cement, and also makes the mixture plastic. The proportions of milk and water are 1 to 10. The resulting solution is added to the plaster.
- Starch - to improve the adhesion of the solution to the base. Add a tablespoon per bucket of solution. Starch is diluted in cold water in advance, then poured into the mixture. When added to cement mortar, you need to wait 15 minutes; you can immediately work with the gypsum composition without waiting.
- Salt - to avoid mold, insects, increase plasticity. For 1 bucket, 1 to 3 spoons are enough.
- Detergent - the mixture becomes plastic and elastic, and also increases service life. For every 10 liters of mixture, take 50 ml of product (usually liquid soap).
- Washing powder - works like detergents. Add to dry batch before diluting with water: 150 g of powder per 25 kg of solution.
- PVA glue - to improve adhesion and ductility. From 50 to 100 ml per liter of finishing mixture.
Initially, the solution is mixed, and then the mentioned plasticizers are added
Such additives allow the coating to gain strength in a tolerably short time. It is also possible to avoid shrinkage. Most are inexpensive, and some are even free.
Plasticizers for plaster mortar
Proportions of a classic DSP screed
The classic mortar for floor screed, as already mentioned, is cement with sand diluted with water. The proportion (the amount of sand per unit of cement) depends on the required strength of the screed and the brand of cement used. To make the floor surface durable, use expensive Portland cement grade M400 and higher.
Proportions of mortar for floor screed for M150, M200 and M300 when using different grades of cement
For screeding floors in utility rooms, you can also use the cheaper M300. It will cost a little more, but there will be savings. It is better not to use such cement for the foundation of a house or apartment under modern coatings. The rework will require significantly more savings on cement.
Which sand to take
It is better to take river sand, washed, of at least two fractions: coarse and medium. Why river? Because it has sharp edges, and this reduces the likelihood that it will settle into the lower layers. This is understandable. Why washed? It contains minimal dust. The less dust, the higher the strength of the solution. Sand is also needed in different sizes so that the strength of the solution is normal.
To screed the floor you need sand: washed river sand, two fractions (not fine)
If you are going to lay an expensive coating on the floor with high requirements for the strength of the base (parquet, parquet or engineered boards, vinyl tiles), it is better to take this kind of sand. There will be fewer problems.
Kneading sequence
When making a floor screed solution, first mix the dry ingredients - cement and sand. When mixing manually (in a trough), there is not much difference between what to throw in first - cement or sand. If you use a concrete mixer, immediately add sand and spin it for a couple of minutes without cement. Then, gradually, usually with shovels, cement is added. After each portion, wait until it is more or less evenly distributed, then add the next one. After adding the entire amount of binder, mix until a uniformly colored mixture is obtained.
You choose how to prepare the solution yourself: order it at the factory/workshop, mix it yourself
When the dry ingredients are mixed until a homogeneous gray mass is obtained, add water little by little. It is calculated based on the amount of cement. Usually 0.45-0.55 parts of water are taken for 1 part of cement. Why don't they indicate exactly? Because the amount of water depends on the moisture content of the sand. It is advisable to pour a minimum amount of water: this way there will be fewer cracks when drying.
Ready-made mortar or sand-cement mixture
Those who have at least once mixed DSP or concrete on their own are more often inclined to buy ready-made concrete. And not a mixture of sand and cement in bags, but concrete from a concrete mixer. Yes, it costs more money, but it requires much less time and effort. Another advantage of this solution: filling without cold seams. This means fewer cracks and problems in the future. The next plus is that concrete mixers can deliver the solution to the desired floor. Imagine that you have to move a couple of tons of sand and cement. Even if there is a freight elevator, it is not easy. It can also be costly if you pay helpers. Climbing stairs “on your shoulders” is generally a problem.
So that you do not care about the proportions of cement and sand, you can buy ready-made mixture in bags
What are the advantages of buying ready-made sand-cement mixture in bags? The fact is that the proportion is kept exactly, sand is used in several fractions and in the right quantities. That is, the screed is guaranteed to have the required strength. The downside is the price. You can buy the same amount of cement and sand for a much smaller amount. This is if you don’t bother with sand fractions. If you take care of this, the savings will become smaller: not all factions are cheap.
Dry cement-sand mixtures M-150, M-200
Dry cement-sand mixture (DSP, sand cement) is a building material that contains fractional sand and cement mixed in certain proportions. DSP mixtures often include various additives that give the material specific properties. The most widely used additives are those that increase moisture resistance (hydrophobic), frost resistance, improve adhesion and various strengthening additives.
Technical characteristics of cement-sand mixtures
Sand cement has the following unique technical characteristics:
- High compressive strength – more than 15 MPa;
- Ability to withstand at least 50 cycles of freezing and subsequent thawing - high frost resistance;
- High bending strength and excellent adhesion to the base.
Where are sand-cement mixtures used?
Dry cement-sand mixtures are produced in different grades of strength, on which the specifics of its use depend. Sand-cement mixture of strength grade M150 is used:
- for plastering surfaces;
- for repair of reinforced concrete products, including floor slabs;
- performing masonry and installation work;
- high-quality leveling of wall surfaces;
- finishing of window and door openings;
- laying tiles.
Manufacturers supply the market with high-quality mixtures of different brands at very affordable prices.
Some tips for using cement-sand mixtures
The M150 cement mixture has several interesting features:
- Possibility of use in damp rooms due to low sensitivity to moisture;
- excellent adhesion to the surface of the base;
- resistance to microorganisms such as fungus and mold;
- ability to perceive low temperatures;
- no shrinkage deformations.
For one kilogram of dry cement-sand mixture, it is enough to take about a glass of clean water at room temperature and then mix everything thoroughly. Before use, the prepared solution should stand for about five minutes. Before plastering, the surface of the base must be prepared - clean it of dust and dirt, and then apply several layers of primer. This will make it possible to improve adhesion and increase the service life of the coating.
Manufacturers indicate material consumption rates and other instructions on the packages of the mixtures. On average per 1 sq. meter it takes about 20 kilograms of the mixture when applying a layer of 10 mm. However, different brands of mixtures have their own consumption rates.
Mixture solutions must be handled carefully, avoiding contact with skin or eyes. When working, it makes sense to use protective equipment (gloves) and special tools.
How to buy cement-sand mixtures profitably in the Moscow region
Customers of the MixWall online store have the opportunity to buy sand-cement mixtures from leading brands at the best prices in the Moscow region. We provide prompt delivery of your orders throughout Moscow and the Moscow region. We will organize the ascent to the floor.
Pros and cons of gypsum self-leveling floor
Gypsum mixtures for installing self-leveling floors are good because:
- are able to level themselves after applying the solution to the base of the floor;
- harden quickly, which reduces repair time to a minimum;
- easy to apply - the craftsman has the option of choosing a manual or mechanized installation method;
- They have a completely natural, eco-friendly composition that can be used in children's and medical organizations.
This method has important advantages
The disadvantages of this method of creating a screed include:
- poor moisture resistance of the floor, which makes its use undesirable in bathrooms, washrooms and kitchens;
- small thickness of the gypsum layer, which is not recommended to be more than 30 mm;
- poor compatibility with tile finishes. The tile adhesive transfers moisture to the gypsum layer, after which the tile falls off.
Gypsum self-leveling floor does not fit well with tile covering
How to make self-leveling cement floors with your own hands
In order for self-leveling floors to be smooth, durable and wear-resistant, it is necessary to follow the order of work.
Tools for getting the job done
Before starting pouring, prepare the following tools:
- drill with attachment;
- grinder and grinder;
- container for mixing the solution;
- respirator and gloves to protect against exposure to harmful substances;
- a special construction vacuum cleaner for removing dust from the surface of the base under the self-leveling floor;
- spatula or rule to create a flat floor surface;
- a needle roller to remove air bubbles from the cement screed;
- paint shoes - shoes for walking on freshly poured screed.
Shoes for walking on uncured self-leveling floors
Preparatory stage
Before starting work, prepare the base for the self-leveling screed.
Fill cracks, large chips and holes with cement-sand mortar. This will reduce the consumption of the self-leveling floor solution. Areas of the leveling layer are of different thicknesses and dry at different times, which leads to the fact that the strength of the screed differs in different places.
Remove the tubercles using a grinder or grinder.
There should be no greasy stains on the floor surface. If there are any, then degrease the floor in this area. If the area of contamination is large, cover it with special construction lining paper.
The base must be clean. Vacuum before pouring the screed.
The screed must be completely dry.
For good adhesion of the solution and the base, the floor surface is pre-primed. The choice of primer depends on the base material. If the base is porous, then the primer is applied in several layers. Filling is carried out a few hours after applying the primer.
Then, using a horizontal line, mark the level of the new floor. To do this, measure the required height on the wall and make marks using a pencil and level.
To make pouring more convenient, you can install beacons on the base.
Next, a damper tape is laid around the perimeter of the room, which is 1 cm wider than the thickness of the fill. It is also laid if the floor surface in the house is being leveled with different compounds. Without the use of tape, due to the different coefficients of thermal expansion of gypsum and cement, the screed in the contact area may be destroyed.
Now mix the solution for the self-leveling floor. To do this, mix the leveling mixture with the required amount of water in a large container. The proportions for the solution are taken from the instructions that manufacturers indicate on the packaging. To make kneading easier, use a mixer or a special attachment on a drill.
How to make a homogeneous solution for self-leveling floor? To do this, first pour water into the container, and then add the mixture. If you do the opposite, there will be lumps in the finished solution.
https://youtube.com/watch?v=w5LqDTsJzTc
First stage. Pouring the floor
Start pouring from the far corner of the room and lead towards the exit from the room. Since the solution dries quickly, it is prepared in separate portions. The prepared solution is poured onto the floor and leveled.
Leveling the screed surface
Then compact with a needle roller.
Compacting the screed with a needle roller
Second phase. Drying and sanding
When the mixture has set, grind the surface using a grinder.
You can move on the screed 2 – 3 hours after pouring. However, it is possible to lay the floor covering or carry out further processing only after 24 hours.
In order for the screed to dry evenly, it is necessary to protect it from direct sunlight. Do not use heating devices to speed up drying.
What is a plaster mixture?
Page navigation
Several decades ago, the choice of finishing materials for professional builders was limited to meager options. Today, most stores offer a wide range of building mixtures. There are mainly different mixtures on sale. Some are already ready to use and all you have to do is stir. Others first require the addition of water, after which kneading occurs.
But such products are not cheap and, fortunately, there are individual components (sand, cement) on sale. Therefore, there are craftsmen who independently prepare a solution for plastering walls, and the proportions are sometimes determined experimentally.
The correct ratio of components allows the plaster to lay down properly so that it cannot run or crumble.
Any modern solution is a ready-made material that requires adding water and stirring. They are initially created with ideally selected proportions, and therefore eliminate the need for manual dosing of components.
There are many ready-made mixtures in stores
Comparative analysis of cement-sand and gypsum mixtures
Cement-sand mixtures or CSP are already classics for centuries. This finishing material is practical and durable and for this reason is at the peak of popularity even in our modern age. No matter how many years pass, the relevance is unlikely to disappear.
Rural residents use a mixture of lime and clay for fireplaces, stoves and other buildings.
In addition to this finishing, craftsmen also use gypsum mortar, but its scope is limited by the properties of the material. If you compare both products, you can find both similarities and differences.
First of all, both types have different binders - gypsum and cement, which is noticeable by the name of the finish. In addition, cement mixtures are relevant for plastering external brick and concrete walls, since they are not afraid of high humidity. They can also be used to treat internal surfaces.
Gypsum material is suitable for plastering indoor spaces with a humidity level of no more than 60%. This solution is contraindicated to use, even if tiles are being laid. Moisture will always find ways to penetrate and then the layer of plaster will inevitably begin to fall off over time. In addition, gypsum is more of an air binder, while cement is a hydraulic binder. Solutions also differ in terms of time to gain strength, life expectancy, as well as a number of other properties.
Cement and gypsum mixtures
But both solutions have similar features:
- fire safety;
- long service life;
- environmental friendliness;
- when included in lightweight fillers, they become heat-retaining;
- resistance to vibrations and shrinkage of buildings leaves much to be desired;
- materials must be stored only in dry rooms.
Actually, this is where the similarity ends. However, there are situations where it is optimal to make a choice in favor of gypsum mixtures, despite all the advantages of cement analogues. It all depends on various factors and mainly the operating conditions of the premises.
Gypsum is an air binder. It should not be used for structures that may come into contact with water.
Advantages of floor screed mixtures
The market for modern building materials is replete with a wide variety of finished products. Using dry mixtures for floor screed, you can get a set of noticeable advantages that are impossible when using mixtures made by yourself:
- When using ready-made mixtures, you do not have to devote additional time to correctly maintain the proportional balance of ingredients. The finished product complies with all required standards for the number of components.
- There is no need to separately purchase ingredients, which can be quite problematic. For example, buying cement will not be difficult, but buying 300 kg of sand will be more difficult, since many suppliers will accept an order if its minimum weight is more than one ton.
- The thickness of a self-made screed should not be less than three centimeters, and using a floor screed mixture with added plasticizers can significantly reduce this minimum threshold.
- Mixtures produced in factories using polymer compounds have less mass compared to sand mortar, which means that such a mortar can be laid even on weakened wooden floors.
- To produce the finished mixture, much less effort is required, since to produce it it is enough to simply add water and stir it all with a construction mixer, but to perform the DSP you will need a concrete mixer or a special trough.
- Fine-grained components included in mixtures made in factories are much more amenable to smoothing for final design.
- Dry mixtures for floor screed are produced in a wide range, which allows you to select them for a specific particular case.
Types of mixtures from manufacturers
What can be prepared from such mixtures?
Decor items
Outdoor vases
These elements perfectly complement the territory of the personal plot, serving both practical and decorative purposes. The following solutions can be used to make floor vases:
- Cement-sand (from one measure of cement and three to five measures of sand).
- Gypsum - made from gypsum powder and water (possibly with the addition of PVA).
- Polymer concrete - from a diluted ready-made dry mixture (available for sale).
Moldings
Columns and rosettes, cornices and platbands, bas-reliefs and pilasters - all these products can be made with your own hands, using special molds for casting. The following types of solutions are used for stucco:
- Gypsum is suitable for finishing ceilings, as well as for decorating facades. In the latter case, a moisture-proof coating is necessary. Or take a special hydrophobic plaster.
- Cement - most often used for exterior decoration of houses.
- Polyurethane - sold ready-made. Finds universal application. The products are light, durable, and can withstand any atmospheric conditions.
Garden sculptures
Fashionable and beautiful decorative elements. To make them, sometimes very little is required: a mold from scrap materials, cement or plaster, fillers. The figures are made from gypsum, cement or gypsum-cement mortar (usually with the addition of PVA glue). Large sculptures require a frame or armature.
Paths for a garden or cottage
Today it is customary not to make them solid, but to make them from individual figured tiles. Special molds are produced for these tiles (but you can also make them yourself - molds for architectural and decorative products made of concrete, plaster, and cement are described in special materials in this section).
The solution poured into molds usually contains cement, sand and crushed stone. If you want to make a colored path, appropriate coloring pigments are added to the mixture.
Products for construction purposes
Fences and posts
These elements, fences and pillars for them, must be strong enough, so they are cast from concrete (based on cement grade no lower than M400). Reinforcement made of metal rods or wire must be laid inside.
Artificial stone for masonry
For interior work, gypsum stone is often used - it is lightweight and does not cause problems when attached (it can be glued with almost any adhesive). For cladding facades, cement stone that imitates natural is often used (for which dye and natural stone chips are introduced).
Types and composition
Numerous dry mixtures for screed are divided into two groups:
- Cement.
- Plaster.
They differ in the main binding component - cement or gypsum. Plus, these mixtures contain various fillers, polymer fibers for reinforcement, sand and modifying additives.
When choosing a composition, you should proceed from the specific situation. For rough leveling, the “warm floor” system and finishing fill, different options should be used. It’s like deciding in a store – which generator is best to choose for your home. For welding you need one unit, and for a gas boiler another.
Calculation of expanded clay base for screed
Cement
Cement mixtures are universal compositions. You can lay parquet boards, laminate, ceramic tiles and other coverings on a screed made of them. Such a surface is not afraid of moisture. Plus it is more difficult to destroy or damage. However, due to the mobility of the base, a thin layer of concrete in a cement-based screed often begins to crack after the first steps on it. This is especially true when a similar composition is poured onto wooden floors.
Gypsum floor screed
Cement-based floor screed mortar sets and hardens longer than its gypsum counterpart. However, it is stronger once cured and lasts longer when mixed before it hardens. At the same time, the price of the cement version is higher than that based on gypsum. Plus, due to shrinkage, it can crack when drying.
If the screed is made in two layers, then you have to use two different cement mixtures for it. For the bottom layer, a coarse-grained version is used, and for the top layer, another – a fine-grained version. In both cases, the same composition is used on plaster.
Types of floor screed
Plaster
Gypsum mixtures for floor screeds are cheaper and have better sound and heat insulation characteristics, but have low moisture resistance. They cannot be used in bathrooms and toilets. But for a wooden floor this is just the thing. This option is also recommended when preparing the base for flooring in children’s rooms, living rooms and bedrooms.
Gypsum floor screed
Gypsum surfaces are more environmentally friendly, and in terms of strength and thickness they are not much inferior to cement surfaces. Plus, gypsum is highly vapor permeable. When the humidity in the room is high, such a floor draws moisture into itself, and then when the room air dries, it releases it back. But if it is highly saturated with water, the gypsum surface can turn into mush. In this case, it instantly loses all its strength properties.
In this case, a gypsum layer can be poured over the cement layer through a primer. On the contrary, cement cannot be laid on top of gypsum. This way, a wet cement-sand mortar will release moisture downward, causing the gypsum backing to blur.
Types of backfill for screed
Sad consequences
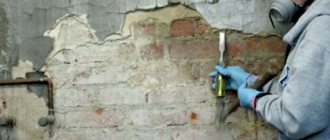
Unscrupulous performers use a solution of cement and gypsum for rough plastering of surfaces - the mixture is well laid in a thick layer and hardens quickly. This allows you to increase the speed of finishing work many times over, since without gypsum the cement-sand mixture has to be applied to concrete walls in layers with intermediate drying for several hours.
However, such plaster very quickly, within one to five days, becomes covered with a dense network of microcracks. If the material is applied to a red brick wall indoors, then the situation can be saved by a finishing layer of cement mortar without plaster or façade putty. In the case of concrete walls, this technology will not bring results.
Gypsum added to a cement-sand mortar sets quickly - the plaster becomes hard a few minutes after application, but it takes much longer to dry and is at the same time exposed to the “cement bacillus” due to the chemical reaction that occurs.
As a result, a plaster layer made from a mixture of gypsum and cement inside a dry room can last up to 5 years without collapsing, but on the façade of a building it will become unusable after the first winter. If a metal mesh is used for reinforcement, it will quickly begin to rust, since the plaster absorbs moisture due to the introduction of gypsum. Traces of rust will appear on the surface of the plastered wall.
How to calculate the mixture consumption for floor screed
If you have decided which mixture you will use, now you need to calculate exactly how much material you will need. Usually the product is sold in bags weighing 25 or 50 kilograms.
An example calculation looks like this:
- Using a measuring tape, determine the length and width of the room, multiply the resulting data and thereby obtain the floor area of the room.
- Determine the required height of the future screed.
- Find out the average consumption of the mixture on the packaging. It is usually equal to 18 kilograms per square meter with a screed height of one centimeter.
- Based on the data obtained, make a calculation: for example, you need to pour 2.5 centimeters of screed over a total area of 10 square meters. This means that for 1 sq m of screed you will need 18 * 2.5 = 45 kg of mixture, and for the whole room it will take 45 * 10 = 450 kg, which is 10 bags of 50 kg.
This calculation does not take into account the volume of liquid.
Preparing the base
Preparatory work includes removing debris and dirt, removing all kinds of stains using solvents, and sealing cracks with a quick-drying agent. As the latter, you can use epoxy putty.
Preparing the base
Before pouring the composition, you need to make sure that the floor is completely dry.
Table No. 3. Tools for installing self-leveling floors.
| Name, photo | What is it for? |
| Raklya | This is a special spatula with teeth, the size of which ensures the rapid formation of a screed of the required thickness. To apply the gypsum mixture you will need a tool with a steel blade. |
| Benchmarks | Steel devices serve as beacons on the surface of the base, helping to ensure that the coating is distributed evenly. |
| Needle roller | Designed to eliminate air bubbles formed when mixing the composition with water. If you do not remove the air using this roller, then after the solution hardens, pores will remain inside the screed. This will make the floor less durable. |
| Paintshoes | To level the uncured solution with a needle roller, you have to walk on it in such overhead soles with spikes. If you step on a wet mixture without these pads, then unevenness may remain on the surface. |
| Damper tape | A strip of porous polyethylene, fixed around the perimeter of the wall, saves the screed from cracking due to expansion when drying. |
| Level | Required to check the evenness of the coating. |
| Plastic bucket | Will be used to transfer the finished gypsum mixture. |
| Construction mixer | Necessary for preparing this mixture. |
| Primer and roller for its application | Pre-treatment of the subfloor. |
Basic methods of floor leveling
Concrete screed is used to make the floor perfectly level, but do not rush and run to buy a mixture for its installation, because there are several other methods of leveling the floor that may be suitable specifically for your case:
- The most popular, but not the easiest way is to level the floor with plywood. Plywood sheets laid on joists or on a concrete base will serve as an excellent support for a finishing coating, for example, laminate or linoleum, and will also save you from serious floor defects that are difficult to correct in other ways;
- Epoxy primer is an inexpensive material that can be used to level the floor, but before choosing one, it is worth assessing the depth of the unevenness of the concrete base. The primer will not cope with serious damage to the floor, so it is used only to correct minor construction flaws;
- A concrete screed made from building mixtures is a universal solution, because it will hide even strong unevenness, however, it is also not always worth using. If the load on the floor is not serious, and a lot of mixture is required to level the floor, then it would be more advisable to use plywood or chipboard.
Types of additives for cement: features, dosage, use
In order to choose the right product for the implementation of your tasks, it is important to know the characteristics of each substance. According to GOST 24640-91, additives for cement are divided into the following types: plasticizing, air entrainers, mixture set accelerators, set retarders, sealing agents, corrosion inhibitors, antifreeze, polymer, coloring.
Let's take a closer look at each type:
Advantages
A plasticizer is a special product in the form of a powder, liquid or ready-to-use solution, which, when added to a cement mixture:
- increases the degree of elasticity and fluidity;
- increases the hardness and strength of a monolithic structure up to 125-140%;
- reduces the concentration of water in the solution by 5-15%;
- increases resistance to temperature fluctuations;
- reduces the percentage of material shrinkage after hardening;
- increases adhesion between the components of the cement mortar and with metal products;
- prevents the occurrence of corrosion formations on fittings and other elements;
- reduces the amount of cement used in mortar by up to 15%;
- reduces the likelihood of air voids;
- increases the total coverage area by reducing the thickness of the solution poured;
- improves workability and saves labor resources.
In addition, plasticizing additives make cement more homogeneous, holistic and durable. Thanks to this, the material does not delaminate, does not become covered with a “network” of cracks, and is stored longer before use.
Types and areas of use
Depending on the effect they have, plasticizing additives for cement are divided into 4 groups:
- Super strong - capable of increasing mobility by 3-4 times and the plasticity of the solution by several levels (for example, from P1 to P6) without reducing the strength and density of the material. The product is made on the basis of sulfuric acid, 30% formaldehyde, naphthalene and sodium sulfate. Super-strong plasticizing additive for cement is suitable for any construction work: pouring, screeding, plastering.
- Strong - a substance made on the basis of acrylic polymers, inorganic salts, lignosulfonate. Strong plasticizers increase the workability of the cement mixture, increase thixotropy and plasticity by 3-4 levels (from P1 to P3). Recommended for use in molding various structures, screeds and plaster.
- Medium – an additive that increases the waterproofing properties of cement; improves resistance to sulfates and chlorides; increases the mobility of the material from P1 to P3. Medium plasticizers are traditionally used for building foundations and laying plinths.
- Weak - a product created from sodium, fluorine and potassium methyl siliconate increases the plasticity of cement by only 1 level, but at the same time significantly improves its waterproofing characteristics. It is advised to choose weak additives if you need to build small cement structures.
All classes of plasticizing additives increase the density of cement, due to which it conducts heat better (especially important when used for screed under heated floors).
Additive dosage per 100 grams of cement
The dosage of the product depends on its concentration - it is different for each manufacturer. As a rule, this is 0.5-1% of the substance from the total mass of cement - that is, 0.5-1 g of additive is needed per 100 grams of solution. Plasticizers are diluted with water in a ratio of 1:2 (t - up to 30 degrees), and then added to the cement mixture during the mixing process (dry - at the beginning, liquid - in the middle).
Let's look at an example:
when using 0.5% additive by weight of cement - it is necessary to add 100 g of plasticizer for every 10 liters of water
Video: Plasticizer for WARM FLOORS CemThermo+ FIBER Cemmix= KNEADING+ STRENGTH check.
Use of gypsum for cement production
Cement is a multicomponent material, which includes:
- clayey rocks (loam, clay, shale, loess or loess-like loams);
- mineral rocks of the carbonate group (calcite, dolomite, limestone, chalk, marl).
If we consider the chemical composition of cement, it contains oxides of aluminum, silicon, magnesium, iron, and calcium.
During the production of cement, natural materials are dried, ground and mixed, after which the mixture is heated to high temperatures. The resulting clinker is ground again - the powder should be fine. Then various modifier additives are introduced to give the material certain properties.
Gypsum is added to all types of cement mixture to prevent rapid setting of the solution - this allows the material, ready for use, to be transported over the required distances. In addition, gypsum adds strength to the solution. The percentage of gypsum in cement is strictly defined - the volume of the additive is 3-6%, no more.
How to make cement mortar
For cement screed you will need the following ingredients:
- Sand;
- Cement 400;
- Plasticizer;
- Fiber.
Sand must be selected dry. The best solution is obtained from river sand. It must be thoroughly sifted to remove any debris and small stones. Plasticizers in the composition can improve the characteristics of the final product. Fiber is polypropylene fiber.
To increase strength, you can use granite chips, pebbles or small crushed stone as a filler. Mixtures with expanded clay are prepared if you want to insulate the floor. This is true on the first floors. Expanded clay is often also used to reduce the load from the screed.
Quantity and proportions
Cement-sand mortar for floor screed is considered the most popular
Therefore, it is important to know how to prepare it correctly. Unfortunately, if you mix it yourself, you won’t be able to accurately maintain the ratio of different components.
Therefore, you should focus on density.
Any calculations begin with determining the volume for the screed. This volume can be calculated by multiplying the layer thickness by the area of the fill. Based on the obtained figure, the required weight of the solution is calculated. However, these calculations should not take filler into account. Therefore, its weight should be removed from the result.
The proportions depend mainly on the brand of cement. So, for cement 600 you need 1 part cement to 3 parts sand. The result will be a floor screed solution with the M300 brand. If you take the same brand of cement, but 4 parts of sand, then the product will be M200. With cement 500 and a ratio of 1:2, you can get an M200 solution, and if there are 3 parts of sand, then you get an M300 solution. If you take one part of 400 cement and the same part of sand, you will get an M300 solution. The same cement, but in a ratio of 1 to 3, gives a solution of M150. The grade of cement 300 and the same volume of sand as a result of mixing will give M200, and if you mix them 1:3, then it will be M100.
To install the screed, the final grade of mortar must be no less than M150.
What to consider
When choosing cement, the date of its manufacture is very important. If a bag has been in a warehouse for up to six months, it loses a third of its qualities. Proportions are calculated for fresh product that was produced up to 3 months ago.
Cement in its pure form is not used for screed construction. The standard composition of the screed for leveling the floor is 1 part cement and 3 parts sand. The average figures for 1 cubic meter are 1350 kg of sand and 450 kg of cement.
Mix the solution
It is important to know that liquids and dry ingredients must be mixed in different containers. First of all, the dry components are mixed - sand, cement and fiber.
The dry substances are mixed for five minutes.
Next, plasticizer and water are mixed in another container. So, approximately 190 grams of plasticizer should be used for 50 kg of cement. Water should make up a third of the weight of cement. A third of a bag of cement requires 5.6 liters. water. 0.6 liters are needed for the plasticizer.
Then you can mix the dry and liquid components of the solution. To do this, slowly pour the dry mixture into a container with liquids. It is necessary to stir the solution thoroughly. If you immediately pour liquid into the dry mixture, lumps will form, which will be very, very difficult to stir.
It is extremely difficult to thoroughly knead the resulting mixture by hand and this process can take a very long time. It is best to mechanize this work using a construction mixer or a drill. The use of power tools guarantees high quality results.
The cooking process is now complete. You should not make the mixture too viscous - it is very difficult to work with, but there will be practically no cracks on the surface. To ensure that there are no cracks at all, it is necessary to observe the correct composition of the floor screed solution, and the poured surface must be moistened with water every day.
Application of gypsum-cement mixture
Before modifiers that could increase the adhesion of the solution began to be widely used, gypsum was added to the cement-sand mixture for plastering ceilings and upper slopes to simplify the work. As a result, it was necessary to regularly repair the ceilings, since after a few years the plaster could begin to fall off in pieces.
Cement and gypsum can be mixed to obtain an effective binder under one condition - pozzolanic additives, which contain silica in active form, are introduced into the mixture. These can be materials of natural origin (opka, diatomite, tripoli) or artificial (acid blast furnace slag). Silica reduces the concentration of calcium hydroxide in the mixture, thereby preventing the formation of ettringite.
Gypsum-cement-pozzolanic binder (GPVC) is used for the production of concrete. When manufacturing it, it is important to carefully observe the proportions of the components in order to avoid the risk of damage to the material by the “cement bacillus”.
Which floor screed is better
Leveling of bases is carried out on a variety of objects. It is not possible to determine which floor screed is best for all occasions. The VyborExperta.ru team recommends taking into account the scope of application, operating features, and load on the coating. Taking these factors into account, we recommend:
- Unis Horizon – as a base layer in housing construction;
- Perfekta Fiber layer – for commercial use;
- Knauf Ubo is the best screed for heated floors in a private home;
- Forman No. 31 - for finishing leveling.
All the brands presented in the review are worthy of the attention of professional builders, but only the most functional compositions were awarded the title of best levelers.
Step-by-step instructions for installing a gypsum self-leveling floor
Stages of installing a gypsum self-leveling floor
Table No. 4. We make a self-leveling gypsum floor with our own hands.
| Steps, photo | Description of actions |
| Step 1: Cleaning the base surface | After preparing the base, you need to clean the surface from small debris and dust using an industrial vacuum cleaner. |
| Step 2: Prime the floor surface | Next, the base needs to be primed, which will improve the adhesion of the gypsum to the concrete. Apply up to 3 layers of primer using a roller or brush. Each layer of soil requires drying for 12 hours. Compositions such as “Putzgrunt”, “Betonkontakt”, “ST-17” are suitable. |
| Step 3. Protect the walls with damper tape | The place where the wall will come into contact with the mortar must be protected with damper tape to compensate for the expansion of the composition when drying. A barrier should be built at the doors to prevent the solution from leaking, and formwork should be built around the water supply and heating pipes. It is not advisable to fill these areas with the composition. |
| Step 4. Preparing the mixture | First, the required amount of water is poured into the bucket, and then the powder is poured. It is necessary to follow the proportions recommended by the manufacturer of the mixture. A construction mixer will help thoroughly mix the ingredients. |
| Step 5. Filling the floor | Applying the composition to the base begins from the corner of the room farthest from the door. A small amount of the mixture is poured onto a section of the floor, 20 cm away from the wall. Next, the remaining solution is distributed in small portions over the surface. To obtain a perfectly flat surface, it is advisable to use the rule when applying the composition. If the mixture is applied in a thick layer, then to control the floor level you can use reference beacons, which are placed at regular intervals throughout the room. |
| Step 6. Processing with a needle roller | Immediately after pouring the solution, air bubbles are removed from the surface of the screed using a needle roller. It is advisable to carry out this procedure for 30 minutes, after which the composition loses its plasticity. |
| Step 7. Hardening of the coating | After 6-8 hours, the plaster will harden so much that you can walk on it. Finishing is usually done in 2-6 days. |
Advantages of floor screed mixtures
The market for modern building materials is replete with a wide variety of finished products. Using dry mixtures for floor screed, you can get a set of noticeable advantages that are impossible when using mixtures made by yourself:
- When using ready-made mixtures, you do not have to devote additional time to correctly maintain the proportional balance of ingredients. The finished product complies with all required standards for the number of components.
- There is no need to separately purchase ingredients, which can be quite problematic. For example, buying cement will not be difficult, but buying 300 kg of sand will be more difficult, since many suppliers will accept an order if its minimum weight is more than one ton.
- The thickness of a self-made screed should not be less than three centimeters, and using a floor screed mixture with added plasticizers can significantly reduce this minimum threshold.
- Mixtures produced in factories using polymer compounds have less mass compared to sand mortar, which means that such a mortar can be laid even on weakened wooden floors.
- To produce the finished mixture, much less effort is required, since to produce it it is enough to simply add water and stir it all with a construction mixer, but to perform the DSP you will need a concrete mixer or a special trough.
- Fine-grained components included in mixtures made in factories are much more amenable to smoothing for final design.
- Dry mixtures for floor screed are produced in a wide range, which allows you to select them for a specific particular case.
Types of mixtures from manufacturers
Where are they used?
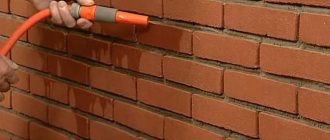
Cement plaster is used for:
- interior or exterior work in any premises, even in unheated and damp ones, including basements, outbuildings, garages, entrances, balconies, loggias;
- finishing of facades, plinths, fences, especially those exposed to aggressive mechanical influences;
- filling joints when laying walls made of foam or gas blocks;
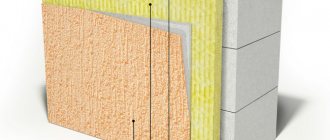
- processing of concrete structures in order to increase heat-insulating properties;
- restorations subject to compatibility with the previous material;
- finishing surfaces exposed to temperature changes;
- decoration of walls or ceilings where frequent repairs are impossible.
Gypsum plaster is used for:
- leveling and finishing of internal walls in rooms with normal humidity;
- ceiling decoration;
- leveling walls with large differences, application in several layers is acceptable;
- finishing surfaces for which cement is unsuitable - wooden, painted, ceramic;
- preparing walls and ceilings for painting or wallpapering.
You can protect plaster from moisture by applying an acrylic primer. And if direct contact with water is possible, then the walls are covered with waterproofing mastic or tiled.
Which building mixture is suitable for wall finishing?
When choosing a building mixture for treating internal surfaces, as well as walls from the street, you need to be guided by the main criteria.
For interior wall decoration, it is worth considering:
- Purpose of application - rough finishing is preferably performed with cement mortars. For the finishing layer, it is optimal to use a gypsum or lime mixture.
- Operating conditions of the premises - some materials are suitable for use in conditions with high levels of humidity (cement, lime), others are suitable only where it is dry (gypsum).
- Specifics of use - any solution is suitable for living rooms, but to level the surfaces in the bathroom, you should choose a durable, water- and heat-resistant composition in order to withstand exposure to moisture for a long time, including direct contact. This is satisfied by a cement-sand mixture with the addition of lime. Waterproof putty is suitable as a finishing layer.
- Material consumption has a direct impact on the family budget. There are cheap solutions that need to be used in large quantities. Economical options are also sold - at a high cost, the consumption is low. Therefore, we have to look for a middle ground.
To choose a finishing material for exterior work, you first need to take into account the material of the walls, including shade and texture (smooth surface or pebbles). Also, do not forget about the purpose and, accordingly, the operating conditions of the construction project.
Sand of a bright yellow, brownish, or red hue cannot be added to cement mixtures, as this reduces the strength of the coating.
Today, the range of plaster for facades is far from poor:
- cement mixtures;
- mineral compounds;
- acrylic plaster;
- silicate solutions;
- silicone variations;
- terrasite solutions;
- cork products.
Which plaster is suitable for finishing walls?
Facade plaster allows you to highlight the outer surfaces and hide minor irregularities. In addition, the coating reliably protects the base from snow, temperature fluctuations, exposure to solar ultraviolet radiation and other negative factors.