A perfectly flat and smooth wall is the optimal basis for applying absolutely any finishing materials. Wallpaper, decorative plaster, and paint will look great on this basis. But a completely flat wall is the key to long and serious work. How to achieve an ideal wall surface with your own hands and how to check that the hired finishing craftsmen are not trying to sell you a pig in a poke and “slip” a wall that is far from perfect as a result of the work performed? In this article you will find answers to these questions.
Why carefully level the walls?
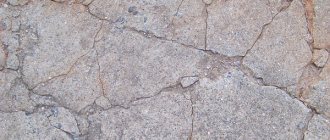
Whatever one may say, any wall during renovation requires careful preparation before finishing work is applied to it. Especially if paint or thin wallpaper will be used for finishing. If you neglect leveling, then, most likely, there will be clearly noticeable depressions and irregularities on the wall, which will definitely spoil the impression of the final coating. If there are also slab joints on the surface, then in these places without proper alignment there will be the most noticeable defects, which will definitely not decorate the wall.
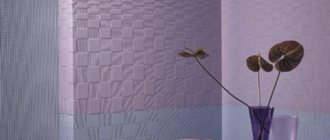
Smooth walls will ensure high-quality and beautiful application of the finishing coating
By the way, before finishing you need to level not only the walls, but also the ceilings. Especially if you plan to paint or bleach them.
Typically, preparing walls for further finishing and leveling them takes place in several stages. If the surfaces were previously finished with any material, then it must be removed. This is the preparatory stage. Then the finishing begins, when the walls and ceiling are first primed or even reinforced with fiberglass, then leveled using putty. And only then does the so-called fine finishing occur, when facial finishing materials are applied to the surfaces. That is, at this stage the walls are painted and wallpapered.
Some, in a hurry to finish the repair as quickly as possible or, in order to cheat, sometimes neglect the first two stages and immediately try to apply finishing materials to the surface. But this is a very serious mistake. Pay attention to the walls that were finished without preliminary preparation: the wallpaper on them seems to be pasted on top of small debris, and if such walls are painted, then they are full of all sorts of tiny defects and irregularities. As a result, the wall looks ugly and untidy. To avoid this, it is important to pre-plaster the walls. Then it will be possible to achieve uniformity and a beautiful appearance of the surface.
When painting an unprepared wall, all defects are immediately visible
First, the walls are plastered, large defects such as cracks and severe curvature are leveled. Putty is necessary to make the walls smooth and even. It will remove all minor bumps, make minor irregularities invisible, and fill in potholes and cracks. And any finishing materials will fit perfectly on the surface that will be formed with a putty layer.
Paints for bathrooms, kitchens and hallways
For kitchens and corridors, the decorative acrylic paints described above and water-based silicone paints are suitable. They have sufficient abrasion resistance and can be washed frequently. The use of paints with a pronounced relief in kitchens is not entirely justified - it will be difficult to keep the walls clean. But pearlescent stains can make a small room visually more spacious, especially if the base color is light.
But there are also several moisture- and temperature-resistant paints that can be used in wet rooms - kitchens and bathrooms - but are undesirable in living rooms.
Alkyd compositions
Alkyd paints are very similar in consistency to oil paints, but have a significant difference both in the base (alkyd resins) and in performance characteristics. The surface painted with them tolerates high humidity, elevated temperatures, and exposure to ultraviolet radiation. It has average vapor permeability, and therefore can be used in damp rooms. It applies well to wood and metal surfaces. What is also attractive about these paints is that painting walls does not require significant investments - they are inexpensive. However, a well-prepared surface is required for a normal appearance. Depending on the type of surface created, alkyd paint can be glossy, matte, or semi-matte.
Examples of alkyd paints
There is only one serious drawback - they are diluted with organic solvents - white spirit, gasoline, turpentine. Therefore, when painting and drying, there is a persistent characteristic odor in the room. Another minus is that over time they lose their color brightness and a yellowish coating appears. The option is inexpensive, but not the best in terms of durability. They are very good for painting radiators and heating pipes - they can be heat-resistant - but for walls it is worth using a different composition.
Paints based on silicates (liquid glass)
If we talk about the specific properties of silicate coating, then this is a good choice for the bathroom: the chemical composition is such that fungus or mold never appears on painted walls. If there is such a problem, this is one of the options for solving it. The coating is very strong and durable, and vapor permeability is the highest among all paint and varnish compositions existing today. Therefore, you can use these paints both in the kitchen and in the bathroom.
Silicate paint - prevents the development of fungi and mold
But there are significant disadvantages. Firstly, until it dries, the composition is very harmful to health. You need to work with it in protective clothing and respiratory protection (a good respirator). After drying, the film is absolutely harmless, but it cannot be kept indoors until it crystallizes. Secondly, silicates are not compatible with other types of coatings. They do not apply to surfaces previously painted with any other paint. In the same way, no other surface will “lie” on a surface painted with silicate paint. In both cases, complete removal of the previous layer is required. Thirdly, the compositions are tinted only with mineral pigments, and this significantly narrows the number of colors and shades.
You may be interested in the topic “How to choose a kitchen apron for your work area”
How to properly prepare walls with your own hands
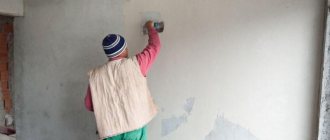
To achieve the perfect wall, you don't always need to call in a professional. You can do it yourself, you just have to spend time. Let's see how to prepare the walls for finishing on your own.
Important! Remember that each of the steps described below is very important. Don't neglect any of them. The early stages are considered even more important than the subsequent ones, since defects formed during the preparation of the base cannot be corrected during finishing.
Plastering and puttying are important steps that should not be neglected.
The first step is to prepare the base itself. This is exactly what we briefly talked about above. At this stage, the remnants of old materials, if any, are removed, and it is also necessary to remove dirt, dust, and grease stains, if any. The easiest way to sweep away dust is with a brush or vacuum cleaner. Next, the already cleaned surface is treated with a primer. It will increase adhesion, and the materials that you apply next will adhere better and more reliably.
Then we start leveling. First, with the help of beacons, the so-called final alignment plane is formed. Beacons made of metal or plastic are installed strictly according to the level.
Important! Remember that after the plaster has dried, the metal or plastic beacons will need to be removed from the surface, and the resulting cavities will need to be sealed with plaster.
After installing the beacons, you can level the walls with plaster. Having prepared the solution according to the instructions indicated on the package with the dry mixture, apply it to the surface and then level it using the rule, focusing on the beacons. This layer defines the geometry and plane.
There is also visual plaster, when large holes and unevenness are hidden with a layer of plaster. This is an economical option, since plastering is not carried out over the entire wall. It should be used only in technical rooms where aesthetics and beauty are not important.
The next stage is making it smooth. Here the finishing putty is already applied in a layer of 1 to 5 mm. Remember that before applying the next layer, the previous one must be dry. After the finishing putty has dried, the surface must be sanded with sandpaper and the surface must be cleaned of dust and debris.
It is important to sand the walls thoroughly
Advice! To avoid scratching the wall, do not use a vacuum cleaner at this stage. It is better to take a slightly damp cloth and wipe the surface with it. You can use a mop with a microfiber attachment. The main thing is to wring out the fabric well.
After all these stages, the walls can be covered with wallpaper. If you decide to paint them, it is better to add one more stage of preparation - the so-called superfinish leveling. It will create an ideal surface without the slightest irregularities. At this stage, a polymer putty is usually applied, which is called superfinish. It has a uniform structure, is easy to use and is applied in a very thin layer. After it has dried, the wall must also be sanded with fine-grained sandpaper, and then dust must be removed from the surface.
Video - Sequence of painting work
The main stages of preparation for staining
In most cases, surface preparation consists of the following steps:
- alignment;
- patching defects with starting putty;
- smoothing out minor imperfections with finishing plaster;
- cleaning and priming.
If you are working with textured materials, then the process of leveling and sanding may be absent. Wallpaper, the color of which you want to change, just need to be opened with a thin layer of diluted glue.
How to check the quality of plastering work
If you decide not to do the repairs yourself, but to hire a team of finishing craftsmen, then you will need to take part in the process of accepting the finished work. And here it will be very important to check the quality of the plastering work. This can be done in different ways. For example, use a new building level and a long rule (about 2-2.5 m).
First check for significant horizontal and vertical deviations. Differences are permissible, of course, but they should not exceed 1 mm per 1 meter of length. And their total height over the entire surface should not be more than 5 mm. There should be no more than 2 irregularities on the walls per 4 square meters, and even then with very smooth outlines. A long rule that is applied to the walls and ceiling vertically and horizontally in several places will help you calculate them. Its plane should not rise above the surface of the plaster by more than 2 mm.
Checking the walls with the rule
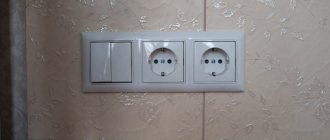
The most difficult thing to check is the evenness of the surface in places with batteries, sockets, switches, and near windows, but it is necessary to make sure that the walls there are even. And in general, surfaces need to be checked everywhere, not just at eye level. If there are uneven spots somewhere, especially in the area of window and door openings, then cracks will form in these places when installing the platbands.
If the list of works stated the alignment of angles up to 90 degrees, then do not forget to check this item during acceptance. Here they find out whether there are deviations in degrees horizontally. Moreover, even seemingly insignificant deviations are already violations. An angle of just 89.9 degrees on a wall 5 m long already gives a deviation of 1 cm, let alone large values.
Advice! Don't forget to check the strength of the coating. There should be no cracks or loud sounds when tapping the walls.
You can check the evenness of the corners with a tape measure. Measure the room along two diagonals and compare the lengths. If they are equal to each other, then the room is strictly rectangular, the corners are straight and even.
You can also use a square with long sides (at least 0.5 m) to check. It needs to be applied to the corner in several places, moving from floor to ceiling.
Checking corners with a square
If you needed to make opposite walls absolutely parallel to each other, then use a tape measure to measure the distance between them at the beginning and at the end. If the distances are equal, then the walls are truly parallel.
Video - Checking the quality of plaster
Preparation for painting textured plaster and wallpaper
To ensure that the paint lays evenly and to reduce its consumption, decorative plaster, fiberglass and non-woven wallpaper are primed before painting. This is not to say that these are mandatory manipulations, but if you want high-quality repairs, do not neglect them.
Requirements for the wall surface vary depending on the future decor. If you plan to use textured paint, they do not have to be completely smooth. The relief of the coating will hide minor defects. But if you want to apply a monochromatic shade, draw a design using a stencil, or decorate the walls yourself using a sponge or fabric, the surface must be flawless. Otherwise, all the flaws will be noticeable. Take this nuance into account when treating walls before painting.
Painting lamp - an assistant in preparing perfect walls
Significant defects on a plastered wall can be easily identified using a level and a rule. And minor irregularities are practically invisible in normal daylight. But if you look at a seemingly perfectly plastered or puttied surface from a different angle and with special side lighting, then most likely you will immediately discover a lot of small defects. The wall or ceiling will no longer be so perfect.
You can identify such jambs using a painter's lamp or a painter's lamp, as it is sometimes called. You can also hear the name “developing light”. This is a special lamp, the light from which comes at a certain angle of 15 degrees.
Painting lamp at work
Important! The angle of incidence of light from such a lamp is completely different from that of any other lighting device used in everyday life. That is why only a painting lamp can demonstrate maximum surface defects, if any.
Such lamps are used mainly by painters and plasterers (hence the main name of this device), and can also be used by tilers, especially when creating mosaics.
As a rule, a painter's lamp is made based on LEDs. It is bright, but does not blind the master.
Interesting! Before the advent of professional lamps, craftsmen used halogen spotlights to check the quality of the leveled surface. Moreover, the spotlights were very powerful and greatly irritated the eyes. Conventional carrying will reveal only significant defects, so they were practically not used.
A painting lamp will always show even the most invisible defects.
Advantages of a painting lamp:
- allows you to see small defects;
- does not irritate the eyes;
- does not consume a lot of energy;
- allows you to achieve a perfect finish.
Using such a lamp is simple: just illuminate the walls with it and all the irregularities are immediately visible. Some devices have a telescopic handle, allowing you to use the lamp even at height. The lamp body rotates and can be locked in the desired position.
The main disadvantage of such a lamp is its high price. Therefore, many craftsmen make such a device with their own hands.
Styles
Designer decoration of apartments offers dozens of different styles. Among them there are those who will help turn existing disadvantages into advantages.
Loft
Rough industrial style does not imply that the walls of the room will be perfectly smooth. Deliberate carelessness of finishing is what is inherent in this direction. The rough structure of concrete or uneven brickwork will look appropriate in such an interior.
Dyeing in dark colors
Attention
The shades of black and dark gray are quite gloomy, but they perfectly hide existing height differences and minor defects.
For small rooms it is better not to use this technique, but in large rooms such a trick will be a real salvation. In such a room it will be important to provide many light sources. Proper lighting will expand the boundaries of the room.
Ombre technique
This type of coloring has long crossed the threshold of beauty salons. It is even used in clothing design, creating spectacular interiors. Gradation of shades of the same color with a transition from saturated to blurry will help decorate surfaces with flaws.
Painting problem walls without prior leveling is a difficult and exciting task at the same time. After studying the advice of professionals, you need to choose the type of wall covering - wallpaper or special paint. Don’t be afraid to experiment: sometimes a non-trivial approach leads to amazing results , because you can create an attractive and original home interior.
Puttying with finishing putty
The finishing putty has a finely dispersed structure and forms a perfectly smooth base. It will not help to hide serious defects. Therefore, it is only good in combination with a starting mixture, provided that the base is properly prepared. If the finished material is too thick, dilute it with water. It is very convenient to work with white putty on a gray base, since areas where there is not enough material immediately become visible. It is necessary to form an opaque and dense coating. Two layers will be enough.
Whitewashing tool
- Mixer attachment. Used for stirring the solution. Inserted into a construction mixer, drill or screwdriver.
- Paint brush. Choose a special natural brush for whitewashing (width 150-200 mm).
- Paint roller with tray.
- Vacuum cleaner with whitening attachment. Use a vacuum cleaner with the function of blowing air through a special hole, equipped with a polyethylene lid with straws. This lid is the sprayer that is used for whitewashing. The spray cap is placed on a regular half-liter glass jar and connected with a hose to the outlet in the vacuum cleaner. When the vacuum cleaner is running, air under pressure enters the sprayer through the hose, draws the diluted whitewash mixture from the can through a special tube lowered into the can, and then sprays it out along with the air through the nozzle. There is also another hole on the sprayer; by closing and opening it (with your finger), you regulate the flow of whitewash solution.
- Glass jar. If the volume of a half-liter jar is not enough for you, you can use a liter jar, but for this you need to take a longer tube that is lowered into the whitewash solution. The tube should reach the bottom of the jar.
- Spray.
Application technique
The choice of roller coat depends on the chosen paint. The layering technique is also changing. Each paint has its own characteristics. They need to be taken into account in your work.
Water-based paint
The roller coat when working with water-based paint is velor or pile . If you need to paint a small area, then velor is suitable, as it does not absorb paint well. For painting large areas, it is better to use a lint roller. It is more expensive, but it also has advantages:
- layer thickness adjustment;
- uniformity of application;
- tool durability;
- Suitable for rough surfaces.
Enamel
Enamel gives a glossy surface, so the requirements for the initial flatness of surfaces and roller material are higher. The fur coat should not leave streaks, air particles or bubbles behind. The ideal effect can be achieved with a roller made of natural wool, always of a large size. Then the coating turns out smooth, without dried stripes and stains.
Silicate
When applying this paint, the roller must pick up and release the same amount of color with each application. Otherwise, the thickness of the layers and their unevenness will be evident. To apply silicate paint, synthetic rollers and trays with a mesh-shaped rolling area are used.
Are you thinking about painting the walls in your apartment? Read about how to do this in the hallway, living room, bedroom, bathroom and toilet, as well as in the kitchen and dining room.