It’s hard to imagine a modern kitchen without an electric oven and a built-in hob. This is a good way to optimize the ergonomics of a room and improve the interior. The majority of users have difficulty connecting such equipment to electricity. To connect the oven, a regular European socket is sufficient. But the hob, due to its potential and energy consumption, is connected through an auxiliary electrical connector that can withstand high voltage. How to connect a hob and an oven if two different plugs do not fit into the same outlet?
Origins of the problem
Often in the kitchen of an apartment or private house there is only one electrical outlet at the equipment connection point. This is how the living space was designed, especially for old houses.
At the same time, we are faced with the task of ensuring the connection of two independent loads simultaneously, each of which has its own electrical input.
This situation becomes critical when the electrical equipment:
- has high power, which does not allow solving the problem through a multi-socket extension cord or tee;
- due to its purpose, it was not initially designed for frequent connections and disconnections.
An additional complicating factor is that the electrical appliances located at a given load point, in our case the oven and hob, must function simultaneously, and the problem cannot be solved by alternatively connecting one of the devices to another point.
How to connect a built-in oven to the mains
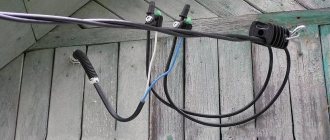
Now that the cabinet is in the right place, it needs to be connected correctly. If the house was built a long time ago and it uses aluminum wiring, you will need to lay a three-core copper wire from the panel to the device socket.
- There are several ways to connect the oven to the mains:
- Via a power cord connected to the oven outlet. You can start it:
- to an outlet of the required power (the cord must have a suitable plug);
- to a machine installed nearby in a separate plastic box (cord without plug);
- to a terminal block mounted on the wall near the equipment (machine on the panel).
- Connection without a cord, directly to the line that comes from the electrical panel (the machine is installed on the panel).
Here you need to do everything correctly and without errors, since this is an extremely important process. With a device power of 3.0-3.5 kilowatts, the current consumption will be 16 amperes. A separate 25 ampere circuit breaker is set in the panel for just turning on the device. Next, a VVG - 3x2.5 wire is pulled from it in the cable channel to the socket.
Devices with a power of more than 3.5 kilowatts are also produced - what to do with them? We carry out the same process, only the machine should be set to 40 amperes, since the current consumption will be approximately 32 amperes. You also need to choose a slightly different wire - VVG - 3x4.0 will do.
All that remains is to connect the built-in oven to the power supply.
When installing an electric oven, things are a little easier - there are no gas hoses, and there is practically nothing to be afraid of. But this does not mean that you can relax and not follow electrical safety rules.
Here everything is just the opposite, and an incorrectly connected electric oven can cause a lot of problems for the owners, the most serious of which is a short circuit and, as a result, a fire. Be sure to do everything right - in particular, follow a few simple rules.
An electric oven is a powerful consumer of energy, and it must be connected with a separate branch of wire with a cross-section of at least 2.5 square meters. Naturally, the wire must be solid and not have any twists, even well-soldered ones.
The branch that provides power supply to the electric oven must be equipped with a separate circuit breaker - its power must be calculated based on the current consumption of the oven you purchased.
As a rule, this is 16-20 amperes - if an electric hob is also connected in conjunction with the oven, then the machine is selected based on the total power consumption.
Grounding is a must. The safe operation of an electric oven depends on grounding. In private houses there are no problems with this, but sometimes in apartments there are problems - as a rule, in old buildings there is simply no grounding.
You will have to do it yourself by extending an additional wire strand to the common panel in the entrance and connecting it to any metal element.
In all other respects, installing and connecting an electric oven is no different from installing a gas oven. The only additional thing you need to do here is to equip the oven wire with a plug - everything is very simple here.
The cable has three wires, one of which is the ground wire - usually a yellow or green wire. They must be connected to the ground terminal.
The remaining two wires are screwed to the other two terminals of the plug - which one and where it doesn’t matter. The contacts must be crimped tightly so that they do not heat up and the insulation of the wires does not melt - this, again, can lead to a short circuit.
You will need a three-terminal (“phase”, “zero”, “ground”) “Euro-socket”, that is, you need to take care of purchasing it in advance. It must be connected to the wire laid to the kitchen.
Some apartments use a two-wire wiring diagram in which there is no ground, and this becomes a definite problem. However, as you know, there is no way out only from the grave, and in our case, the solution would be to call an electrician. He will have to supply ground from the main access power supply panel.
Today, ovens are produced in a variety of configurations, parameters, and characteristics. Some products have a 3-pin connector on the back that allows you to connect a 3-wire cable.
Others are deprived of this benefit - on them you can only find a terminal block with screws. With such cabinets you will have to tinker a little extra - you need to tighten the cable with screws and connect a Euro plug on the other side.
And the final stage of installing any oven is checking its performance and the first idle start. We simply turn on the oven according to the instructions, first check the indication, then the heating, and when we are sure that all the heating elements or burners are working, we start it at full power.
Set the temperature on the thermometer to 150 degrees and burn off the factory grease inside the oven. Perhaps, or rather certainly, smoke will pour out of it. There is no need to be scared, this is why the concept of the first start exists - after the smoke stops coming out, the oven can be fully used.
Justification for separate connection
The PUE states that to power household loads whose power exceeds 3.5 kW, a dedicated cable with a separate circuit breaker must be used. This means that for power supply a radial circuit must be implemented.
In our case, the hob often has a power that is higher than one kilowatt. Despite the fact that the oven is a less powerful device, there are models that consume one and a half kilowatts or more.
Therefore, these two devices can be considered as a single whole not only from the point of view of functional purpose: cooking, but also load.
Where to install the socket?
The easiest way is to immediately distribute all sockets, electrical wiring and panels during the initial construction of a house or when performing a major renovation of an apartment. If it becomes necessary to connect the oven in a room with completed finishing, you will have to partially damage it, since it is undesirable to place the wire in an open state.
The socket should not be installed behind the oven . If you need to turn off the device, you will have to reach for its body.
Not recommended location for installing the socket (at the back of the oven)
Recommended location for installing the socket (there is easy access to turn off the oven)
In addition, the distance from the oven to the wall will be quite large. You should also not place power points below 30 cm from the floor This is a forced and unsafe option, since otherwise there is simply nowhere to place the sockets; densely installed furniture gets in the way.
Preliminary remarks
When connecting the oven and hob, a number of requirements must be met regarding wiring and circuit breaker:
These include:
- the wire is known to be in good condition;
- withstands prolonged maximum load;
- contains the required number of working conductors, neutral and grounding;
- complies with all safety standards.
When choosing a machine, it makes sense to be guided by the values of 25 A with a total load power of up to 5 kW and 32 A with a higher power (see table below).
Table. Limit parameters of 220-volt single-phase wiring for cables with a core cross-section of 4 mm2.
| Exposed wiring or box | Closed wiring (in a groove) | |||
| Core material | Copper | Aluminum | Copper | Aluminum |
| Current, A | 41 | 32 | 27 | 21 |
| Power. kW | 9 | 7 | 5,9 | 4,6 |
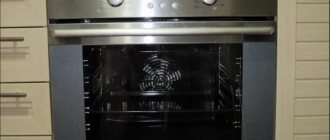
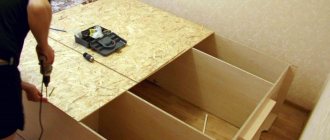
Installing a built-in oven
Connecting the oven begins with preparing a niche for its location. It is necessary that there are no distortions (we use a level to control this moment), otherwise the device may quickly break due to improper heat distribution.
Before installing the oven with your own hands, you need to prepare the work area in advance. First of all, the niche where it will be installed. It is important to ensure that there is not the slightest distortion here. To do this you need to use a level.
If even a slight misalignment is allowed, the device may fail after several years of operation - heat will be distributed incorrectly and unevenly, which will damage delicate electronics.
When the built-in oven is operating, a large amount of heat is generated. Its accumulation can lead to a variety of problems. The product itself may fail due to overheating.
Even worse, if a wooden cabinet smolders and then catches fire, this will lead to a real fire. Therefore, to install such equipment yourself, you need to carefully calculate each step.
The risk of overheating and fire will be zero if the cabinet is correctly positioned in the niche before connecting it to the network.
- Experts establish the following distance from its walls to the edges of the niche:
- 40 millimeters from the back wall;
- 50 millimeters from the left and right walls;
- 90 millimeters from the bottom.
This distance ensures high-quality ventilation, completely eliminating the risk of equipment overheating.
Installation Features
Electrical equipment is much simpler, and therefore preferable for DIY installation. However, here too it is important to carry out the installation correctly, since a short circuit can be as fatal as a gas leak.
As a rule, manufacturers of kitchen sets and built-in appliances adhere to the same standards, so there should be no problems. But it would be useful to check the size with a tape measure before connecting the oven.
Connecting an electric oven is much easier than connecting a gas oven. Therefore, many people decide to do this work themselves, without overpaying specialists.
Yes, there are no hoses through which gas flows, but still you cannot relax, forgetting about the basic rules of electrical safety. After all, one mistake is enough for a short circuit to occur, which may well lead to a fire.
First of all, you need to take seriously connecting the cabinet to the network. An electric oven is a very powerful household appliance. Therefore, to connect it you need to use a separate wire branch.
Moreover, its cross-section should be at least 2.5 square. There should be no twists (even very well connected) or any other damage along the entire length of the wire. Otherwise, the risk of a short circuit increases sharply.
The branch intended to supply power to the oven must be equipped with a circuit breaker. Power is calculated for a specific model, depending on the current consumed when the oven is operating.
In most cases, this number ranges from 16 to 20 amps. In cases where an electric hob is connected together with an oven, you should choose an automatic one, taking into account the total power consumption.
Grounding is a mandatory attribute of a modern oven. Only this allows you to ensure complete safety when working with an electric oven. If we are talking about a private house, then there are no problems here. In apartments, especially old ones, this is much more difficult - the wiring simply does not provide for grounding.
It is better to entrust this work to specialists. If you decide to connect the oven yourself, you need to stretch an additional wire from the kitchen to the common panel on the landing and connect it to a suitable metal object.
Only if all the work is done correctly and carefully can the safe operation of the new oven be guaranteed.
Safety regulations
Caution should be exercised both during the preparation of electrical wiring and when actually connecting a conventional or built-in oven. First of all, this concerns personal safety.
Since an electric oven has high energy consumption, you will need to install an additional branch under it, using an undamaged wire with a conductor cross-section of about 2.5 or 4 square meters. mm, if you come across an oven with a power of over 3.5 kW.
The current-carrying wire is connected through a separate circuit breaker, to which you can also connect an electric hob. The characteristics of automatic protection are selected depending on the entire load supplied to it with a 10% margin.
In order for further operation of the electric oven to be safe, you will need to properly install the grounding. In your own home this is not a problem. But in multi-apartment buildings of old construction, a separate core will need to be independently grounded to the bus of the common electrical panel.
If we are talking about equipment with a relatively low power of up to 3 kW, and the wiring in the house is reliable and designed for modern loads, standard European sockets can be used to install ovens.
Installation work
If there is no factory plug on the device cable, you can install it yourself. You will need a Euro type plug with a grounding plate - the corresponding cable core will be connected to it (usually it has a green or yellow braid). The remaining two wires are tightly pressed with terminals to the brass contacts.
To the power cable supplied from the distribution box, the socket under the oven is connected in the same way.
Some ovens don't even have a power cord. In this case, you will need to purchase it and attach it to the appropriate terminals.
To work, you will need a VVG wire (if the core cross-section of 2.4 sq. mm is sufficient) or PVS - such a length that it can be stretched from the oven to the nearest junction box.
The diagram for matching the color markings of the wire and the terminal panel is shown in the table.
| Type | Conductor braid color | Terminal marking |
| Phase | Brown | L |
| Zero | Blue | N |
| Earth | Green yellow | P.E. |
Examination
When all work on installing the ovens has been completed, it is recommended to test their operation in “idle” mode.
- To do this, you need to turn on the oven and perform the check in this order:
- Turn on the cabinet as specified in the manufacturer's instructions.
- Check the operation of the indicator lights.
- Make sure that all heating elements begin to heat up evenly.
- Set the heat to full power.
Heat the oven at a temperature of +150 to +250 °C with the windows open or the hood on, so that the factory grease completely burns out.
Everything is fine? Then we send the equipment to the niche left for it, level it and screw on the mount.
Selection of household appliances based on the possibility of existing wiring
Let's go a little deeper into the topic so that everything is clear.
If you are just planning to buy an oven and hob, then it is important to understand whether the existing wiring will withstand the total power of both devices, and not a short-term, but a long-term load.
To do this, you need to find out what cross-section of wires the wires have and based on this, make calculations or use ready-made tables.
To measure the cross-section of the wire, use a caliper. An ordinary ruler will not work, as the measurements will have a large error.
Do the following:
- Disconnect the cable.
- Strip the insulation of one core to at least 1 cm.
- Take measurements using a compass.
Next, use the formula from the school course: S=π×d²÷4.
Where:
- S is the required cross-sectional area.
- D – measured diameter.
- Π = 3.14.
For example, measurements showed a core diameter of 2.4 mm. We carry out the calculation: 3.14x2.42÷4=4.52mm2. The recommended value is from 4 to 6 square millimeters.
In new houses built after 2001, the conductors are usually copper, in old ones they are mainly aluminum.
Further, using the table below, you can find out how much power this cable can withstand.
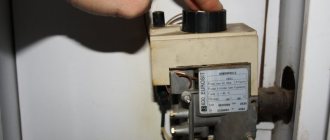
Self-installation
To connect an automatic protective switch in the electrical panel, first install the upper part of the switch on the DIN rail . Use a screwdriver to pull out the eyelet and press the lower part. The lower grip is released and snapped into place.
Then the contacts are connected. If stranded conductors, crimped with lugs, were previously connected, they are inserted back into the upper and lower clamps and the screws are tightened. If the core was without a tip, it is better to remove and clean the old end, then use a screwdriver to make a fresh, undeformed conductor.
After connecting the wires, voltage is applied to the machine and its operation is checked. If everything is in order, connect electrical appliances and make sure that no sparks, crackling, heating or other undesirable effects appear at the switch contacts. Heating is checked with a pyrometer.
It is important to choose the correct ratings of the circuit breakers, the diameter of the copper conductors, and install the breaking phases and not the neutral wire. The machines are installed in the operating position by sliding the switch buttons up.
This is interesting:
Connecting the hob and oven to the same outlet and is it possible to do this?
Connecting the plug to the hob
About the demand coefficient
The demand coefficient is calculated using the formula Ks = Рр/Рн, where:
- Рр – design power.
- Рн is the total power of electrical consumers, in our case the oven and hob.
In simple words, if the demand coefficient is 1, this means that it is possible to simultaneously use all electrical appliances on one network at maximum capacity. But in practice this rarely happens.
For example, 0.7 indicates that electrical appliances are used separately or simultaneously, but not at maximum loads, provided that they are connected to one point.
Below is a table for calculating the power consumption of an apartment taking into account the demand coefficient.
What do we mean by this? And the fact is that if with a wire with a cross-section of 4 mm2 and a load it can withstand of 5.9 kW, you can purchase electrical appliances that in total consume more power.
For example, you liked certain oven and hob models that consume a total of 8 kW at maximum load. But you do not plan to use these electrical appliances in this mode.
We multiply 8 kW by the demand factor of 0.7 (you can take less, but this figure is the most optimal), we get 5.6 kW, which suits you quite well.
Electric oven power
- Most buyers make their choice based on the following indicators:
- functionality,
- device power,
- Energy consumption.
Therefore, you should consider all the values described before purchasing.
Electric model
The power consumption of the oven can vary - from 1 to 4 kW. Models that range from 2 to 3 kW are among the most common appliances and are simple devices for household use.
If you use models whose power consumption is more than 3.5 kW, then you should equip a separate outlet that can withstand high current. This is necessary to ensure normal operation of the electrical network.
Most models of Bosch built-in ovens have certain parameters. The height usually ranges from 55 to 60 cm, less common are devices with a height of 40 to 45 cm.
Such electrical appliances have a convenient control panel, which displays data on the cooking process and other information about the operation. The presence of additional functions affects the power consumption of the oven in kW, so you should also pay attention to this parameter.
Energy classes
Such electrical appliances are divided into several classes according to the degree of energy consumption.
- There are seven classes that have the following energy consumption indicators (kWh):
- less than 0.6;
- 0,6-0,8;
- 0,8-1;
- 1-1,2;
- 1,2-1,4;
- 1,4-1,6;
- more than 1.6.
All these indicators refer to small-volume built-in Bosch ovens. If we talk about large devices, it is worth noting that such devices belonging to class A will consume from 1 kW/h.
Gas models can have a power of about 4 kW, which does not greatly affect utility bills, because gas is much cheaper than electricity.
Effect on temperature
The power of an electric oven affects the temperature at which food is cooked. If you take devices with an electricity consumption value of 3.5 kW, then they can heat up to five hundred degrees.
The standard temperature ranges from 220 degrees. This means that the optimal power of the built-in oven should be 2.5-3 kW. In this case, the maximum temperature can be 250°C.
It is better to choose a device from Bosch, which has a maximum temperature of 300 degrees.
To work safely with such kitchen appliances, one more parameter must be taken into account. To do this, it is enough to divide the power of the built-in Bosch oven, indicated in its characteristics, by the average value of 220 W. The result will be the desired current strength.
When choosing an oven, you should take into account the basic rule - parallel use of devices that have a power of more than 3.5 kW is prohibited. An alternative option would be to purchase a gas device.
How to choose a device
Many people ask the question - what oven power will be most optimal? To understand this, you need to consider a few points:
When buying an oven, you should first pay attention to the number of functions available. Many people prefer those models that have a variety of cooking modes and, accordingly, have great power.
But it’s worth asking the question: will all the programs presented be used? If they are used very rarely, then you should not purchase such a product.
You should also think about how many electrical devices you have in your home. This is necessary, because if the oven and the appliance, which also consumes a large amount of energy, are turned on at the same time, the wiring may not be able to withstand it, causing the entire network to shut down.
The choice may also be affected by the frequency of use of the built-in device. If the device will work very rarely, then you can safely choose more powerful models that allow you to cook dishes much faster. If you use it frequently, it is better to choose a device that consumes less energy.
Another factor influencing the choice is the volume of the built-in oven. For a large family, of course, it is better to purchase a model that will allow you to cook a lot of food at once. But such devices consume almost twice as much electricity, which will affect your electricity bills.
Connection options
You can connect electrical appliances to the network using detachable and permanent methods.
Options for connecting the panel and cabinet to the electrical network
A detachable connection is based on the use of a plug and socket, which are pre-mounted on the cable: the connected equipment and wiring, respectively. It's convenient and practical.
Permanent connections are made through the terminal block. The advantages of this connection method are a strong and reliable connection of contact pairs and lower cost.
The purpose of the machine
The protective circuit breaker (circuit breaker) is used to prevent overheating of the electrical wiring.
Important! The cable is designed to carry a certain current. If it exceeds the permissible value, the cable overheats and the wiring begins to melt, resulting in a short circuit.
If a short circuit occurs, the automation stops the current supply and the power in the network is turned off. As a result, both wiring and equipment remain undamaged.
Connection via socket
In practice, the following main versions of sockets are used, which are shown schematically in the figure below:
- assembly of two single sockets with a separate cable for each of them;
- assembly of two single sockets with a common cable;
- monoblock socket with two seats for plugs.
Options for the end section of wiring for connecting the hob and cabinet, from top to bottom:
- with individual cable and circuit breaker for each socket;
- with the installation of a monoblock double socket and a common circuit breaker;
- using a daisy chain connection of two sockets and a common circuit breaker.
Taking into account the high power of electricity consumed, monoblock sockets with three or more seats are not used in this connection method.
The type of socket used is significantly limited if the panel and/or oven cable is reinforced with a plug. You cannot change it for another one, since in this case, at a minimum, the factory warranty will expire.
When connecting, it is advisable to use socket modules with different form factors, which are also available in a double monoblock version.
Dual power socket with different form factors and the option of lateral cable supply to it in a brick wall groove
Power calculation procedure
Often, when users unpack a brand new oven, they are faced with an unpleasant surprise - the appliance does not have a power cord. This is not a mistake by the supplier, but an opportunity for the owner to independently choose the desired connection method.
Often such devices are connected directly to the panel , without intermediate elements (sockets).
Connecting an oven without an outlet
Connecting the oven using a socket
This method is safer in terms of fire, but the ability to turn off the device sometimes becomes a necessity. For example, if you need to wash the oven, clean it and other similar procedures, it is easier to remove the plug from the socket and turn off the power to the device than to go to the control panel and select the desired machine.
To correctly select the type of outlet and supply wiring, you need to know the operating characteristics of the device. The main parameters of electrical equipment are indicated in the passport or on a special nameplate installed on the surface of the oven, usually on the back side. The parameter we are interested in is the power of the device .
Oven power 2480 W
It can also be denoted by the Latin letter P, for example, P = 3200W means that the oven power is 3.2 kW. Using this indicator, you can calculate the current strength, for which the power (in watts) must be divided by the voltage in the network:
3200 : 220 = 14.545 A
Since differential machines according to the standard are manufactured for current strengths of 6, 10, 16, 25, 40A (etc.), in our case we need a 16A . If the calculation turns out to be 18 or 20A, the difavtomat should be selected for 40A .
Difavtomatic 16A
Difavtomat 40A
In addition, you can determine the required wire cross-section. To do this, it is not necessary to make complex calculations; it is easier to use an online calculator or the table below:
Wire cross-section selection table
For a current of 14.5 A, a wire with a cross section of 2.5 A .
Now you can understand why a separate socket and machine are used for each powerful device. The point is the difference in parameters. If two devices with a significant difference in cutoff current are connected to the same power point, one of them will be connected with a large margin.
If it has problems, the machine may not respond, since its settings are designed for a much higher current. This can cause many troubles, from electric shock to people to fire. Therefore, you should not neglect the rules and hope for “maybe”; nothing good will come of this venture.
The term “power calculation” in our case is used incorrectly, since the power of the oven is known initially, and there is no need to calculate it. The current strength is calculated, which determines the type of outlet. However, users are accustomed to using the term “Power calculation”, which defines almost any similar operation when installing and connecting household appliances. Therefore, the usual name is also used here.
Connection via terminal block
This connection is made in two cases:
- if the connecting cable of the hob or oven does not have a plug;
- if a terminal block is installed on the device itself as an element of connection to the network.
Figure 4 shows both of these cases in schematic form.
Options for connecting the cable to the panel and oven
In the latter case, to connect, connect two terminal blocks with a cable: the device itself and the linear one, and the cable itself is not included in the delivery package of the device and must be purchased separately.
This option is labor-intensive to implement, but does not limit the distance between the cabinet/hob and the power cable exit point, and also allows you to very accurately select the length of the connection cable and avoid the formation of loops.
Most often, the functions of a linear terminal block are performed by a so-called barrier block.
One of the barrier block options
This type of terminal block got its name due to the presence of a protrusion-barrier separating the fastening components of the input and output sides of the device.
The block can be installed openly on the wall or mounted inside a cutting box, for which it is provided with appropriate mounting holes for screws or screws.
Cable selection
To connect the oven, a three-core cable of the required cross-section . It is necessary to choose a copper cable with single or multi-core wires. Aluminum is installed only with a current strength of 50A or more, for reasons of economy - such loads will require very thick conductors, and aluminum is cheaper than copper.
VVGng-cable-3x2.5
VVGng-cable-3x4
VVGng-cable-3x6
Most often, flat power cable VVGng-LS 3x2.5 is chosen. External width - 10.3 mm. It has three single-core copper wires with a cross-section of 2.5 mm2. Color marking of cores eliminates erroneous connection. Usually the wires are blue, brown and yellow-green (phase, neutral and ground, respectively).
Other core color options are possible. The order of connection is not of fundamental importance, since all wires are exactly the same.
The main requirement is not to mix up the wires and not allow, say, a phase wire to end up on the grounding terminal.
Features of connecting the panel and cabinet to the barrier block
There are two things to consider during the connection process.
The first of them is that the connection of the panel and cabinet to the linear terminal block, regardless of the design of the connection block of the device itself, is always performed according to a star circuit, which is shown in schematic form on the left side of the figure.
Connection diagram of line terminal block, hob and cabinet
The use of a loop circuit on the right side of the figure is not recommended due to the fact that the fixing elements of the hob terminal block are not initially designed to connect two wires to it.
The second feature is that, given the large currents flowing through the socket, it is necessary to ensure low contact resistance in the area where the panel/oven cables connect to the terminal block.
To achieve this effect do:
- reinforcement of individual cable wires with lugs (an example of such a component is shown in the figure below);
- the use of a special crimping tool for their installation.
Fork-type tubular cable crimp lug
The correct connection is additionally checked by the color of the insulation of the individual cable cores, their purpose is additionally controlled by the accompanying documentation of the device.
Connection diagram to the machine.
Installation procedure for a gas oven
If the gas oven has a common power supply with the hob, then they are installed together under each other. And if you have an independent oven, you can choose any place, as long as there is a gas tap nearby.
During installation, it is important not to confuse the steps, use good materials and not ignore the instructions. And then make sure the connection is tight. When installing a built-in oven yourself, use a tee for a gas pipe to which the hob is already connected.
But you can’t do that! You may receive a fine. The cabinet and panel must be connected separately, each with its own pipe.
In this case, pipe routing can only be done by service specialists.
To connect to the common line, use a flexible hose or metal tube. The hose must be undamaged and no longer than 1.5 m. Also, during installation, make sure that the hose hangs freely.
Installing a gas oven step by step:
- Check if all the parts are there and if they are damaged.
- Connect one end of the hose to the gas pipeline. Use a dielectric insert.
- Connect the other end of the hose to the equipment using a nut. To seal the connection, use a gasket with grease.
- Check the tightness with a soap solution. Apply it to the joint, open the gas and see if there are any bubbles. If they are not there, you did everything right.
- If the oven has electric ignition, then you need to connect it to the network. In this case, the line for this must be independent.
- Then fix the device in the niche using fasteners.
- And check its operation, turn it on according to the instructions.
Important!!! After you have installed the gas oven yourself, it must be checked by a gas service worker. We do not recommend using the equipment before this.
Connecting a Gorenje electric hob
Before starting work, be sure to study the technical characteristics of the selected model with the connection diagram.
Make sure there are jumpers.
Install jumpers between pins 1 - 2, 4 - 5.
Unscrew the cable clamp, pry it with a screwdriver and remove it.
We connect the wires according to the diagram.
We fix the cable with a clamp.
Next, pump up the hob using the methods described above.