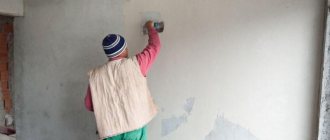
Wall decoration with decorative plaster has gained popularity over the past 5 years. At the same time, applying decorative plaster is considered a complex process that cannot be done independently, and hiring a professional is expensive because the cost varies from 700 to 1,500 rubles. for 1m2. In fact, this is not so, all the work can be done without hiring hired specialists, and the result obtained will be no worse.
By choosing a decorative coating as a finishing material, you will give your home a unique design that will compare favorably with traditional renovation methods. Remember that, despite the beauty, this finish has its pros and cons.
The advantages include:
- Easy to clean;
- The design will be very impressive and 100% individual;
- The coating is durable;
- Requires minimal care;
- Not afraid of strong temperature changes;
- Some types of structural mortars act as an additional layer of insulation;
- Most materials are environmentally friendly;
- Some types of finishing will help hide the imperfections of the walls.
The disadvantages of using are:
- High cost (applies only to some mixtures);
- Some compositions require good preliminary preparation of the walls;
- Complexity of application compared to traditional repair methods;
- Lengthy and labor-intensive replacement process.
If these disadvantages are not critical, such repairs will be an excellent choice for both an apartment and a private house.
If you have no experience working with decorative materials yourself, it is recommended to practice beforehand. This can be done on pieces of drywall or plywood.
Types and methods of applying decorative plaster with your own hands.
Today, many types of decorative plaster are produced for wall decoration. Each of them has its own special options for applying plaster. But the surface preparation technology, the main part of the tool and the painting technology are the same.
To tell the reader how the technique of applying decorative coatings differs, let’s look at their main varieties.
Textured.
These decorative compositions include mixtures that give a unique relief on the wall when using a special tool (for example, structural rollers), the relief can also be obtained using special installation techniques (for example, decorative plaster world map). The movements of the master's hand in combination with the use of a special tool will create the desired patterns.
Structural.
For structural mixtures it is not necessary to use a special tool or special technique. An extraordinary relief is obtained due to the fillers included in the composition. Granite and marble chips, mineral inclusions, fibers of various fabrics and more are used as filler. Using a spatula and trowel, apply one layer to the surface, after the first layer has dried, use the trowel again to create a pattern. There are also marble plasters that create a stone shell of walls entirely consisting of particles of this noble stone.
Venetian.
This type of decorative plaster will give the house the real luxury of a Roman mansion. This wall covering imitates natural stone, most often marble, granite, malachite, etc. Before applying the composition, be sure to practice on sheets of drywall. The application process will be described separately because... is complex and a brief description will not be helpful.
Bas-relief
In the article, by bas-relief we will understand all types of sculptural images made using gypsum or other types of plaster and receding from the plane of the base to a short distance. Such work is carried out with subsequent decoration. If you feel the strength and talent to choose a bas-relief as a decoration, the efforts spent will be returned a hundredfold.
Choosing one of the listed types is difficult, but necessary, because the future method of application will depend on this choice.
Some nuances
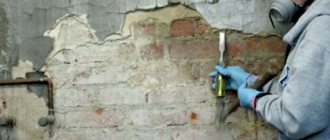
This material is very demanding on surface preparation. Although it can hide small cracks, other defects will be noticeable. Therefore, it is necessary to eliminate any shortcomings.
It is worth paying attention to some features:
- Avoid using products called fiberglass. It can damage the decorative layer. This is due to the fact that the material has good absorbency, which even a primer cannot level out.
- If metal beacons were used to apply the starting composition, they must be removed. Otherwise, there is a high probability that traces of corrosion will form.
- Walls in rooms characterized by high humidity are treated with moisture-resistant impregnations. Antiseptics are applied in advance, which should protect against fungus and mold.
Many manufacturers of silk-effect plaster recommend observing certain time intervals. Namely:
- block walls must withstand an interval of several months after the starting coating has been applied;
- for brick walls the period is up to six months;
- if the work was carried out in winter (in frozen rooms), then the decorative layer is laid only in summer.
Preparing the wall surface.
Let us briefly dwell on this stage of work as preparing walls for decorative plaster. Beginning craftsmen often wonder whether it is necessary to level the surface to perfection?
Like wallpaper, decorative plaster can be applied to uneven walls, but with some restrictions. For example, coatings requiring gloss should be applied to perfectly flat areas. Otherwise, after glossing, all irregularities (depressions, protrusions, differences) will become visible. Most of the solutions do not require special preparation, and on the contrary, textured and structural ones will help hide minor imperfections.
If you do not have the desire or ability to level the walls to an ideal state, in any case, the main thing is to properly prepare the surface before application.
For any finish the algorithm will be the same:
- Remove old plaster (especially if it is peeling).
- Repair cracks and scratches;
- Perform a rough finish - just plaster with a cement-sand mixture until strong visible defects are eliminated;
- Cleaning and dust removal are mandatory;
- Application of deep penetration primer.
As you can see from the above, the process described above is not complicated, and anyone can do it.
What you need to apply decorative plaster yourself.
In addition to the mixture itself, plastering requires a tool, and it will differ from the standard one. Like the technology, the equipment will change depending on the type of wall covering chosen.
Ordinary spatulas will not work, firstly, they have sharp edges, and secondly, they metalize the surface.
Let's list the required tool:
- Spatulas for decorative plaster have rounded edges and are made of high-quality metal.
- Trowels. Often special trowels are even called Venetian.
- Sponges for creating textures.
- Brushes for creating custom designs
- Special structural rollers
- How to paint the plaster is up to you. You can paint by adding a regular color to the base mass, or you can paint the already applied layer; for this, a sponge or brush will be enough.
Special tools are not cheap, but you will need them.
Accessories:
- Cotton gloves;
- Respirator;
- Fabric to protect floors and walls from dust and construction debris;
- Buckets;
- Stepladder for working at height;
Varieties of travertine
Travertino plaster can be used to create the interior of an apartment, or for facade work on the outside of a building. For this, different components are used to ensure that resistance to environmental factors is at the required level. So for exterior work you will need a mortar with white cement, for the interior it will be suitable with marble and quartz chips.
Travertino plaster can be used to create the interior of an apartment, or for facade work on the outside of a building.
Silicate mixtures
Modified and acrylic polymers are used for production. It is distinguished by the creation of a layer that allows air to pass through well, allowing the walls to breathe. It also does not crack or change shape over time. It is not subject to the formation of mold and mildew.
It is distinguished by the creation of a layer that allows air to pass through well, allowing the walls to breathe.
Mineral compositions
Often chosen for outdoor work, they can withstand the harsh conditions found outdoors. A durable protective layer is created for the facade. It stands out for its low consumption and high level of adhesion. Suitable for working with cement, gypsum, concrete, plasterboard and chipboard.
Often chosen for outdoor work, they can withstand the harsh conditions found outdoors.
How to apply textured plaster.
Correctly applying decorative plaster to walls is not difficult, especially when it comes to textured mixtures. Let us remind you that textured or embossed mixtures are called mixtures whose pattern is created using special tools. To create an original relief, improvised materials are often used, such as: cellophane bags, wrapping paper, newspapers and much more.
Application steps:
- Preparation . Textured plasters are precisely those mixtures that do not require very careful leveling of the walls. It is enough to remove severe surface defects.
- Application. Using the textured mixture is very simple. As a rule, it is applied in a thicker layer compared to other types of coatings. Use a spatula and trowel to apply.
- Relief creation . Patterns are created with different tools.
Here are examples of such patterns obtained with different tools:
Canvas drawing - created with a hard brush, drawing first vertical and then horizontal lines, you will get a real artistic canvas.
Circular pattern - created by the same brush by rotating around an axis; waves or circles of different diameters also look good
Patterns with a roller – various patterns can be obtained using special structural rollers. You need to choose a roller with a pattern you like in the store and simply roll it along the wall. This way you can even get the texture of natural reptile skin.
Spraying is the simplest method. The first layer is applied evenly. The second step is to take a broom and dip it into the plaster, at this time you should have a stick in your other hand. By hitting a broom with a stick, we get a relief of various splashes on the wall. You can paint the first layer in any color, and spray it with another or even several colors.
- Leveling the formed coating. Often, after processing with a tool, parts of the relief that are too protruding remain; to remove such marks, use a trowel to smooth the slightly dried coating.
- Coloring. You can paint in one or two stages. You need to paint with a roller or sponge, this way the tops of the relief are made lighter, giving visual depth.
As you can see, do-it-yourself decorative plaster on walls is applied in just 5 simple steps.
Compliance with the correct sequence and accuracy in work guarantees a good result.
Trowel, spatula and other tools.
In addition to rollers, do not forget about other tools. There are no special requirements for them, so they can be easily used when creating a unique design.
The trowel helps to level the applied composition. With its help they create a suitable texture.
It is more convenient to use a spatula in combination with other tools, as it levels the material well. Its working surface is inferior, so you can only process small areas. We are talking specifically about creating a design.
A grater is a small plate with a handle. It is used for grouting the surface.
Brush. Don't underestimate this tool just because of its interaction with the plaster. It can be used to create drawings with various strokes. To do this you will need to make the mixture more liquid.
Here it is worth adding relief coloring in several colors. This method acts as a texture enhancer. Another color is applied to the base color using a roller.
Now let's move on to non-standard options. This list of tools is suitable for those people who want to put as much creativity into their work as possible.
There are stencils for decorative plaster. Thanks to them, unusual patterns on the wall are obtained. You can not only purchase a stencil in a store, but you can also make it yourself. Most often, the outlines of flowers are involved. On the wall it looks beautiful and voluminous. The stencil is attached with tape, and the material is applied on top. Then the stencil is carefully removed.
Let's talk about a sponge. It can be pressed against a damp wall, creating a suitable design. This is an original and simple solution when there is nothing else at hand.
You can create voluminous folds on the wall using plastic film. To begin with, a thick layer of putty is applied to the wall. The film presses down on an unleveled surface. This eliminates air bubbles. After a few hours, the film is removed. Afterwards you need to wait for the wall to dry and you can apply the paint with a brush. These are not the only possible options. You can take anything, you just have to be creative.
Recreating an original design doesn't require a ton of experience or a huge investment of money, but it is still a labor-intensive process that requires some knowledge. In this article, we tried to touch on some important points in making decorative plaster with our own hands, and also looked at popular texture options. There is too much information about various compositions and methods of application, it is constantly being updated, so it is not possible to cover everything at once. However, the main goal of what is written is achievable - to show that for high-quality and beautiful finishing you do not always need to resort to the help of an expert.
Tags:
Rate the material:
How to apply structural decorative plaster to walls with your own hands.
Decorating the outside of a house with various decorative plasters that have a structure is very common. The most famous of the mixtures of this type are “bark beetle” and sand plaster. Structural plaster is a composition with a mineral filler. Which are chips of marble, granite and much more. It is thanks to this filler that the structure is formed. Let's figure out step by step how to work with such coatings.
Application steps:
- Preparation. As with textured plaster, no special preparation is required; it is enough to remove significant damage and differences. Decorative bark beetle coating looks great as an exterior decoration for private houses. Don't forget to clean the walls of old coating, dust and dirt. Before plastering, the surface must be primed.
- Application. Apply the composition in an even layer on the walls, using a spatula and trowel for application.
- Second stage of application. Wait until the first layer dries and use a plastic spatula to begin smoothing the plaster using top-to-bottom movements. An individual pattern in the form of traces of a bark beetle will begin to appear on the surface. This pattern appears precisely due to the presence of large mineral granules in the composition.
- Coloring. The coloring of the structural mixture occurs by adding tint (color pigment). You can take the most common color scheme; in the store, the seller will definitely advise which option is right for you. No separate painting is required.
- Finishing. Some manufacturers recommend using additional wax to impart water-repellent properties.
Apply the plaster in sections. Start applying the next section strictly before the previous one has dried.
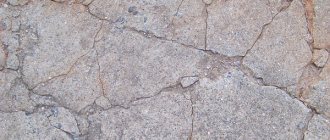
Features of travertine
Travertine plaster helps to achieve an unusual style on the surface, imitating stonework. But the product also has other advantages:
- Enhanced strength characteristics;
- Wear resistance;
- Hydrophobic protection is created.
Ingredients in a standard recipe include:
- Fine and purified sand;
- Lime with tiny particles of minerals in the form of dust or crumbs;
- Binders that help to obtain a high-quality level of adhesion to the base;
- Decorative additives.
Travertine plaster helps to achieve an unusual style on the surface, imitating stonework.
DIY bas-relief.
There are unusual ways of applying gypsum and decorative plaster. One of these methods can be considered the creation of relief panels and bas-reliefs. Such works of art will look great in any room giving your home a luxurious look.
The bas-relief does not have to be made from special plasters; ordinary plaster will suffice. The sequence of work for making the bas-relief will be as follows:
- Surface preparation. Often, separate niches are prepared in the walls, or the outline of the future work is highlighted using a frame. The place where the relief image is applied is prepared in accordance with the plan. The surface can be either smooth or textured.
- Drawing an image. Using a stencil or dimensional grid, transfer the relief design to the wall.
- Creating a bas-relief. Using palette knives (special sculptural spatulas of various sizes), a sculptural image is formed. The gypsum mixture is prepared in small portions because it hardens quickly. The consistency should most closely resemble soft plasticine.
- Grinding. The resulting relief is sanded using sandpapers of different grain sizes. Then they pass over the surface with a mixture having the consistency of sour cream, removing the shells that appeared during the grinding process.
- Coloring. Paint the surface with acrylic paints using a spray bottle. If necessary, varnish is used as a finishing touch.
It is convenient to use half a children's rubber ball as a container for preparing portions of gypsum plaster. Such containers are easy to clean from frozen residues.