Houses made of wood will never lose their relevance. After all, wood is a unique building material. In addition to the fact that it can store the energy and warmth of nature, it is also beautiful. There is one more feature: it does not lose its attractiveness for a long time. Absorbing time, it ages gracefully.
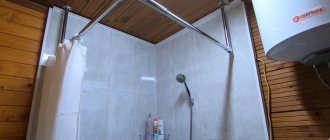
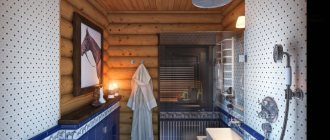
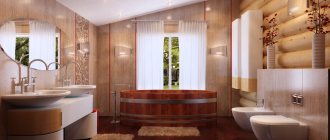
In addition, wooden walls are warm, quiet, and cozy. Therefore, the idea of covering rounded logs or profiled timber with another type of finishing is somewhat barbaric. But in a private house there are several wooden walls that sometimes still have to be leveled: the bathroom and the kitchen. In the bathroom you need to get a flat surface for tiles, in the kitchen - for wall cabinets and an apron. Another thing is old houses, with untreated, cracked logs. Here, the alignment of wooden walls for a different type of finish is dictated by necessity.
Rules for selection and advantages of finishing
When comparing the complex properties of all possible cladding materials, pay attention to the following characteristics:
- terms of Use;
- total cost of work;
- environmental friendliness of the material.
Siding has the following advantages that help you make a choice in its favor:
- long service life;
- resistance to sunlight and other weather conditions;
- impact resistance;
- ease of installation;
- ease of repair;
- fire safety.
When deciding to purchase a material, you should pay attention to the following properties:
- uniform coloring on both sides, which indicates the quality and integrity of the manufacturer;
- quality of holes for fastenings;
- uniform thickness of the panels among themselves and around the entire perimeter.
How to make straight corners
When using gypsum board sheets, the corners are perfectly even. When applying plaster or putty, it may be necessary to level the corners in order to give the corners (internal, external) an angle of 90°. How to align the corners of the walls for wallpaper is decided taking into account the base material and the location of the corner (external, internal).
Aligning the outer corner
For these purposes, a metal corner with perforation is used. Further:
- putty (starting) is applied to both walls making up the corner;
- the corner is pressed into it;
- Excess material is removed, the surface of the corner is cleaned.
The angle is leveled and strengthened at the same time.
Aligning an inside corner
Starting putty is also used for leveling. Work algorithm:
- the angle is formed by the rule by which first one wall is leveled, then the second;
- the applied layer is sanded.
Then the finishing putty is applied. This allows you to eliminate the smallest defects.
Advantages and disadvantages of drywall
The advantages of drywall are as follows:
- increased sound insulation properties,
- the ability to hide behind the casing electrical wiring, wiring of weak currents and other communications: water, sewerage, heating pipes,
- simplifies the installation of chandeliers and sconces,
- finishing materials dry much faster,
- facilitates the installation of insulation and sound insulation,
- environmental cleanliness,
- communication wiring is completely hidden behind the frame.
This building material also has a number of disadvantages:
- Fragility.
- The structure of a sheathed wall or partition made of hot-rolled sheets, much weaker than that made of brick or tongue-and-groove blocks.
- Special dowels and fasteners are required for fixing furniture and equipment to hot-rolled walls.
- It is not advisable to use the material in rooms where the humidity level is above 70%.
Covering walls with plasterboard with your own hands is possible if you follow the rules and basic knowledge about finishing work. At the same time, the cost of work and expenses will be significantly reduced. Below we will propose a step-by-step method for installing drywall on a frame and adhesive basis.
Throwing mortar
Applying the building mixture to the wall using a spatula.
The plaster is prepared according to the instructions on the package, after which it is applied to the wall. The work will require a spatula or a painting ladle. After sketching, the order of work is as follows:
- You need to start pouring the mortar between the beacons from the bottom point, covering part of the wall.
- The rule is placed on the beacons at the lowest point, leaning on them, the plaster is pulled up. You need to lay the mixture by gently rocking it from side to side.
- It is necessary to putty until the mortar laying is continuous and even.
- The adhering mixture is removed with a spatula and again thrown onto the concrete or wall.
- The work is carried out to the top. After one strip of beacons, you need to lay the next one, and so on every square meter until the room has smooth walls.
This completes the first part of the work. The starting layer has been laid, but the walls still need to be leveled, even visually the unevenness is noticeable. It will be possible to completely level the wall with a more liquid composition.
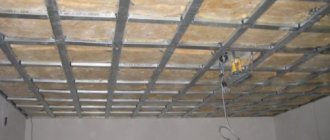
Drywall finishing technique
Wall finishing with plasterboard is done in three ways - on a metal frame, on a wooden frame or on an adhesive composition.
Finishing with plasterboard will help improve the room
Each method of installing drywall has certain requirements:
When installing drywall on a metal frame with your own hands, it is important to choose the right profiles, taking into account their purpose. When installing a wooden or metal frame, it is first important to make the markings correctly in accordance with the level. The guides are installed strictly plumb.
Wall finishing using a wooden frame is not carried out in rooms with high levels of humidity, in unheated or non-residential buildings. Sheathing with an adhesive composition can be done if there are slight unevenness on the walls. Do-it-yourself interior partitions cannot be installed using a frameless method. In order to obtain a durable structure, it is important to take into account all the nuances of finishing
Before any repair work, you first need to prepare everything you need
In order to obtain a durable structure, it is important to take into account all the nuances of finishing. Before any repair work, you first need to prepare everything you need
You can do the finishing yourself, but it’s better to work together
How to choose the right materials
When selecting materials for finishing a house made of timber with plasterboard, several fair questions arise:
- Is it possible to attach drywall directly to wooden walls inside the house?
- If you use a frame, can it be assembled from wood or should you prefer a metal profile?
- What type of drywall should I use: wall, moisture-resistant or fire-resistant to improve fire safety?
The answers to these questions will determine the further choice of material, as well as the techniques for finishing a house with plasterboard.
Frame or frameless methods
The frameless method of mounting plasterboard sheets to the wall surface is simpler and faster, but requires compliance with many factors.
And in this case, laying communications becomes much more difficult. For example, you will have to directly drill the supporting structures for the wiring.
Scheme for frameless installation of drywall
The frame, on the contrary, makes it possible to level out any differences and unevenness of the walls to the ideal value, and laying utility lines under the plasterboard sheets will not be difficult at all. In addition, if suspended ceilings are planned, structures on a solid foundation can withstand the load much better.
Metal or wood
In timber houses, both wooden slats and metal profiles can be used as frame material. Moreover, in the first option, it is permissible to build a simpler structure by attaching the beams under the gypsum board directly to the walls (again, taking into account differences). But the quality of lumber must be at a high level. Only wood that is well dried and treated with protective compounds is used. The cross-section of the racks of such a frame must be exactly 50×25, the same criterion for the crossbars, but the guide bars are no less than 75×25!
Mounted wooden frame under plasterboard in a timber house
The process of attaching wooden frame posts
Metal profile types are also suitable for use in wood construction. With their help, you can build a solid foundation that is resistant to influences such as humidity and temperature changes.
An example of fastening a metal frame in a timber house
Metal frame on the ceiling
To do this, you need ready-made guide elements UD profiles and rack CDs. In terms of cost, metal “parts” of the frame will be cheaper in comparison with high-quality wooden slats. The video shows how to install a metal frame on timber walls.
Which drywall to choose
The type of drywall for finishing a wooden house is selected depending on the purpose of the room. In the bathroom, toilet and kitchen there must be a moisture-resistant sheet; in living rooms, a wall option is quite suitable, and a fire-resistant one is used for finishing structures that may be exposed to temperature influences. In addition to the above-mentioned features of material selection, in a house made of timber, it is necessary to use a vapor barrier.
Making partitions correctly
We will not linger in this section, since we have already studied the topic of installing plaster partitions many times. Today we will only remind you that you should not forget how to mount a drywall profile and install sheets of material on it after installing the frame.
A correctly drawn up project, preparation of surfaces for work, purchase and preparation of materials and tools, dimensions and marking of surfaces for the partition, installation of a guide and rack profile, strengthening of the structure, cladding staggered on each side and always without cross-shaped joints of the material - the main stages of rough work in construction of partitions. Further, only adjustments, sealing of seams, putty and grout.
Leveling for putty
Grouting and leveling the putty
If the first layer begins to dry out, but does not have time to harden, then it’s time to level the wall under the putty. All defects are rubbed over with a solution; in terms of consistency, it is necessary to use a mixture that is thinner. Application is done with a large spatula and leveled using the beacon rule. Thus, the entire perimeter is covered, it is better to make the layer thin and the base turns out to be close to ideal. This stage is necessary so that the putty consumption is minimal.
If the solution is like thick plasticine, the beacons are removed by prying them up with a screwdriver at the bottom. Next, the seam is filled with putty and the wall is leveled with a spatula; if necessary, the seam can be trimmed, because when the mixture is not completely hardened, it cuts perfectly.
Important! During leveling, you need to ensure that the plane remains level. This completes the alignment of the walls. Next, you can carry out interior finishing work, painting the walls in different colors, gluing wallpaper on them, laying tiles and other finishing materials.
Leveling the walls with your own hands (video)
Do-it-yourself plasterboard wall covering: how to mount the frame
First, let's look at the necessary material. As a rule, leveling walls with plasterboard is carried out using two types of profiles - ud and cd. One thing to remember is that the ud (guide) profiles are designed to define the surface plane, and the cd (bearing) profiles serve to strengthen the structure and give it volume.
Now let's talk about the frame. Based on the fact that ud profiles are designed to form a plane, we draw a simple conclusion - they must be installed on the floor, ceiling and walls adjacent to the sheathed surface. The installation sequence is as follows:
1
First comes the floor - if we are talking about maintaining the geometry of the room and maintaining angles of 90˚, then special attention must be paid to the floor guide. To keep everything clear, it is necessary to install floor guides along all existing walls
If we are talking about only one wall, then the direction of this guide must be chosen based on so that as little space is stolen as possible.
Do-it-yourself plasterboard wall covering photo
2. Now the adjacent walls - you can’t do without a level here. The wall guide profile is inserted into the floor one, after which it is positioned relative to the vertical level and secured with dowels or self-tapping screws.
Leveling walls with plasterboard with your own hands
3. Well, last but not least, a ceiling guide is installed, which is inserted at one end into the left wall profile and at the other into the right one. In fact, the installation direction of this profile is already set by the wall guides, so during the mounting process it remains to slightly adjust its position using a long level or thread.
The next stage, which involves leveling the walls with plasterboard with your own hands, is strengthening the frame and giving it volume. One thing should be understood here - it is to these profiles that the drywall is screwed
Therefore, you need to pay special attention to two points
- Firstly, this is the rigidity of their fastening, which is ensured by U-shaped brackets.
- Secondly, it’s still the same plane. Under no circumstances should the supporting profiles fall out of the plane defined by the guides.
Installation of drywall on walls photo
According to these requirements, we install CD profiles:
1. First of all, you need markings. Every 400 or 600mm from any wall we mark vertical lines running from the ceiling to the floor.
2. Further, relative to these lines, every 600 mm, starting from the floor, we install U-shaped brackets on the wall. They need to be placed with this gap along each of the drawn lines.
3. Now it’s up to the cd load-bearing profiles. We cut them to the required size and insert one end into the ceiling guide profile, and the other into the floor guide profile. We position them according to the markings of 400 or 600 mm and attach them to the guides with metal screws with a diameter of 3.5 mm and a length of 9.5 mm. Popularly these screws are called “teks”, “fleas”, “bugs” or “elems”. They need to be installed in two pieces on each side of the cd profile.
4. The final stage of leveling walls using plasterboard, or rather constructing a frame, is attaching the profiles to the existing wall. To ensure that the cd profiles do not fall out of the plane, it is necessary to stretch a pair of threads across them, touching which the supporting profiles are fixed. They are attached to the U-shaped bracket on both sides with the same self-tapping screws with a diameter of 3.5 mm and a length of 9.5 mm.
How to make a frame for drywall photo
Now we can say with complete confidence that the frame for the drywall is completed in full.
Assembling a wooden frame
If space allows, the frame is assembled in a horizontal position, and then raised and attached to the wall, but more often it is necessary to assemble the structure element by element simultaneously with fastening.
The frame of the separate partition is fixed to the timber frame in the following sequence:
- lower horizontal support beam;
- side racks;
- upper closing beam;
- racks and beams for framing window and door openings;
- intermediate posts or beams;
- spacers
The process of installing a frame under plasterboard
The bars are secured to each other using corners.
Installation of the frame of the partition leaning against the wall:
- horizontal support beam (attached to the floor);
- fastening the main load-bearing elements in a horizontal or vertical layout;
- spacers (attached to the main beam).
Ready frame for drywall
Lathing on hangers
Installation will be speeded up by installing the sheathing on hangers - fastening elements of the steel frame for plasterboard.
Drywall frame with direct hangers
- suspension profiles are attached to the enclosing wall or ceiling with dowels;
- then a beam is placed, the sides of the suspension are bent, the horizontal and vertical are checked;
- temporarily secured with nails in several places;
- attach each beam to the hangers with self-tapping screws on both sides;
- install and secure spacers.
If it is necessary to reduce the height of the room, the suspensions are aimed at the ceiling, a beam of the appropriate length is attached vertically to each suspension, guides are mounted to the suspension bars, and spacers are installed between the guides.
Schematic representation of a wooden frame for plasterboard on hangers
Lathing on spacers
In order not to level the wall under the sheathing, unevenness can be leveled with spacers. To do this, cords are pulled vertically and horizontally along the perimeter of the future frame, taking into account maximum irregularities. When shooting the sheathing elements or hangers with dowels, a gasket of the required thickness is laid at each fastening point. The method reduces construction time, saves money, but requires great care and careful alignment of levels.
Surface covering options
Let's start with the walls in the rooms.
The types of walls in different types of houses are divided into:
- wooden (rare);
- reinforced concrete;
- brick.
On all these types you can either install a frame or glue sheets.
There are 2 main ways of covering surfaces:
- frameless;
- using a frame (made of metal profiles and wood).
Both methods require financial costs, but they can be reduced by doing the work yourself, without involving craftsmen. If we talk about wooden profiles, it would be appropriate to mention the low moisture resistance of wood in places where there is a large accumulation of moisture, for example, in the bathroom.
But this process can be leveled out a little if you try to install a waterproof, moisture-resistant wall covering in the form of gypsum boards.
Features of fastening the main body to a curved wall
It is impossible to find perfectly straight walls, but if they are too strongly deviated from the vertical axis, and you want to “soften” this deviation, make it almost invisible?
Then you should follow this method:
- prime the sheet with glue on both sides and let it dry;
- cut it into small squares of approximately 7 cm;
- mix the solution, make three-dimensional figures on the wall that look like slightly flattened balls, form them along the intended perimeter of the sheet (on which it will be attached) in increments of up to 40 cm at the same horizontal and vertical distance;
- then we insert squares onto these “balls”, align them using the rule, and on the gypsum board we also form flattened balls, only larger, so that when connecting the sheet to the wall they do not come into contact with the balls on the wall;
- We lean the whole thing and align it again with the rule.
This method will be acceptable for deviations of more than 40 mm, only instead of “flattened balls” you need to make stripes on the wall for a better effect (Knauf Fugen putty and Perlfix glue are used).
GKL on frame fastening
Might be interesting
In constructing a frame for drywall, you can highlight a number of pros and cons.
Pros:
- strength, reliability;
- behind the frame you can hide cables and wires;
- installation of sound insulation;
- will withstand fastening tiles and decorative elements.
Minuses:
- difficulty in installing and assembling the structure;
- takes up a lot of extra space.
To finish walls using a frame, the following materials are required:
- GK sheets;
- guide profile;
- ceiling profile;
- self-tapping screws;
- direct suspension;
- screwdriver;
- roulette;
- knife for cutting sheets;
- metal scissors;
- level.
To lath under plasterboard walls, we first install guide profiles cut to size on them and on the floor. We use a plumb line to measure where the profiles are located and fixed to the floor.
Then you should install ceiling profiles, which must be adjusted to the height of the room.
There are 3 profiles per gypsum board: one in the middle, two at the edges, and they are attached so that 2 adjacent sheets can join in the middle.
Next, along the vertical lines marked on the wall along the established plumb line, you need to secure the hangers (in the future you will need to attach profiles to them). The hangers are attached to the walls using self-tapping screws.
Then, for the strength of the structure, we fasten it, then we connect the vertical posts and the transverse ones with each other
At the final stage, we place plasterboard sheets on the frame and, using reinforced steel self-tapping screws, try to fasten them as carefully as possible so as not to damage the slabs
GKL on frameless fastening
The frameless method of covering walls with plasterboard is much simpler than the previous one, mainly due to the fact that it allows you to avoid building additional bulky structures and structures.
Pros:
- simplicity;
- convenience;
- hourly and financial costs are lower;
- extra buildings do not take up much space in the room.
Minuses:
- It is not recommended to lay tiles, as the sheets will not support the additional weight;
- the level of reliability and noise insulation is significantly lower than that of the frame method.
To finish walls using the frameless method, the following materials are required:
- GK sheets;
- mortar for fixing blocks;
- putty;
- finishing putty;
- primer;
- roulette;
- knife for cutting sheets;
- level.
The method of installing the blocks is the same as in paragraph “Features of fastening the main building block to a curved wall.”
Work procedure
Leveling walls in a wooden house with your own hands is done using different technologies - each has its own instructions. It all depends on the type of leveling material.
Plaster
When plastering a wooden house, the following rules must be observed:
- Start leveling the walls 2-3 years after construction - otherwise, when shrinking, the plaster layer will simply crumble;
- The humidity of the walls should not exceed 12% - anaerobic mold may appear, despite various impregnations.
The technology itself does not cause difficulties:
- the wall is primed. This, firstly, will help protect the mortar from water loss - wood species actively absorb it, and secondly, improve the adhesion of the mortar to the walls;
- shingles are packed perpendicular to each other, at an angle of 45o to the floor;
- beacons are installed;
- spray is applied;
- The main layer of plaster - soil - is laid on top of the set but not completely dried spray;
- The process is completed by applying a covering. Grouting is carried out before painting.
Details on the rules for filling shingles, installing beacons and the recipes for various plaster solutions can be found here.
Panels
You can also level the wall with panels. You need to start with the installation of wooden sheathing. Experts recommend putting wooden slats under the panels and lining - it’s easier and faster than assembling a metal structure.
The lathing technology is standard:
- horizontal slats or vertical posts are marked. It all depends on how the panels will be mounted. If it is horizontal (siding), then the slats are attached vertically. For PVC panels the opposite is true - the cladding is vertical, the arrangement of the slats is horizontal. Step approximately 40-50 cm;
- The strapping beam is attached to the ceiling. This can be done using a metal corner or a long self-tapping screw through the beam. But then you need to drill the rail with a slightly smaller diameter drill. Otherwise, you can break the notch at the head of the hardware;
- using a plumb line, locate the place where the harness is attached to the floor;
- the lower beam is attached;
- work on forming the strapping by attaching the block to the walls is being completed;
Important: for tying, take a 50x100 mm beam, for a transverse or longitudinal beam - 50x50 mm.
- Internal bars are attached to the harness. To do this, take metal corners;
- To impart rigidity to the structure, internal slats are additionally attached to the wall every 60 cm using direct hangers.
Sheathing diagram for PVC panels.
The process of installing the sheathing is completed by tying the window and door openings. With relatively flat walls, you can do without a frame. In this case, the supporting slats are placed directly on the wall, without strapping.
Panels are mounted on the frame. This is done in the following sequence:
- special moldings are attached to the edges of the sheathing;
- the panels are cut to length so that the strip at the bottom fits completely into the groove of the molding, and halfway at the top - this makes installation easier;
- The first panel is inserted into the grooves of the molding (from below, from above, and then from the side). Work should be started from the most illuminated corner so that the completion is less noticeable. There the panels can be cut in half;
The same scheme is for the wall.
- the first panel is attached with nails or self-tapping screws to the inner bars of the sheathing;
- the second panel is mounted, etc.
Attention: for better sealing, experts recommend lubricating the spikes with silicone.
Instead of nails and screws, you can use glue. Details of the technology are here.
Drywall
Leveling the walls in a wooden house with plasterboard is carried out using the same technology as on brick or concrete walls. Therefore, we will not increase the volume of the article and will send those who wish to study the corresponding instructions for the material “How to level walls with plasterboard with your own hands?”
For general information, let us briefly recall what we are talking about:
- a metal profile sheathing is installed;
- plasterboard sheets are attached to the sheathing;
- drywall is primed;
- joints are sealed with sickle and putty;
- the entire surface is puttied under wallpaper or paint.
Lining
The lining is mounted on a wooden sheathing. Connected to each other by a tongue-and-groove system. Attached to the sheathing or with special fastening devices designed for hidden fastening or with finishing nails.
Fiberboard
About 40-50 years ago, owners of wooden houses, without further ado, tried to straighten the walls of wooden houses for wallpaper using fiberboard. They nailed the sheets to the full height and glued their trellises. But after a couple of years, waves appeared on the walls - this is how the finishing material reacted to the breathing walls. They stayed for many years - there were simply enough other jobs in the village.
The idea of using fiberboard to level walls was just an idea for a long time, until modern materials appeared that completely changed the technology. The work is performed in the following sequence:
Important: with wood-fiber boards you can level walls with a small difference in height - up to 2 cm. And it’s even better when you simply remove the grooves between the crowns.
- the wall is primed;
- Fiberboard is cut across the sheet into strips. The width should be enough for one whole crown and half of the upper and lower logs or beams. The lower and upper stripes are slightly wider - they should cover 2.5 logs;
- the strips are nailed along the edges and in the middle with small nails. Step - 10-12 cm. A gap of 4-5 mm is left between adjacent slabs - a guarantee that there will be no waves;
- The reinforcing mesh is cut to size, with an allowance of 10-15 cm - it is laid overlapping;
- a thin layer of gypsum plaster is applied;
- fiberglass reinforcing mesh is pressed into the solution;
- using a spatula, the reinforcement is covered with a mixture of already applied plaster;
- After the first layer has dried, a thin second layer is applied. For wallpaper this is enough; before painting you need final leveling of the gypsum plaster. What it is, you can see in the article “Gypsum plaster”.
Step by step - simple, affordable - inexpensive.
Features of drywall
It is often used for finishing and decorative works. Due to the ease of installation, it is popular for DIY repairs. Eco-friendly and does not pose a health hazard.
When creating drywall, gypsum is used as a base.
Basic properties:
- Warmth and waterproofing. The structural features of gypsum make it possible to control the microclimate in the room. There are no problems with excessive humidity or dry air.
- Sound absorber. Helps in solving the issue of excessive hearing. The best result is achieved in combination with mineral wool.
- Fire resistance. Not the most fireproof material. Asbestos, for example, is more durable. If drywall is used in facilities with an increased risk of fire, its variety is used - gypsum board.
- Ease. This is one of the most “airy” building materials. The weight of a sheet with an area of 1 m² and a thickness of 6.5 mm is 5 kg. This figure is almost 4 times less than the mass of similar structures.
Working with drywall does not require the purchase of complex tools. Gypsum foam is cut with a simple knife.
GKL - a sandwich panel popular among builders
Table 1. Types of drywall.
| View | Characteristics |
| With insulation | The polystyrene foam coating enhances the heat-saving properties of the material. |
| GKLO | Fire-resistant variety. |
| GVL | It is characterized by increased strength. Due to the fact that it does not have a cardboard covering, it is resistant to fire. |
| GKL with vinyl coating | Used primarily for decorative finishing. It is well fixed and has a long service life. |
| GLKV | Thanks to the presence of additives, it is characterized by increased moisture resistance. The sheet holds its structure well and does not delaminate. Used for furnishing a kitchen or bathroom. An ideal material for country houses, as they have high humidity. Resistant to mold formation. |
Physical and technical characteristics of plasterboard sheets
Selection of leveling material
How to line the walls:
- cement mixture - characterized by increased strength and is not afraid of moisture;
- gypsum - if the packaging does not indicate that it is moisture resistant, then it is used indoors in dry rooms.
The polymer variety is universal, but cannot be used for rough work due to its thin layer application. It is used as a finishing, decorative layer.
Cement plaster
Finishing the ceiling with plasterboard in a wooden house
Therefore, when carrying out installation work, it is necessary to take into account the properties of both wood and the building as a whole and adhere to the following principles:
- it is better, easier and faster to level the ceiling surface in an old house;
- it is possible to install complex multi-level plasterboard ceiling structures to suit any design;
- The principle of a ceiling covering independent of the walls is implemented.
Finishing residential premises with plasterboard sheets has firmly won its fans, since this material provides almost limitless opportunities for creativity when designing interiors, both in city apartments and private country houses. The advantages of using gypsum plasterboard for finishing wooden houses are quite obvious and are as follows: It is necessary It should be noted that when hemming ceilings in a new house, as a rule, the method of attaching the frame directly to the ceiling beams is used, which makes it possible, if necessary, to perform insulation, and also to eliminate additional cladding with boards. Fastening plasterboard to a metal frame is not the only way to install a plasterboard ceiling in a wooden house. Many people worry about the consequences of flooding from neighbors above and, knowing about moisture-resistant plasterboard, wonder whether it should be used on the ceiling. VGKL is less hygroscopic and has additives to protect against mold and mildew, but it will not save you from a serious disaster.
Ordinary drywall will also withstand slight moisture; it will soon dry and return to its original qualities. There are six types of plasterboard, but only ceiling plasterboard is used for ceilings. Its difference from a regular wall one is in thickness: 9.5 mm versus 12.5 mm. Due to this difference of 25%, the weight is lighter, which creates additional convenience for work. In addition, the material has acquired greater flexibility, which is required to create multi-level structures: they make waves, arcs, and curved elements.
After puttying the seams, the entire ceiling is cleaned of dust and primed with a deep penetration compound. When the primer has dried, begin finishing. Painting or wallpapering is more often used. At the end, the ceiling plinths are installed.
For shaped cutting of plasterboard sheets, a jigsaw is used, which is equipped with a wood saw. To cut the material in a straight line, the surface is cut through ¾ of the thickness of the sheet with a stationery knife, and then broken off at the point of the cut. If gypsum plasterboard is sawed rather than cut, a lot of dust will form in the room. It is more convenient to break the sheet on the edge of a table or other surface. After this, the cardboard at the break point is cut with a knife.
After the sheathing has been carried out, the frame can be sheathed with sheets. We always start the sheathing by installing whole sheets, and only then attach individual pieces. Attaching drywall to a metal frame occurs as follows:
- We attach the sheet of material to the profiles and secure it with self-tapping screws;
- the edges of each sheet should fall in the middle of the metal profile;
- the sheet is attached parallel to the existing windows in the room;
- There should be three metal profiles per slab of drywall;
- We install self-tapping screws along the perimeter of the sheet, as well as along the middle profile. They need to be screwed into the material approximately 1 mm. This is done to ensure that the final finish is perfectly smooth;
The second most popular and widespread application is attaching plasterboard to the ceiling on a wooden frame. The interior decoration of a wooden house with plasterboard adds to the overall atmosphere of comfort, harmony and the indescribable warmth of the hearth.
Additional information on the topic:
- What is the difference between a profile and plasterboard guides?
- Holes for lamps in drywall should be made before or after puttying.
- Why did the drywall on the wall ripple?
- Finishing plasterboard walls for wallpapering
- Construction of a wooden frame for a plasterboard partition
Preparatory work
In all materials recommending how to properly level walls in a wooden house from the inside, preparatory work for any type of surface leveling is carried out according to the same algorithm:
- electrical wiring, lamps, sockets, switches, and various fasteners are removed from the walls;
- the wood is cleaned of dirt, especially greasy stains. If it doesn’t work with household chemicals, radical means come to the rescue - a plane or an ax;
- areas damaged by rot or fungus are removed mechanically - combed off;
- cracks in the corners of the house and between the crowns are additionally caulked - the operation is mandatory;
- cracks in cracked wood are treated with an antiseptic and then sealed. The technology and materials used can be viewed here;
- the fastening of door and window blocks is strengthened;
- strongly protruding places are removed with an ax or plane;
- the wood is impregnated with antiseptic materials. In this case, the solution is not just splashed, but carefully and carefully applied at least twice.
Is it possible to attach GVL directly to a concrete wall without profiles?
The concrete wall does not have large differences, so the gypsum boards are fixed with glue.
Gypsum compositions are not used for concrete due to the incompatibility of the included elements. It is better to use acrylic glue.
Before gluing the material, the surface is prepared. Namely:
- notches are made on the concrete for greater adhesion;
- The entire wall is covered with primer.
After that:
- The gypsum board sheet is laid on flat wooden slats in front of the fixation point.
- Glue is applied to it with a notched trowel.
- The sheet is lifted, a piece of drywall is placed under it so that there is a gap from the floor and it is leveled.
- Press it to the base and secure it with a “mop” until the glue dries.
- The second sheet is fixed after the first has dried.
If the wall has a curvature, beacons made of wooden slats or cut strips of plasterboard are used.
List of tools and materials
- Metal profile, galvanized. Sheet insulation. Antiseptic compounds for protecting wood. Drywall sheets. Wallpaper. Glue. Paint and putty. Screws. Electric drill. Screwdriver and hand screwdriver. Paint brushes. Spatulas. Tape measure. Plumb and level. Pencil.
If the finishing of the surfaces of a room is carried out correctly and efficiently, then its appearance can change beyond recognition. When using high-quality materials, such finishing of the interior surfaces of the house will last for many years.
When the construction stage is completed and the turn of finishing approaches, the question of choosing the material arises.
If the walls are not level, then plasterboard sheathing is ideal. In this case, you can do redevelopment, add various structures and additional partitions, or create arches, with the help of which you can conditionally divide the room into several zones. This finishing provides good protection from moisture to wooden walls and retains heat inside the house. This material is easy to work with, so anyone can handle it.
General rules for finishing a house with plasterboard yourself
Installation of a metal frame for plasterboard walls and partitions in a house is subject to a number of general rules:
- The step at which the guides are attached to the ceilings is no more than a meter. It is recommended to use fasteners with 60 cm pitches.
- Fastening method - dowel-nails or anchors. It is clear that the former are cheaper. Considering the specificity of the loads, their strength is sufficient.
- Each individual structural element must be fastened at at least three points.
- The distance between the posts should not exceed 60 centimeters. Better - 40.
- The lathing is mounted in such a way that the edges of adjacent sheets are attached to one profile.
- Fastening to the floor, ceiling and walls - only through damping tapes made of polyurethane foam or foam rubber. They are usually sold with an adhesive layer already applied. Tapes are needed to prevent acoustic vibrations from being transmitted to the walls.
- If the project involves installing a door in a plasterboard partition, its frame is installed immediately after assembling the frame, before covering the partition with plasterboard. The doorway should be surrounded by a profile around the perimeter.
Preparing walls in a wooden house
A newly constructed wooden building must stand for about six months for the foundation to settle.
Only after this is finishing done. Only houses made of laminated timber do not shrink so much, so you don’t have to wait so long. The walls need to be cleaned and the old coating, if any, removed from them.
Then you need to treat the wooden beam with a special solution, insulate it and seal all the cracks. To do this, you can use moss, tow or sealant. Be sure to sand the logs.
Cladding and finishing the ceiling in an apartment yourself: what you need
To install a gypsum board ceiling you will need the same tools as for walls. Additionally, you will need a hydraulic level or laser level, a coated marking cord and a T-shaped stand made of bars or profile. It is more convenient to carry out all work on the ceiling with a partner.
How to attach to a concrete base on the ceiling
The locations of the ceiling profiles are marked on the ceiling. They are usually placed along a short wall with a pitch of 600 mm. The most convenient way to do this is with a coated cord. Then the hangers are attached to dowels with self-tapping screws or dowel-nails. If the ceiling is lowered to a significant distance from the draft, you need to use special hangers, similar to Armstrong ceiling mounts.
Fastening the guides
Mark the mounting location using a laser level or hydraulic level, marking points at the corners of the room at a given height, usually as close as possible to the rough ceiling, and drawing lines using a marking cord. A damper tape is attached to the wall, then guide profiles. A gypsum board ceiling can be lowered for laying insulating materials or installing communications.
How to hang sheets correctly
The gypsum boards are attached to the frame, starting from the corner, with the long side along the short wall, parallel to the ceiling profiles on the plane. The most convenient way to fasten the sheets is to support them with a special stand, which you can purchase in a store or make yourself from a block or profile in the shape of the letter “T”. It is recommended to use moisture-resistant plasterboards.
Do not release the sheet until it is secured with at least 15 screws.
Calculation of the amount of plaster mixture
The procedure consists of two successive steps.
1. Determining the thickness of the desired layer.
After cleaning the surface, the maximum number of beacons is set. In separate zones, key points are identified - at the place of measurements. After calculating how much the surface deviates from the planned one in the main areas, the data is summed up and divided by the number of points.
Approximate calculation:
- evenly littered wall 5 cm;
- deviations in three control areas are 1, 5, 3 cm;
- in total this is 9 cm, which is divided into 3 CT.
The average thickness of the plaster layer is 3 cm. When using beacons, regardless of the indicators obtained, the coating cannot be less than 6 mm - to hide them.
Correct calculation will help you calculate the exact volume of material, avoid purchasing too much or looking for where to buy what you need.
2. Counting the number of packages.
When purchasing a mixture packaged in 30 kg packages:
- consumption per square meter is 8.5 kg with a thickness of 10 mm;
- with a surface area of 10 m2 and a layer of 30 mm: 8.8 × 3 x 10 = 255 kg or 9 packages of the mixture.
Mixing the mixture using a construction mixer
Finishing ceilings with plasterboard
Drywall does not burn, it is a fairly environmentally friendly material, does not contain toxins, and is hypoallergenic.
According to the structure, plasterboard products contain gypsum inside and are covered with cardboard on the outside. That is why it is advisable to use such material in rooms with low humidity. The exception is moisture-resistant drywall.
Therefore, it is not advisable to use it in the bathroom. Well, for rooms such as a hallway, bedroom, etc., plasterboard sheets are an ideal solution for installing ceilings and partitions, because they do not burn, are quite environmentally friendly, do not contain toxins, and are also hypoallergenic.
In addition, such material has excellent noise and heat insulation and can both release and absorb moisture.
This material can be used to make a design of absolutely any complexity. Moreover, no special skills are required to mount the frame.
Methods for determining surface roughness
Before choosing an alignment method, you need to determine how much the wall is curved. This can be done in several ways using different tools.
To determine the degree of deformation of surfaces, a long rule, levels of different designs and plumb lines are used.
- The rule, in this case, just like one of the building levels, must have a length of at least 2000÷2500 mm, since it is required that the tool rise vertically to almost the entire height of the wall, and also that it can be easily rotated along diagonals. As a rule, if it is not in the home “arsenal”, a perfectly straight slate can be used. But it should not be too thin, bending when force is applied, otherwise accurate measurements will not be possible. Its size in cross section 20x50 mm will be sufficient.
Determining the unevenness of walls using a long rule and a building level
A strip, level or rule is applied to the surface of the wall vertically, horizontally and diagonally. They monitor the size of the gaps formed between the wall and the tool, which will show the degree of surface unevenness.
- Another simple and affordable way to check the verticality of a wall that does not require expensive tools is to use a plumb line. Even if the farm does not have such a device, it is easy to quickly make it yourself. To do this, you will need a thin but strong cord about three meters long, as well as a load weighing 150÷200 grams, best of all, a balanced, symmetrical shape.
A simple device is an ordinary plumb line, but it allows you to inspect the unevenness of the wall with the highest accuracy.
Using a plumb line is not difficult: to do this, a nail is driven into the wall, under the ceiling, at a distance of 25–30 mm from the joint, onto which a cord is attached, and a weight tied to it, freely falls vertically along the wall. The load should hang freely, not reaching the floor by 10÷15 mm. When the load calms down and does not move, you can see how distorted the surface is - measure the gaps at various points in height - and compare the results.
- In addition to the evenness of the walls, it is necessary to check their perpendicularity, that is, the corners of the room must be straight.
Checking the perpendicularity of the walls using a square.
A construction square will help in determining this parameter, which is applied in several places along the entire height of the joint and the necessary marks are made. True, the square must be quite large in order to accurately identify possible deviations.
If there is no large square, then it is better to apply the “Egyptian triangle” rule. To do this, two legs are laid from the corner along the walls, multiples of 3 and 4, and the hypotenuse should be a multiple of 5. For example, 1.5 m (0.5 × 3) is measured along one wall, 2 m (0.5 × 4), and the distance between these points in a straight line should be 2.5 m (0.5 × 5). If this is not the case, then the angle is clearly different from the straight one, and it is necessary to look for the cause and a way to eliminate it.
Prices per building level
building level
- Probably the most optimal and accurate option is the use of a laser level (laser plane builder).
It is most convenient to inspect wall unevenness using a laser plane builder.
This device sets perpendicular vertical planes, projects lines in space, along which, by simple measurements and comparisons of clearance values, it is easy to identify unevenness of wall surfaces, their correspondence to the vertical plane and mutual perpendicularity.
Having determined the deviations of the walls from the required plane, the location of irregularities - depressions or convexities, their approximate height or depth is immediately assessed.
— In the case where surface defects or deviations from the vertical plane are 8÷15 mm or more, the walls will have to be leveled by plastering along beacons or by installing plasterboard sheets.
— If the differences do not exceed 5÷8 mm, then you can correct the surface by applying a thin layer of plaster or putty mortar.
Frameless installation
In some cases, if there are large defects, you can do without a frame. Do-it-yourself plasterboard wall cladding is done in 2 stages: first, cut out strips to fit the irregularities and glue them to the base, then carry out the cladding.
Installation is carried out at a temperature not lower than +10 degrees Celsius. The glue must be of high quality, the best option is “Perlfix” produced by Knauf. The adhesive solution is applied immediately before doing the work, because it needs to be worked out within 10 minutes. Strips or patches of glue are applied to the underside of the plasterboard sheet, after which the part is pressed tightly against the wall. Any excess that appears is removed with a rag. While the glue has not hardened, the sheet can be corrected. The entire wall is covered in the same way.
How to determine wall unevenness
To identify defects, the simplest scheme is used:
- the rule (2-2.5 m) is applied to the wall in a horizontal, vertical, diagonal position;
- the tool is pressed tightly into the surface;
- deviations are measured with a ruler or tape measure;
- After measuring the irregularities, check their perpendicularity using a 90-degree square.
Particular attention is paid to potholes, cracks, and depressions. It is necessary to measure their depth with a thin knitting needle and make marks.
Roughness measurement
Advantages and disadvantages of gypsum board finishing
The advantages of the design include:
- the absolute safety of the material, it is environmentally friendly and non-toxic, and does not harm the environment, people and animals;
- drywall is a modern and high-tech product that protects the room from unnecessary noise, sounds and temperature changes;
- it can be used in various rooms and buildings, regardless of the number of levels;
- the possibility of using gypsum board in rooms with high humidity, for example, in the bathroom;
- the ability to adapt it to an interior of any complexity and color scheme;
- it is heat-resistant and does not pose a fire hazard, which indicates its safety;
- If you need to additionally insulate your home, you can use insulation that is applied over the sheathing.
One of the disadvantages is that gypsum boards must be protected from direct contact with water. If a flood occurs, the entire structure will take an unnatural shape, undergo deformation, and in the worst case, collapse. It is worth noting that drying will not help in this case; the situation can be corrected by repeated repairs and installation.
Pros and cons of methods
Each technology has its own advantages and disadvantages. It is up to the owners to decide which method to choose.
Plaster
“Wet” plaster is one of the most common methods of leveling any surface. Many years of practice have revealed all the strengths and weaknesses of the method.
Pros:
- strength. But this only applies to cement mortars. You cannot screw a self-tapping screw into clay, lime, or plaster;
- durability - all types of plaster have a minimum service life of 30 years;
- fire resistance - prevents the fire from spreading to the walls if there is a fire inside;
- the heat and sound insulation of the house is improved;
- hardness - the surface is difficult to damage even in clay with light impacts, not to mention the CPR;
- environmental friendliness - can be used in the bedroom or nursery;
- the ability to restore damaged areas.
Minuses:
- high cost of work;
- high labor intensity of filling shingles;
- the technological process is extended in time due to the drying of each layer - up to 30-45 days;
- the need to install communications only on top of the finishing - grooves for wires and cables cannot be cut;
- complex technology - difficult for a beginner to understand.
Panels
The panels have their own advantages :
- no finishing is needed - they give room for imagination when decorating the interior;
- simple installation;
- work is completed in a short time;
- affordable for people with below-average income;
- have a long service life;
- make it possible to carry out additional thermal insulation with basalt wool or expanded polystyrene;
- easy to clean;
- You can hide wires and cables.
Several disadvantages greatly limit the scope of application:
- steal the volume of the room. If it is unimportant for the living room or bedroom, then it is critical in the bathroom;
- Heavy objects cannot be secured (hanging cabinets, quartz and ceramic heaters, etc.). Therefore, it is not recommended to use it in the kitchen.
Sheet material
The advantages and disadvantages of sheet material largely overlap with the strengths of panels. Let us briefly recall:
- there is no dirt, as with “wet plaster”;
- for performers of work there are minimum requirements for experience and qualifications;
- high sheathing speed;
- the ability to hide communications;
- surface leveling is combined with heat and sound insulation.
The disadvantages include :
- complexity of material delivery;
- the need for finishing;
- problems with fastening cabinets and various shelves - you need to provide for the installation of load-bearing panels or buy special butterfly dowels (each dowel is supported on one sheet of plasterboard 12.5 mm thick up to 25 kg, on a double sheet - up to 40 kg);
- useful area is consumed;
- low moisture resistance of most materials.
Lining
The list of advantages of leveling walls with clapboard:
- easy installation - easily cut to size, assembly is carried out using the tongue-and-groove system;
- possibility of additional finishing in some places;
- good design;
- long service life - 40-50 years;
- acceptable price;
- excellent sound and heat insulation properties.
In addition to the listed strengths, there are several specific advantages :
- conifers release substances beneficial to the human body into the air;
- the smell of forest has been in the house for several years, which calms the nervous system after a difficult day;
- Due to the hygroscopicity of the material, a comfortable microclimate is maintained.
Disadvantages of the material:
- risk of deformation during operation if drying technology is violated;
- sensitivity to high humidity;
- does not like sudden changes in temperature.
Fiberboard
You can also level the walls with fiberboard. The technology has many advantages :
- no frame is needed, therefore the reduction in the volume of rooms is minimal;
- work is completed quickly;
- simple technology allows a beginner to perform the work;
- applying gypsum plaster on top makes it possible to take advantage of all the benefits of plaster (see above);
- allows you to use wallpaper, painting, or liquid wallpaper as a finishing touch;
- financial costs are the lowest compared to the above methods of wall leveling.
There are three drawbacks , but one significant one: after a few years of use, waves will appear on the wall - there is not enough rigidity, no matter how often you hit nails or screw in self-tapping screws. Besides:
- cables and wiring will have to be secured to the finish;
- There are some difficulties when attaching shelves and cabinets.
Frequently repeated mistakes when working with gypsum boards
In order to avoid problems that can overtake you when placing and installing plasterboard structures incorrectly, we suggest looking at the list of the most common mistakes:
- improper preparation of the sheet surface. First you need to remove dust from the edge edges and moisten the cut edges of the blocks with water;
- inconsistency of the putty mass. It is recommended to use the mass that is included in the “dry method” construction system kit;
- selection of reinforcing tape. The best choice is paper tape, which needs to be moistened before gluing;
- Avoid sudden changes in temperature and high levels of humidity in the room. During putty, maintain the temperature above +10 C, regardless of the season and time of year, do not forget about the moisture level;
- choose the type of putty correctly; Apply the putty mixture carefully.
- the placement of expansion joints should occur every 15 meters. With frames - every 10 meters;
- Proper storage of sheets before use. The absence of moisture, placing the slabs in a horizontal position at a distance of 30 cm from one another in a closed room guarantees the safety of your plasterboards intact;
- incorrect installation of the frame. To prevent the structure from being flimsy and soon falling apart, it is necessary to correctly fasten the ceiling profiles, because eventually the gypsum boards will be fixed to them;
- profile cutting problem.
- an error in the selection of a profile can affect the sound insulation, reliability, and durability of this design;
- violation of the frame will lead to cracks in the drywall;
- not knowing which side to install the sheets. An error in fixing a gypsum board, and especially other types (GKLV, GKLO, etc.) on the wrong side will result in improper distribution of moisture and the appearance of fungus (GKLV), or will not prevent the walls from burning from the inside (GKLO);
- assembly of sheets previously divided into smaller pieces or simply joining them incorrectly gives hope for corrosion and destruction of the sheets.
What can be used for leveling
To level the walls, modern functional mixtures and sheet materials with high performance characteristics are used. To choose the right leveling material, you need to understand its purpose and features of use.
Dry mixes
The easiest and most affordable way to level walls is to use special dry mixtures to prepare leveling solutions. These include:
Cement mixtures
The main components are cement and middle fraction sand. To increase plasticity, ordinary lime is used. Such mixtures come in two types: cement-sand and cement-lime. Cement mixtures with coarse sand are intended for rough work, with fine sand for finishing. Significant disadvantages are susceptibility to cracking, low adhesion and setting time. Mixtures with the addition of lime are more practical and versatile.
Gypsum mixtures
Such mixtures are widely used to level surfaces of various curvatures. They have high ductility, excellent sound insulation and heat-saving characteristics. Some types of gypsum compounds provide good adhesion to the surface.
Clay mixtures
Often, environmentally friendly mixtures based on natural clay are used to level surfaces. Sawdust, chopped straw and chalk can be added to the finished solution. Such a coating provides good thermal insulation of walls and reduces heat loss in winter.
Thermal insulation mixtures
The active components of thermal insulation mixtures are cement, lime and polystyrene foam balls. Their low thermal conductivity ensures heat accumulation indoors even with sudden temperature changes. The only drawback is the high hygroscopicity of the solution.
Sheet materials
Another equally effective way to eliminate the curvature of surfaces is the use of sheet materials. Suitable for these purposes:
- Sheet plasterboard (regular and waterproof).
- Gypsum fiber panels.
- Panels made of chipboard, PVC and MDF.
They have strength, resistance to high moisture and mechanical stress, practicality and durability. In addition, such materials provide excellent sound and thermal insulation.
Types of wall covering using plasterboard.
Also among the positive properties of this material is the fact that sheathing walls with plasterboard can be done either frameless or using a metal or wooden frame. It is difficult to answer which of these methods is better, since it all depends on specific goals and conditions. For example, the frameless method is suitable only if the plaster on the wall surface is in very good condition. Otherwise, after some time, the entire structure, along with the old plaster, may collapse. The method using a frame is more reliable, but it will require additional time to install the frame. Therefore, which method you prefer is up to you.
We install drywall on wooden slats: advantages of the solution
Despite the fact that many builders prefer metal as a base for plasterboard structures, wood also has its obvious advantages, which make a wooden frame a worthy competitor to its metal counterpart!
Advantages of a wooden frame over a metal one:
- Availability of the material and its low cost.
- High speed of construction.
- Environmentally friendly.
- Easy to use.
Before you start working with wood, the slats will need to be left for several days inside the room where the installation will be carried out to acclimatize.
Glue or frame method?
Before covering the walls with plasterboard, compare 2 installation methods according to the proposed criteria, objectively evaluate the pros and cons of frame and frameless installation. First, let's look at the features of fastening to the sheathing.
Advantages:
- The design is reliable, durable and almost eternal.
- You can hide communications, insulate and soundproof the room.
- The method is suitable for covering surfaces of any degree of curvature.
- Plasterboard on the sheathing supports the weight of the tiles, so this type of fastening is suitable for kitchens, bathrooms, and toilets.
Minuses:
- Installing a frame is a labor-intensive task that not everyone can handle.
- Do-it-yourself plasterboard covering of a frame is more expensive than the adhesive method: you will have to buy profiles, hangers, and fasteners.
- In small rooms, the frame takes up a lot of space, so the room becomes noticeably cramped.
Mounting to a lathing made of wooden blocks and planks has the same pros and cons as mounting to a metal frame. An additional disadvantage is the ability of wood to swell from moisture, so in rooms with high humidity it is recommended to use a frame made of profiles as a base.
Features of glue fastening
Advantages:
- compactness;
- minimum expenses;
- simplicity.
Flaws:
- the design is less durable;
- the method is only suitable for relatively flat walls;
- the surface of the drywall cannot be tiled - the structure is not designed for such weight;
- It is impossible to hide communications under the sheets or lay heat-insulating and sound-proofing materials.
When you evaluate your capabilities, abilities and design requirements, it will become clear whether covering walls with plasterboard on glue (without a frame) is suitable for you or whether it is better to make lathing.
Why are walls leveled?
Page navigation
The procedure for refining wall structures is necessary:
- for high-quality wallpapering, painting, laying tiles;
- increasing the level of thermal insulation of walls - which is important for panel high-rise buildings;
- increasing the noise insulation of a house - when it is located in the city center, near transport interchanges, etc.
Smooth walls from the inside of the apartment visually look better, as does any finishing subsequently laid on them.
Required components
In addition to the sheets themselves, for the interior decoration of a room with plasterboard, you will need a certain set of profiles, fasteners and related materials. Among them there are the following types:
- CD profile. In Russian designation it is called PP. It is the main component of the frame for both walls and ceilings.
- UD (aka PN). It has a U-shaped section. The base for the frame is mounted from it. This profile serves as a guide for the previous version.
- The next type is CW (or PS). In the flat part, this device has holes that repeat the shape of the letter H. Various types of communications from electrical networks to Internet cables are mounted through them.
- And the last one, UW (PN) profile. It can act as a guide and can be used to form partitions in the frame.
Here we also mention arched ones, which allow the installation of radius structures. Finishing an apartment with plasterboard at the stage of creating the frame also requires certain components. Among them:
- A single level connector called a crab. It fastens the CD profile in one plane.
- A two-level connector is used if the elements are in different planes.
- Direct hangers are designed to fix the frame structure to the ceiling.
- Extensions connect profile sections if the standard length is not enough.
- A corner connector can be called a special case of a crab: it connects profiles that are at the same level in a blind corner.
Installation of beacons
Installation of beacons
To make a flat surface from a curved wall, beacons are used to level the walls. This is a profile that is placed in one plane on the wall; the beacon will direct the plaster to the right places, filling voids and making the walls even. The beacon method involves the use of a galvanized steel profile; these are T-shaped profiles, although timber is also used as guides.
A metal beacon is more convenient to use than the timber method; it is easier and more convenient to install. The plaster layer will be approximately 8 mm. The disadvantage of the method is the cost, the amount is not large, but it is an additional expense. In addition, plaster and steel do not adhere well to each other, so when the mixture dries, the beacons are removed and the holes are sealed.
When using wooden slats, the process becomes cheaper, but even timber is more difficult to find. Moisture damages the wood, and the plaster layer is uneven. Some people use the solution as beacons. Initially, strips of plaster are applied to the wall, leveled, and after drying they are used as beacons. The method is cheap, but also more complicated than other beacon types.
Important! The evenness of the walls depends on the correct installation of the beacons. If you place the beacons exactly, then the result will be excellent; if there is an error, then the desired result will not be the best and the work may need to be redone.
To install on the wall, several cakes of plaster are made, a profile or block is sunk into them, everything is leveled to the desired degree, you can use a plumb line. When the cakes dry, you can continue working. The width between the beacons is taken from the calculation of the rule that is available.
How to do installation: first stage of finishing
When arranging the frame, you should take into account the design of communication and light sources.
At the initial stage, it is necessary to make a level mark. At this stage, you should take into account the communication device and, of course, all light sources.
If spotlights will be used as lighting devices, then the ceiling height should be more than 15 cm; free space is essential to allow air to circulate, as well as to avoid overheating of light sources. If you plan to hang a beautiful chandelier, then a height of 6-8 cm will be enough.
In order to find the starting point, you need to use a level. It should be noted the zero level along the entire perimeter of the room, and it is to this level that the profile guides will be attached in the future.
All guides must be secured with dowels. The step is 50 cm.
Next you need to start installing the ceiling profile. To do this, you need to put small notches on the guides. The step is 60 cm. The ceiling profiles along the entire room should be attached to the resulting marks. When attaching the profile, it is necessary to make a small indentation from the wall. This will help subsequently avoid such an unpleasant phenomenon as deformation of the frame due to temperature changes.
To attach the second level frame, it must be mounted in the first level frame.
Is it possible to attach drywall to wooden blocks: 7 secrets of good fastening
In any construction business you cannot do without special tools. To ensure the job goes smoothly, purchase everything you need in advance. What you need when working with drywall is listed below.
To avoid the appearance of cracks in the seams, work should be carried out after establishing a constant temperature and humidity in the room.
After preparing the drywall, you can proceed directly to attaching it to the sheathing. To do this, we place the sheet close to the slats and secure them with self-tapping screws.
One edge of the sheet should be located as close to the wall as possible. The heads of the screws must be below the level of the sheet.
Before you start working with wood, the slats will need to be left for several days inside the room where the installation will be carried out to acclimatize.
The first thing you need to do is remove the old coating from the walls, the remnants of insulation and sound insulation - in short, any objects that may interfere with the work process.
Assessing the evenness of the wall surface
Before making any curved wall smooth, it is assessed and the maximum difference is calculated.
Curvature is determined in two ways.
- Visually. The master examines, identifying local bulges or depressions.
- Instrumental. The specialist applies the rule at 3-4 points horizontally, vertically and diagonally, calculating the distance of the batten from the wall surface.
There are 2 types of examination of the evenness of a wall surface: visual and instrumental.
The presence of a vertical blockage is determined by a plumb line or level.
conclusions
Thus, we considered options for leveling walls in a wooden house. In fact, it’s difficult to advise anything, since everyone has their own idea. Some people just want to cheaply renovate a dilapidated village house, while others want to create a modern interior from a wooden house. On the one hand, there are not many finishing options, but on the other hand, it all depends on your budget. Agree, finishing walls with plywood without a frame and applying decorative plaster with all the associated work to prepare the walls are completely different budgets.
In any case, the choice is yours!
Write in the comments how you leveled the wooden walls of your house!
Candidate of Sciences, permanent expert of the site, a real, and not abstract (unlike other resources) person.
Houses made of wood will never lose their relevance. After all, wood is a unique building material. In addition to the fact that it can store the energy and warmth of nature, it is also beautiful. There is one more feature: it does not lose its attractiveness for a long time. Absorbing time, it ages gracefully.
In addition, wooden walls are warm, quiet, and cozy. Therefore, the idea of covering rounded logs or profiled timber with another type of finishing is somewhat barbaric. But in a private house there are several wooden walls that sometimes still have to be leveled: the bathroom and the kitchen. In the bathroom you need to get a flat surface for tiles, in the kitchen - for wall cabinets and an apron. Another thing is old houses, with untreated, cracked logs. Here, the alignment of wooden walls for a different type of finish is dictated by necessity.