The decision to build an extension can be detrimental to the foundation of the main house. Often, due to inexperience, people lay the wrong foundation and after a few months cracks appear between the house and the extension.
The article describes the process of building an extension to a house made of foam blocks with all possible mistakes and tips on how to extend its service life. How to make window and door lintels and what danger awaits when planning an opening wider than 1.75 m.
Finally, you will find some ideas for decorating and using your extension.
Where to begin
Many owners of private houses ask the same question: “I want to make an extension to the house, where to start?”
You need to start by figuring out what size the building will be. We also need to decide what material we will build from.
If the main house is wooden, it is also better to build the extension from wood. If the main structure is stone, it would be more logical to choose brick or concrete blocks for the extension.
But there will be nothing terrible if you make an extension to a stone building from wood, and to a wooden one from brick. It will look normal and correct. There are many examples of such buildings.
Record the dimensions of the future extension on paper: make a drawing. It's not as difficult as it seems. It is necessary to draw a plan, that is, a top view of the structure and several sections - what the structures will look like if they are cut vertically. It will be useful to make drawings of individual joints of structural parts. Enter the dimensions.
A basic drawing is necessary for any construction. Having completed it on paper, you will already see what you will get as a result of construction.
Often masters of their craft say that they imagine everything in their heads and do not need drawings. This may be true, but there is a risk that you will still miss something, and then you will need to redo some of the work.
Possible options for the location of the extension relative to the main building.
We choose the location for the construction of the extension on the side where there are no windows. Usually the door to the house is inside the extension. That is, when leaving the house, we find ourselves in the outbuilding, and from the outbuilding we enter the plot. In this case, the extension serves as a veranda or entryway. This option is the simplest and most economical, but other schemes are also possible.
Design and drawing
Before you begin the process of adding a veranda to a residential building, it is worth deciding what size the extension will be. To do this, a project is created with a drawing of the future building, in which the width and length of the room, as well as its total area, are clearly marked. Without a ready-made plan, it is quite difficult to make a level foundation and install a frame without errors and deviations in degrees.
At this stage, the quantity of building materials is calculated, indicating their total price. The house owner should also take care of such nuances as the type of attachment of the veranda to the house, the location of windows and doors in the extension, as well as the need to dismantle individual parts of the roof over the main part of the house.
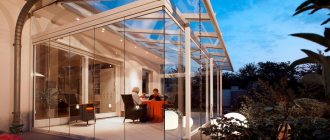
Glazing
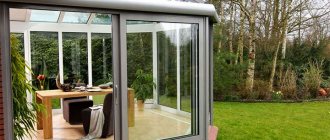
Glazing of the veranda is done in different ways: using metal-plastic, polycarbonate, PVC film, aluminum profile, wood. These days, the most popular are plastic windows.
The advantages of this choice include:
- guaranteed long service life;
- frost resistance;
- dustproof;
- the double-glazed window has good sound insulation;
- do not deform under the influence of sunlight;
- waterproof - unlike wood, they do not absorb moisture;
- do not require painting, antibacterial or anti-corrosion impregnation;
- ease of care;
- easy to install.
Among the disadvantages, it should be noted that plastic is not a natural material; some types of it can release toxic substances. When purchasing a double-glazed window, you should ask the selling party for a certificate for the product, which indicates the hazard class. If the plastic is not of very high quality, over time it may lose its shine and become dull.
Pure plastic is weak and may not withstand the weight of glass, so metal-plastic bags are more often used for glazing. This structure is heavy and requires a load-bearing support. Non-reinforced plastic is used on lightweight structures; it has thin, non-tempered glass. Such windows are fragile and dangerous.
To install metal-plastic windows, wooden beams (100 by 150 mm) are suitable as supports. During the installation of double-glazed windows, special fasteners are used to connect the structure to the end of the frame. The resulting cracks are sealed with polyurethane foam.
The same rules apply when glazing the veranda ceiling, if necessary. The ceiling frame must be strong to hold metal-plastic bags, so it is easier to use polycarbonate. Sometimes they provide ceiling windows, which looks original. For ventilation using ceiling structures, a remote control is usually provided.
Plastic windows retain heat well and are suitable for winter verandas equipped with a fireplace or other heating means. Due to the nature of their manufacturing, metal-plastic structures cannot be too large. If you need floor-to-ceiling windows, you should select other materials (wood, aluminum).
Glazing of the veranda can be partial or panoramic. In the first case, windows are not installed on all walls. This is a cheaper option, but the extension will not be light enough. If the windows from the rooms face the veranda, the rooms will remain poorly lit. Panoramic glazing touches all external walls, sometimes even the ceiling. This extension receives the maximum amount of natural light.
Opening methods
Depending on the method of opening the frames, you can choose any suitable glazing.
- The swing option is the most popular. The package consists of two or three parts, and only one or two parts can swing open, while the central one remains motionless. The ability to open a window increases the cost of the design, so not every section is ordered movable.
- Sliding frames move on special skids in one or different directions. Each section overlaps the other when offset. This design is good for small verandas, as it does not take up much space.
Foundation
The choice of foundation is the most important issue that determines all aspects of subsequent actions. The most common types are:
- Pile.
- Slab.
- Tape.
Pile foundation
Pile foundations are used in difficult conditions with high soil water levels. Its construction requires the immersion of reinforced concrete piles into the ground by driving, filling prepared and reinforced wells, or screwing screw piles into the soil. Immersion is carried out until contact is made with dense layers of soil that provide reliable support.
Slab foundation
The slab foundation is a homogeneous reinforced concrete slab laid on a drainage layer of sand and gravel mixture (SGS). Such a foundation performs well on heaving clay soils that have serious movements during autumn-spring floods. The slab simply “floats” on the soil surface, without receiving any problematic deformations from movements, and the building located on it is protected from additional loads. The disadvantage of this method is the high consumption of material and the impossibility of forming a basement. If the extension is small, for example, if you plan to build a garage from foam blocks, you often use a ready-made reinforced concrete slab laid on a drainage layer.
Popular articles Choosing a door for the veranda and creating it yourself
Strip foundation
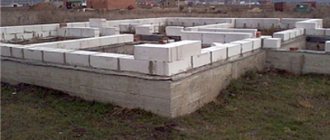
Strip foundation is the most common type of foundation. It is easy to create, does not require any special excavation work involving special equipment and can be done independently. In addition, taking into account the fact that an extension made of foam blocks does not have much weight and will not create a high load, you can get by with a shallow version of a strip foundation that does not require the formation of a trench below the freezing level of the soil.
The responsible node is the connection between the old and new foundation.
Some sources recommend firmly attaching the new base to the existing one. This should not be done under any circumstances. The difference in the weight of buildings and the degree of shrinkage will certainly lead to the formation of cracks or gaps between the walls. An even worse option is when the old house “leans” towards the new one, crushing the wall at the junction. Therefore, you should make a completely independent foundation, in no way connected with the old foundation.
What you need to know about masonry walls
To improve adhesion to the solution, the underside of the block is wetted with plain water. In order to prevent moisture from leaking in the future, several layers of waterproofing compound are laid on the first row as protection. Before installing the next row, the previous “floor” is wetted with water
You should pay close attention to the laying of the first row. The check is performed horizontally and vertically
The further process and the correctness of the masonry depend on the quality of the initial design. Subsequent work must be carried out using an adhesive composition. This will allow you to get seams of small thickness, approximately 1 mm. The use of an adhesive composition reduces the total area of the seams, which can allow cold to pass through. Seams are also called “cold bridges”. Each finished row of masonry is checked horizontally and rubbed down with a sanding float. All work is carried out in strict accordance with the instructions. Having laid out 5 rows of the wall in this way, you should use reinforcement in the corners, designed to bind the entire structure more firmly and prevent the formation of cracks. Using a circular saw, you need to make a square cut to a depth of 50 mm. The cut edge should not exceed 30 mm. Having knocked out the groove with a hammer and/or chisel and cleaned it, the welded reinforcement is placed in the center of the groove. It must (mandatorily) be filled with adhesive. An extension to a house made of foam blocks involves further arrangement of window and door lintels, production of a reinforced belt and ceiling.
You will learn more about how to connect the wall of a house and an extension from this video:
Window and door lintels
If the jumper is installed incorrectly (meaning large clearance), the increased load will negatively affect it. In this case, you can make a brick lining that will strengthen the structure.
Arrangement of jumpers.
But such a situation occurs extremely rarely. The arrangement of lintels and window structures can be done using two methods: by installing removable or permanent formwork.
Reinforced belt
An extension made of foam blocks is not possible without installing a reinforced belt.
Armobelt.
It is necessary to give the house stability, including strengthening the load-bearing walls of the new structure.
Overlap
When an extension of foam blocks is installed, the ceiling is the final phase of construction work. The foundation of the house is poured, the openings are ready, the construction of the erected walls does not raise any complaints, therefore, we can begin to re-roof.
The ceiling of the extension is made of foam concrete material.
After a pause of several days, after installing the reinforced belt, the overlap is made. The materials used for the work are most often wood and aerated concrete slabs. If wooden parts are mounted, they must be impregnated with a bio/protective and fire retardant compound. The foam block extension is ready. You need to polish the exterior, give the walls a decent appearance, and insulate them. Decoration involves the use of artificial stone, decorative plaster or foam.
Deciding on the shape and design set
The idea of creating a built-in veranda is implemented at the design stage. The attached one is mounted on its own foundation. These options differ in installation specifics and cost, but, as experts note, this is due to the desire for increased living comfort.
Rectangular shapes are recognized as classic; their use is widespread due to their versatility. Round and semicircular shapes are usually used when creating classic exterior design. Polygonal shapes serve as a special structural element in complex designs.
- Introduction
- Gallery
- Video
- Read more on the topic
A little bit about yourself
But first, let me introduce myself. My name is Pavel Usmanov, and I have first-hand knowledge of building houses. In 2006, I graduated from Arkhangelsk State Technical University with a degree in Industrial and Civil Construction.
Having received a diploma in construction, I began my journey of experimentation in search of the ideal field of activity. I was involved in the restoration of cultural heritage monuments, worked as a design engineer, and was engaged in panel housing construction. The practice was very varied.
However, I chose the construction of houses from aerated concrete blocks. “Plastic” building material allows you to implement the most daring architectural solutions. This freedom of construction thought fascinated and fascinated me.
Together with a team of experienced specialists, we created a company that is engaged in the construction of houses from aerated concrete frame blocks and other materials. Our catalog contains photographs of already erected buildings, as well as projects created by me even before the appearance of DST.
Gallery
Video
One-story houses made of aerated concrete with a terrace and veranda
To avoid confusion, I suggest you immediately understand what a terrace and a veranda are. Despite the abundance of conflicting information on the Internet, you should know that these concepts are not synonymous.
» >
Photo 1. House with a veranda and terrace
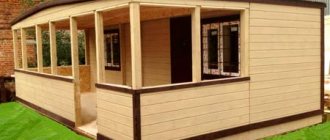
What is a veranda
:
- A spacious, completely enclosed, usually unheated terrace in the cold season.
- In most cases, the veranda floor is installed at the same height as the floor in the entire house.
- The lower part of the veranda walls is made of brick, aerated concrete, stone or wood. The top of the structure is panoramic glazing.
- Usually a permanent roof is built for the veranda, which is part of the roof of the house.
How to attach an extension to a country house?
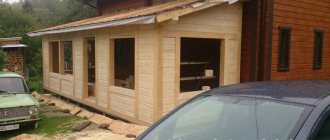
It is a common belief that only extensions that were built from wood can be attached to a wooden house. This is a misconception, because there are no particular problems when attaching an extension made of blocks, as in the case of brick. First, you need to check the condition of the walls of a wooden house, if necessary, replace the deformed timber, and analyze the condition of the foundation.
Attaching an extension to a wooden house begins at the stage of constructing the foundation, when we inserted reinforcing bars into the foundation of the building with our own hands and connected them to the reinforcing mesh of the base of the extension.
Preference is best given to a sliding coupling, which is performed through longitudinal grooves. If you are not confident in your abilities and are afraid that the coupling will be performed incorrectly, then you don’t have to do it at all, filling the free space between the two structures with any suitable thermal insulation material (for example, mineral wool).
If the foundations of the foam block extension and the building are of the same type (for example, both are strip), and were also laid at identical depths, then the heaving forces on both structures will be approximately equal. In such cases, the foundations are connected using reinforcing bars.
If the depth of the foundations differs, then in the case of a rigid coupling of the foundations, there is a high probability of cracks forming at the junction of the structures. To reduce the likelihood of cracking, you need to connect the foam concrete wall with a brick wall at a height of no more than one floor. At the same time, dressing is performed from reinforcing rods (the diameter of which should be about 7 mm) - they are laid every two to three rows.
Construction stages
Before construction, you need a recommendation (project) from a specialist who will assess the condition of the house: log frame, foundation, roof and offer the best option. There you will receive calculations (estimates) for the work being carried out.
First, determine the location, dimensions and height of the structure. Its roof should not reach the level of the roof of the house.
At the design stage it is planned:
- places for laying communications;
- coordinates of the doorway - it is better to arrange it instead of a window; if you have to cut a new one, then this is done after calculating the load.
Stage 1. Foundation
An extension made of foam concrete does not require a very strong foundation, but it must meet several criteria:
- same design as the main building;
- the same burial depth;
- the same value of shrinkage of foundations during soil heaving - this is determined by calculation.
On non-heaving soils, a rigid connection of foundations is used with the help of reinforcement, the dimensions of which are determined after strength calculations (this should be done by specialists). When an extension to a wooden house made of foam blocks is built with your own hands, it is easier and more economical to leave a deformation gap between the buildings, filled with insulation. In this case, the foundations may differ in design, and the floor level in the extension is made lower than in the house - by the amount of calculated distortions.
Popular articles How to build a summerhouse with your own hands
Stage 2. Laying walls.
When the base hardens, it is treated with waterproofing mastic, insulated and filled with bitumen.
It is easy to add a house extension even without skills - just like a regular building made of foam concrete. The foundation is lined with roofing felt on top and the first row of blocks is placed on a regular cement-sand mortar, starting from the corner. Subsequent blocks are mounted with special glue (select its summer or winter variety). The upper plane of the laid row is moistened with water, and the adhesive composition is applied to the bottom and sides of the assembled foam block. The thickness of the seam does not exceed 3 mm - this reduces the risk of cold bridges.
If a decision is made to rigidly connect parts of the building, this is done using metal brackets made from reinforcement or a rod with a diameter of 10–15 mm and a length of approximately 300 cm. The rods are driven into the wall to the middle, the remaining part is placed in the seam between the blocks.
How to make an extension to a house made of foam concrete more rigid and protect it from deformation?
To do this, reinforcing belts are laid every 4–5 rows and in the corners. Using a circular saw, cut 3 x 3 cm grooves with a depth of 5 cm in the stacked blocks, and remove the middle from them. The welded reinforcement is fixed in the grooves and filled with glue.
Stage 3. Installing jumpers
They are mounted on foam blocks if the width of the opening (door, window) is no more than 1.75 m. If the size is larger, sand-lime brick is used for reinforcement.
Jumpers are made in two ways:
- with removable formwork made of bars - they are lined with sawn foam blocks from the inside, reinforcement is installed, then the blocks are treated with water and concrete is poured (with compaction);
- with permanent formwork - using U-shaped blocks.
Stage 4. Overlapping
An extension made of cellular blocks is covered with foam or aerated concrete slabs; pine timber is also popular. Wooden beams must be dry, planed and impregnated with an antiseptic. The sheathing is made of plywood, boards or OSB.
Walling
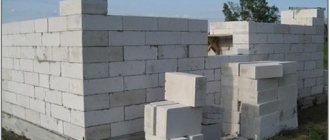
Let's look at how to make an extension to a house from foam blocks on an already prepared foundation. Laying briquettes is simple, it is carried out in one layer and can be completed in a short time. A special adhesive composition is used to connect the foam blocks; adjustment to size is carried out using a regular hacksaw. There are no special technological techniques; laying is done with the blocks offset by half the length. To speed up the work, it is best to hire an assistant who will carry the blocks, prepare the adhesive solution, etc.
Veranda foundation
Like the construction of an ordinary house, the construction of a veranda begins with the arrangement of the very foundation, i.e., the foundation. Of course, it will be good if you already have a ready-made veranda project attached to the project of your residential building or cottage. Then the foundation will be made in parallel and combined with the main design of the house.
We place the foundation according to a pre-planned project with a foundation depth of 100 centimeters or more. The layer of sand at the bottom of the pit should be about 20 cm, then we press it. In the case of sandy or problematic soil, crushed stone is added to the sand.
The backfill is poured with molten bitumen on top. After hardening, this material becomes an excellent waterproofing material. Then a layer of concrete mortar is laid on the surface of the pit. We use leveling tools to achieve a perfectly flat surface.
We lay brick supports on the foundation. Focus on the height of the flooring 25-30 cm below the base of the house itself, so that the roof of the future veranda can be placed under the roof structure of the country house.
The height of the extension will fully correspond to the premises of ordinary rooms. For better waterproofing, brick supports are coated with bitumen. The voids are filled with rubble.
Video description
A veranda is considered a closed building, which is a continuation of the house with a common roof. The structure can be with solid walls or partial glazing. A veranda is usually added to a finished house to increase its usable area.
Covered terrace attached to the houseSource obustroeno.com
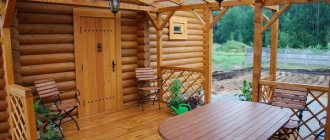
What elements does an open terrace consist of?
If you order the construction of an open terrace from a construction organization, the kit will include the following elements:
- Terrace posts made of wood with a diameter of 10x10 cm. They are installed at a distance of 1.3–2 m.
- Elements for constructing a foundation: pillars, piles.
- Wooden railings, balusters with carved trim.
- Roofing material of the selected color: corrugated sheet, metal tile, ondulin
- The floorboard is tongue-and-groove or planed.
At your request, any additional elements can be included in the package, for example, balusters are replaced with a continuous clapboard fencing.
An open terrace made of wood attached to a brick house. Source pinterest.com
What elements does a closed veranda consist of?
Unlike open structures, closed verandas have walls. When ordering the construction of a closed veranda, the kit includes the following elements:
- Posts for mounting a frame made of boards 4x10 cm, jibs 4x10 cm.
- Thermal insulating material KNAUF, layer thickness 5 cm.
- Grooved floorboards 3.6–5 cm thick.
- Lining for external finishing.
- Entrance door with a set of fittings.
- Roofing material.
The kit for buildings with glazing is complemented by wooden or plastic windows with fittings.
Enclosed verandaSource stroyvsadu.ru
We create the perfect project
The location of the veranda is key: the extension should create a unified style with the house. This location will provide a shady area: you can relax without being exposed to excessive sunlight. Wind load is an important factor: the design must be reliable and safe, providing maximum comfort of use in any weather.
At your discretion, the entrance can be from the street, from the building part or through a through purpose. This option is predetermined by the operating format and the customer’s plans. In this case, it is necessary to provide for the situation with drafts, which are undesirable for any type of use of the living space.
How to make an extension to the house so that it does not move away
To ensure that the extension does not move away from the house over time, you need to remember the secrets of the old masters and build it with a pre-planned slight bias towards the main structure. We set the vertical slope of the walls within 1 cm per meter of height of the extension. The slope can be laid already at the foundation construction stage.
For example, for an extension 3 meters wide, the foundation for the external wall will be 3 centimeters higher than the foundation for the internal wall adjacent to the main building. Visually the slope will not be noticeable, but you will receive a guarantee that the extension will never move away from the building.
What to do after completion of construction work?
If all construction work has been completed, then the only thing left to do is to fill out all the documents for the extension and obtain the appropriate permit. Of course, it is possible, and perhaps necessary, to collect all the necessary documentation in advance and take it to the employees of the appropriate authority.
But, as you know, in our country, most homeowners go to register extensions upon completion of construction - this is permitted by law.
You can clarify the documents required to register an extension and obtain permission from the regulatory authority in your region.
Strip foundation
Sequence of work:
- dig a trench wider than the thickness of the wall, to the level of the depth of the house’s foundation;
- pour 10 cm of sand to the bottom and compact it;
- mount the formwork from wooden panels, place supports outside and braces inside from studs and nuts;
- from corrugated reinforcement, tie the frame into 10x15 cm cells or weld it;
- mount the frame at the bottom of the trench, installing its stands 0.5 m high;
- prepare concrete using: M400 cement, sand, crushed stone fraction no more than 40 mm in a ratio of 1: 3: 5;
- fill the foundation with concrete in layers, one at a time, up to the height of the foundation;
- it is advisable to compact concrete with a vibrator, which can be rented;
- remove the formwork after 7 days, continue further work after three weeks, when the concrete has completely hardened;
- attach foam plastic to the foundation if the extension will be made warm;
- cover the surface with bitumen or waterproofing if the room is not heated;
- Place two layers of roofing material on top of the foundation.
Organization of construction events
Where would you prefer to live: in a private house or apartment?
The foundation has been created - you can begin building the garage space. To build a garage with your own hands near the house, it is optimal to use blocks of cellular concrete. They are relatively light in weight, in the mid-price range, and easy to process. Thanks to the increased dimensions, construction time is reduced.
Popular articles How to make a gazebo from corrugated sheets with your own hands
Before attaching a garage to a garage or to a house, you need to select the material for its construction
Let us summarize the recommendations of experts on the question of how to attach a garage to a house with your own hands:
- after the foundation has acquired strength characteristics, proceed with the construction of walls;
- lay the waterproofing layer on the base. Use roofing felt or special mastic in several layers;
- install guides that allow masonry to be carried out without deviations;
- apply a cement composition for laying the first row of wall material;
- Lay the blocks in the same way as laying bricks. The difference is in the solution used for fixation. Brickwork is done using cement; special glue is used for blocks;
- treat the wall shared with the house with fire-resistant impregnation;
- start installing the roof. Provide a slope angle for the beams that allows snow to slide off the roof without hindrance;
- install the gate, controlling the vertical and horizontal position of the frame, using a building level;
- carry out finishing work.
When deciding on the choice of material for finishing activities, remember the need to ensure a consistent style for the vehicle storage space and the building.
The foam block is easy to do when doing the work yourself
Advantages of foam concrete blocks
Foam concrete blocks are an ideal building material for those who decide to build a house on their own. Compared to other materials used for wall construction, foam concrete is inexpensive. But at the same time, it also has a number of positive qualities, thanks to which foam concrete is popular among private developers.
- Foam concrete blocks are lightweight and simple. You can cut them with a regular hacksaw and give them the desired shape.
- No skills are required to work with this material.
- Foam concrete blocks can be easily transported.
Foam concrete does not have through pores like aerated concrete, so it does not absorb water.
The higher the density, the stronger the foam block will be. If a summer veranda is being built, then it is better to choose denser foam blocks, and for arranging a bathroom, blocks with a lower density coefficient are ideal.
If you choose between foam concrete and aerated concrete blocks to build a veranda, then in terms of fire resistance, environmental friendliness, sound and heat insulation, these materials are equal to each other. But aerated concrete, due to its porous structure, easily absorbs moisture, so it is more often used for internal floors. This means that foam concrete is more suitable for the construction of external walls.
Pros and cons of building from aerated concrete
When building a veranda from aerated concrete, you should pay attention to the following advantages of this material:
homogeneity of the material and its stability over the entire surface; high levels of strength and noise insulation of the structure, since the blocks are produced in autoclaves; low rates of material shrinkage under the influence of external factors; fire resistance
- As for the disadvantages of aerated concrete construction, these include the following characteristics:
- the need to waterproof walls by plastering and painting them due to strong moisture absorption.
- low level of thermal insulation compared to foam block structures.
If all construction work is carried out in strict order and in accordance with the project, the result will be a strong aerated concrete extension connected to the house. If you feel that certain stages cannot be completed alone, you can use the services of a professional team, for example, at the stage of pouring the foundation or erecting walls.
b602fcae1398e6ea81387adb76214f9e.jpe 4c4eb81e7d898f4a4556059d8f574ff7.jpe
What materials are suitable for building extensions
For the construction of an extension to a country house, plans are drawn up by architects taking into account your wishes. Materials are selected depending on financial capabilities and the purpose of the extension. The most commonly chosen are the following:
Timber of any kind
: rounded, planed, glued. Glued material has higher thermal insulation properties, while rounded material has the most attractive appearance. The advantages of timber include affordable cost and high environmental performance. It is suitable for construction for any purpose. The wood is treated with special compounds to protect against pests, mold, and mildew. Objects made of timber are built quickly and easily.
Moisture-resistant chipboard or OSB boards
used in frame buildings. The material has high sound insulation properties and retains heat well. In residential extensions, additional insulation is performed with mineral wool. The cost of the material is affordable. Experienced builders will quickly cope with the task of covering walls with chipboard or OSB.
Brick.
The material has high strength, durability, and a wide range of colors. But at the same time, they will demand the highest price for working with bricks. In combination with double-glazed windows, the material is suitable for the construction of a winter garden and greenhouse. Bricks have significant weight, so a reliable foundation is needed for an extension to the house. The most difficult stage in the construction of such a structure is the docking with the main object.
Foam blocks and aerated concrete blocks.
The advantages of the material include affordable cost, high thermal insulation due to the porous structure, short construction period from large blocks. The structure is lighter than a brick one and does not require a reinforced foundation. The disadvantages of block objects are the need for cladding, since their surface is destroyed under the influence of precipitation and other negative factors.
Extension made of foam blocks to a wooden houseSource celinrmo.ru
Regardless of the material chosen, the safety and reliability of the constructed object correlates with the quality of its connection to the main structure. The simplest option is to build an independent closed foundation. The space between the walls of the extension and the house is filled with insulating materials.
Features of the construction of extensions from foam blocks
You need to start building an additional room from foam blocks by drawing up a plan:
Choose the size of the building; Thinking about the height of the structure
It is important to know that you need to leave room for the roof. The already erected roof should not touch the roof of the main house; Choosing the base for the room; We think over the place of laying communications; We make a diagram of exits and windows; Choosing insulation; We are thinking about the finishing. Scheme for finishing walls made of aerated concrete blocks
Recently, cellular concrete has become widespread as a material for construction. No wonder. Cellular concrete is lightweight and can be used to make an extension to a wooden house without much effort.
The use of high-quality blocks is the key to reliable construction
You should pay attention to the color: it should be uniform. Cellular concrete should not have chips, cracks, or stains
Scheme of the foundation for an extension made of foam blocks
The material should be ordered from a large enterprise that has its own production. It is best to order blocks from one batch. Construction should begin only using well-dried blocks in dry weather. A block structure will be successfully erected on both a strip and column base.
Columnar foundation
The advantage of this type of construction is not only its low cost, but also the fact that the owners will always be able to access the land under the building. The construction of a columnar foundation is recommended in areas where there is a lot of water in the soil.
Strip foundation
More substantial construction should be started with a strip foundation. This foundation for construction is more expensive, but it will not have to be repaired as often. In addition, builders recommend making a strip foundation for the extension if the main building has the same type of foundation: this will protect the building from distortion.
Scheme of constructing a veranda wall from foam concrete blocks
Combining foam blocks with a wooden building wall
With this option, it is important to consider the following nuances:
- correct combination of different wall materials;
- The foundation of a wooden house always shrinks.
Wood is subject to deformation due to changes in air temperature and humidity. Therefore, between the wooden structure and the veranda made of foam blocks, an expansion joint is made - a flexible layer of polyurethane foam 1-1.5 cm thick.
As soon as the construction is completed, they move on to the external decoration and internal improvement of the veranda. Bare foam blocks cannot boast of a presentable appearance, so it is better to line the walls on the outer and inner sides with any material you like.
