Have you always dreamed of having your own home away from the city, from roads, from cars? Do you have a plot of land in an excellent location, have you completed all the bureaucratic procedures and are now the full owner of the plot? Well, dreams must become reality, which means it’s time to think about your own home. First of all, about what material you are going to build it from, what kind of roof it will be, external and internal cladding.
In this article you will learn why it makes sense to build buildings from foam concrete; we will tell you how to build a house from foam blocks with your own hands.
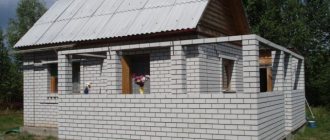
Construction of a house from foam blocks
Advantages and disadvantages of foam concrete
When looking for the strengths and weaknesses of this material, it should be understood that if foam concrete had any significant disadvantages that would make building a house impractical, then most likely houses would not be built from this building material. Architects, in this case, would not have been offering hundreds of expensive projects for houses made of foam concrete for decades.
Let us list the main advantages of this material. It is precisely because of these advantages that many builders decide to build foam concrete houses:
- Foam concrete walls have the same ability to “Breathe” as wooden ones.
- Foam concrete is a type of very heat-resistant material; it keeps heat well in winter and cool in summer.
- Foam concrete has soundproofing qualities.
- From the point of view of environmental standards, foam concrete is clean and does not require additional processing.
- Allows you to save on heating.
- Over time, foam concrete becomes stronger.
- Affordable price because it contains simple, affordable components.
- The volume of the blocks is equal to the volume of fifteen bricks, despite the fact that their weight is half as much, and it is much easier to build from foam concrete.
- Houses made of foam concrete do not require foundations that can withstand particularly heavy loads.
Despite the convincing list of advantages, if you decide to build a house from foam blocks with your own hands, you will have to face some disadvantages of the material:
- The house must be built exclusively using frame technology, so you will have to experience all the disadvantages of frame construction.
- It will be necessary to carefully monitor the quality of each connection and make labor-intensive calculations and measurements. If you do not have proper experience in construction, you will need a specialist designer.
- The structural basis of the blocks requires insulation; be especially careful when choosing it.
Foam block: characteristics of building materials, standards
Several technologies are used to produce foam concrete. In all cases, mix cement, sand, foam or foaming agent and water. Additives are added to enhance certain properties.
The result is lightweight or cellular concrete, in which air bubbles are evenly distributed throughout the entire mass of the hardened solution. The latter, depending on the purpose of the material, may be in larger or smaller quantities. Because of this, different types of foam blocks have different purposes (D – brand):
- D200-D600 – thermal insulation;
- D600-D900 – structural and thermal insulation;
- D900-D1200 – construction material.
There is no strict gradation between them. For example, D600 can be used for both thermal insulation and masonry. Performance characteristics (ranges - from D200 to D1200):
- strength, kg/sq. cm: from 7.7 to 90.0;
- compressive strength class, MPa: from B0.5 to B12.5;
- density, kg/cub. m: from 200 to 1200;
- thermal conductivity, W/m*K: from 0.05 to 0.38;
- mass humidity,%: 25;
- vapor permeability, mg/m*h*Pa: from 0.26 to 0.1;
- sorption humidity%: 8 (up to D700), 10.
The density of the material is indicated in its brand. Regulatory documents for cellular concrete: GOST 31359-2007 for autoclave curing, GOST 25485-2019 for non-autoclave curing.
Reviews
Here are some reviews from those who dealt with this type of material during construction:
Vladislav Voronin, novice builder, Engels:
“I participated in the construction of a house made of foam blocks twice: the first time, so to speak, I helped. The second time, the guys and I laid out the armored belt and started laying down the blocks. I got the impression that with proper design, foam blocks are the building materials of the future. You can build almost any building from it - a garage, a house, or even a full-fledged two-story mansion. The house was built in almost a month. The main thing to remember is that professionals must work in a team, because if you deviate from the standards, the finished house will not be durable.”
Igor Korchygin, owner of a house made of foam blocks, Moscow region:
“Seven years ago, my wife and I decided to build our own house and bought a plot with a ready-made foundation. For everything together they paid about 1.5 million, despite the fact that half of the money went to the site. Thus, the house cost (give or take) 800 thousand. The price included foam blocks and roofing, support posts and a team of four people to build an armored belt. There was one large load-bearing wall inside the house. The armored belt was erected within one day. The dimensions of the walls grew and grew every day, I laid a huge number of blocks myself, but not without advice (they advised how to properly moisten the surface of the blocks with water for better masonry). I saved not only money, but also nerves and time. It’s funny now to see how people give advice, saying that a house made of foam blocks will not last, it will not be as warm as we would like, etc. If you have any doubts, don’t build anything at all, but if you want to build, I recommend foam block structures to everyone.”
Concrete tape
The strip foundation is considered the most common when constructing any house. It is laid below the freezing depth of the soil. The width of the tape is made at least 10 cm greater than the thickness of the walls. The minimum height of the plinth is 40 cm.
Types of tape
Non-recessed tape diagram
The unburied concrete strip is located on the ground surface. This design is not suitable for building a house.
Scheme of shallow tape
A shallow concrete strip is laid to a depth of up to 60 cm. The type of foundation is suitable if the site does not have heaving soil. In case of deep freezing of the soil, the concrete structure will have to be insulated. The tape differs in two types of cross-section:
Rectangular tape diagram
- The rectangular shape of the concrete strip is suitable for one-story buildings of small dimensions.
T-belt diagram
- A special feature of the T-shaped tape design is the increased width of the sole. On this basis, two-story massive buildings can be erected.
Recessed belt diagram
If it is planned to build a basement, then preference is given to a recessed rectangular strip. A T-shaped structure with a sole is erected only for multi-story buildings. During construction, it is necessary to take into account the depth of groundwater. If the layers are located above 3 m, drainage is arranged around the tape, plus measures are taken to waterproof the base.
Step-by-step construction of a house from foam blocks
Step #1. Paperwork.
To get started, you'll need documentation. To start building a house with a clear conscience, solve all the formal procedures - obtain building permits, for the site, develop or modernize water supply systems, drainage, heating and electricity issues.
A rationally laid out water supply system is the key to comfort
Step #2. Order in the workplace.
Avoid the usual order of things. A construction site is not a dirty place where everything around is dangerous and chaotic. Provide water supply to the construction site, allocate a special place for tools and building materials. The area should be clean - no nails, screws or scraps of foam blocks. There should be a designated area for you and those who will help you, tools should be protected from rain, covered with a thick tarpaulin, if necessary.
Mark all future structures on the site, think through everything in advance, including the number of people you may need.
Step #3. Construction materials and soil preparation.
Construction of the foundation is considered one of the main stages of building a house. You will have to consult with many people and read a lot of literature.
Preparing the soil for a strip foundation
The best option is a strip foundation. According to the project, you need to make precise markings on the site, according to which you will dig a pit, either manually or using machinery.
Step No. 4. Pit.
Before laying the foundation, sand must be poured into the pit (the layer thickness is no more than 0.25-0.3 m of sand). It is necessary to pour crushed stone on top of the sand - its thickness should be the same. After compaction, the concrete pad can be considered ready. After this, it is necessary to assemble the reinforcement frame.
Pit filling scheme
The reinforcement must be attached to each other as firmly as possible and at a high level - no slipping or shifting.
Installation of formwork
The next stage is the installation of formwork. You will need strong boards that will be fastened into a shield. They must be placed strictly parallel to each other, otherwise the pit will not be level. From above, all panels must be connected to each other with transverse wooden fasteners.
Now it’s time to prepare the concrete: one volume of cement + sand (three units) + small crushed stone. The solution is poured onto the pillow, then erect the entire structure. The foundation tape should have a width of 0.3 to 0.5 m and a height of 0.7 m or more.
If you have completed the foundation, now it’s time to start bringing in building materials: foam blocks, glue, reinforcing rods, waterproofing.
Step #5. Walling.
Construction can begin, which means start building walls. Having treated the foundation with waterproofing materials, you can begin laying foam blocks. To do this, use special notched spatulas.
Coating the foam block with a solution
It should be noted that laying walls is a pleasant job (from the point of view of visibility of the result), but not easy. Particular care must be taken to place the first row of blocks. The quality of further rows depends on its evenness.
Start of construction of walls
Do not forget that the strength of the house depends not only on the material, but also on the principles of masonry - use the binding of foam blocks exactly as with brick: in each row, move the blocks according to the principle of “row relative to the previous row” by half the length of the foam block. This type of masonry will make a great contribution to the strength of the future home.
Dilution of glue for foam blocks
Glue for foam blocks must be prepared according to the recommendations on the packaging; with a notched trowel, it must first be applied to the side edges of the blocks, and then to the bottom. Then lay the block. The level needs to be checked not every row placed, but every block placed. Yes, the work is painstaking, but the result will bring you so much joy and pride that it is worth it.
We invite you to watch a video that shows how in 15 days the guys built a house from foam blocks with an area of 90 square meters:
Pile foundation
Pile foundation diagram
A pile foundation differs from a columnar foundation only in the type of supports. You won't be able to install the piles yourself. You will have to use the services of hired specialists, which increases costs. However, installing piles is the only correct solution if the construction of a house is carried out in swampy areas.
Types of piles
When constructing private houses, it is customary to use bored and screw piles. Supports with a thickness of 108 mm are capable of supporting a one-story building weighing up to 6 tons. For a two-story house, piles of larger diameter are used, which makes it possible to increase the step between them. The supports are usually buried down to 2–3 m. The load from the building falls on the sides and the supporting end of the pile.
Reinforcement and insulation of walls
Reinforcement is the key to strength. The reinforcement procedure is very important. Those who complain about the fragility of a house built from foam blocks, as a rule, initially decided to save on reinforcement. It is this process that prevents cracks from appearing in the future. After you have laid out the first row of foam blocks, you need to make grooves on their surface using a wall cutter (as a rule, a size of 0.4 m x 0.4 m is sufficient, and at the same time step back from the edge of each block by at least 6 cm). Make two grooves, they should be parallel and have rounded corners. Be sure to clean the grooves from any remaining dust, after which the adhesive solution should be poured into them. Place reinforcing rod inside. Then continue laying the rows. Every 3-4 rows it is necessary to repeat laying the armored belt. Some builders reinforce each row, this significantly slows down the construction process, but we can only guess how much this strengthens the structure!
Cleaning grooves for armored belts
You should know that when working on window and door openings, you should not forget about metal corners. The length of the corner to be laid (placed above the future window and doors) must be at least 0.6 m greater than the width of the opening itself.
According to observations, a team of 4 people copes with the construction of the walls of a 120-meter house on average in a week. If you work at a relaxed pace, three weeks will be enough.
Performing calculations
When drawing up a plan, it is necessary to calculate the amount of materials. In particular, how many foam blocks will be needed. To do this, you need to know the dimensions of the future house and its layout. They depend on the area of the construction site, the wishes of the owner and his financial capabilities.
The algorithm for calculating the number of foam blocks for load-bearing walls is as follows. The length of the perimeter is determined and multiplied by the height of the house. We get the area. Openings (windows, doors) are subtracted from it. What remains is divided by the area of the side of the block. To the resulting number of units you need to add 20-30 units for additions and defects. The same applies to walls.
You can do it differently. Knowing the length of the foam block, as well as the length and width of the house, you need to calculate how many blocks will lie in one row of masonry. The height of the building and the block determines the number of rows and the total number of blocks. You need to subtract from them how much is needed for windows and doors, and add the technological reserve.
Attic and ceiling
In order to build a ceiling, as a rule, ready-made products are used, namely concrete slabs from the factory and wooden beams. When buying beams, remember that they must be dry. It is advisable to tie the beams with 3 cm boards.
We are building a wooden frame for the second floor
The most correct thing is ground assembly of attic structures with further lifting and installation. The structure should be sheathed with boards, then waterproofing layers should be laid, and then the roofing should begin.
We are building a wooden frame for the second floor
Third layer: foam for minimal seams
The third layer is usually easy to install. The blocks are easy to lay on the foam, and you no longer need to level them so carefully.
No, we continue to use the level every time, but as a rule there is no need to correct anything. However, the time has come to use the reinforcement.
We use foam for laying foam blocks
Iron reinforcement 15 mm thick is sufficient to create a rigid coupling between all blocks. You can throw two 20 mm reinforcement in the corners for greater reliability.
Interesting: the total distance between seams on a 10 meter wall will be reduced by 15-20 cm if you use foam instead of adhesive for blocks.
Facade finishing
Since you are building a house, this means that you, first of all, want comfortable living conditions for yourself and your family. The appearance of the house is an important component of comfort, so the surface of the walls must be finished from the outside, otherwise the house will darken and turn into a “gloomy castle.” Moreover, the aesthetic component is not the main reason for the need for external work; finishing enhances the parameters of foam concrete, the house becomes stronger and warmer, and moreover, sound insulation characteristics increase.
Exterior decoration of the house
There are several ways to decorate a foam block house:
- Decorative panel. It is necessary to leave an air gap between the walls and hanging cladding.
- Mixtures that are used as concrete plaster.
- Stones or bricks for finishing.
- Painting with silicone, waterproof and steam-resistant paint.
As for the interior decoration, here “there are no comrades according to taste and color” - the interior design depends solely on your taste and imagination.
Calculation of foundation strength
Sometimes a situation arises when some calculations cannot be made. Then the calculations take into account higher strength qualities of the foundation than they should. For example, when calculating a pile foundation, a larger number of piles are taken.
The “life expectancy” of the building depends on how well the foundation is constructed. This is precisely the reason that it is better to order these calculations from specialists. Because the calculation formula is very complex, and you need a good knowledge of mathematics in order for the calculations to be performed clearly and efficiently. The calculation is performed using the formula:
- S – base area;
- F – total weight of the house;
- Ro – soil resistance;
- Yn – reliability coefficient;
- Yc – additional condition coefficient.
The value of soil resistance ranges from 1 – on plastic clay, to 1.3 – on sand. The reliability coefficient is most often taken as 1.2.
Roofing a house made of foam blocks
When erecting the roof of a house, you should remember that its weight should not be too large, because, otherwise, the load on the edges of the walls will be unacceptable.
If the walls of the house were made of reinforced concrete, then the roof could be anything, but with foam blocks things are somewhat different - the material has a cellular structure, you should try not to load it, excessive forces on the blocks can lead to destruction.
In order to make the roof lighter, you should adhere to the following rules:
- use a lighter lattice shape;
- use a hollow wooden crossbar;
- Use channels that are based on OSB;
- Use corrugated sheet materials, copper sheet structures, and metal tiles for roofing.
House made of foam blocks - an intermediate stage of construction
The units included in the attic structures must be fastened to each other using thick metal staples. Use only wood that is as dry as possible. Do not forget about antiseptics and fireproofing solution; the wood must be carefully treated with these materials. Use pine needles whenever possible, they are the most moisture resistant.
Second block level: residual alignment
For the second layer, masonry mortar can no longer be used. If any errors remain, or the solution has settled too much in some place, use an adhesive solution.
If you are sure that everything is smooth, you can use foam. Sometimes the entire second layer is laid on foam, except for 1-3 blocks that unexpectedly fall into the masonry mortar.
Correct application of the solution: create an air layer inside that retains heat
Foam, as we wrote above, is very easy to work with. Before applying it, the block is moistened with water, for which a wide brush is useful.
The foam is pressed under pressure in two parallel strips onto the bottom block and onto the side wall.
It holds the building material securely and dries very quickly. Try not to get yourself dirty, as it is extremely difficult to remove foam from clothes or hair.
Just remember the rule: each laid block must be checked by level from above and from the side.
Final stages of work
The cast tape is aged for 28 days. The first 3 days it is necessary to water it with water every 4 hours, then for a week watering is done every 8 hours. This allows you to equalize the stress and humidity of the outer and inner layers of the tape.
The formwork is removed 10 days after pouring.
NOTE!
Despite the long curing period, you should not try to shorten it, even if you feel that the concrete is already quite hard. The foundation is a critical element of the building, which does not allow for a free approach to technology.

