For a car owner, a garage is not just a place to park the car.
In addition to protecting the car from bad weather, theft or robbery, the garage serves as a workshop, a warehouse for spare parts and conservation, as well as a resting place for male company.
A foam block garage has absorbed many advantages from other materials. It is also an economical option for building a garage.
What is foam concrete
Foam concrete is a type of cellular concrete. Used as the main wall material in low-rise construction. Its production is based on adding a foaming agent to the concrete mixture. Blocks made by forming foamed mortar in special molds have smooth edges and surfaces.
The main distinctive features of foam concrete, like any cellular concrete, are low thermal conductivity, low weight and ease of use. According to its characteristics, foam concrete is very similar to natural stone. It is environmentally friendly, since the raw material mixture for its production includes only natural ingredients. Moreover, its shelf life is practically unlimited. It does not rot and cannot be destroyed by insects or fungi. At the same time, foam concrete is much lighter than stone, so it can be used for the construction of buildings in areas with weak soil, with high groundwater levels and on a lightweight foundation.
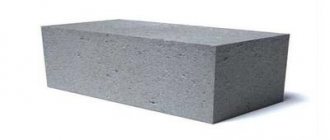
Foam concrete building block Source domozavr.pro
Another significant difference from stone is vapor permeability. Thanks to this property, a garage made of blocks has the ability to self-ventilate. This does not eliminate the need to install a ventilation system, but “breathable” foam concrete walls help create a favorable microclimate in the room with an optimal level of humidity. But this is only provided that the exterior and interior decoration of the garage is also vapor-permeable.
Building with foam concrete is quite easy. This does not require special equipment or complex expensive tools. The blocks are produced in large sizes. But due to their porous structure, they do not weigh much. They can be laid by hand. As a masonry mixture, you can use a special adhesive composition, which allows you to build with masonry joints of minimal thickness. And the thinner the seams, the lower the heat loss from the walls.
An important advantage of foam concrete as a material for constructing a garage is that it belongs to the first degree of fire resistance. Another significant difference is that foam blocks can be easily processed using hand tools. They can be sawed without any problems into the desired shape.
Hacksaw for cutting foam blocks Source martand.ru
Characteristics of foam blocks as a material
Foam blocks are lightweight and inexpensive.
Foam blocks are preferred due to their affordable cost and low weight compared to bricks or cinder blocks . The latter feature makes it possible to significantly reduce the cost of creating a foundation (due to the small mass of the garage, a lightweight foundation can be used).
At the same time, foam concrete is a very durable material. It will certainly withstand the weight of all the structural elements of the garage.
Table: Dimensions of foam concrete blocks
| Foam block brand (determined by density) kg/m3 | Height mm | Width mm | Length mm | Required pcs. per 1 m2 of masonry | PC. in 1 m3 |
| D 500 | 250 | 200 | 600 | 6.7 | 33.3 |
| 250 | 26.7 | ||||
| 300 | 22.2 | ||||
| 350 | 19.0 | ||||
| 375 | 17.8 | ||||
| 400 | 16.7 | ||||
| 500 | 13.3 | ||||
| D 600 | 250 | 200 | 600 | 6.7 | 33.3 |
| 250 | 26.7 | ||||
| 300 | 22.2 | ||||
| 350 | 19.0 | ||||
| 375 | 17.8 | ||||
| 400 | 16.7 | ||||
| 500 | 13.3 |
There are 4 main types of foam concrete produced:
- Blocks of grades D150-D400 are heat-insulating material with a density from 150 to 400 kg/m3. In terms of strength, foam blocks begin to be standardized starting with grade D400 - B0.5-B0.75; the strength of such foam concrete is 9 kg/cm3. The above grades of material are not standardized for exposure to low temperatures;
- Foam concrete grades D500-D900, with a density of 500-900 kg/m3, are considered structural and thermal insulation. The strength of the D500 material is 13 kg/cm3. D600 – strength 16 kg/cm2, D700 – strength 24 kg/cm2, D800 – strength 27 kg/cm2, D900 – strength 35 kg/cm2;
- Foam block grades D1000-D1200, with a density of 1000-1200 kg/m3, are considered structural. Material strength D1000 – 50 kg/cm2, D1100 – 64 kg/cm2, D1200 – 90 kg/cm2;
- Foam block grades D1300-D1600 with a density of 1300-1600 kg/m3 are considered structurally porous. They are produced in small batches, for this reason their characteristics are not standardized in GOST.
The strength indicator may have deviations due to differences in humidity and temperature during the manufacture of blocks from a particular manufacturer; in addition, the strength is affected by the brand of cement and filler.
Choosing a location on the site
The initial stage of building a garage is choosing a suitable location on the site for it. Typically, garages are located next to the house or near the entrance to the site. Moreover, the second option is often used in cases where the garage building is planned to be built from cheap and not very aesthetic material. However, foam concrete garages fit perfectly into the overall architectural composition of any cottage. They look good next to the main building.
There must be a minimum distance from the garage to the entrance to the site. The longer the path from the entrance to the garage, the less space there is left on the site for a recreation area, lawn, garden and other landscaping elements. In addition, long paths with turns are inconvenient.
The location planned for the garage should not be located in a low area or above laid communication lines. And, if communications can be moved if necessary, then nothing can be done about the humidity that inevitably forms in the lowlands. And for the construction of a garage made of foam blocks, the humidity factor is especially important, since this porous material can become saturated with moisture.
Porous structure of foam concrete Source daewoocenter.ru
It is advisable to build a garage in a place where there is space not only for the garage itself, but also for open parking in front of it. Outdoor parking is very convenient. It is useful for washing, inspecting and repairing a car. It is also irreplaceable in cases where guests come to the house in their own transport.
Recently, garages are increasingly being built as extensions to the house. If there is such an opportunity, it is worth taking advantage of it, since an extension garage has many advantages. Its entrance can be under one canopy into the house, which is very convenient in bad weather. It may have internal communication with the house. In addition, it is easier to connect all communications to the attached garage and make it heated.
Heating in a garage made of foam blocks Source kamtehnopark.ru
See also: Catalog of projects for garages made of foam concrete blocks presented at the exhibition “Low-Rise Country”.
Advantages and disadvantages
Foam blocks have significantly more advantages than disadvantages
It is often argued which is better – non-autoclaved or autoclaved foam blocks. Manufacturers only praise their products, but in practice foam concrete and gas silicate blocks are very similar. And, naturally, both of them have both pros and cons.
Positive properties of non-autoclaved foam blocks
- High thermal insulation ability. Compared to brickwork, a wall made of this material has 3 times lower thermal conductivity. In terms of this characteristic, gas silicate blocks are not far behind them;
- Low weight - 2.5 times lower than that of expanded clay concrete. Gas silicate blocks have approximately the same mass. Because of this, non-autoclave and autoclave blocks are easier to load, transport over long distances and lay. They allow the construction of buildings without a strong foundation, which reduces labor intensity, simplifies installation and speeds up construction;
- High strength. Using blocks of a grade higher than D900, you can lay load-bearing walls of up to 3 floors. Gas silicate blocks have slightly higher strength;
- Excellent frost resistance. The porous structure of the material protects the interior of the room well from low temperatures. In case of possible freezing of the walls, the blocks do not crack due to the fact that the internal structure has enough space for the expansion of freezing moisture;
- High fire resistance. Both gas silicate and foam block can withstand exposure to flame for at least 4 hours. This can be checked in practice - point a gas burner at the block and look behind it. Unlike conventional concrete, the blocks will not crack or collapse;
- Biostable, environmentally friendly material. Over time, the blocks do not deteriorate or rot. They do not contain toxic components, and the material does not emit harmful substances. In this regard, gas silicate blocks are worse. In an autoclave, during the foaming of raw materials, small particles of lime and aluminum interact with each other, resulting in the formation of hydrogen. During operation of the material, it will be released in small quantities. Foam concrete does not have this disadvantage; foaming agents (protein or synthetic) are used in production, which do not emit harmful gases. In addition, the pores of the foam block are absolutely sealed - their structure resembles foam granules;
- It is also used for monolithic construction. You can make concrete directly on the construction site - you just need to install a special installation. Supply compressed air from the compressor through a special hose and deliver the material to the required location. But in this case, foam concrete can only serve as a heat-insulating material. For example, you can fold a half-brick wall, fasten sheets of moisture-resistant plasterboard at a distance on the other side, and fill the resulting space with foam concrete. It will cost less and take less time than installing traditional insulation;
- Ease of processing. It is easy to make grooves and holes in the material. You don’t need any special tools for this, you don’t have to put in much physical effort;
- Low cost compared to similar materials. Usually different building materials are compared by recalculating the costs to the cost of the brick. When using a lightweight (inexpensive) foundation, the cost of constructing a garage will be small. This is often a determining factor in the choice;
- Excellent resistance to moisture. This is achieved thanks to the sealed cells of the material. Gas silicate blocks (which have channels) have significantly lower moisture resistance; moisture through the channels quickly permeates this material. The sealed cells of the foam blocks even allow it to float on the surface of the water.
Disadvantages of foam blocks
- During masonry, significant shrinkage occurs due to the high moisture content; the wall can settle by 1-3 mm per 1 m of masonry. This happens if a lot of water is added to the composition during the production of blocks, or the masonry is made from fresh (immediately after production) blocks. In order for them to harden well, you need to keep the material for at least a month in a dry place. Irresponsible manufacturers do not meet this technological requirement. Gas silicate (autoclave) blocks do not have this disadvantage - this material is not subject to shrinkage. For this reason, these precautions are not necessary when working with gas silicate.
- There is a small ability to absorb moisture, which requires additional finishing of the surface of foam concrete walls. You can cover the walls with a concrete water repellent, plaster them, or install a ventilated façade;
- Foam concrete chips, most often on the edges. It must be carried and folded carefully; it is strictly forbidden to pour blocks into the body in bulk. But at the same time, the small mass of the foam block allows it to be carried carefully, completely eliminating possible damage;
- Walls made of foam concrete do not hold screws, dowels and nails well - they fall out. It is necessary to use special dowels designed for foam concrete and equipped with a special threaded attachment made of ABC plastic. First, screw the screw into the nozzle. You can use screws for woodworking. Having prepared a hole in the wall, clean it and carefully screw the nozzle and screw into it. This fastening method allows you to securely hang shelves or cabinets.
Design
Despite the fact that a garage is a fairly simple building, it must be designed by a specialist. During the design process, all structural elements are calculated, the layout is thought out, and the consumption of materials is calculated. Projects for garages made of foam blocks vary in type of layout. They come in the following varieties:
- attached and detached;
- for 1 or several cars;
- with utility unit;
- with terrace;
- with parking canopy;
- with inspection hole.
An attached garage is more difficult to design than a detached garage. It must structurally fit into the overall architecture of the house, and at the same time have additional insulating protection. An extension garage can have several exits, for example, to the street, to the house and to the courtyard. In order to create maximum protection of the house from the car room, a buffer zone in the form of a vestibule, technical room or corridor is usually planned between the garage and the residential part of the building.
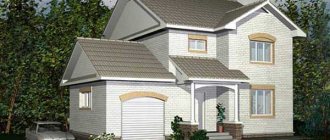
Project of a house with an attached garage Source zen.yandex.tm
The terrace and utility block can be located differently relative to the garage itself. In addition, there are options for garage buildings that are even more complex in design. For example, a guest house may be located above the garage. Often now they build garages combined with a bathhouse.
A separate design stage is the calculation of the garage roof. Typically garages are built with a pitched roof. In this case, it is necessary to properly consider its slope.
Drafting
Before starting construction, it is necessary to develop a project or use a ready-made standard solution.
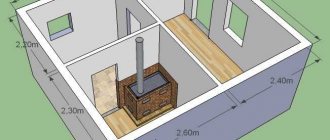
In the absence of experience and appropriate education, it is enough to depict the future structure on a piece of paper in various views - horizontal, frontal and profile projection, taking into account the depth of the foundation, the height of the walls, the roof structure and other expected features.
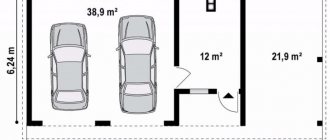
The standard dimensions of a garage for one car are 6 by 4 meters. If it is planned to build a garage for 2 cars, the dimensions of the building increase accordingly.
When planning a future construction, you should consider whether the following additional components are provided:
- inspection hole;
- cellars for storing food and preserving it for the winter;
- racks for spare parts, materials and tools;
- additional space for installation of auxiliary equipment and others.
If the garage is supposed to be combined with a home workshop or recreation room, in order to save space, it is recommended to plan a two-story building.
Material calculation
The number of blocks must be calculated by the designer or qualified builder. You can do this using a special online calculator. Calculations can begin only after the designer, together with the customers, have decided on the type of foam blocks. To make the garage warm enough, it is recommended to build it from blocks with a thickness of 200 mm or more.
Foam blocks of different thicknesses Source all-atop.com
In order to pre-calculate the consumption of foam blocks, it is necessary to take into account their dimensions and the parameters of the garage. First you need to divide the height of the garage walls by the height of the blocks. The result will be the number of rows that will need to be laid out during construction. After this, the perimeter of the garage is divided by the length of the block. The result is the number of blocks in one row. Next, the number of blocks in a row is multiplied by the number of rows.
This way you can calculate how many blocks are required. But before purchasing, you also need to subtract the size of all window and door openings, as well as gates. You need to purchase material taking into account the battle and defects. Experts recommend purchasing 10% more material than was calculated.
Features of foundation construction
When constructing a garage, a monolithic slab is used as a foundation. In this case, the base can be a pillow, which should consist of gravel and sand. Using these materials it will be necessary to form a smooth and continuous surface. A monolithic foundation slab acts as the most suitable option, which is able to withstand all the loads from the machine and other structures of the building. The slab will be made in the form of a floating system, which will take on all the loads. Its strength is due to the fact that it is presented as a single whole. If you build a garage from foam blocks with your own hands, then using a monolith as a base will eliminate uneven deformations. In order to increase the rigidity of the base, it is necessary to lay stiffeners.
Marking
Marking the site begins with pegs being driven into the corners of the future building. Next, string is stretched between the pegs. To build a garage made of foam blocks that will meet the highest requirements, everything should be done accurately and without errors even at the marking stage. The length of the parallel threads stretched during marking should be the same. The angle of convergence of perpendicular threads is strictly 90 degrees.
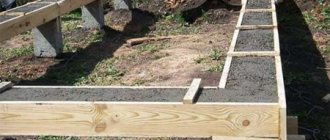
Marking and trench for the garage foundation Source readmehouse.ru
Expert recommendations
We build a garage from foam blocks with our own hands, following certain rules. Every 2 rows you need to lay a steel reinforcing mesh in the horizontal seams. During work, you need to ensure that the elements are horizontal. If there is a need to adjust the position of the product, you must use a rubber mallet
The important thing is that each joining seam should be located at a certain distance from the previous one; this step should be equal to 10 centimeters or more. In order to build the described structure, you need to overcome some rather difficult moments
Among them, we can highlight the need to lay a beam, which is mounted above the gate opening. If we are talking about a standard opening, then it is 3 meters. The lintel for the opening, which will consist of two corners, must be welded at several points with a steel strip and then coated with a primer. Laying must be done using the solution that was used when working with foam blocks.
Foundation
Since the blocks have minimal weight, there is no need to construct a complex and expensive buried foundation for the building. However, in addition to the characteristics of the wall material, when calculating the foundation, it is also necessary to take into account soil conditions.
If the site has good, non-heaving soil, and the groundwater depth is low enough, you can build a garage on a strip foundation, up to 50 cm deep. But if the soil is heaving, it makes sense to build a monolithic foundation. The fact is that the blocks are characterized by low resistance to bending loads. Without a firmly fixed base, they can break, and this leads to the destruction of the entire structure.
When arranging a strip foundation, certain stages of work are performed.
- A trench is dug to the required depth and width to match the width of the foam block.
- The bottom of the trench is compacted.
- A sand cushion of approximately 100 mm is poured onto the bottom.
- Crushed stone is poured onto the sand; it should be slightly less than sand.
- The formwork is being installed.
- A pre-prepared metal frame is installed in the trench.
- The trench is filled with concrete, which needs to be thoroughly vibrated.
Strip foundation for a garage Source nauka-i-religia.ru
What kind of garage can a home craftsman do?
Of course, a lot depends on the developer’s ambitions, his knowledge in construction and practical skills. But, undoubtedly, someone who is no stranger to physical work, skillfully wields tools and has ingenuity will be quite capable of independently building an above-ground detached garage with a pitched roof. And a popular building material called foam block will play a special role in the success of this business.
The peculiarity of the structure of this building element made of cellular concrete, water, sand and foam makes it lightweight, malleable to mechanical stress and surprisingly durable.
For the amateur craftsman, the size of the foam block for the garage matters: the most common is 20x30x60 (cm). This is 5 times more than brick, with relatively low weight. Therefore, the construction time for walls made of foam blocks will be significantly reduced in comparison with brickwork. And the use of special glue as a binding material will significantly strengthen the structure with small (up to 20mm) thickness of the seams.
A wall thickness of 30 cm will fully correspond to the functionality of a garage space, and factory D500 blocks will provide strength with a load of 500 kg per 1 cm of area.
It is worth keeping in mind that to simplify the determination of the exact angle at the junction of the walls, there are also corner blocks of the appropriate dimensions on sale.
Inspection hole
This is an optional, but very convenient element of the garage. Arranging a viewing hole may present certain difficulties. So, in an area where water occurs at a depth of more than 2.5 meters, everything can be done easily and quickly. But if the water flows higher, then the inspection hole must be provided with a drainage system.
- First, a hole is dug for the hole. This takes into account the desired depth of the finished pit, as well as the thickness of the drainage, waterproofing, sand cushion and finishing screed.
- A layer of gravel (100 mm) is poured into the bottom of the hole and compacted.
- A layer of sand (50 mm) is placed on top and compacted too.
- A trench is dug along the perimeter of the finished pit for drainage.
- Then geotextiles are laid with overlaps of 80 cm on each side.
- Next, a layer of gravel is poured into the trench and a drainage pipe is laid with a slight slope.
- The pipes are covered with gravel and covered with geotextiles.
- The floor of the pit is covered with clay.
- Lay waterproofing.
Waterproofing inspection pit Source stroyservis-74.ru
- Formwork and a reinforcing frame are installed at the bottom of the pit.
- The bottom is filled with concrete with the addition of waterproof components.
- Another layer of waterproofing is laid on the dried screed.
- The walls of the pit are also treated with clay.
- The walls can be lined with brick or monolithic concrete. The second option requires formwork and reinforcement.
- The finished surfaces of the walls and floors are covered with cladding. Any option of the owner's choice will do.
- A metal frame must be laid along the perimeter of the upper edge of the finished pit.
- A safety rail is placed on top of the frame to prevent the car's wheels from accidentally falling into the pit.
Summary
Garage designs don't necessarily have to have that much living space. If there is only one car, then all calculations regarding the garage should be made for it. In this case, the attic above the garage can be expanded by making it overhang the ground floor of the garage. In this case, an additional canopy is formed, under which the car can be placed for temporary parking. The presented garage projects do not use skylights. This is due to their significant cost, but this does not exclude the possibility of their presence in an individual garage project. They are easy to use and also increase the amount of natural light available throughout the day.
Recommended Posts
Design of a bathhouse with a terrace or veranda
Arrangement of a cellar in the garage for storing vegetables
How to make shelves for a garage with your own hands
DIY workbench
How to arrange a garage with your own hands
DIY automatic garage doors
Gate installation
Installation of a gate or frame under a gate is often carried out even before the construction of walls begins. At the place where they are installed, roofing material is first laid on the foundation in several layers. The gates are fixed with wooden blocks. In order for them to end up being built into a foam concrete wall, pieces of reinforcement must first be secured to them. They must then lie in the masonry joints of the wall, so the height of their location must be correctly calculated. The gate is fixed at the top using a beam with a metal frame.
Frame for garage doors Source www.stroytal.ru
Ventilation and power supply device in the superstructure
After installing a two-story garage, it’s time to move on to equipping the attached room with a staircase and installing a floor surface. The inside of the room is plastered, and the walls are painted in any color you like.
Other interior finishing options are possible, but most of them entail an increase in load on the foundation and walls of the underlying room. And this, in turn, can lead to divergence of the walls and subsidence of the foundation, which will negatively affect the durability of the structure being built and its strength characteristics.
In the event that the second floor was completed with the purpose of establishing a work workshop in it, then the premises must be equipped with high-quality ventilation and heating. Comfortable temperature and humidity levels are impossible without an air exchange system.
In principle, even if the superstructure is equipped for living in it, these communications should also be taken care of. But if the room will be used only for storing tools and work equipment, then there is no need for communications.
There are several options for ventilation in rooms of this kind:
- Installation of valves on doors and windows of the room.
- Exhaust device under the ceiling.
To ensure good traction, many experienced builders advise equipping superstructures with special insulated sandwich channels.
The duct of such an exhaust system is led to the roof and is equipped with a hood, as well as a protective mesh, thanks to which it will be possible to prevent precipitation, large particles of dirt, beetles and rodents from entering the room.
Heating of such extensions is best organized using fan heaters called heat guns, electric heaters
In order for heating equipment to operate without interruption and not cause a fire, it is extremely important to take care of the quality of the electrical system
You should carefully select the electrical wiring and, if it is already available, make sure that it is fully operational.
If we are talking about a newly created electrical system, then it is advisable to create a pair of circuits in the superstructure: the first will be used for sockets, the second for lighting. In addition, it is recommended to place 16A circuit breakers on the DIN rail. The electrical network cable system is hidden in special cable channels.
Also, if possible, it is better to give preference to energy-saving lamps and LED strips: they are economical and do not pose a big threat to fire safety.
Walls
The walls are laid from the corner of the building. Foam blocks are placed with the long side along the wall. A rope is stretched between the laid out corners, which serves as a guide for aligning the masonry vertically. The outer blocks across the row are sawed using conventional hand tools. When working, it is necessary to use devices to check the level of the masonry.
It is better to lay the blocks not on a cement mixture, but on an adhesive composition. This speeds up the construction process and improves the quality of the wall. Laying of the top layers is carried out taking into account the roof slope. To withstand the slope, some blocks need to be reshaped by sawing. To give the building greater strength and reliability, the walls are reinforced.
Reinforcement of a foam concrete wall Source dompodrobno.ru
Tools
To perform the work you will need to prepare the following tools:
- bayonet and shovel, crowbar - for excavation work when laying the foundation;
- building and water level, plumb line;
- concrete mixer - for preparing mortar and concrete;
- woodworking tools - to process wooden elements - rafter structures, etc.;
- hammer and nails - for assembling formwork structures;
- grinder - trim foam blocks and other materials;
- construction tools - kelga, devices for plaster.
An approximate list is presented; it may need to be supplemented, depending on the individual characteristics of a particular construction.
Roof
The roof can be arranged in various ways. Consider the option of using an I-beam.
- First, beams 800 mm thick are laid across the future roof. with allowance for slopes. They are embedded in the plane of foam concrete walls. Slopes are needed so that a garage made of foam blocks with a pitched roof is protected from precipitation and wind.
- Then the roof structure is supplemented with 400 mm thick beams, which are laid in smaller increments.
- Ruberoid is laid on top, the edges of which should protrude by 10 cm. The edges are folded.
- The roofing material is covered with a dry heat insulator, for example, expanded clay.
- A cement-sand screed is laid on top, which after drying must be covered with liquid mastic.
- After all this, sheets of rolled soft roofing are fused, overlapping. The top sheet should cover the edge of the bottom sheet.
Roll fused roofing Source cs.aviarydecor.com
Construction of a garage from foam blocks: do it yourself
The dream of the vast majority of car owners is a spacious and comfortable garage for their own car. For motorists in large cities, unfortunately, this dream is very difficult, and often simply impossible, to translate into reality. But for the owners of suburban housing not to have a garage on their territory is simply “indecent”, and its construction must be thought out during the overall design of the future development.
Construction of a garage from foam blocks
But what should it be built from? Installing a prefabricated metal building is not serious; you cannot create good conditions for a car in it. Assembling a garage from sandwich panels is a good option, but not available to everyone due to various circumstances. Wood is highly flammable, brick is too labor-intensive. Why not opt for an option such as building a garage from foam blocks? And the building turns out to be permanent, and the problem of insulation is half solved, and the construction itself will not take too much time.
What is attractive about building a garage from foam blocks?
First of all, what are foam blocks? This is one of the types of building materials made of cellular (porous) concrete. At the stage of manufacturing the mortar mass, in addition to the usual components - cement, sand, water and plasticizers, special additives - foaming agents - are introduced into it. Depending on the type of these additives and the mechanism for obtaining the foaming effect, either aerated concrete or foam concrete is obtained.
- So, if chemical components are introduced that cause a violent reaction with the components of cement with the active release of gas (oxygen, hydrogen, acetylene), then aerated concrete is obtained. When gases leave a material that has not yet solidified, they leave many open pores of a fairly large size, which determines the physical characteristics of the resulting blocks - they are characterized by high vapor and water permeability, which is not always good for the construction of external structures.
- During the production of foam concrete, chemically neutral substances are introduced, and the foaming process is caused by active mixing of the mixture with its simultaneous aeration - saturation with air (something similar happens when foaming detergents). As a result, the pores are closed (the gas is not under excess pressure and does not tend to escape out). These blocks are denser, stronger, have significantly less hygroscopicity, and can be used for the construction of residential and utility buildings, including garages.
The resulting foam concrete is cut into building elements of various sizes. For the construction of walls, blocks are most often used - parallelepipeds with sides 600 × 300 × 200 mm. For internal partitions, you can use so-called semi-blocks - 600 × 300 × 100 mm.
Standard packaging of foam blocks - 30 or 40 pieces per pallet
Modern production lines make it possible to produce blocks with high geometric accuracy - the dimensional error of high-quality products should not exceed 1 - 2 mm.
Some types of foam blocks are equipped with a locking tongue-and-groove part at the ends. This material is certainly more expensive, but the laying process is greatly simplified.
According to their technological purpose, foam concrete blocks are divided into three categories:
- Thermal insulation, grade D400 - D500 (the number after the letter D indicates the density of the material - kg/m³). The class for compressive strength is low, and for frost resistance it is not standardized at all, since such material is not used for open work, and it is not suitable for the construction of a garage.
- Structural thermal insulating foam concrete has significantly greater versatility. Its brand in density is from D600 to D1000, in strength - from M25 to M100 (the number is the ability to withstand mechanical load in kg/cm²), and frost resistance class 0 from F15 to F75 (the number of guaranteed cycles of deep freezing and thawing without any loss of strength qualities). At the same time, the level of its thermal conductivity is low. Thus, one of the most used foam concrete in private construction, D800, has a thermal conductivity value of only 0.18 Kcal/m³×ºС.
- Structural foam concrete is used exclusively for the construction of building elements, since its thermal insulation qualities are no longer so good. However, they are almost twice as good as, for example, ordinary brick. The density of structural blocks is 1100 – 1200 kg/m³, the strength grade reaches M150 ÷ M170. If the thermal insulation of the walls is not a determining factor, then this type of block is perfect for constructing a garage.
The main advantages of building a garage from foam blocks:
- The low density of the material greatly facilitates the construction of the garage itself. You can get by with a shallow strip foundation.
- The blocks are easy to use due to their low weight - no lifting equipment or excessive physical effort is required. At the same time, their large dimensions speed up the process of wall construction.
Foam concrete is easy to process
- Foam concrete is easy to process - drilled, cut, milled, without the use of any special equipment.
- The material is environmentally friendly, does not pollute the environment and does not pose a danger to living organisms.
- Closed-pore foam concrete allows walls to be laid almost from ground level, without a high base.
- Foam concrete has excellent noise-absorbing properties, which is especially important for technical buildings such as garages.
- Foam concrete blocks do not shrink significantly after construction - after 3 ÷ 4 weeks you can carry out external finishing without fear for its integrity.
This material also has certain disadvantages that must be taken into account:
- Sufficiently high moisture absorption makes it necessary to finish the external walls with protection from precipitation.
- There are certain difficulties with the use of fasteners - not all dowels hold well in a foam concrete wall. However, finding the ones you need is not difficult.
Nails or regular dowels do not hold well in a foam concrete wall - special fasteners will be required
- Foam concrete blocks do not have good vapor permeability, so it is imperative to think through the issue of thorough ventilation of the room so that a damp atmosphere is not created in it.
Video: what you need to know about foam blocks
Prices for building blocks
Building blocks
Construction of a garage from foam blocks - stages of work
The entire process of constructing a garage is divided into several stages:
- Drawing up a project, carrying out calculations of the required amount of building materials.
- Foundation construction. At this same stage, the issue of covering the garage floor and equipping the inspection pit is often immediately resolved.
- Construction of garage walls, installation of gates.
- Roof arrangement.
- External and internal wall decoration, ventilation arrangement.
Drawing up a garage project, preparing materials
Without a well-thought-out project, it is impossible to begin construction of even such a simple building as a garage. There are several ways to obtain this document:
- Many standard projects are posted on the Internet. The difficulty, however, is that they were once developed for certain terrain criteria and customer requests, and may not fully meet actual conditions.
- The most correct way is to contact a specialized design organization, whose employees will carry out all the necessary geodetic and architectural calculations. The main disadvantage of this approach is that such services cost a lot of money.
- The optimal solution seems to be to take one of the ready-made designs that best suits existing conditions, take into account your preferences and wishes, and try to implement the final project yourself. Here, drawings executed in compliance with all graphic rules are not at all necessary - a clear understanding of the scope and sequence of all upcoming work is important.
The optimal dimensions of a garage are considered to be 6 by 4 meters.
The project must have an exact connection with the area allocated for the garage, taking into account the planned dimensions of the building and its internal structure. The functionality of the room is immediately thought out - will it be just a box for placing a car, or can it be possible to set up a small workshop there with shelving for tools, a workbench, and other equipment.
- The roof structure is planned immediately. If it is single-pitch, then to ensure the slope it is necessary to provide for a difference in the height of the walls.
- The thickness of the walls when building from foam blocks can also be different. For central or southern regions, a thickness of 200 mm is often sufficient (excluding external finishing). Thus, each block will cover an area of 600 × 300 mm = 0.18 m². If the garage is being built in a climate zone with harsh winters, then it is better to make the wall thicker - 300 mm, and, accordingly, the block placed in this way will already be only 600 × 200 mm = 0.12 m².
Based on this, it is easy to calculate the required number of blocks. The total area of the walls is calculated, minus the opening of the gate and windows (if they are planned). Then the resulting value will be divided by the area of one block in the selected position to determine the required quantity. Typically, a 10% reserve is added to the result obtained.
The standard factory packaging of foam concrete blocks is 40 pieces per pallet. A simple calculation shows that this is 1.44 m³ in volume, 7.2 m² with a wall thickness of 200 mm or 4.8 m² with a wall of 300 mm. The net weight of the package can be easily determined by multiplying 1.44 by the density grade of the selected material - this may be necessary when planning the transport delivery of foam concrete blocks.
- To pour the foundation and install the garage floor, you will need the usual ingredients of a concrete solution - cement (at least M400), sand, gravel. Reinforcement of these structures involves the use of reinforcement with a cross-section of 10 - 12 mm. In addition, reinforcement will be required to strengthen the wall masonry - here a diameter of 8 mm is sufficient.
- To create waterproofing between the foundation and walls, roll material is needed. Usually they use high-quality roofing felt, but it would be even better to use hydroglass insulation, which is laid on a layer of bitumen mastic.
- A separate conversation about masonry mortar. You can, of course, use ordinary cement-sand, but this will require fairly thick seams between the blocks, and these are stable “cold bridges” through which heat from the room will quickly escape to the outside. The uniqueness of working with foam concrete lies in the fact that it is possible to use a special construction adhesive composition. In this case, the seams will not exceed 2 ÷ 3 mm in thickness, and the wall will be extremely smooth.
One of the types of construction adhesives for foam blocks.
This glue contains special additives that give it high adhesion to cellular concrete and create a very strong adhesion of the blocks. When choosing, you should definitely pay attention to the fact that the glue you purchase is intended for outdoor use, that is, it has proper frost resistance.
The price of glue should not be intimidating, although it is certainly higher than that of a simple concrete solution. However, consumption is reduced by 6–7 times, and as a result, total savings of at least 2 times are achieved.
An important note: work using an adhesive composition will be possible if high-quality foam concrete blocks with consistent geometric dimensions are purchased, otherwise all the advantages are simply reduced to zero.
Breakdown on the ground. Pouring the foundation
If the project is ready, you can proceed to transferring the garage plan to the area.
Pegs are driven into the corners of the future building, and cords are pulled between them. The straightness of all angles is carefully verified. You should immediately, directly on the spot, once again evaluate the location of the garage, the absence of obstacles to opening the gate, the access road and other important nuances.
Foam concrete is a fairly light material, so in stable soil conditions a shallow strip foundation is sufficient.
- A trench with a depth of 700 mm and a width of 200 ÷ 300 mm greater than the planned wall thickness is opened along the perimeter of the future building.
- A sand cushion 100 mm thick is poured onto the bottom and compacted thoroughly. A gravel layer is laid on top of it in the same way.
- The formwork is being installed. The height of the base above ground level at the lowest point can be 150 ÷ 200 mm. It is very important to set the horizontal level of the base as accurately as possible - when working with foam blocks, this is of particular importance.
- A waterproofing coating (for example, polyethylene film) is laid inside the formwork so that the edges extend upward along the walls. After this, a reinforcing belt is installed - usually 4 reinforcements arranged in a rectangle and connected by jumpers.
- Ordinary concrete mortar is poured and the surface is thoroughly leveled. The period of hardening and strengthening is at least 3 ÷ 4 weeks.
The garage floor can also be poured at the same time as the foundation.
- Simultaneously with pouring the foundation, you can also provide for the installation of the floor in the garage - the absence of walls will greatly simplify this process. The total thickness of the reinforced screed, excluding the sand and gravel cushion, must be at least 100 mm, since the coating must be able to easily withstand significant loads from the weight of the car.
The absence of walls will facilitate excavation work for the construction of an inspection pit
- At the same stage, it is necessary to think over the arrangement of the inspection hole, if it is planned. Its depth should be about 1.8 m, width - 0.9 - 1.0 m. Its walls can either be lined with bricks, or gradually filled with concrete with mandatory reinforcement, gradually moving the formwork upward. The edges of the inspection hole are framed with a metal corner, which will also serve as a kind of beacon when pouring the floor screed.
If the soils on the site are unstable and heaving, then a strip foundation may not be enough. Foam concrete blocks do not like fracture loads, and when the soil subsides or shakes, they can crack.
In this case, you can choose one of the following options:
- Pour a continuous “floating” foundation - a monolithic slab on which all further construction will be carried out. True, in this case you will have to immediately abandon the inspection hole or basement.
Combined reinforced foundation for unstable soils
- Deepen the strip foundation and strengthen it with piles, creating a complex base structure. One of the options is shown in the attached figure:
Further work begins only after the concrete has completely hardened and matured.
Construction of garage walls
From this stage, the actual work with foam blocks begins.
- First of all, you need to decide how the gate will be installed.
- If they are already ready, then you can display them in the intended place, with strict adherence to the verticality and horizontality of the overall structure. The gate is fixed with wooden spacers. As the walls rise, they will be built into them. To do this, pieces of reinforcement up to 500 mm long are welded perpendicularly to their racks, so that they fall on the seams between the rows of blocks.
Ready-made gates can be pre-installed on supports before the walls are erected
— If the gate is planned to be installed later, then an opening of the required height and width is simply left for it.
- The upper section of the foundation is covered with a layer of bitumen mastic, onto which waterproofing is glued - glass hydroisol or roofing felt. This will create a cutoff for capillary penetration of ground moisture onto the walls.
The first row is laid on the waterproofing layer
- The first row of foam concrete blocks is always laid on cement mortar. Laying begins from the corner, always from the highest point. The main task is to eliminate possible errors in the horizontality of the foundation and reach a uniform level along the entire perimeter of the walls. For control, cords are pulled between the installed corner blocks, which are aligned using a water or laser level.
- If it is necessary to cut blocks to length, this can be easily done with a regular hand saw with a large tooth. You can also use a chainsaw for these purposes, but with special precautions.
- The next rows are laid out on construction glue. To do this, it is diluted and mixed in accordance with the instructions supplied with it using a mixer or an attachment to an electric drill. After mixing, the solution must be allowed to stand for at least 5 minutes. When diluting the solution, you should avoid excess amounts - it is necessary to take into account that the “lifetime” of the finished glue may be limited - this is indicated in the instructions.
- After laying out the entire first row and preliminary setting of the solution, reinforcement is carried out:
— Two parallel grooves are cut along the entire masonry. The distance from the edge of the blocks is at least 60 mm, the depth of the groove is 15 ÷ 20 mm. To do them, you can use a special tool - a wall chaser, or a regular grinder with a stone circle.
Cutting grooves for masonry reinforcement
— After making the grooves, they are thoroughly cleaned of dust with a brush and half filled with construction glue. Then Ø 8 mm reinforcement is laid and recessed into them. In this case, the corners are necessarily reinforced with a whole rod, which bends at an angle of 90º. The overlap of adjacent reinforcement bars is made at least 300 - 400 mm.
Laying reinforcement
— After laying the reinforcement, the grooves are completely filled with mortar, which is leveled to the level of the surface of the blocks.
After laying the reinforcement, the grooves are completely sealed with mortar
- Next, the second row is laid. The blocks are installed “in a dressing”, offset by approximately half the length (but not less than 100 mm).
Approximate scheme for ligating blocks when laying walls
- Before laying each next row, the surface must be checked for evenness. If even minor bumps are detected, they should be removed using a grater or even a plane. After this, the surface is thoroughly cleaned of dust and generously moistened with water - the glue will lie on wet foam blocks much easier and more evenly, without the formation of “pellets”.
Applying adhesive using a trowel
- The adhesive solution is applied using a trowel - a special tool that allows you to evenly distribute it over the surface in a thin layer, creating the necessary grooves. If the foam blocks do not have a tongue-and-groove lock, then they are coated with glue on three sides - in a horizontal and two vertical planes. If there are locks, the solution is applied only in the horizontal plane. The layer of solution should not exceed 3 mm - this is quite enough for a reliable connection.
Blocks without tongue-and-groove joints are coated with glue in two planes
- After installing the block in place, it is carefully aligned vertically and horizontally, pressed manually or by tapping it with a rubber hammer. The excess mortar that appears is removed, the seams are immediately plastered with this mortar flush with the surface of the wall being built.
- The masonry continues in the same way, with mandatory periodic reinforcement:
Where else is it necessary to lay a reinforcing belt
? It is recommended to lay a second belt between the 2nd and 3rd rows, and then every 4 rows.
— The belt must be laid under the windows, 1 row below them.
— The area where lintels are installed above windows, doors, and gates is reinforced.
— If it is planned to pour a common concrete belt over the walls, then similar reinforcement is also carried out.
- Lintels over gates or window (door) openings can be poured from concrete by arranging the formwork on wooden supports. You can do it differently - embed a channel of the appropriate width into the solution or, for windows and doors, a welded structure of two corners with jumpers, and then continue laying foam blocks along this metal support. In this case, you will have to cut the blocks slightly in height so as not to disturb the evenness of the top cut of the overall row of masonry.
Lintels over gates and doors
- If you plan to build a gable roof, you can continue the masonry to create the front and rear gables.
- Is a common reinforced concrete reinforcing belt required along the top edge of the constructed walls? By and large, it will never hurt - it will give the structure additional strength. In addition, it will be much more convenient and reliable to attach a power plate to it for the roof structure. If a room (residential or technical) is planned above the garage, then an armored belt is mandatory. But when the decision is made on a simple pitched roof, you can do without it.
For the armored belt, formwork with a height of 200 - 300 mm is prepared, reinforcement is laid (4 rods arranged in a rectangle) and concrete mortar is poured.
Video: features of laying foam blocks
Installation of a roof over a garage
More details about possible options for arranging a roof are described in the corresponding article on our portal. Here are just a few tips for installing the simplest, pitched roof.
The slope of the roof can, as already mentioned, be provided for at the stage of erecting the walls - it is planned to slope back or to one of the sides. It is possible to do it differently by constructing a wooden structure that provides a slope at the same level of the walls.
A wooden structure can be built for the roof slope
It will be absolutely pointless to build insulated walls from foam concrete if the pitched roof is a thin roof deck that does not have proper thermal insulation. Therefore, very often they resort to the following method of arranging it:
- I-beams are mounted in the direction of the slope, securing them to the upper edge of the walls or to the Mauerlat. The distance between the beams is no more than 800 mm. In addition, they must extend beyond the surface of the walls by 250 ÷ 300 mm to create a canopy that protects the walls from precipitation.
- The remaining openings between the I-beams can be filled with brickwork.
- Boards with a thickness of 30 ÷ 40 mm are laid on the lower shelf of the I-beam. A layer of roofing material is laid on top of them, so that on each side it rises upward by 100 mm.
- Dry insulation – slag or expanded clay – is poured in, and reinforcing metal mesh can be laid on top of it.
- Then a light screed, no more than 30 mm thick, is poured. The solution must be thick enough to provide the desired roof slope.
A soft roofing material made of roofing felt is fused on top of the poured concrete screed on the roof.
- After the screed hardens, it is covered with a soft roof. To begin with, coating with tar mastic is carried out, and then roofing felt is laid using the fusing method. The strips are laid across the slope, starting from the bottom edge, so that each subsequent sheet is 100 mm above the underlying one.
External and internal wall decoration, ventilation
As already mentioned, the features of foam blocks are such that walls made from them require mandatory additional finishing. There are no restrictions in choosing a specific method - any plaster, facade paint, etc. fits perfectly on them. You can arrange decorative cladding from wall panels, tiles or siding. Inside the garage, you can also limit yourself to a layer of plaster followed by finishing in any available way, or cover the walls with sheets of moisture-resistant plasterboard.
For normal air exchange, ventilation is required. Setting up a forced ventilation system is probably too much of a luxury for a garage. Natural air circulation will be sufficient. It will not be difficult to cut holes in a wall made of foam blocks at different levels - near the floor surface and, on the opposite side - under the ceiling. Ventilation grilles can be installed there, equipped with adjustable dampers so that the intensity of the air flow can be changed in accordance with the time of year and the prevailing weather.
So, building a garage from foam blocks is quite doable for the average site owner. Of course, you will need to mobilize all your strength and efforts, increased accuracy in work and strict adherence to the sequence of technological operations. However, such construction is one of the least expensive, allowing you to build a major garage in the shortest possible time.
Read detailed information with instructions in our new article - “Building a house from foam blocks with your own hands.”
Floor
The floor in the garage should be as durable and reliable as possible. With a strip foundation, it is laid on the ground, which must be compacted well. Next, waterproofing is laid, and then layers of crushed stone, sand and gravel are poured. Each layer should have a thickness of about 100 mm.
A concrete screed is poured on top with a layer of 200 mm. In the garage, the floor can remain concrete. But it can be decorated with a durable coating. For example, the floor in a garage can be painted, covered with a special rubber-containing material or PVC tiles. But experts consider self-leveling flooring to be the most successful option.
conclusions
A garage with an attic is a typical modern solution that makes good use of the land area, but requires somewhat larger investments. Even with single parking on the second floor, you can organize a full-fledged living area, suitable for the role of a guest room or sports room.
Foam block is often used as the main material, which can significantly save time and money. High-quality blocks are laid with glue, while “rough” blocks are laid with cement-sand mortar. Reinforcement is required, every three layers. It is strongly recommended to make an unloading reinforced belt before constructing the ceiling.
Externally, a building made of foam block must be faced with siding or brick, or treated with plaster, followed by the application of a hydrophobic composition.
If the second floor will be used as a living space, it is necessary to equip the garage with an exhaust system and insulate the attic.
Ventilation
In a garage made of foam blocks, as in any garage, it is necessary to equip a ventilation system. It can be natural, forced or combined. A natural ventilation system is the easiest and most economical way to get air circulation in your car. When choosing this option, it is necessary to provide 2 ventilation holes in the walls of the garage at the design stage. One should be located at the bottom of the room, and the second near the ceiling. They should be located in opposite walls.
The lower hole in natural ventilation is needed for air flow, and the upper one serves as an exhaust hood. This type of ventilation works due to the difference in temperature indoors and outdoors. Therefore, natural ventilation is effective only in the cold season. In addition, it cannot cope with the fumes of toxic substances and exhaust gases. This means that natural ventilation can only be used in a detached garage. In the design of a country garage made of foam blocks, which will be attached to the house, a forced or combined system must be provided.
What a multifunctional garage with an attic looks like in the photo: typical solutions
One of the ways to universalize a garage building is to build a second attic floor. Such a project not only competently manages the not cheap and, moreover, not always huge area of the land plot, but also helps to increase the usable area of the structure as a whole. Looking at the garage with an attic in the photo, it is easy to notice a feature that unites construction projects in this direction - the presence of unobstructed access to the second floor, bypassing the garage door. The staircase can be built:
- outside;
- in a vestibule specially separated from the parking area;
- directly in the garage with duplicate access (through the door).
When constructing such universal facilities, two things are primarily taken into account:
- number of cars;
- purpose of using the attic floor.
Analyzing various photographs and the results of the layout of the second floor for a serious living space, it is easy to see that even above a single garage it is possible to recreate a completely spacious one-room apartment with the necessary operational premises. Often wealthy people who hire security and other service personnel provide them with just such autonomous residential communications.
However, a garage with an attic made of foam blocks or other modern building materials is often considered an exclusively non-residential structure when the second floor is created for:
- storage room or storage room;
- workshop;
- sports room;
- temporary office.
Naturally, in this state of affairs, the need for arranging heating, water supply and sewerage systems and organizing effective ventilation is automatically eliminated.
Often the design of the upper floor is interpreted in an exclusive way through primitive architectural solutions, for example, arranging a balcony and terrace. The easiest way to model a future garage with an attic is from existing photos of finished projects, which often show non-standard design solutions.
Insulation and finishing
Walls made of foam blocks retain heat well. The main thing is to protect them from moisture with finishing materials. If there is a need for insulation, this can be done using ecowool, mineral wool or polystyrene foam.
It is best to use mineral plaster as an exterior finish. It should be applied along a grid fixed to the wall. Without such protection, foam concrete will gradually collapse under the influence of precipitation and wind.
The inner surface of the foam block wall should also be protected. For this purpose I use plaster for interior work. It can be coated with paint.
Features of choosing foam blocks
When purchasing foam concrete, be sure to pay attention to the certificates of conformity
First, make sure that the foam block manufacturer has the necessary quality certificates, check compliance with GOST requirements and product delivery conditions . If maximum information is in the public domain, it means that the manufacturer has nothing to hide, and he uses high-quality materials. This is what large, reliable organizations do. A good manufacturer of foam blocks has sufficient space to organize production (at least 180 m2 is required), where all equipment can be conveniently placed. Industrial buildings must have a fixed roof and be heated.
The cost of the material offered is of great importance - find out the average market price for blocks of a certain brand. If you are offered material much cheaper, then you need to think - perhaps they are trying to sell you low-quality blocks.
Important! If a foam block manufacturer claims that its low-grade blocks can be used as structural ones, since they are made using a “special” technology, you should not trust such a manufacturer. No special recipes for mixing and processing raw materials can significantly improve the quality of products. You will not be able to build even a small reliable garage from such blocks - for load-bearing walls you need to use only especially strong grades of foam concrete.
Inspect the selected material before purchasing - the blocks cannot be white. This is impossible due to technology. Their color is grayish, heterogeneity of color is unacceptable.
Make sure that the cells of the blocks are sealed - if they are connected, dampness will quickly spread into the material. Break apart (with permission) the block and evaluate whether the interior and exterior structures are similar. Normal cells are round; cracks or chips inside the blocks are unacceptable.
For convenient wall laying, you need to buy blocks with the correct rectangular shape - make sure of this. To do this, place one foam block on top of another and shake them, examine all 4 planes of the blocks - the defect may be noticeable only on one of the sides. Subsequently, this can cause you troubles and increase the time spent on work.
If you bought foam blocks immediately after production, then do not rush to use them for masonry. They will achieve the required strength no earlier than after 28 days. For this reason, it is better to keep the purchased blocks for 2-3 weeks, covering them from the sun and rain.
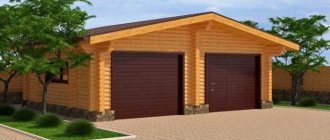
Project No. 10. Three car garage project
The author of the project conceived it as a garage with a living area for service personnel. The solution will be of interest to owners of large plots of land who place increased demands on their own comfort. On a total area of 145 m² the following zones are located:
- a garage for three cars, but, alas, there are only two entrances, so one of the cars will be constantly blocked, which can be considered a drawback of the project;
- two small bedrooms with an almost mirror layout.
They propose to build the garage on a monolithic foundation, build the walls from brick, and use metal tiles for the roof.