For permanent residence outside the city, you will need not only a warm and cozy house, but also non-residential buildings, one of which we suggest you build a practical shed from foam blocks. A barn usually means an unheated and non-residential indoor space, which is traditionally used for keeping livestock or storing various property or hay.
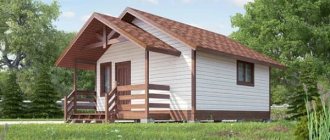
Shed made of foam blocks with a roof made of metal profiles
There are many types of sheds that you can build with your own hands in different ways and from different materials, for example, from foam concrete or aerated concrete. To do this, it is not necessary to attract highly qualified specialists.
A shed made of foam blocks is a very relevant room, which almost no country site can do without. You may always need additional storage space for various property, gardening tools, building materials and tools, which is not advisable to place at home. A self-built shed made of foam blocks will solve this problem with storing such things, eliminate the lack of space and allow you to store only necessary household items in your living space.
Projects for aerated concrete sheds do not take as much time, effort and expense as the construction of residential buildings, but even here, compliance with certain rules and regulations is required.
Option for constructing a shed made of aerated concrete
First, you need to understand what the future building should look like and prepare its detailed design. You can buy ready-made barn projects or find free options online. The project must take into account all norms and requirements; it is necessary to clearly know for what purposes and how the aerated concrete shed will be used in order to correctly determine its future location and estimate what size it should be.
When the shed project is ready, you can begin to prepare the tools and materials that will be required for its construction:
- shovels for preparing the foundation and supplying materials;
- tape measures, squares, rulers and other measuring materials;
- a hammer drill with a special attachment and a bucket for making construction mixture;
- sand, gravel and crushed stone to create foundation layers;
- containers for liquids and a watering can for moistening concrete;
- reinforcement and wire to strengthen the foundation;
- saw (any type) for cutting foam concrete blocks;
- roofing material (slate, metal or asbestos-cement sheets);
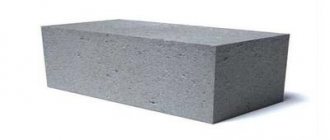
- foam concrete blocks;
- roofing felt for creating waterproofing;
- ladder;
- nails, screws, self-tapping screws, hammer;
- wooden beams and boards;
- pump and hose for supplying concrete when pouring the foundation.
Choosing a place to build a shed
Before you start building a shed from foam blocks or aerated concrete, you need to decide on the most suitable place for it. Since shed projects are not buildings that could be classified as architectural buildings, they try to hide them away, without building them in the most visible place.
However, this should also not be abused, because if you build a shed from foam blocks or aerated concrete too far from the house, you will have to walk a long distance to retrieve the property stored in it.
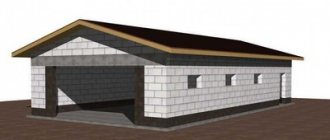
Project of a barn with a canopy and barbecue
The location of the shed depends on the size of the plot and the personal preferences of the owner. The most common, according to the majority of owners of country houses, is the location of the shed in the courtyard behind the residential building. On the one hand, this is the close location of the building to the residential premises, and on the other hand, it is the residential cottage that remains in the foreground.
The main thing is to avoid constructing barn projects in lowlands with your own hands, because such areas are usually subject to flooding in the spring from melting snow, or heavy rainfall at any other time of the year.
Once the site for the construction of the barn has been determined, you can begin the initial stage of construction - building the foundation.
Flaws
Disadvantages of houses made of expanded clay concrete:
- Low building height. This is due to the lack of strength of the elements, which is only enough to build a maximum of a three-story house. In this case, the thickness of the walls must be at least 40 cm.
- Need for finishing. It is impossible to leave a house without external cladding for longer than 2 years.
- Unattractive appearance. Unfinished houses look gray and unkempt.
- The need to insulate the wall if its thickness is less than 40 cm. Although this factor is largely determined by the regional climate.
- High moisture absorption rate. The material is porous, so it quickly absorbs water. If it does not have time to weather and freezes, this will lead to gradual destruction of the structure.
- Difficulty of processing. Cutting expanded clay concrete blocks requires special equipment. Considering that the material is fragile, this process is fraught with a number of difficulties.
Foundation for a barn
It is impossible to build a shed made of aerated concrete or foam concrete without a foundation, which you can also build with your own hands.
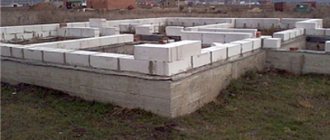
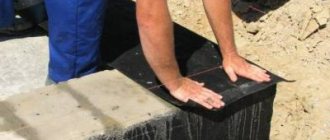
Preparing a trench for pouring a foundation for a shed made of foam blocks
There is a fairly common misconception that you can completely do without it, and many people actually start building barn projects without preparing the foundation. As a result of this mistake, the structure turns out to be short-lived and extremely fragile; it can collapse from the most ordinary bad weather. Therefore, it is better to start construction correctly right away so that you do not have to remodel and rebuild the barn in the future.
The first step in preparing for the construction of a strip foundation will be to remove the top layer of soil. In this case, the soil is removed to a depth of 50-100 cm along the perimeter of the future walls of the building. The depth will be determined by the weight of the structure. After this, you will need to pour a layer of sand into the foundation piece you dug with your own hands, on top of which a layer of gravel is poured, and on top there is a layer of crushed stone.
The process of pouring the foundation for a foam block shed
In this case, under no circumstances should the layers be swapped; the sequence should be exactly like this. The total thickness of all three layers should not exceed 20-25 cm. In this case, a kind of “pillow” is obtained. After its production is completed, a special mesh in the form of a belt of reinforcement must be mounted under the foundation.
It is preferable to lay the reinforcement of aerated concrete shed with your own hands in two layers and at the same time carefully ensure that it does not have direct contact with the ground on either side.
The distance between the ground and the reinforcement must be at least 0.5 cm. Once the reinforcement mesh is ready, you will need to make a wooden formwork into which the concrete will be poured. Using a pump and flexible hose will make the process of pouring concrete easier. The reinforcement will make the concrete pour harder and more durable. Over the next few days, the concrete will need to be watered to prevent it from drying out and becoming cracked.
Tools and materials
Before starting work, it is recommended to prepare building material and all necessary tools.
The following devices are prepared for construction work:
- Trench and other equipment. Shovels, picks, hammer, trowel, spatula, buckets, hand mixer, ladder, sander, gas or electric saw.
- Tool for preparing a joining solution. Concrete mixer or special container.
- Measuring instruments. Tape measure, ruler, level, square, plumb line.
- Components for construction, including cement, sand, water, expanded clay, waterproofing, mesh for reinforcement, wooden beams, boards, shalevka, roofing elements.
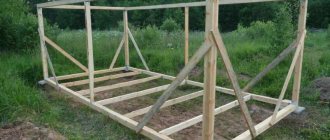
Construction of a barn
A few days later, after all the necessary steps to prepare the foundation have been completed, you can begin building the walls of the shed from foam concrete. The foam concrete blocks that will be required at this stage can be purchased or made independently. There are projects for mini-factories for their production, which will reduce the financial costs of purchasing material.
At the same time, it is important to choose correctly not only foam concrete blocks, but also a special solution that will be used to fasten them together. A mixture of sand and cement, as well as construction glue, is best. Combining these materials will help minimize the size of the joints.
It is best to use large foam concrete blocks for projects such as sheds; this will significantly increase the speed of construction.
Laying the walls of a shed from foam blocks
There must be a layer of waterproofing between the foundation and the first row of foam concrete blocks. Such a precaution is necessary in order to avoid the harmful effects of moisture from the foundation on the blocks from which the walls of the barn will be made, which, in turn, will make it more durable. By the way, there is nothing complicated in this process.
The material for the waterproofing layer will be the most common rolled roofing material, which will need to be laid in two layers.
Also, do not forget about the lighting and ventilation of the future room; for this, when building walls, you need to think about a small window. All work on the construction of walls should begin from the corner of the future shed made of foam blocks. To ensure that the angle is correct, use a corner foam concrete block.
During the construction of walls, it is important to ensure that the vertical position of their installation is not disturbed; a building level can help with this.
Conclusion
Almost finished building
There is absolutely nothing complicated in the construction of a non-residential structure, as we have seen. The recommendations are simple, the advice is rational, and all the work will take at most a few days (also find out how to build a garage from cinder blocks yourself).
If you are interested in this and are ready to get started, then in the video presented in this article you will find additional information on this topic.
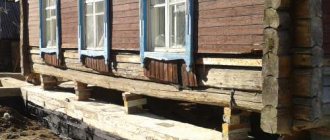
Finishing and landscaping of the barn after completion of the construction process
When the most difficult part of building the barn is already behind you, you can begin finishing and insulating the walls, as well as the general improvement of the barn. First of all, it is advisable to place a table inside the room; it will be useful not only in the future, when the barn is completely ready, but will also become your assistant and a useful addition in the process of interior decoration.
All utility structures and shelving inside the barn can be built from any available materials suitable for these purposes. The walls in sheds are usually not insulated, since this is a non-residential space and there is no special need to retain heat inside it.
Books on the topic:
Scientific and technical basis for the production and use of silicate cellular concrete - Alexander Fedin - 911 rubles - link to book review
Concrete mixtures. Recipe guide for builders and manufacturers of building materials - P. Mayorov - 166 rubles - link to book review
Floor installation. Materials and technologies - Lyudmila Zarubina - 127 rubles - link to book review
Handbook of a modern designer - Dmitry Mailyan - 194 rubles - link to book review
Advantages of foam concrete blocks
The construction of sheds, like any other outbuildings from foam concrete blocks, is quite quick, simple and at the same time a very profitable investment.
This material has a number of advantages that allow it to outperform its analogues. For example, if we compare with brick, then foam concrete blocks have a much lower cost, but at the same time they can be used to build stronger walls. Their thickness can be 30-40 cm.
In addition, foam concrete blocks can be sawed very easily and without unnecessary effort, which allows them to be combined with many other materials during the construction process. Buildings made from this material have good ventilation, which, in turn, eliminates the appearance of mold and fungi.
Installation of barn roof trusses
Being an environmentally friendly material, foam concrete blocks in their qualities, structure and properties are much closer to wood than to stone.
However, compared to wood, they have one very significant advantage - foam concrete does not burn. We can say that these blocks combine the main advantages of other materials - they borrowed environmental friendliness, light weight and easy workability from wood, and high strength and fire-resistant properties from stone.
In conclusion, I would like to note that if you, in the future, plan to install plumbing, a heating system, electrical wiring or other communications into the barn, then, in this case, the choice should certainly be foam concrete blocks.
Finished painted shed made of foam blocks with a pitched roof
In this case, they will become the best option, since through such blocks it will be much easier to carry out all the necessary channels for such systems, which will naturally simplify the task rather than doing the same manipulations with a brick building.
Rules for drafting a project
The standard for building a shed is considered to be an area size of 6 to 9 m2. And the height of the building is from 2 m to 3 m.
The project can be drawn by hand on paper, or using a computer program, such as AutoCad.
It is important to immediately note the location in the project:
- windows;
- doors;
- gate
This will allow you to more accurately calculate the number of blocks required for construction.
The calculation of the project also involves choosing the desired type of foundation:
- Tape . It is used in sheds in which a lot of heavy equipment, hanging shelves, large and bulky items will be stored. The foundation must be strong to withstand such a load from the total weight of the objects. A strip foundation is an ideal option for such sheds.
- Columnar . Suitable if only a few things are stored in the outbuilding, then you can use a lightweight type of foundation - a columnar one.
For sheds, it is best to install a shed roof with a frame made of wooden beams (the installation step of the beams is 1 m), so that the total weight of the roof is not very large. Sheets of slate are attached on top of the wooden frame.
To calculate the required number of expanded clay stones in a project, you need to:
- Determine the total area of the walls. Let's say the barn is 6 m in width, 9 m in length, 3 m in height. The area is: (6×3)+(6×3)+(9×3)+(9×3)=90 m2.
- Calculate the area of the windows (assuming that there are 2 windows 1.2 m wide and 1.2 m high). It turns out that the total area of the windows is: (1.2×1.2)+(1.2×1.2)=2.88 m2.
- Set the area of the doorway (width 1.2 m, height 2.2 m): 1.2 × 2.2 = 2.64 m2.
- Find out the actual area of the walls without window and door openings: 90-2.88-2.64=84.48 m2.
- Calculate the area of one expanded clay concrete block, taking into account its dimensions (for example, a standard block 200×200×400 mm): 0.2×0.4=0.08 m2.
- Calculate how many elements are needed to lay the walls. To do this, the area of 4 walls is divided by the area of one expanded clay concrete: 90/0.08 = 1.125 pcs.
You can take less material, because this figure does not take into account the thickness of the masonry joint. But it’s better not to do this and even add another 5% to the final amount, with the expectation of defects in the pallet or fights during work.
Using the same scheme, the required number of blocks for the internal partitions of the barn is calculated.
Suitable elements for walls
For the construction of cellar and basement walls, suitable expanded clay concrete blocks are solid and hollow blocks and semi-blocks made using a non-autoclave method and complying with GOST standards:
- 33126-2014;
- 6133-99.
The blocks are rectangular in shape, and the half-blocks are square. The structural purpose of expanded clay concrete products is that they are intended for load-bearing walls and are able to withstand certain loads, so their marking will always correspond to the indicators M500-M700 and higher.
To arrange partitions or interior spaces in basements, you can also use thermal insulation and structural type blocks, marked “P” (partition). They can also be used to arrange a second layer of blocks, following the load-bearing ones, so that the room has an even more comfortable temperature.
The second layer of expanded clay blocks is especially recommended for regions with low winter temperatures. Here you can also use slotted products, which are useful when performing thermal and waterproofing.
Regardless of appearance and dimensions, the block and semi-block have a gray tint, a smooth or rough surface. Hollow products, laid in alternation with solid ones, are good because they can be reinforced with small rods.
When drawing up a project, the specialist independently determines, depending on surrounding factors, what materials (solid or hollow) will need to be worked with in the process. Examples of blocks can be seen in the photo table below:
How to insulate a bathhouse made of expanded clay concrete blocks from the inside with your own hands?
The construction of a bathhouse on a country site is always a priority over other buildings. And more often than not, the house is still under construction, and water procedures are already being performed in the bathhouse. This building plays such an important role among Russians. Today, bathhouses are built from different materials: logs, bricks, expanded clay concrete blocks, cinder blocks, cellular concrete blocks.
But, as practice shows, a building made of any material must be insulated. For example, a bathhouse made of expanded clay concrete blocks. This material has excellent thermal insulation qualities. And still, experts recommend even insulation for him. How it's done?
Thermal insulation of buildings
Like any thermal insulation process, the insulation of a bathhouse is carried out in several stages. But before you start the process itself, one very important piece of advice.
Advice! When the conversation turns to insulating a bathhouse, an important question is decided on which side to carry it out from: outside or inside. Since baths are used periodically, it is better to do this from the inside. In this case, there is no need to warm up the walls and floor structures.
Selecting a thermal insulator
Before you start insulating, you need to choose the insulation itself. In principle, there are no special restrictions in this regard. And if earlier this issue was serious, then with the advent of vapor barrier materials, it has exhausted itself.
Therefore, choose any, although a reasonable approach is the choice of material with an optimal price-quality ratio. Eg:
- Mineral wool.
- Expanded polystyrene boards.
- Glass wool.
- Insulation based on other polymers.
Let's take mineral wool and use it to show how to insulate a bathhouse made of expanded clay concrete blocks. Again, we remind you that the process will be carried out internally.
- Mineral wool can only be installed on walls using lathing. Therefore, to do this, it is necessary to install vertical racks directly along the wall and secure them to it with self-tapping screws. Wooden beams with a cross section of 50x50 mm are usually chosen as vertical posts.
- The distance between the sheathing elements should be slightly less than the width of the mineral wool mat. The insulation must enter the space between the slats, pressing tightly against the slats. However, it should not extend beyond the edges of the sheathing. That is, its thickness should be 50 mm.
Advice! All wooden products must be treated with an antiseptic composition before installation. A bathhouse is a humid room, and although the entire thermal insulation cake will be reliably protected by a vapor barrier, you need to be on the safe side. As they say, God protects those who are careful.
So, the insulation has been installed, now you need to cover it with a vapor barrier. For this you can use different materials. There are special membranes made of polyethylene on the market, and there is foamed polyethylene itself, covered with a foil layer. There are a lot of materials, you can use any in the bath
The most important thing here is to install the vapor barrier in such a way that there are no gaps between the edges of its strips. Therefore, the strips are laid overlapping each other by 10-15 cm
The joint is also additionally covered with a special foil self-adhesive tape.
And the last stage is finishing the bathhouse from the inside. Most often, lining is used as a finishing material. It is stuffed horizontally directly along the installed sheathing.
Please note that this material has a tongue and groove connection. So the panels should be positioned so that the groove always looks down
Thus, the problem of moisture accumulation inside the lock joint is solved.