Outdoor flowerpots and pots not only help gardeners in cultivating particularly sensitive plants, giving them the opportunity to select the optimal soil composition for each green pet, but are also one of the best ways to place bright accents, emphasizing all the splendor and harmony of the garden
Flowerpots and flowerpots made from a variety of materials not only serve as containers for optimal soil composition for garden plants, but are also one of the best ways to add a pop of color to your garden space. Outdoor flowerpots can have a variety of shapes, and their decor will complement the garden composition.
Advantages of concrete forms
Due to the versatility of concrete and its resistance to any weather factors, which wood and polymers cannot boast of, objects of any shape, size and functionality, including flowerpots, are cast from it. And with the advent of various plasticizers and dyes for concrete in the public domain, it became possible not only to improve the characteristics of the solution and the finished product, but also to immediately obtain a presentable appearance. It’s no wonder that polished concrete floors, which look like an expensive, exclusive coating, are becoming increasingly popular. To make concrete flowerpots, they practically do not use ready-made adhesive mixtures, although they are presented in abundance, but rather a homemade solution based on Portland cement is mixed.
Phloxes
Phlox will fit into the shaded areas of the dacha, where groundwater comes close to the surface. They love high humidity and coolness. And in the sun they quickly lose their decorative appearance. Subject to these basic conditions and the right choice of soil - without clay, with the addition of lime, with an average humus content - the bushes can grow for many years without special care and not lose their attractiveness.
Photo: Instagram kirykik
- Decoration
7 climbing plants you can easily grow in your apartment
Composition of the filling mixture
Standard composition:
- cement (usually M-500);
- sand;
- crushed stone/gravel or expanded clay (depending on the dimensions of the product, the solution may be without filler);
- water;
- modifying additives;
- pigments (optional).
It is recommended to reinforce massive flowerpots; today, instead of the usual metal, polymer fiber is often used, but you can do it the old fashioned way - mesh, metal rods, fiberglass. Another option is suitable metal products that have gone out of use, of which almost every owner has them in abundance.
Flowers in the country: how to design a container garden
Containers can, of course, be placed arbitrarily within the kindergarten. It will still be beautiful. But you can add some design elements for a container garden:
- make a small (5–10 cm) podium;
- build a wooden garden shelf with steps;
- surround the container garden with a ready-made decorative fence;
- place containers in the garden according to some geometric pattern;
- put beautiful stones (not too large) between the containers, arrange garden figurines;
- place small solar-powered lights in some containers;
- sprinkle the free soil in containers with decorative pebbles or shells;
- wrap large containers with embossed synthetic fabric, burlap or coconut copra;
- placing plants in approximately identical containers in shape, color, material - this is the most stylish garden option. If all the plants are in approximately the same containers, a unified impression will be created, and the flowers themselves will attract attention;
- set up a container garden on the steps of an old staircase. To do this, both the ladder itself and the containers need to be painted in a harmonious color scheme.
If all the containers in your garden are different, you need to come up with some kind of story for combining them. You can, for example, make such a garden a monogarden - the containers are all different, but the flowers are of the same type, for example, only petunias. Or supplement the garden with containers with plants that have discreet flowers but decorative foliage, such as hostas and kochia. Another option is to plant flowers in each container of the same color as the container itself. For example, in your garden there is a container with a picture of red tulips on it. This means planting a plant with red flowers in it (not necessarily tulips, although this is impressive). And plant ageratum in a blue container.
Forms for concrete flowerpots
As for the forms, here, who knows, there are a lot of ready-made prefabricated and monolithic forms on sale, allowing you to get a variety of decorative flowerpots. However, their use is rare, both due to their decent cost and due to the excellent imagination of our homemade craftsmen who are able to turn almost any available device into a masterpiece.
- Containers - boxes, boxes and boxes of everything, more or less suitable.
- Plastic containers - bottles, canisters, eggplants, buckets of food and finishing materials.
- Household plastic and utensils - basins, buckets, baskets, tubs, saucepans, cups, pots, etc.
- Prefabricated forms - made of wood or metal.
- Fabric forms - burlap, towels, rectangular or oval rags.
- Things and shoes - most often children's and adult rubber boots, but there could be any old boots, shoes, or even bast shoes.
By and large, almost any object that catches your eye can become a form, if it can actually be adapted for filling at least once. They even manage to dig holes in the ground/sand, lay a film, and on top - a large leaf of burdock for texture and concrete. You can’t make a full-fledged flowerpot this way, but a bowl for succulents or decor for decoration will work out great.
One of the participants of our portal makes urns from concrete, but they can also be flowerpots if the shape is slightly modified. And in the original version, you can reorient the design for flowers.
IrinaZb Member of FORUMHOUSE
My trash can is made of concrete - I made a trapezoid from old scraps, if you prefer, you can use a square. The size of the figure should be larger than the diameter of the container (I use a bucket) that is inserted into the middle of the wooden form. Then I nailed the wooden base to the sides of the mold. I covered the walls, the bottom of the mold and the bucket with plastic wrap and secured it with tape.
Design ideas for the garden: hanging plants as part of compositions
Decorating the local area with flower arrangements is a common occurrence. Sometimes there is a garden on a personal plot, which only looks cheerful and elegant when it is in flower. But it can also be decorated with hanging flowers, organizing a small recreation area among the spreading tree crowns. You can use the following ideas.
Place a cart in an open area (so that the sun's rays penetrate) and fill it with pots with hanging flowers. Opposite, in the shade of trees, place a bench. The garden will be filled with colorful flowers, and there will be a great place for privacy and relaxation.
Don't rush to cut down a dead tree! On its branches you can hang pots with hanging flowers - the original oasis will delight you all summer with lush greenery and colorful flowers.
In open areas of the garden, you can place old tubs (and, if desired, new ones) and install flower pots on them. A walk through such a garden will bring a lot of pleasure.
When creating the compositions proposed above or invented independently, it is necessary to select the right plants so that they complement each other and favorably shade each other. To do this, you should pay attention to the photo, the names of hanging plants for the garden and try to purchase specimens that correspond to the image formed in your creative imagination or seen on the Internet.
Technology for filling different types of flowerpots
The required wall thickness in massive flowerpots is achieved through double molds - a smaller one is inserted into the larger one, and the solution is placed between the walls and carefully compacted and bayoneted (with a metal rod) to release the air. The solution mixed with the addition of plasticizers is easier to lay, the concrete is denser and without cavities. To make it easier to remove the workpiece, and the surface of the casting to be as smooth as possible, the mold is treated with mining oil, machine oil, a non-stick agent or a special compound sold in hardware stores.
The proportions of the solution are selected individually, it can be 2/3/3 (two parts cement, three parts sand, three parts aggregate), and 1/3 (part cement and three parts sand). The consistency of the mass should be like thick sour cream, the solution is kneaded until smooth, the amount and method of adding plasticizers depends on the manufacturer’s recommendations. If decoration is planned simultaneously with pouring, pieces of tiles or glass, mosaics, pebbles, which are widely used in the interior, and other decorative elements, for example, burdock leaves, are placed on the bottom of the mold, or both on the bottom and along the walls.
IrinaZb
I prepared a cement mortar: one part cement (I have M-500) and three parts sand. The solution should be thicker than government sour cream. I picked burdock leaves (temporarily put them in a bucket of water so they wouldn’t wilt), then poured cement mortar into the mold, making the bottom of the future urn (8-10cm thick). I secured the leaves with a stapler to prevent them from slipping. Yes, I reinforced the ballot boxes - gradually. If you can call it reinforcement. I scribbled some metal tubes on the bottom and a few around the edges. In the center of the mold, I placed a bucket wrapped in film in the concrete that had not yet hardened, and, gradually pouring the solution into the walls, laid the wire (in a cage). After about an hour, you need to pull out the bucket, otherwise it will be difficult to “pull it out” from there.
Some technologies involve adding toppings instead of regular gravel as a filler - coarse quartz sand, corundum chips, colored granite screenings, marble chips. In this case, after removing the flowerpot from the mold (after 6-8 hours), it is treated with a stream of water under pressure to wash the top layer and develop the composite. Baby is not in short supply, especially today.
Mmapp FORUMHOUSE Member
Stone chips are waste from processing various types of stone. It comes in several fractions (sizes), ranging from 0.5 mm and above. The color depends on the stone. It is sold both chipped (with sharp edges) and rounded, smoothed (a little more expensive) due to additional processing. You can buy it in large construction hypermarkets or order it online. You can also buy stone chips at a pet store, where they are used to fill the bottom of aquariums, but it will be considerably more expensive. Before kneading, be sure to rinse the crumbs thoroughly. The result of using unwashed is shown in the photo. The strength of such a vase is significantly lower. Therefore, the inner side is coated with additional “clean” concrete (CPC).
The time frame for stripping forms is individual and depends both on the dimensions of the product and on weather conditions, on average - after a day. The workpiece must stand for a certain time for the concrete to gain strength; this period varies from a week to two. Small flower beds can be immersed in water for this period, large ones are wrapped in film and periodically sprinkled generously with water. Painting and treatment with water repellents or other means is carried out after complete drying. If you plan to extrude the relief with stencils or decorate the blank with stone, glass and other decor, they are pressed into the walls after stripping until the concrete has completely set and is pliable.
IrinaZb
I covered the ballot box with film for 5-6 days, then turned it over, unscrewed the screws in the bottom, and took apart the walls. The leaves are easily washed off under the pressure of a stream of water. If necessary, the top of the casting and the sides can be sanded with a disc (grinder) to smooth out the sharp edges. You can paint the urn with any suitable paintwork materials.
You can also use shells for decoration.
Excellent flowerpots are also made from plastic barrels.
molorik FORUMHOUSE Member
We take a plastic barrel, cut the top part, also cut off the bottom and cut it lengthwise. Then, we will need a Euro-bucket, from which we cut off the upper, hard part (we sell them used), as well as the lid from the barrel. Buckets come in different diameters, the one that suits us is 32 cm, it fits neatly into the recess in the lid. For the form, you need to make two clamps that will tighten the barrel; you can also tighten it with any wire. Now we cover the bucket with a barrel and that’s it! You can pour concrete, it takes about three buckets, and the concrete takes three days to harden. After three days, we turn the mold over, remove the lid, loosen the clamps and rejoice in what we have done!
It’s convenient that the shape is reusable; the bucket can be removed from the barrel, or you can leave it. Decorating a vase is a matter of taste and preference; molorik and his wife collected flat pebbles and glued the flowerpots with regular tile adhesive. The products are, of course, heavy, but there are no plans to specifically edge them around the site - they are designed to be installed on the lawn in order to “paint” it with cascading petunias.
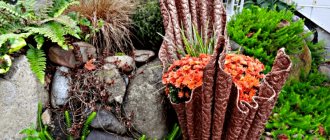
Original concrete flowerpots are made from burlap soaked in a solution.
Garkusha FORUMHOUSE Member
I made flowerpots for myself from concrete, rags and containers (from primer and paint). I prepare a rag (preferably thicker so that a good layer is formed), try it on, soak it in water and squeeze it hard. I dilute the solution - one part cement (M-500) and three parts sand. Minimum water, but enough to completely wet (dump) the base. We wrap the edges of the dampened rag (easier with two people) inside the mold, evenly draping the folds. We don’t touch anything on the outside with our hands, let the pieces dry a little and cover them with film for three days, wetting them periodically. After drying, the flowerpots can be painted - add color to the acrylic primer (the color is at your discretion) and cover with a brush. After the paint has dried, coat the concrete with stone varnish and you’re done. We fill it with soil (my wife already did this) and plant flowers.
How to plant flowers in outdoor pots correctly
The most important thing is to ensure the right ratio of soil and drainage.
For ceramic containers, it is enough to pour a little expanded clay on the bottom so that the bottom is closed. Then you can add soil and plant the plant. Planting in a wooden container is similar, but slightly more expanded clay is required. For a plastic container, on a layer of expanded clay, you need to pour a layer of coarse river sand 1.0–1.5 cm thick. You should try to choose a lighter soil, preferably mixing it with perlite.
When planted in a metal container, expanded clay occupies one third of the height of the container, followed by a layer of sand and light soil. However, in hot weather it is still better to move such containers into the shade, and in rainy and cold weather put them under a canopy or in a gazebo, and the place should be protected from the wind.
Accordingly, if your containers are flowerpots, then all specified drainage rates should be increased.
Conclusion
In general, it is quite possible to make not only an “eternal”, but also an exclusive flowerpot yourself. Concrete, a little ingenuity and imagination and years of admiring not only the content, but also the form.
In recent years, the loft style has become increasingly popular, and with it concrete, not only in gardening, but also in the interior. Concrete makes excellent functional and very original furniture. No less interesting is a material such as tadelakt - it is not only the oldest type of plaster, but also an excellent material for covering concrete sinks. The video shows the first experience of landscape design.
Subscribe to our Telegram channel Exclusive posts every week
Nemesia
The cheerful little flowers provide joy all season long with tons of vibrant colors, including purple, pink, cranberry, bright yellow, pale yellow, orange and white. The plant is usually considered an annual.
Place: partial shade.
Interesting varieties: Berries and Cream, Deep Orange (Sunsatia Kumquat).
Sunsatia Kumquat
Berries and Cream
