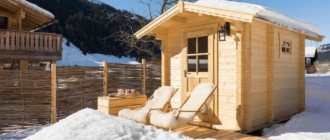
Roof of a frame bath
If you are building a frame bathhouse, then when making the roof there are also some nuances that are important to consider. It is worth noting that with such construction it is best to build a gable structure with a slope of 20–23°
This will allow precipitation not to linger on the roof, but to quickly disappear. So, the rafter system of the roof of the frame bath will rest on the walls. The rafters are made from 150×40 mm boards. At the top, the rafters will rest on the ridge beam, and at the bottom on the wall frame. The lathing is made from boards 150x25 mm in increments of 300 mm.
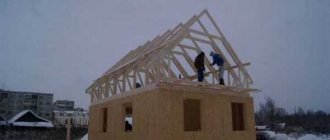
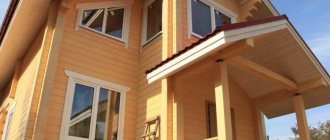
Construction of a frame bath
Immediately before installing the roofing material, a heat-insulating layer is laid, as well as a hygroscopic PVC waterproofing film. Slats are nailed on top of it to form an air gap. The pitch of the wooden sheathing is selected depending on the selected roofing material. For example, for metal tiles, the lathing pitch can be 200–350 mm.
To build a roof for a frame bath, it is best to make the rafter structure on the ground on a flat surface. After this, it will need to be raised to the ends of the walls and secured.
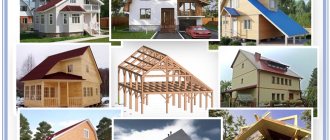
Examples of finished buildings
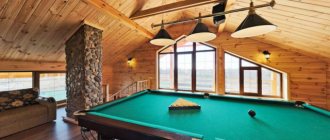
Bathhouses made of timber with an attic. An example of combining a roof with a usable area in which you can relax.
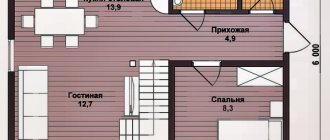
Plan of a frame bath 6 x 6 meters. This is how a plan diagram is drawn, which gives a visual representation of the future object.
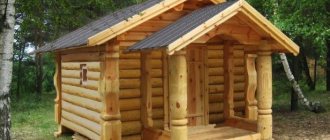
Bathhouse construction made of logs. This material has been successfully used for many years.
Features of the construction of roofs with an angle
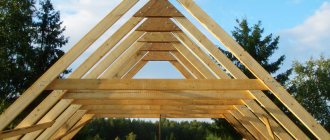
A gable roof is the simplest option for building a private house. The rafter system can have a layered, hanging or combined design.
Layered and hanging rafter system.
In the first case, the rafters are “leaned” - laid on external and internal supports. In the second, they are “suspended” with support only on the walls.
Layered construction
The layered system is used in the construction of houses with internal main walls that relieve external enclosing structures from thrust. The main load here is vertical.
The absence of horizontal expansion forces simplifies and reduces the cost of the design of the supporting roof frame. It consists of rafter legs, struts, crossbars, purlins and racks. The mauerlat or bench is mounted 100-150 mm above the ceiling level for free access to the bottom of the rafters. If the walls are weak, it is placed around the perimeter of the building. Otherwise, you can get by with short ones 60-70 cm long, placed under the rafters.
In wooden buildings, the function of the mauerlat is performed by the upper crown or trim. The lower end of the rafters is cut into the supporting beam, additionally secured with staples and wire twists. To prevent bursting stresses from arising in the ridge and the rafters do not move along the slope, the mating is done with an overlap or a butt, secured with overlays, bolts, dowels.
The system is reinforced with purlins, struts and racks. In addition, this helps to reduce the cross-section of the rafters and deflections. The elements are connected with metal fasteners - nails, staples, bolts, plates, rings, toothed discs.
Installation of a roof using the hanging method
Hanging rafters are installed for house spans of 6-14 m. Relying only on the outer walls, the load-bearing beams absorb significant pushing forces. To distribute them, additional horizontal and vertical elements are introduced into the structure - crossbars, tie rods, headstocks (racks resting on the tie rod).
The wider the span of the building, the greater the stresses that arise in the structures, and the more complex the structure of the frame. Up to 6 m, ties combining the functions of floor beams are sufficient. Above - additional crossbars are introduced. In houses without an internal load-bearing wall, exceeding a width of 9 m, the roof system is strengthened with headstocks and struts. A fragment of two rafters, tie rods and ties is called a truss.
In some cases, the Mauerlat is not installed. The finished trusses are mounted on a board laid along the top of the wall on a layer of waterproofing. The rafters are cut into a tie or laid with a beveled edge. Secure with dowels, pads, clamps.
The ridge knot is more difficult to solve than in layered roofs. The rafters are cut into a horizontal beam, and the joint is reinforced with wooden or metal plates. The construction of a hanging rafter system is more complex and expensive than a non-thrust one. Therefore, trusses are often installed in increments of 3-4 m, connected by purlins along which layered rafters are laid. This method is called combined.
The advantage of hanging structures is the ability to use the attic space as an attic.
Mistakes and recommendations for construction
The main mistakes made during the installation of a hip roof rafter system, as well as recommendations on how to avoid them, can be presented in the following list:
- Incorrect calculation “by eye” of the angle of inclination of the slopes leads to the fact that the roof cannot withstand the snow load and loses its integrity. It is necessary to calculate the degree of inclination of the hips of the hip roof, using the standards of SNiP 2.01.07-85.
- Over time, elements of the rafter frame can become deformed and rot from mold, fungi and wood-boring insects. Before installation, rafters, frames and all wooden elements must be treated with an antiseptic.
- Poor quality fasteners can lead to roof collapse. To connect parts, you need to use high-quality hardware and in the proper quantity.
Installation of a hanging rafter system
The length of the rafters is determined by the distance between the external load-bearing walls and the angle of connection of the rafter legs. The optimal length is considered to be 4-6 meters, taking into account the eaves overhang of 50-60 cm. These parameters should be taken into account when solving the problem of how to make a large roof.
At the top, the rafters are fastened in different ways: end-to-end, overlapping or “in the paw” with grooves cut out. The rafters are fixed with bolts or using metal plates. A tightening is mounted a little lower and the finished truss structure is lifted to the installation site.
First, trusses are installed along the edges, checking their verticality using a plumb line. At the same time, the amount of overhang is adjusted. The rafters are attached to the mauerlat using bolts or steel plates. Sometimes temporary struts are used to support the truss during installation. When inserting the remaining rafters, maintain the same distance between them. After installing and fixing all the trusses on both sides of the upper slope, I nail boards with a section of 5*15 cm.
Design options
To have a pleasant time in a bathhouse with a terrace, you should carefully approach the design of the interior and outdoor area. Often the inside of the room is lined with clapboard of a certain tone. It is better to choose soft shades that will set you up for relaxation.
It is necessary to ensure that there are no large protrusions or sharp corners in the rooms. Even if there is enough space in the washroom, steam room or relaxation room, a person in a relaxed state can accidentally touch the ledge and get injured. For the same reason, care must be taken to ensure that the floors are not slippery.
It is better to use natural materials for interior decoration. Modern ones, such as plastic, are not friendly with a bathhouse, as they can melt or begin to emit unpleasant odors. Even if they do not poison, the holiday experience will be ruined.
In the bathhouse you need to provide all the necessary accessories: brooms, hats, aromatic oils, shampoos, soap, washcloths. It is good to allocate a convenient shelf under them, which is always easy to reach.
For lighting, it is better not to use bright lamps, which do not allow you to tune in to relaxation. It is better to let the light be yellow and soft.
The design of the outdoor area is also of great importance. It may have thick curtains that isolate the terrace space from the hot sun or cold. Sliding elements made of glass or polycarbonate can be used here. Thanks to this, the terrace can be used almost all year round.
The important part is the oven on the terrace. The overall impression of a bathhouse with a terrace largely depends on its structure and design. A separate foundation is laid for the barbecue. The oven is made of refractory bricks on a high base. When building it, it is better to provide a niche for storing a small supply of firewood.
As for the occurrence of smoke, a separate chimney with a high pipe is created to remove it, so that the unpleasant smell and fumes do not spread throughout the terrace and bathhouse.
It is better to lay the floor around with tiles, since if a spark hits its surface, it will definitely not catch fire. Although the floor along the entire terrace can be laid out with it. If it echoes the blind area near the house, this will give unity to the architectural design on the site.
To make the terrace look elegant, it is a good idea to arrange a flower garden around it. Beautiful flowers will look even better against the background, for example, of the carved sheathing of the decorative wall of the extension, pleasing the eyes of those gathered to relax.
We cover the roof step by step with waterproofing and insulation
Next, installing a bathhouse roof with two slopes involves laying hydro- and thermal insulation. From the bottom of the floor beams, they are hemmed with boards, after which a vapor barrier film is overlapped on the rafters, and the joints are sealed with tape. A layer of thermal insulation is laid on top. It is easiest to use the material in slabs, although roll insulation is also suitable.
It is laid in such a way that it fits tightly between the rafters. All gaps and gaps are foamed, and a water barrier is fixed in the upper part. It is also overlapped, with the seams closed with tape.
Beautiful examples
Arranging shelves in a cascade in a steam room saves space and is very convenient for large companies. At the same time, you can steam both sitting and in a horizontal position.
Upholstering walls with clapboard is not only practical, but also aesthetically pleasing. The arrangement of the boards vertically and horizontally makes the interior of the steam room more interesting.
Modern sauna interior made of dark wood. Stones can also be used as decoration.
Interior in old Russian style. A samovar, a lot of carvings on furniture, windows, doors, as well as dishes and accessories typical of a hut.
Chalet style interior. Natural materials in the design and several bright accents are characteristic features of the style.
Bathhouse in Art Nouveau style with a glass wall and a view of the lake. Light shades of wood, picturesque views and simplicity of the interior create a feeling of complete relaxation and immersion in nature.
To learn how to build a sauna with your own hands, see the following video.
Gable roof: advantages, design, ideas
This roof got its name from the number of slopes that form the roof, intersecting along one line. The big advantage is that there is enough space inside to create a full-size room. If the roof is well insulated, the room can become habitable even in winter.
Options for gable roofs.
Most roofs of this type have very sharp slopes - more than 10 degrees. Roofs that have an attic space are called mansard. If the roof parameters are chosen correctly, then there will always be a few extra meters under it for a summer room, office or just a place to relax.
Nowadays, not just the line, but the broken line is becoming increasingly popular. This is called a roof in which the same slope has two directions. For example, from a skate the slope is directed at one angle, but in the middle it changes its direction. This design of the roof of the house was invented for only one purpose - to increase the cubic capacity of the attic space.
Building a broken attic is quite simple.
You may need the following material:
- wooden beam 10, 12 or 15;
- unedged board;
- roof;
- hydrobarriers;
- insulation material;
- nails.
From the tool you will need to have:
- hammer;
- axe;
- construction stapler and staples;
- wood saw or chainsaw;
- plumb line or level;
- roulette.
Owner reviews
The article would not be complete and not very correct if I had not collected for you reviews from the owners of these roofs. I have been sent letters more than once with questions and advice about this roof, and I have put them together for you. I opted for a gable roof because I wanted to organize a full-fledged attic space.
Leave your review in the comments and we will add it to the table!
Read and analyze, and the choice is yours.
| User name or nickname | For or against | Opinion |
| Stanislav Kravchuk | Against | I chose a gable roof for my bathhouse. If you do it, it will be a thorough one, but with a pitched roof there are only problems, it’s on a barn. |
| Cherie | Against | I generally don’t understand people who build pitched roofs for their bathhouses. Well, for starters, it’s not at all beautiful, and secondly, it’s not safe. I have several acquaintances with such roofs, I know what I’m talking about. |
| Anton | Behind | You just need to do it normally, then the pitched roof copes with its functions perfectly. But the fact that the gable is more practical and convenient is yes. |
| Evgeniya | Behind | Any roof will do, as long as snow does not accumulate on it. |
| Alexander | Pros and cons | The optimal solution for small buildings, such as a barn or bathhouse, or as an extension to a house. In all other cases, I would choose a gable roof! |
| Foreman | Behind | An excellent roof option, but there are several features. If the roof slope is less than 14 degrees, then corrugated sheeting should be laid; if the slope is more than 15 degrees, then metal tiles can be laid. If the slope is less than 15 degrees, then water will collect in the grooves of the metal tile, and subsequently dirt and mud. |
Roof structure
The roof of a bathhouse with two slopes is formed by planes located at a certain angle to each other. Such planes are called slopes. The roof structure with two slopes is quite simple to construct and quite practical. If you look at the frontal projection, such a roof is an isosceles triangle. This form is standard for similar buildings.
A roof with two slopes consists of the following elements:
- Rafter frame. It includes many details. Their main purpose is to support the roofing material. The rafter system includes a mauerlat, struts, racks, a ridge run and a tie. It is best to construct the frame on which the roof will be supported from high quality wood. First you need to calculate the load on the rafter system, and then select elements in accordance with it. The location of various parts must also correspond to the calculated values. The load on the rafter system depends on parameters such as the weight of the roofing material and waterproofing.
- Roofing pie. This term implies several layers connected to each other. The above elements are laid on the sheathing. She, in turn, rests on the rafter legs. Most often, the gable roof of a bathhouse is waterproofed with roofing felt. This material has a good margin of safety. The slopes can be covered with metal tiles, corrugated sheets or ondulin.
- Pediments. The gable roof has two gables in the shape of a triangle. Such elements represent a continuation of the end walls of the building. Most often, each pediment is sewn up with light lumber. Often the gables are made of the same material as the walls of the bathhouse.
Baths, which are built entirely from logs or beams, are distinguished by their high ability to retain heat. However, such structures are quite expensive, which is explained by the high consumption of high-quality wood. To reduce the fuel consumption that will be used to heat the stove in the bathhouse, the gables should be reliably insulated. All cracks are sealed and the surface is lined.
Attention! The microclimate installed in the bathhouse is a rather aggressive environment for wood. The temperature outside and inside the room varies greatly; the bathhouse is constantly humid and hot
Therefore, before starting operation, the walls of the bathhouse should be treated with an antiseptic.
The most popular projects of bath complexes with a pitched roof
A single-pitch roof structure can be used in any bath complex project. However, the use of a lean-to structure is not always justified, as this may require creating a significant height difference between opposite walls
One of the most common designs of a bathhouse complex with a pitched roof has a size of 6x4 m and an attached terrace. This project includes several small rooms. The total area occupied by the bath complex is 24 m2. The bath complex in its design has an attached terrace located under the same roof as the building. The terrace is located on the same foundation as the building. This project is ideal when using the complex as a sauna. When using the complex as a Russian bath, the size of the steam room will not be enough, since only one shelf with a length of 200 cm and a width of 80 cm occupies an area of 1.78 m2, and the total area allocated for the steam room is 3.98 m2. The complex includes the following premises:
- bathroom;
- dressing room;
- restroom;
- washing room;
- steam room
This project, being small in size, is ideal for lovers of bath procedures, and will fit perfectly into the design of a summer cottage.
The project of a bath complex with dimensions of 5x5 m is another popular project. This project includes a steam room, a relaxation room, and a washing room. In addition, an open terrace is equipped with the main building under one roof and on a single foundation. The disadvantage of this project is the need to install a heating system for the rest room when operating this structure during the cold season. According to this project, the relaxation room has an area of 6 m2, 5 m2 is allocated for the washing room, and the steam room occupies 4 m2. The open terrace has an area of 8 m2.
The choice of project for construction on a summer cottage depends on the wishes of the owner and his financial capabilities.
Calculation of the amount of material
First of all, you need to calculate the roof area.
To calculate the area of the roof slope, the Pythagorean theorem is used
Let's take the parameters from the example we have already considered as a basis. Let's assume that we want to make a roof from corrugated sheets with an overhang of 200 mm relative to the boundaries of the house. Then:
- Dimension A will be equal to 4/2+0.2=2.2 m (the width of the bath is 4 meters).
- The height from the ceiling to the ridge is determined by the angle of inclination of the roof: H=A∙tg(30o)=2.2/√3=1.3 m.
- The length of the slope is calculated using the well-known Pythagorean theorem: C=√A2+B2=√2.72+1.32=3.0 m.
- The area of one slope is calculated using the formula S slope = C∙D = 5.2∙3.0 = 15.6 m2.
- The total roof area is equal to S=S slope∙2=31.2 m2.
Next, you should calculate the area of the canopy above the entrance, if it is provided for in the project. Usually it is made 0.9 m wide and 1.7 m long. Let’s also take into account the overhang of 0.2 m: S canopy = 1.7∙0.9 + 1.7∙0.2 = 1.9 m2. Then the total surface area under the roofing will be 33.1 m2.
With a standard sheet size of 2x1.1 m (the useful width is indicated after deducting the allowances left for overlapping sheets), 33.1/(2∙1.1)=15.04 sheets will be needed to cover the roof. Rounding up, we get the required need for roofing material: 16 sheets measuring 2x1.1 m. It is better to buy with a reserve of 2-3 sheets in order to provide for possible losses and errors when cutting the material.
For further calculations you will need a roof plan.
To calculate the material required for the manufacture of rafters, a plan for their location on the roof is drawn up
Determine the number of rafter legs:
- for the main roof you need to prepare 19 bars measuring 140x40x2810 mm, the total volume of the board will be 0.3 m3;
- for a canopy over the door you need 4 bars measuring 140x40x1700 mm, total volume - 0.04 m3.
In total, 0.34 m3 will be required for the rafters.
You also need to prepare 2 wind boards measuring 140x30x5800 mm. Their total volume is 0.05 m3. In addition, you will need rough timber with a volume of 0.15 m3:
- 4 slats measuring 40x50x900 mm;
- 4 bars measuring 40x50x6200 mm;
- 8 slats measuring 40x50x5800 mm.
The amount of waterproofing material corresponds to the roof area - 33.1 m2.
Required Tools
To build a structure, you need to prepare the following tools:
- metal scissors;
- electric jigsaw;
- screwdrivers;
- axe;
- hammer;
- spanners;
- building level;
- roulette;
- meter;
- plumb line;
- corner;
- construction cord;
- pencil.
It is also recommended to make a marking strip from a 5 cm wide block.
What material and tools are needed
In order to build a gable roof for a 5x5 m bathhouse, you need:
- boards (pine or spruce) - 50x150 mm (the distance between the rafters is recommended to be 90 cm);
- unedged board for temporary fixation of rafters;
- edged board - 20x100 mm (length 3 m);
- metal corners;
- metal plates - thickness 2 mm;
- bars - 50x50 mm;
- bolts with washers and self-tapping screws;
- glued plywood, OSB or unedged board for sheathing;
- slats - 20x50 mm;
- insulation, vapor barrier and waterproofing material;
- metal tiles or corrugated sheets.
Tools:
- Bulgarian;
- electric jigsaw;
- stapler;
- hammer;
- tape measure - length at least 10 m;
- sharp knife;
- electric screwdriver;
- antiseptic agents and impregnations.
How to make a gable roof: step-by-step instructions with photos
The work includes several stages:
- preparation;
- installation of a rafter system;
- laying hydro-, heat- and vapor barriers;
- installation of roofing material.
Lumber must be well dried. They are stored in stacks under a canopy or covered with film or tarpaulin in bad weather.
Preparation
If the walls are made of piece materials - blocks, bricks - it is recommended to install a reinforced concrete belt around the perimeter of the building. This will allow you to assemble the structure together and level the surface for laying the Mauerlat.
At the same stage, studs with a cross section of 10 mm made of galvanized steel are embedded in the fresh solution. You need to start from the corners, the laying step is 60 cm. Subsequently, the Mauerlat will be placed on them and secured with nuts.
To prevent contact between wood and concrete, waterproofing is installed - the surface of the reinforced belt is coated with hot bitumen and covered with 2 layers of roofing material.
Laying the Mauerlat
Holes are drilled in the timber in those places where the studs protrude from the walls. The Mauerlat is laid on the surface of the wall closer to its inner side to avoid demolition during strong winds.
The bars need to be aligned horizontally. You can insert spacers or trim off protruding parts.
It is allowed to lay the Mauerlat not entirely on the wall, but in separate segments directly under the rafters. For brick or concrete walls, fastening with metal plates, wooden plugs and brackets, and curved reinforcement is additionally used.
The length of the beam is joined with an oblique or straight lock. Corner joints are sawed into place and secured to the wall with anchors (studs).
Installation of ridge beams
At the highest points of the roof, a purlin is laid, which is attached to the posts and beams with metal corners and plates. The pitch of the racks is 3-5 m.
You can change the sequence and start by installing rafters at the ends of the building, but then you will have to secure each pair of beams with braces or boards. In the case where there is a ready-made run, the assembly proceeds faster and with better quality.
Installation of ridge beams
Installation of rafters
It is better to prepare rafters using a template. A groove is cut in the lower part to rest on the Mauerlat. The depth of the cut is no more than 1/3 of the width of the board.
2 types of fastening rafters to the Mauerlat
If lumber has to be spliced for rafters, an overlapping or overlay joint is used. It is recommended to make the joint at a distance of at least 1 m from the support points, preferably at about 1/3 of the rafter length. It is impossible to connect the boards in the center, since the maximum bending moment acts in the middle, and the beam can bend at the weakest point.
The assembly of the rafters begins from the gables. First, the first and last fragments are set, then the cord is pulled and markings are made. The studs should not fall into the support areas, so as not to create problems with cutting. Read in detail about attaching rafters to the mauerlat in a separate article.
The rafters are attached to adjacent elements using stops, struts and ties
It is important to firmly fix the system in space
Fastening the sheathing
The base for laying the roofing covering is made of boards, slats, OSB boards or moisture-resistant plywood. The choice of material depends on the type of coating:
- for metal tiles - boards with a pitch of 35-45 cm, equal to the length of the transverse wave;
- flexible tiles, ondulin, roll roofing - continuous flooring;
- asbestos-cement slate - lathing in increments of 450-750 depending on the angle of inclination.
Boards or slats are laid perpendicular to the rafters. At each fastening point they are screwed with two self-tapping screws. The lathing additionally gives the rafter system rigidity and stability.
Video description
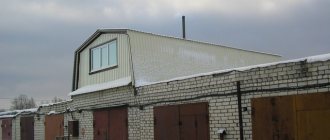
The video discusses the waterproofing of a flat garage roof using rolled roofing materials:
See also: Catalog of companies that specialize in the construction of bathhouses.
Flat roof + corrugated sheeting
Another option for covering a flat roof. This is everyone's favorite corrugated sheet. This roofing material is produced by manufacturers in lengths from half a meter to 13 m. It has become possible to cover the roof of a building in a seamless way, meaning without transverse seams. And this guarantees one hundred percent protection against leakage, which is very important for flat roofing structures.
Flat roofing made of corrugated sheets Source himcomp.ru
The only requirement is to use profiled sheets with a profile height of at least 44 mm and a sheet thickness of at least 0.5 mm. The thing is that a flat roof is subjected to serious snow loads; a non-durable profiled material may not withstand them.
The corrugated sheeting can be laid directly on the concrete screed, secured to it with metal dowels. Or a sheathing of 100 mm wide boards is laid under it, which are attached to the concrete base with self-tapping screws and plastic dowels.
Installation of corrugated sheeting on a flat roof Source primezona.ru
Shed roof for a bathhouse
Everything is clear with the gable roof option; let’s now discuss the features of the lean-to structure. Building a roof for a lean-to bathhouse is the easiest solution.
The design is not complicated, and the rafter system can be assembled independently even by a beginner. In order to create supports for such a roof, one side of the building simply must be higher than the other, so ridges for the rafters are not needed.
In order for a bathhouse with such a roof to be reliable and serve for a long time at any time of the year, several conditions for constructing the roof must be met:
Insulation of the bathhouse roof and walls in this design is mandatory. It is impossible to create a warm attic with this arrangement. Since we are talking about year-round use of the room, insulation for the ceiling is necessary.
On such a roof it is quite easy to install a natural water heating device. In the summer, such a device will replace a shower.
In general, a pitched roof is ideal for those who do not care about having extra space. If you need more space than a simple attic, then they construct an attic roof with a broken system.
But if you are planning to build an attic, then be sure to think about the thermal insulation of the upper room. Otherwise, in the summer there will be unbearable heat when using the bathhouse, and in the winter there will be terrible cold. In the photo of such a bathhouse roof you can see how it is constructed.
8x8
- large scope for integration of auxiliary premises;
- the need for zoning of located objects;
- possibility of arranging a spacious terrace;
- separate placement of steam room and sink;
- 3-4 sleeping places in the attic;
- If desired, you can also design a compact pool.
This is where you can really have a blast! The design of an 8 by 8 bathhouse with an attic can include literally everything your heart desires: from a comfortable dressing room and a spacious entrance to a spacious billiard room upstairs next to the bedroom. The square base of the building allows you to use literally every centimeter of free space for business benefit. You can even arrange access to the balcony. Isn't it great to get out and get some fresh air while enjoying a wonderful holiday?
Of course, in order to ensure comfort not only on paper, but also in practice, it makes sense to take care of reliable waterproofing of the floor base. In this case, you will significantly extend the service life of the materials used and achieve almost ideal safety in using the building.
The layout of bathhouses with an attic in the case of using the 8x8 format becomes more complicated due to greater variation in the placement of entrances and the integration of additional modules like the same balcony, but the end result is amazing. And this is the best option for planning a plot of 10 acres with a house, a bathhouse and a garage. In fact, this is a guest house with a bathhouse function. All that remains is to visit it more often and enjoy a perfect vacation.
What is the difference between layered and hanging rafter systems?
Before assembling a gable roof, you need to know some features of its structure. A hanging rafter system is installed when the house is small in size and there is no internal load-bearing wall. In this case, the rafters are connected at a certain angle, making appropriate cuts at their ends; nails are used for connection.
When installing such a rafter system, the posts and ridge are not made, and the support of the lower ends of the rafters falls on the external load-bearing walls. To make the structure more durable, the top tightening should be located no further than 0.5 meters from the top. Sometimes floor beams are used as tie-downs. The absence of racks frees up the attic space, which allows it to be used for arranging the attic floor.
If the house has an internal load-bearing wall, then it is more effective to use a layered rafter system. In this case, the bed is laid, support posts are fixed on it, onto which the ridge is nailed. This method is considered simpler and more financially profitable. When designing ceilings at different levels, the studs can be replaced with a brick wall, which will divide the attic space into two parts. A gable roof can also be made with different slopes along the length, which is also very beautiful and practical.
Features of a flat roof
The concept of a flat roof does not mean that the roof will be completely horizontal. During the construction process, a slight slope of 5 degrees is always assumed. To the naked eye, such a tilt remains almost invisible, which is why it got its name.
The roof for baths is equipped with support on walls made of reinforced concrete slabs or a poured concrete slab. When a concrete slab is selected, a steel reinforcing grid is installed inside. As a result, it is possible to form a horizontal roof for the bathhouse. In this case, there is no question of any bias.
But, at the final stage of construction, a concrete screed is made, which covers the top floor. It is this solution that will form a slope of up to 5 degrees. On one part of the roof I make the screed thicker, and on the other part less, which allows me to achieve the desired result.
Options for roof designs for bathhouses
Before you start building a roof in a bathhouse, you need to choose the best option. It should be as simple as possible, but reliable, since it is needed to protect the structure from rain and snow. The bathhouse can have a regular gable roof
Most often, baths are:
- attic;
- roofless.
https://www.youtube.com/watch?v=F5G_vLaD9_U
The roof structure itself depends on this. This is also affected by the frequency of operation of the bath. For one that will be used all year round, it is best to choose a gable one with an attic, as it is warmer. There you can equip a rest room.
The gable roof of the bathhouse can be with an attic
Summer baths are usually built without an attic, but are designed to install a tank of water for heating under the sun. This type of roofing is easier to construct.
A bathhouse with a gable roof without a roof looks very beautiful
According to their shape, roofs can be:
- single-pitched;
- gable;
- multi-slope.
A wooden bathhouse is most often built with a pitched roof
Gable roofs are installed on separate structures. They consist of two parts connected to each other at an angle. For areas where a large amount of snow falls in winter, the connection angle should be quite sharp (from 45 to 80°) so that precipitation can easily drain and does not put pressure on the roof from the outside. And in areas where there are frequent winds, there is a minimum slope so that in the event of strong gusts it does not fly off the bathhouse.
The angle of a gable roof depends on climatic conditions
Multi-pitched roofs are usually not erected on small bathhouses, as this is not entirely rational and convenient. But if a large bath complex is being built, then it will be appropriate here. It has a beautiful appearance and allows you to arrange additional rooms under its arches (relaxation rooms, billiard rooms, storage rooms, etc.). The disadvantage of the roof is the complexity of its construction.
A hip roof is suitable for a large wooden bathhouse
That is why masters often choose this option.
The best option for a small bathhouse is a gable roof. It can be inclined and hanging. The first option is equipped with additional wooden stops for greater stability. Hanging systems rest only on the mauerlats or ceiling beams. At the top, the rafters are supported by crossbars.
A simple gable hanging roof is suitable for a bathhouse.
Standard equipment for a timber bath
- Profiled timber of natural humidity, dry, glued 9x14, 14x14, 19x14 cm
- Only in winter 2017-2018, treatment of the bottom of the bathhouse and profiled timber with bio fire protection is included in the price (more details in the video)
- Columnar foundation made of blocks 20x20x40 cm
- Double strapping crown made of timber 15x15 cm (photo)
- Subfloor made from edged boards
- Dry floorboard 36mm
- Ondulin roofing in three colors to choose from
- Jacks for veranda supports
- Installing panel doors
- The steam room has a wedge aspen door
- The windows are real wooden double-glazed windows (photo) (video)
- Aspen canopies grade “A” (photo)
- The steam room is lined with aspen clapboard grade “A”
- Insulation and vapor barrier
- Saws into openings (photo) (video)
- Warm corner
- Logs on the first floor 10x15 cm (photo)
- The ceilings and attic floor, if there is one, are lined with clapboard grade “B” (photo)
- Flat carved balusters are made on the terrace (photo)
- If a staircase is provided, then it has railings and turned balusters (photo)
- The ceiling height in a one-story bathhouse is 2-2.05m, if the bathhouse is 2-story, then the first floor is 2.10-2.15m, the second is 2.3m
Additionally:
- Shower system in the washroom (more details)
- Glued laminated timber or dry
- Altai cedar link to photos and videos
- Strapping crowns and logs made of larch
- Pile screw foundation
- Treatment of lower crowns with antiseptics
- Metal tiles
- Assembling walls using a spring assembly (more details)
- Installation of the stove (photo) Barrel “Premium” (link), there is a “compact” (link), and “elite” (link) New stove Barrel compact panorama (video)
- Drainage system (photo)
Good to know
- Every sane customer should know this (more details)
- Or watch the video right away if you are looking for CHEAP
- What to look for when choosing a contractor
- Jacks on supports are always (more details)
- We don't give away metal doors, find out why!
- Construction companies and screw foundations, how to choose
We have quite a few projects for compact baths, but project No. 22 is rightfully considered one of the most successful. It is a 6x6 timber one-story bathhouse with an open veranda on the side and under a hipped roof. The project is suitable for construction from profiled timber immediately on a turnkey basis - the dimensions of the bathhouse allow you to avoid waiting for shrinkage.
The layout is quite standard: steam room, washing room, relaxation room + corner veranda (in the project it is open, but can be made closed). Nothing extra. An excellent option for a summer residence.
Instructions for installing a sloping roof over a bathhouse
Installation of a rafter system for a sloping roof of a bathhouse
- We attach a solid Mauerlat around the perimeter of the walls using steel wire and construction pins. For greater strength of the wooden frame, we make holes to a minimum. It is desirable that the studs fall between the rafter elements.
- We fix the floor beams at the lower level. Depending on the expected loads, they can be made from single or double timber with a total cross-section of 25 cm2.
- We install the front vertical rafters, securing them to the floor beams, and stretch the rope between them. It will be a kind of level for the following elements.
- We place intermediate vertical posts in increments of 2-2.5 meters.
- We fix all vertical parts with temporary spacers.
- We lay special purlins on top and attach the remaining racks strictly vertically.
- We attach transverse ties to the purlins and strengthen them with struts.
- We carry out installation of the side lower rafter elements. They can be prepared in advance, making only the top cuts. Initially, we fix the outer rafters, then the intermediate ones in increments of 1-1.2 meters. At this stage we make the lower cuts. All parts must rest against the load-bearing walls of the bathhouse.
- We install the upper rafter elements, attaching them to the ridge. For further installation of windows, we strengthen the upper part of the frame with transverse crossbars.
- We make additional bases for the gables of windows and doors on the outer rafters.
Please note that for laying a vertical system of racks it is better to use a light beam with a cross-section of less than 5 cm2. Please also note that the rafter elements of a vertical roof slope are usually made inclined, and the upper parts are hanging.
Thermal insulation of a sloping roof over a bathhouse
- We cover the frame with a vapor barrier membrane from the ridge to the mauerlat. We lay the material with an overlap of 20-30 cm. We glue all joints with metallized tape. To fix the vapor barrier, we use thin strips and a construction stapler.
- We install the main sheathing. The pitch of its elements depends on the density of the selected roofing material. A hard roof requires the installation of sparse sheathing, while a soft roof requires continuous sheathing.
- We lay a heat insulator between the sheathing boards and the rafters. The best option is mineral wool.
- On the inside, to securely fasten the insulation, we stuff the strips, performing additional lathing.
- We fix the rolled waterproofing on top with an overlap of 15-20 cm. We glue it with sealing tape.
Finish coating for a sloping roof of a bathhouse
- We stuff a counter-lattice made of planks 3-5 cm thick onto the waterproofing film.
- We install the roof starting from the top edge. The installation technology depends on the type of roofing material. Using ceramic or bitumen shingles, lay each new row on top of the previous one. Ondulin and profiled sheets are also suitable for such a roof.
- We install gutters. It is better to choose plastic or galvanized drainage systems. They are resistant to corrosion and are relatively inexpensive. Pipes made of aluminum, copper and titanium look more impressive on a bathhouse with a sloping roof, but they will not be cheap.
- We install window systems. Windows made of wood or PVC are ideal. It is also worth calculating the size of the hole so that it occupies at least 1/8 of the roof.
Instead of a counter-lattice, you can simply stuff OSB sheets. They have high moisture-resistant characteristics, are durable and strong.
https://youtube.com/watch?v=F5G_vLaD9_U
Do-it-yourself selection and installation of roofing
To cover a pitched roof, there is a large selection of roofing materials - roofing felt, metal tiles, corrugated sheets, ondulin, slate and others.
The most commonly used sheet materials are slate, ondulin and corrugated sheets. Laying begins on the leeward side, with the top sheets positioned on top of the bottom sheets. First, lay the first sheet, then two other sheets in the same row, then two sheets in the second row and add one sheet to the first row. An overlap is made horizontally in one wave, and vertically by 15–20 cm.
Corrugated sheet
Depending on the slope of the roof and the characteristics of the material, corrugated sheeting is laid on a continuous or sparse sheathing:
- at angles of inclination up to 15o, a continuous flooring is made under sheets with a wave height of up to 20 mm, and for more rigid (with a wave from 21 to 44 mm) products, sheathing is installed in increments of 300 to 500 mm;
- for steeper slopes, the sheathing is made sparse, and the pitch can vary from 300 mm (profiled sheet of grade S-10) to 1000 mm or more (load-bearing wall panels NS-35, S-44 and others).
To fasten the sheets to the sheathing, special self-tapping screws with a sealing washer are used. They should not be tightened too tightly, but they should not be tightened too much either. A thin layer of glass wool can be laid between the sheets in the overlap area. Such a layer will prevent the roof from blowing through, but at the same time it does not interfere with normal ventilation.
The roofing screw should be tightened so that the rubber sealing washer is slightly wrinkled, but not flattened by the tightening force.
Gable roof for a bathhouse: construction technology
Advantages of a gable roof of a bathhouse
- Possibility to additionally equip the attic space.
- Reliable thermal insulation.
- Long service life, because precipitation does not accumulate due to the slope.
- Attractive view.
Materials for a gable roof
- Euro slate (>27 degrees) - from 200 rubles per piece;
- Metal tiles (>27 degrees) - from 240 rubles per square meter;
- Ondulin (3-15 degrees) - from 250 rubles per square;
- Seam roofing (>18 degrees) - from 255 rubles per square meter;
- Ruberoid (>5 degrees) - from 220 rubles per roll;
- Corrugated sheeting (>8 degrees) - from 180 rubles per square meter.
- Mauerlat;
- Roof trusses;
- Vapor barrier layer;
- Lathing;
- Waterproofing;
- Roofing covering.
Phased construction of a gable roof for a bathhouse
- We install the Mauerlat. To do this, we attach 10*10 cm or 15*15 cm bars with embedded studs (anchors) to the walls. At the same time, be sure to maintain horizontality.
- We make special holes in the timber for further installation of rafters. If the wall is thicker than the mauerlat, then we wrap it with roofing felt in two layers and lay its outer side with bricks. This will increase the reliability of the system.
- We assemble roof trusses. They are a triangular rigidly connected structure made of strong timber. Additionally, to strengthen and secure them, we install spacers and jumpers. We attach a crossbar under the vertex of the triangle. For convenience, it is better to collect them on the ground.
- We lift the rafters onto the roof, place the outer rafters first and secure them to the mauerlat with special screws and capcacaillie. In this case, be sure to maintain verticality.
- We stretch the rope along the ridge and install the remaining trusses in increments of at least a meter. We balance them using temporary supports. If the slope is more than 4.5 m, we mount the racks vertically so that they support the rafter leg from above and rest against the floor beam from below.
- We will install a canopy on the ridge.
- We determine the installation location of the chimney pipe and install a metal sheet around it to increase the level of fire safety.
- We attach a vapor barrier layer to the rafters with small nails. You can also use a construction stapler for this.
- We make lathing from the boards to securely fasten the roofing material. It can be vertical or horizontal. If a roll coating is planned, then the structure must be continuous. With slate, bitumen or metal roofing, you can leave a distance between the boards of 15-25 cm.
- We install a sheathing with a 20 cm overhang at the edges to protect the building and rafter system from external influences.
- We trim the end part. If in the future it is planned to equip the attic space, then we leave room for doors and window systems.
- We attach a layer of waterproofing to the slopes with a stapler. In some cases, a waterproofing membrane is installed between the counter-latten rafters and the sheathing itself. In this case, an air gap is formed. Thanks to this, the roof dries quickly.
- We lay the roofing material. We start installing the slate covering from the bottom up, from the back, and attach three sheets of the first row. It should be at the level of the cornice.
- Using a circular saw, jigsaw or wood hacksaw, cut the slate sheets in half and lay them overlapping.
- We fasten the slate on each side. On average we use 20 nails for one sheet.
- We install the steel angle at the end of the roof with self-tapping screws.
- We insulate and sheathe the roof slopes from the inside. The most suitable material for this is considered to be basalt mineral wool. We lay the insulation in a checkerboard pattern. To ensure optimal thermoregulation, its layer should be at least 10 cm.
- We provide thermal insulation of the ceiling. For hemmed, floor and panel types, different insulation options are used. This can be not only the cotton method, but also the bulk method.
https://youtube.com/watch?v=T9GVcFwg3RI
tutknow.ru>
Options for choosing roofing materials
In the retail chain, buyers can expect a huge selection of modern building materials for the construction of buildings for various purposes.
If you are building a bathhouse with a pitched roof, then there are no problems with purchasing quality products. When purchasing, first of all, you should pay attention to the durability of the roofing and whether its appearance matches the appearance of the building. An important parameter is the cost of the products.
The most popular roofing materials are:
- metal tiles are considered an expensive product, but durable (they can last for half a century). If this option is chosen, then the angle of the roof slope should be at least 30 degrees;
- corrugated sheeting is a durable coating; the minimum inclination angle cannot be less than 8 degrees;
- roofing felt - its cost is low, but its service life is insignificant (maximum 10-15 years), it is used for roofs with a slope of 5 degrees (more details: “Coating a roof with roofing felt - basic rules”);
- slate can be a reliable roofing covering for 3 decades. When choosing this product, the smallest slope angle is 20 degrees;
- Seam roofing is a durable option that allows for an inclination angle of 18 degrees.
Sloping roof for a bathhouse: construction technology
Materials for a sloping roof over a bathhouse
- Slate (from 250 rubles per piece);
- Tiles (from 28 rubles per piece);
- Metal tiles (from 200 rubles per square meter);
- Ondulin (from 200 rubles per square meter).
Preparing for the construction of a sloping roof for a bathhouse
- The total mass of the finishing roofing material;
- The load created by the elements of the sheathing and counter-lattice;
- Weight of insulating materials;
- The length of the span from the ridge to the eaves overhang;
- Slope of gentle and steep slopes;
- The spacing of the rafters and sheathing elements;
- Additional loads (precipitation, ventilation system, fencing, double-glazed windows).
Installation of a rafter system for a sloping roof of a bathhouse
- We attach a solid Mauerlat around the perimeter of the walls using steel wire and construction pins. For greater strength of the wooden frame, we make holes to a minimum. It is desirable that the studs fall between the rafter elements.
- We fix the floor beams at the lower level. Depending on the expected loads, they can be made from single or double timber with a total cross-section of 25 cm2.
- We install the front vertical rafters, securing them to the floor beams, and stretch the rope between them. It will be a kind of level for the following elements.
- We place intermediate vertical posts in increments of 2-2.5 meters.
- We fix all vertical parts with temporary spacers.
- We lay special purlins on top and attach the remaining racks strictly vertically.
- We attach transverse ties to the purlins and strengthen them with struts.
- We carry out installation of the side lower rafter elements. They can be prepared in advance, making only the top cuts. Initially, we fix the outer rafters, then the intermediate ones in increments of 1-1.2 meters. At this stage we make the lower cuts. All parts must rest against the load-bearing walls of the bathhouse.
- We install the upper rafter elements, attaching them to the ridge. For further installation of windows, we strengthen the upper part of the frame with transverse crossbars.
- We make additional bases for the gables of windows and doors on the outer rafters.
Thermal insulation of a sloping roof over a bathhouse
- We cover the frame with a vapor barrier membrane from the ridge to the mauerlat. We lay the material with an overlap of 20-30 cm. We glue all joints with metallized tape. To fix the vapor barrier, we use thin strips and a construction stapler.
- We install the main sheathing. The pitch of its elements depends on the density of the selected roofing material. A hard roof requires the installation of sparse sheathing, while a soft roof requires continuous sheathing.
- We lay a heat insulator between the sheathing boards and the rafters. The best option is mineral wool.
- On the inside, to securely fasten the insulation, we stuff the strips, performing additional lathing.
- We fix the rolled waterproofing on top with an overlap of 15-20 cm. We glue it with sealing tape.
Preparation for installation: sizing, drawings
For convenience, all calculations will be made for a bathhouse with a side of 5 m. It is recommended to build it from sawn timber, and use the top row as a mauerlat.
Before making rafters, it is necessary to make all the necessary calculations and measurements, as well as determine the angle of inclination of the roof and the dimensions of the wooden elements.
The roof system is subject to certain loads:
- the mass of rafters, sheathing and the roofing material itself;
- snow load and wind factors;
- workers' weight;
- the likelihood of natural disasters (they are not taken into account in our country, since they have a low percentage of the likelihood of their occurrence).
When calculating the thickness and width of the rafter system elements, take into account the totality of all types of loads.
The diagram will help you calculate the material
The lower elements of the rafters are placed on the Mauerlat, and they bear lateral and vertical loads. Horizontal ones are placed on crossbars. The ridge part of the rafters takes on the compression forces in the horizontal direction. Rafter spans are subject to the greatest degree of bending.
The choice of material depends on the loads on the rafter legs
When calculating the load, it is necessary to use correction factors that depend on the height of the house.
In order to determine the load, it is necessary to multiply the standard by the specified coefficient
There are also different snow load values depending on the climate zone.
If the weight of the roofing material is specified by the manufacturer, then the loads can be calculated independently
Belonging to a certain climatic zone can be seen on a special map.
Snow load map of Russia