Screed is one of the most initial and extremely important points in repair. This leveling layer is distributed between the base and the decorative material. When creating a screed, you can not only level the floor, but with its help you can disguise the communication system, improve the strength of the base, and also organize hydro- and thermal insulation.
Before starting work, it is necessary to determine the nature of the unevenness. To do this you will need a building level.
Sometimes the differences between the floor elements reach up to 100 mm in height, and the evenness of the surface can be disturbed by cement deposits, protruding reinforcement, etc. Such defects can be eliminated with the help of a high-quality screed. Let's look at the existing types and key features of each.
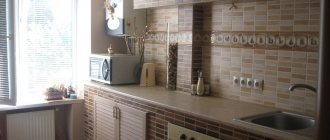
Leveling the kitchen floor using the dry method.
The surface is ready for laying decorative coating.
In spacious rooms, minor differences may not be noticeable at first glance. But this is only possible at the initial stage - the consequences of an uneven surface will still appear during the finishing process, or when filling the room with furniture.
Technology selection
To choose the option most suitable for leveling the floor of your kitchen, I advise you to first remove the old covering and inspect the existing base.
If you have an old screed with minor irregularities and defects, I recommend making a partial repair of it, or filling the surface with a layer of polymer-cement self-leveling mixture.
If there is no screed or its significant destruction, it is worth removing the entire layer before the overlap and making a new, reliable and durable screed.
We choose a screed, taking into account existing conditions:
- We choose a dry screed if your apartment is on the ground floor, there is an unheated basement under the kitchen or a room with a high noise level. It should be borne in mind that dry screed will significantly reduce the height of the room.
- A semi-dry screed is an ideal option for leveling the base in a used home. Due to the minimum water content in the solution, moisture from the screed is prevented from getting into the ceiling and lower floors of the building. The finished screed is ready for laying tiles in 3-4 days, for laying laminate and linoleum in 2-3 weeks.
- Wet screed is a cheaper coating option. A simple technology allows you to make it yourself.
Preliminary stage
Before you begin leveling the floor in the kitchen, you need to remove furniture and large household appliances from the room, remove the kitchen sink, and dismantle the finishing of the floor, walls, and ceiling. At the same stage of work, the installation or replacement of utilities is carried out, if required by the project.
Since the kitchen is a wet room, it may be necessary to install waterproofing, but this will require dismantling the old screed, which complicates the work and increases repair costs. But if you just have a cracked screed, then today manufacturers offer a wide selection of self-leveling mixtures for rough finishing of the floor, including for leveling complex bases - such materials are suitable for use with cracked, uneven screed.
When choosing a self-leveling mixture, consider the following parameters:
- curvature of the surface (if the height differences are large, it is better to level it in two steps - with a rough and finishing layer);
- condition of the screed (composition may be required for complex bases);
- type of finishing coating (the base under the tile must be rough to ensure good adhesion to the adhesive layer, the base under the linoleum must be even and smooth).
At the preparatory stage, you should clear the base of the floor of debris and carefully inspect the screed. Protruding irregularities must be eliminated with a spatula or using a chisel and hammer.
The cracks are cut out and filled with a quick-hardening mortar - this is required so that moisture from the self-leveling mixture does not go under the screed. The cracks around the pipes running vertically through the floor are also carefully sealed.
Self-leveling coating on existing screed
New modern technology for leveling the floor with a layer of 15-20 millimeters.
Prepare the mixture according to the recommendations indicated on the package.
We clean the existing screed from dirt. Small defects are filled with mortar and rubbed.
We prime the surface of the screed twice and let it dry.
Pour the finished mixture onto the prepared surface, spreading with a spatula.
Thanks to its fluid consistency, the mixture spreads, filling all the pores and irregularities.
Important!
To prevent the formation of pores and bubbles, roll the filled surface with a needle roller.
Figure 2. Pouring self-leveling screed.
You can walk on this coating the next day, and lay the finishing coating after 5-10 days, depending on the thickness of the layer and drying conditions.
This method is suitable if the surface of the screed has slight unevenness and cracks.
Preparation of concrete bases for screed
If the old screed has significant unevenness and damage, it must be completely removed.
We prepare the base for the screed in the following sequence:
- We dismantle all layers of the coating, right down to the reinforced concrete floor.
Figure 3. Dismantling the old screed.
- We remove dirt and dust from the concrete base. We seal the damaged areas with a solution. We prime the surface.
- We waterproof the base and adjacent walls 10-15 centimeters above the screed level.
Suitable for this:
- bitumen-polymer or rubber mastics;
- roofing felt, laid with an overlap of 10-20 centimeters, glued to a bitumen emulsion;
- dense polyethylene film, from 100 microns, laid in sheets secured together with tape.
Important!
Places of passage through the ceilings of risers of water supply, sewerage and heating pipes should be sealed with silicone sealant.
- Attaching a damper tape around the perimeter of the room to compensate for deformations of the screed due to changes in humidity and temperature.
Figure 4. Marking the screed level.
- We determine the marks of the top of the screed with a laser level and transfer them to the walls.
Dry screed
To ensure even filling of the expanded clay layer, we install beacons. Wood slats or galvanized metal profiles are suitable for this.
We install the outermost row of guides at a distance of 15-20 cm from the wall. The rest - in increments, 10-20 centimeters shorter than the length of the rule with which we will distribute and compact the backfill.
Important!
Install the guides according to the marks, checking the horizontal position strictly along and across the beacons.
Figure 5. Laying expanded clay.
For backfilling, it is better to take an expanded clay mixture of different fractions.
We start filling from the far corner of the room, gradually moving towards the exit. Carefully level and tamp the mixture.
Let it rest for at least a day and proceed to laying a solid base.
It is better to use two-layer Knauf gypsum boards for the top covering, two centimeters thick, fastened together with interlocking joints.
Figure 6. Laying Knauf floor slabs on expanded clay.
The advantage of a dry screed is that it does not put too much stress on the floors and is ready for installation of the final floor covering immediately after installation.
A significant drawback is that if water gets into the expanded clay layer, it cannot be removed from there without dismantling the entire coating. Because of this, this technology is not recommended for use in kitchens, bathrooms and toilets.
The main reasons for raising the floor level
Usually, during renovations in an apartment or house - especially an old one, where the ceilings are quite low - they try to make sure that the floors rise slightly during leveling. But in certain situations, the floor level may still need to be raised somewhat.
The main reasons for raising the floor level
Quite often, the procedure for raising the floor is associated with the redevelopment of the room. For example, the floor can be raised onto a loggia in order to then remove part of the wall and increase the space of the room. Also, sometimes it is necessary to level the floors in the entire apartment and make them at the same level, and here, too, most likely, you will have to raise the base a little in some room.
In neighboring rooms, the floors can have different heights, and they can differ either significantly or by just a few millimeters. It depends on the house itself and the type of room layout.
Raising the floor with a dry screed
In a private house, raising the floor level may be necessary to lay an additional layer of thermal insulation if the previously laid one is not enough. To do this, you need to raise the base a few cm (about 10) in order to lay insulating material into the void.
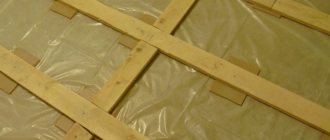
Communications under the joist floor, installation
Semi-dry screed
To create a perfectly even coating, we install guide beacons along the marks. They can be made from gypsum plasterboard profiles or timber.
When installing beacons, it is necessary to control them using a building level.
Figure 7. Semi-dry screed device.
When making a solution in a small volume, only for the kitchen, the mixture is prepared directly at the installation site.
It is better to take the ready-made dry mixture in bags and prepare it in strict accordance with the instructions on the package.
In the absence of ready-made compositions, we take grade 500 cement and washed river sand in a ratio of 1:3. Mix the dry ingredients in a concrete mixer or in a container using a drill with an attachment. Gradually add dry propylene fiber in small portions at the rate of 600-800 grams per 1 m3 of solution.
Add water to the dry mixture in a ratio of 1:0.3. Water is only needed to hydrate the cement.
To make installation easier, plasticizers can be added to the mixture.
We check the correct consistency of the mixture by squeezing a small amount of the mixture in a fist. The finished solution forms a dense lump without releasing water.
We place the semi-dry mixture between the beacons, distributing and tamping using a long rule.
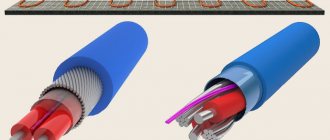
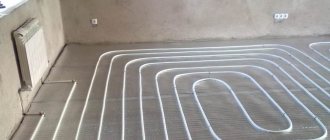
When installing a semi-dry screed on a heated floor system, first, foil-coated polystyrene foam is laid on a reinforced concrete slab, then the thermal elements are mounted. After checking the system, the semi-dry mixture is laid in a layer of 30-50 millimeters.
Important!
Do not place underfloor heating elements in areas where furniture or household appliances will be installed.
Two hours after installation, we remove the beacons from the profile or slats, and fill the resulting cavities with a semi-dry mixture.
Figure 8. Grouting a semi-dry screed.
We rub the screed using a trowel, moving over the freshly laid mixture using concrete shoes.
To protect against drafts, the surface can be covered with plastic wrap for 12-24 hours.
Briefly about the main thing
Before leveling the concrete floor, specialists determine the zero level using a bubble, laser tool or level. Then they choose the method of carrying out the work. The concrete base can be leveled using a “wet” cement-sand or semi-dry screed, as well as by applying a self-leveling mixture or fixing gypsum fiber sheets.
The materials used in all methods differ in the technology of laying on an uneven base. Professionals know this well. Therefore, their help is often used by homeowners who want to have perfectly smooth floors in their premises.
Ratings 0
Wet screed
We make wet screed using traditional technologies from cement and sand in a ratio of 1:3, thoroughly mixing until creamy.
You can use ready-made dry mixes following the instructions on the package.
Due to the increased shrinkage properties and the possibility of cracking, the cement-sand screed must be reinforced with metal or fiberglass mesh.
We pour the solution between the beacons and level it using the rule.
After a day, we remove the beacons, fill the voids with mortar and grout.
Cover the surface with plastic wrap to ensure uniform drying and protection from drafts.
This screed takes at least 28 days to dry and gain strength.
Figure 9. Production of cement-sand screed.
Undoubtedly, a semi-dry screed is the best option for leveling the floor in the kitchen. It is convenient to install it in multi-storey buildings, without the risk of water from the solution getting onto the lower floors. It does not overload the structures due to the small amount of water, and has good heat and sound insulating properties. Ideal for pouring underfloor heating systems.
It is important to entrust the work to professionals. And without much hassle, get a reliable, strong and durable foundation for any finished floor.
;
Kitchen floor screed
Content:
- Choice of technology.
- Self-leveling coating on existing screed.
- Preparation of concrete bases for screed.
- Dry screed.
- Semi-dry screed.
- Wet screed.
One of the main stages of a major kitchen renovation is leveling the floor and installing a base for its finishing surface.
The reliability and service life of not only the screed, but also the floor finishing depends on the quality of the material and the correct choice of technology.
Figure 1. Kitchen floor.
Features of the cement type
To understand the features of a cement screed that is applicable to your kitchen, you need to study the composition of the surface. To do this, remove the old base and clean it of dirt and dust.
- Screed with minor defects (irregularities, cracks) can be easily corrected by a simple partial finishing method.
- In case of serious damage to the integrity of the surface, it is necessary to carry out a major repair by replacing the old screed with a new one.
Depending on the environmental conditions, climate of the area, humidity, choose its type:
- Dry. Suitable for apartments located on the ground floor with high humidity. Under the kitchen in such conditions there is usually a basement (unheated) or a room with a high noise level. It should be taken into account that dry screed reduces the height of the room.
- Semi-dry. The water content in this solution is minimal, which prevents moisture from entering the lower floors or ceilings of the building.
- Wet. The simplest, most economical screed anyone can make.
The main reasons for the procedure
Owners of apartments with standard ceiling heights do not face this problem. If it is necessary to install heating pipes in a room, they try to slightly lower the floor base so that after installing the system, the ceiling height in the room does not change. When the house was built on stilts, and the heating procedure from the lower part of the living space did not show a positive effect, it will be necessary to increase the height of the ceiling partitions and carry out thermal insulation work in parallel.
Another reason that led to the need to raise the floor is the leveling of the base of the slab. In this situation, the choice of building finishing material (finishing material) is made quickly, since many products in this category meet the requirements of a rough coating.
Raising the floor structure is most often necessary in different rooms: kitchen, bathroom, bedroom, corridor, hall. But sometimes, for safety reasons, you need to increase its height on a balcony or loggia. In this case, questions arise when choosing and purchasing building materials. This is due to the fact that in all residential premises the base of the floor is represented by a concrete slab, so the way out of this situation is to raise it in the most convenient way with minimal expenditure of money, effort and time.
Compound
Ready dry mix
Ready-made mixtures for screeds are popular. They already contain the necessary components in compliance with important proportions. The master only mixes the mixture with water. Mixture ingredients:
- For rough leveling. A coarse fraction of sand and granite chips are added to the mixture. This composition is ideal for heated floors with a thickness of 30 to 80 mm. This option requires additional alignment.
- Self-leveling mixtures for finishing floor filling. The mixture is made by adding plasticizers to the fine sand fraction. The resulting surface is immediately ready for covering.
- Self-leveling composition - for clean coatings with a thickness of no more than 5 mm. It takes a short period of time to dry, but the composition is complex and costs several times more than other types.
- Mixture for pouring heated floors. It has an ideal consistency and high plasticity. Suitable for kitchen work on floor surfaces.
Attention
Very good compositions for preparing the mixture are made from gypsum. Sand and special fibers create additional strength. This composition is suitable for rooms with high humidity.
Preparation of the solution
The composition must include sand in certain proportions. The proportion of its content should vary at a rate of 4:1. That is, there should be four times more sand in relation to the other components. It is responsible for strength and all the most important performance characteristics. Cement is added in a small volume, then polypropylene fiber. Due to it, the strength and quality of the screed is enhanced. The plasticizer increases the elasticity of the surface and the entire material. Water plays a key role when mixing the solution. Depending on the climatic characteristics of the region and possible frequent pressure changes, the volume of the required liquid is selected. Take one share of cement and three shares of sand if the humidity in the kitchen is high. If the climate is dry, then four parts of sand are added to the share of cement. Reinforcing fiber is also added. Its quantity is 0.6 to 0.9 kg of ready-made solution per 1 sq. m. m. With these proportions, add water - 15 liters for every 50 kg of cement. When preparing the solution yourself, you should not use a composition lower than grade M150. It is best to take a proven mixture of a brand no lower than M200.
How to do it yourself?
Comprehensive preparation
- First, completely clean the surface of excess debris. To do this, sweep or vacuum the concrete surface.
- All irregularities are pre-cleaned and smoothed. Level the surface and prepare it for further work.
- The surface is completely dismantled down to the concrete floor.
- The junctions and bases of the walls are waterproofed approximately 10-15 cm above the screed level. Materials - bitumen-polymer or rubber mastics, roofing felt laid with an overlap of 10-20 centimeters and glued to a bitumen emulsion, dense polyethylene film from 100 microns, laid in sheets fastened together with tape.
Installation of beacons
Beacons are needed to level the surface and establish the same level of the floor with the walls and along the perimeter. Then you need to drive in the dowels and screw in the screws. The distance from each other should be no more than 1 meter. Between the screws, the densest possible thread is placed, horizontal in its location. This horizontality can be traced by measurements.
Advice
Beacons - slats made of metal profiles or pipes, benchmarks or tripods, even simple self-tapping screws. After applying the solution, the selected beacon option is set. Using a spatula or a rule, all defective areas are leveled so that the beacons are on a smooth base.
Damper tape
Damper tape is foamed polyethylene. Used to compensate for thermal expansion of concrete. The tape is laid between the kitchen wall and the screed being poured. The pressure compresses it at first, but after that everything returns to its normal state. The distance between the walls and the concrete layer is minimized, thereby reducing the damage that can occur if the coating deforms.
Fill
The screed is poured onto a flat and clean surface. Fill the surface layer by layer, first a small layer, then another and so on until the planned amount reaches the beacons.
Before direct pouring, you need to sketch a diagram or otherwise record all laid communications (you can take a photograph).
- Filling begins from the corner of the kitchen opposite to the exit. The solution is poured so that it is evenly distributed between the two beacons. The level of the poured mass should be slightly higher than the beacons.
- As soon as this is achieved, the unevenness is straightened and leveled using the rule. Excess is removed and added to those places where there is a shortage of solution.
- Repeat all steps until the floor is completely filled and leveled.
Important
All work must be completed on the day it starts, since the dried material may crack under the pressure of fresh pouring.
No. 4. Leveling with gypsum fiber sheets (GVL)
Leveling with GVL is called dry screed. This process is much simpler and faster, but the quality of the finished screed is inferior to a monolithic one. A layer of expanded clay is laid under the gypsum plasterboard, which plays the role of a heat insulator. The technology allows the use of other materials that have similar thermal insulation properties.
Leveling of GVL begins by cleaning the surface from dust and dirt, after which a waterproofing material, which can be a polyethylene film, is spread over it. Its strips are laid with an overlap of about 10-15 cm and overlapping the walls by 10 cm. Along the perimeter of the room, it is better to use an edge strip, which is placed between the plastic film and the expanded clay layer.
Expanded clay must be carefully compacted and leveled to the intended level. The first plate is mounted in the corner closest to the door, secured with self-tapping screws. When the first layer of gypsum plasterboard is ready, proceed to the installation of the second, which is attached with glue. It is imperative to shift the sheets by 25-30 cm relative to the first layer. For reliability, the second layer can be attached with self-tapping screws to the first. Some experts recommend installing beacons in the form of wooden blocks or metal U-shaped profiles. To move on expanded clay, sheets of plywood or gypsum fiber board are used.
At the final stage, the joints of the plates and the fastening points with self-tapping screws are primed , then the rest of the surface is primed, and the excess plastic film and edge tape are trimmed. An important advantage of this method of leveling the floor is the ability to perform it in stages, in several approaches, and not in one day, and this greatly simplifies the process when leveling the floors is done with your own hands.
Tools and materials
Tools for screeding a kitchen on your own:
- concrete mixer;
- cart;
- bucket;
- mixer;
- containers (for preparatory work).
You will need a shovel and a rectangular bath weighing about 90 liters. This volume is convenient for unloading; you can move the container yourself. It is better to take a galvanized bath, which will be just enough to fill a small kitchen area. You can use a 200-liter barrel as an option, just in case. You need to purchase a ready-made mixture or dilute it yourself. If you prepare it yourself, you will need a cement composition of sand and cement in a ratio of 4:1, and a gypsum mixture (gypsum and fiber additives). Expanded clay concrete, which consists of expanded clay sand and polystyrene granulate, is suitable for work. You need to purchase factory-prepared dry mixtures. The screed can be insulated with foam plastic. This measure is taken if the apartment is on the ground floor, when there is a possibility of the floor freezing. You can choose polystyrene foam that is not very thick, so under the floor and its insignificant width will be enough to retain heat.
Deciding on the method of leveling the concrete floor
Once you have decided on the maximum difference in floor heights, you need to analyze what can be improved with little effort. Take a close look at your floor. It often happens that there is some kind of hump that creates a large difference. cutting down concrete is still a pleasure, but if it helps reduce costs or reduce repair time, then you can do it. When everything that could be corrected has already been corrected, the height difference will again have to be determined. Next, you can choose how and with what to level the concrete floor.
Leveling a concrete floor in this condition is not at all easy.
For small differences up to 5 mm
If you have differences of 1-1.5 mm per two meters of length, this is generally an almost ideal floor and there is no need to level it. You can put any covering. If the situation is slightly worse, but the differences in height of the concrete floor are up to 5 mm, such deviations are considered small. Leveling a concrete floor can be done in several ways:
- There is no need to level it under tiles or porcelain stoneware. This difference will be covered by the thickness of the adhesive composition. But glue consumption will be higher.
- Concrete floors with differences of up to 5 mm can be leveled with a leveler. These are self-leveling compounds, which are specifically designed to level differences of up to 5 mm. For this case, finishing or medium levelers are suitable. Finishing ones are more expensive, but have greater fluidity, due to which differences after their use are minimal. But if the flooring does not require an ideal base, it is quite possible to get by with an average leveling compound - the costs will be lower.
Self-leveling floors can be made in layers from 1 mm to 15 mm - Use tile adhesive for leveling. But, firstly, the floor needs to be primed, and secondly, it is more difficult to work with than with self-leveling floors. The glue is diluted according to the instructions. You can just slightly increase the amount of water. But just “a little.” The main difficulty is that the composition is sticky, sticks to the rule and the spatula, and is difficult to level. The price is not much cheaper than with levelers, and it is easier to work with them.
Can also be leveled with tile adhesive
When choosing a composition for leveling a concrete floor, pay attention to strength. The strength of the leveling layer should be the same as the base. A difference of 50 units is acceptable, no more. For example, if your screed is M150, then the leveling layer cannot have a strength higher than M200. Why? Because if tensions arise in it (and they will arise), it will simply tear the bottom layer. And cracks in the floor are not good at all.
Differences up to 3 cm
Leveling a concrete floor with height differences of up to 3 cm is the most inconvenient task to implement. Laying a concrete screed less than 3 cm thick is problematic, since to guarantee long-term operation the layer must be 3 cm or more. If you can raise the floor level a little, you can use:
- Concrete screed made of DSP or expanded clay concrete.
- Dry screed on expanded clay chips with special GVL slabs (Ceresit technology).
How to level the floor without screed. The fastest way - Dry screed the floor with joists, but you will have to raise the floor by at least 6 cm. But you can improve the sound and heat insulation.
Leveling the floor under laminate, linoleum using a dry screed along the joists
If raising the floor level is not in your plans, you can use levelers. A coarse or medium composition will be needed. Look at the thickness of the layer. Three centimeters - most likely, you will find only in the starting lineups, and smaller ones (up to 15 mm exactly) can be found in the middle ones. Be prepared for the fact that when using a starting leveler, another layer may be required - a finishing layer.
How to level a concrete floor with differences of more than 3 cm
Leveling a concrete floor in an apartment with a height difference of more than 3 cm is traditionally done by laying a DSP screed. If you need to cheaply level the floor, DSP is your budget option. But the cement-sand screed for leveling has a serious drawback - it “matures” for 28 days. Moreover, at least the first week it is necessary to maintain high humidity. Then wait until it dries. In order for the concrete to be strong and not crumble or crack, the drying process cannot be artificially accelerated. And only tiles can be laid on a damp base. Other floor coverings have fairly stringent requirements for substrate moisture.
If you don’t want to deal with “wet” processes or the ceiling does not allow you to add a large load, leveling the concrete floor with a dry screed will help. There are two options - bulk and on logs. The second option is when one of the sheet materials is placed on the logs - plywood, fiberboard, fiberboard, gypsum fiber board. We get a flat surface with minimal differences. But this method will lead to the floor level rising by at least 7-8 cm.
Leveling the floor using beacons is one of the most popular methods
The bulk method of making a dry screed is to pour granules (usually expanded clay) onto the floor, level it and lay the same sheet material on it. It's easier and faster to do, but it has its own peculiarities. If you use the wrong backfill or level it poorly, during operation you may end up with distortions, holes, and dips. But, leveling the concrete floor in this way, following the technology, gives very, very good results. The “load capacity” of such a floor is up to 10 tons per square meter. So more than enough.
What to do if the concrete is covered with bitumen mastic
Sometimes, after removing the old floor covering, it is discovered that it was lying on bitumen. This situation often occurs in old housing stock. If you plan to level the concrete floor with a screed using beacons, all you need to do is inspect it for cracks and peeling. The peelings must be removed and the bald areas covered with a new layer of bitumen. Fill out the cracks as much as possible. Fill with polyurethane glue or epoxy resin, and also fill with bitumen on top.
If the damage is too extensive, remove the old bitumen completely if possible. If you can’t remove it completely, remove only the damaged areas and fill the cracks. Coat everything on top with a new layer - there will be excellent waterproofing.
If a bitumen-impregnated floor looks like this, it's best to remove everything
If you plan to level a concrete floor using “levelers” (levelers), it is advisable to remove the bitumen. It has a too smooth surface, which has a bad effect on the level of grip. A “spatula” attachment is installed on the hammer drill and beaten. Then they remove debris and dust, and prepare the surface for priming.
If bitumen cannot be removed, you can go over the leveling mixture several times with soil for difficult bases. The adhesion will be sufficient, but the cost of such a primer is high. When the soil is dry, you can pour the levelers.
How to care?
After complete drying on the 21-30th day, it is necessary to provide sufficient humidity.
This needs to be done for about 10 days. To prevent the screed from losing its quality and hardness, immediately after installation it is watered with water (but not copiously) for the first five days. You can take a two-liter bottle for wetting and make small holes in it. Irrigate the surface through them. If there is sufficient humidity in the kitchen and there is no stuffiness, then the floor does not need to be covered with anything. If it’s hot outside and the kitchen is not ventilated enough, then for these 5 days of humidification it is better to cover the floor with polyethylene. After this period, the polyethylene is removed. The surface is no longer irrigated so abundantly and often. Advice
In order for the layer to dry well under natural conditions, it is necessary to ensure an optimal hardening temperature at which the material will not swell and gaps will not form.
The optimal temperature in the kitchen during installation and drying is 5 degrees. This indicator indicates that no additional conditions are required. It will dry quickly under natural conditions. Screeding in the kitchen is easy to do. You need to calculate the amount of material and perform simple manipulations. After filling is completed, the floor must be sprayed with water and covered with polyethylene.
How to raise the floor above 10 cm
If it is necessary to raise the floor above 10 cm, a screed alone will not help. Lightweight aggregates will be required here. Fine-grained pumice, sand or expanded clay are used as building materials. First, they scatter over the entire surface of the subfloor. Then the solution is poured onto them in such an amount that it slightly covers the frames. Otherwise, it will be difficult to remove excess.
If the height is over 20 cm, the pre-dry mixture is filled with cement laitance, on top of which a screed is made. For cement screed it is better to invite specialists, but for wooden screed you can do it yourself.
Main types
Cement
This method is the most popular, since using a cement or concrete screed you can level out serious differences. In addition, this alignment method does not require special skills; the technology is quite simple.
The main disadvantage of this method is the long drying period, but the main advantage is that the material is environmentally friendly and excellent for use in the kitchen.
Self-leveling
A modern leveling option. A special composition with a thickness of 20-30 mm is distributed over the entire base, after which the mixture, due to its good fluidity, fills all the depressions on the surface.
Dry
To use this method, an experienced craftsman is required. The first leveling option is to install wooden logs, on top of which plywood sheets are laid.
The second method involves installing a first layer of expanded clay, sand or a special mixture, after which sheets consisting of gypsum fiber are fixed using glue or self-tapping screws.
The gypsum fiber layer is considered quite fragile; even heavy decorative material is undesirable for such a floor. The load should be distributed evenly over the entire area.
Ready-made composition for creating a dry screed.
Distribution of material throughout the entire kitchen area.
The top leveling layer is gypsum fiber sheets.
Plaster
This type is used quite often in apartment renovations, since the material is harmless to humans and also contributes to the formation of the correct humidity and temperature conditions in the room.
The laying technology is the same as pouring concrete for the floor, but gypsum hardens faster than concrete.
With plasticizers
The basis for the mixture is a concrete solution, to which special plasticizers are added. This material regulates the level of humidity, improves the strength and thermal conductivity of the floor, does not absorb water, and is excellent for use in an apartment.
To create a screed, you need an experienced specialist who will form a composition with the correct ratio of plasticizer and cement.
Raising the floor level in rooms
In rooms, you should choose the method of raising the floors according to your own preferences, the strength of the floors and the properties of the selected finishing coating. Since the area in residential premises is usually larger than in a bathroom or toilet, the mass of the cement screed here will be significant. Thus, in rooms it is easier to use a wooden joist system to raise the floor.
In general, the floor level usually rises to a maximum of 10 cm, and according to average indicators - only 2-3 cm. If the floors need to be raised as much as possible, it is also recommended to use a joist system. The voids between them can be filled with insulation or other materials so as not to “move through the air.” It is optimal to use mineral wool or polystyrene foam as a filler.
Raising the floor in an old apartment
So, the decision on choosing a method to raise the level is influenced by the following aspects.
- Budget for repairs . Some materials are more expensive, others are cheaper, and you need to correctly calculate all possible options and choose the best one.
- Rationality of the work carried out . You don’t always have to choose a complex and time-consuming option; sometimes the simplest is enough - it will be enough to lift the floors without effort and at minimal cost.
- Labor costs . It is always worthwhile to adequately assess your time and effort that will have to be put into performing certain works.
