Beton-House.com
Website about concrete: construction, characteristics, design. We combine the experience of professionals and private craftsmen in one place
Concrete screed: not only practical, but also beautiful
At a certain stage of construction, or when carrying out major repairs, the owners are faced with a dilemma: to install a self-leveling concrete floor or to prefer other methods of leveling the floors.
A self-leveling concrete floor is certainly an economical and effective solution to the problem of leveling the base. But when finishing the floors, it is important not only to level the base, but also to carry out the work with minimal financial costs. Let's consider all the methods of leveling the floor using solutions, evaluate their effectiveness and tell you about the advantages.
- Types of mixtures
Leveling the floor
If you decide to install self-leveling concrete floors, then, first of all, you should understand that this procedure will take a lot of time. There is an absolute plus: the process does not require special construction skills, and all work can be done independently.
Preparation
As with any screed, the procedure begins with inspecting and cleaning the old floor. Not only will the topcoat have to be removed, everything will be removed, including the previous fill. If the old concrete covering is of poor quality, it should be dismantled to the level of the slabs.
Such careful dismantling is done not only for the high-quality installation of a new self-leveling floor, but also for the reason that self-leveling floors over old concrete will eat up the height of the ceilings in the room: the minimum thickness of a concrete floor is 7 cm.
Attention! Even in a situation with a new apartment, purchased in a state of complete renovation, evaluate the quality of the fill: if the screed is soft and loose (the builders did not maintain the proportions in the mortar), it is best to dismantle such a fill.
The base must be repaired and cleaned before pouring.
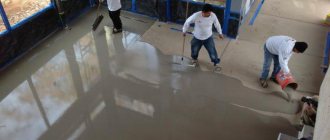
Pouring concrete screed
After the base has been prepared and cleared of dirt and dust, a self-leveling concrete floor is installed.
The sequence of work is as follows:
- Base primer. Deep penetration solutions should be used. Before priming, it is necessary to repair any existing cracks or depressions. After the solution is absorbed into the surface, usually after 2-3 hours, further work can be done.
- Waterproofing. Depending on what your base will be, the film can be laid in different ways. The main requirement for rolled material is overlapping laying with the seams secured with construction tape.
- Thermal insulation. Even if in the future a horizontal heating system is installed in this area, it is necessary to lay insulation material. This will eliminate significant energy losses, which is a very significant factor at current energy prices. Before you start laying, position the slabs without fixing them to determine the best cutting. Laying the material begins from the far corner, fix the insulation, glue the joining seams and the perimeter near the walls.
- Installation of beacons. Focusing on the zero mark, fix the aluminum guides to the cement mortar. When installing, use a building level to avoid deviations from the horizon. Beacons should be located at a distance not exceeding the size of the rule. The first line is fixed 0.3-0.5 m from the wall. After making sure that the guides are horizontal, we leave the solution underneath them to harden.
Installed aluminum beacons on cement mortar
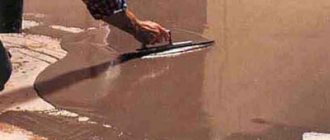
- Pouring concrete. The solution is mixed in small portions so that it does not have time to set while you are working with the previous volume. The solution is applied from the far corner and pulled out using the rule along the beacons. Do not lean on the beacons, otherwise there is a danger of shifting the level.
- Roller work. The poured screed must be passed over with a needle roller.
- The screed is covered with plastic film and left to gain strength.
Ready poured concrete
- The process of pouring the concrete screed will take at least 4 weeks.
- If you try to save time by placing beacons on plaster mortar, you will only add more work to yourself.
- The guides will set faster, but after pouring the gypsum will have to be removed from the screed, which will significantly add hassle and will take a lot of time.
In addition to the main rough screed, other pours can be made using concrete mortar.
Features of the use of various screeds in practice
The advisability of using one or another type of screed or a combination of them depends on several factors.
An indicator for the use of cement-sand screed is the complex terrain of the floor, namely:
- large differences in height between floor slabs;
- significant unevenness, potholes;
- large angle of inclination of the plates.
These defects require the installation of a thick layer of screed, therefore, the advantage of using cement-sand mortars in this case is undeniable.
If it is necessary to achieve significant heat-saving characteristics of floors, for example, interfloor, perilite, expanded clay or polystyrene foam balls are added to the cement-sand screed. Heat-saving functions are not characteristic of self-leveling floors and heat-saving indicators cannot be achieved by adding any additives.
Advice: It is believed that you can make a self-leveling floor yourself, without resorting to the services of specialists.
The stages of surface preparation for all types of screed can be characterized as follows:
- cleaning floor slabs or existing rough fill;
- surface dust removal;
- treatment with primer compounds to ensure better adhesion.
Ready-made concrete floor screed
Various filling methods
Generally, the pouring method depends on what substrate the mortar is being applied to and what type of finish the pour will be used for.
Conventionally, it is customary to distinguish three methods of pouring the solution:
- Self-leveling floor on concrete. A situation where the fill is a finishing coating. The thickness of such a layer is no more than 1.5 cm. For better adhesion, the concrete base is sanded and primed before pouring. This method makes it possible to do without further finishing work, but requires perfect evenness. After drying, it is usually varnished or painted.
- Two-layer cake: the solution is poured onto a base with fundamentally different physical qualities - for example, wood. To ensure that the properties of both materials do not harm each other, a separating layer (polyethylene) is laid between them. The thickness of this fill is no more than 2 cm.
- Floating screed. In this case, the base may be similar to the fill - but a leveling layer is placed under a finishing material of a different property, for example: laminate or parquet. In this situation, a separating material (film) is also laid over the walls and glued along the entire perimeter with damper tape. The thickness of the layer is no more than 2.5 cm. After laying the decorative material, the remaining film and tape are cut off, and the gap is closed with a plinth.
Wooden floor prepared for pouring floating screed
Regardless of the method used to construct self-leveling concrete floors, the technology for pouring them is the same:
- Work is carried out from the opposite corner towards the exit.
- You can't rely on lighthouses.
- The rule is to drive in a zigzag pattern.
- Do not leave a large volume of unleveled mortar on the floor.
- When mixing, it is necessary to strictly observe the proportions.
- Having finished pouring, it should be covered with polyethylene and access to the room should be closed.
Self-leveling floor on concrete screed
Let's sum it up
For quick orientation when using types of screed, depending on the coating and leveling thickness, we present a general table.
Parquet, laminate, linoleum, carpet, other material that requires a flat surfaceTile, mosaic, stone, other material that requires a rough surfaceThin layer of filling from 0-5, mm Self-leveling floor Self-leveling floor Middle filling layer from 5-30, mm Self-leveling floor/screed Modified screed Thick filling layer , significant height differences and defects - 30-200, mm Combined method - screed with self-leveling floor Any type of screed
Pouring materials
The possibility of leveling the floor is not limited to concrete mortar. You can purchase dry construction mixtures or mix cement mortar. In addition, there is a wide range of self-leveling mixtures. Therefore, it is important not only to understand the pouring technology, but also to choose the right material.
Let's compare the capabilities of different compositions:
| Type of solution | pros | Minuses |
| Concrete |
|
|
| Cement-sand mixture |
|
|
| Dry construction mixture |
|
|
| Self-leveling floor |
|
|
Packages with ready-made dry mixtures always contain detailed instructions for application. CPS (cement-sand mixture) can be prepared independently by mixing M500 cement and sifted fine river sand in a 1:3 ratio.
The proportions of the concrete solution depend on what kind of screed is poured. The most interesting in this series are self-leveling floors. A little more about them.
Advantages of ready-made mixtures
The quality of floor coverings is influenced not only by the material they are made of, but also by the strength of the base. It should be as smooth as possible and withstand all loads without problems, and not change its linear dimensions during temperature fluctuations. Modern self-leveling mixtures fully meet the most stringent consumer requirements.
Self-leveling mixtures have a number of advantages
The advantages of the material include important characteristics.
- Great mechanical strength. This property applies only to cement-based mixtures; gypsum has worse parameters. But each floor covering has its own individual requirements; some are satisfied with the characteristics of gypsum.
- Manufacturability. Working with such materials is much easier than making traditional screeds using semi-dry cement-sand mortars for lighthouses.
- Minimum shrinkage parameters. When hardened, the material almost does not lose its original horizontal characteristics, does not sag, does not swell, or cracks.
- High adhesion values. If you fully follow the manufacturer's recommendations, the likelihood of detachment is almost eliminated. Due to such properties, it is possible to significantly reduce the thickness of the layer, and this is a significant saving in expensive compounds.
To ensure high-quality floor leveling, it is necessary to strictly follow the workflow technology
The only drawback is the relatively high price. But professionals know the secrets to reducing the estimated cost of floor repairs; savings can reach significant amounts.
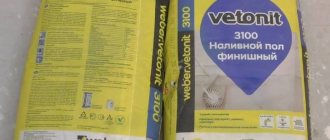
Self-leveling floors
When considering mixtures for self-leveling floors, it is worth immediately clarifying that they are divided into levelers and finishers. At the same time, the specifics of use are such that when using a branded leveler as a base, it is necessary to fill the finishing layer of the same brand. But the finishing layer itself can be applied to any base.
What is the fundamental difference between the mixtures:
- Levelers are essentially a replacement for rough screed. The mixtures are applied along beacons, using a technology similar to applying concrete mortar. Rule alignment required.
- The finishing mixture, as the name suggests, can be a decorative finish. The application layer is no more than 30 mm. They have very good fluidity and do not require additional leveling.
Any construction brand that produces a leveler necessarily offers a finishing filler for it. The photo shows several possible options.
To level the floor, modern manufacturers of building materials offer mixtures of various compositions and filling methods. You can do the work using self-leveling floors yourself, but you should take into account the type of composition and pouring conditions in advance.Types of mixtures
All existing types of mixtures for self-leveling floors differ according to the following criteria:
| Layer height | Highly filled and thin layer |
| Participating Mixer | Aqueous and solvent |
| Electrical conductivity | Antistatic and electrically conductive |
| Texture | Smooth and rough |
In addition to these indicators, it is very important to know what binder the mixture is based on.
The following mixtures are available on the construction market:
- Polyurethane. The basis is transparent polyaspartates. Finished floors are highly elastic and resistant to color fading. Give owners the opportunity to create 3D images on the surface. At the same time, they have very low resistance to mechanical stress.
- Epoxy. They are made from epoxy resin and quartz sand using a hardener. They have very high resistance to chemical and physical influences. The highest price tag of all possible options and a long hardening period.
- Cement-acrylic. They tolerate physical activity well, have an anti-slip effect, and are suitable for outdoor use. A significant disadvantage is the large labor costs of installation.
- Methyl methacrylate. They dry very quickly and are suitable for rooms with high vertical static load (production workshops). Toxic when poured, safety precautions must be observed.
Modern technologies of self-leveling floors give enormous scope for imagination
More about pouring conditions
For any type of mixture used, there is only one requirement for a concrete base for self-leveling floors: the surface must be of high quality and without flaws. Depending on the type of mixture, the drying period for the floor varies. As a rule, the surface can be used after 3–4 weeks.
During this time, certain conditions must be observed:
- It is necessary to maintain a constant temperature inside the room. Ideal conditions are temperatures within +15 - +25 degrees.
- When applying, the moisture content of the concrete base should not exceed 4%.
- To maintain these parameters, drafts should be avoided in the room.
The surface of the self-leveling floor after drying
Floor pouring instructions
If you decide to fill the floor yourself, be sure to read the instructions on the package.
Each mixture has its nuances, but in general the order of work is as follows:
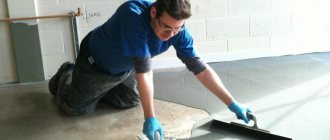
- Mix the solution, strictly observing the proportions specified by the manufacturer. The optimal composition is similar in consistency to thick sour cream.
- Pour the mixture onto the subfloor and spread using a wide spatula. The minimum pouring thickness is 5 mm. You can make the layer thicker - this will increase strength, but will entail a significant increase in financial costs.
- Go over the surface with a needle roller to remove air from the composition.
When walking with a roller to work on large areas, wear special shoes
Important! If you are using a mixture with an aqueous solution, then increasing the amount of water will give better spreadability, but will lead to cracking when drying.
If the floor has been leveled under decorative sheet or roll material, then the work is complete. But if you plan to finish filling, then after complete drying the entire cycle of work should be repeated, but with the finishing solution.
After complete drying, at first the finishing layer should be protected from sunlight and water.
Attention! Self-leveling floors can be used for any decorative finish: laminate, parquet, tiles, linoleum. There is only one thing that doesn’t make sense: installing a self-leveling floor under concrete.
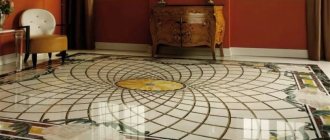
Decorative self-leveling floor in the interior
The video in this article will introduce you to the technology of working with self-leveling floors.
Brief information about the features of concrete screed
Over time, cracks and scratches appear on the concrete surface, which inevitably leads to the need to level the flooring. It is impossible to efficiently install or replace laminated or parquet flooring or linoleum without restoring the concrete screed. The minimum thickness of pouring the concrete mixture when eliminating deficiencies in the existing concrete screed is 30 millimeters.
TIP: The surface of the concrete screed must be additionally sanded if relatively thin linoleum is to be laid. However, sanding costs extra money.
Specialists make concrete screeds using beacons; it is this technology that allows you to maintain the required level throughout the entire room. The need to use beacons and manually level the mixture with a special tool also makes the process labor-intensive and classifies the screeding process as low-tech.
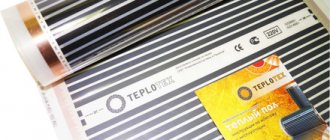
IMPORTANT: Experienced specialists note the positive aspect of using a screed - elements of the “warm floor” system can be immediately laid inside it.
The advantage of a concrete screed: it can be used to install a heated floor system
Level determination
The first preparatory stage is determining the fill level. It is necessary to prepare the most even base possible.
If using a laser level, place the device on the highest point of the floor and turn it on. The laser will create a red line around the perimeter of the room. Place marks on the walls in the places where the laser points.
If it is not possible to use such a modern tool, you can get by with a traditional hydraulic level. The process takes longer, but we can also do it ourselves. The main thing is to be careful and attentive.
Find the highest point of the floor, located near the wall, measure 5-6 cm up from it and apply a mark. Now you will need a long rail or guide. Attach the guide along the wall to the mark and, using a construction hydraulic level, level it parallel to the ground. Make marks on the wall along the length of the slats and on the opposite wall. Treat the entire room in this manner.
Now attach the rope to the wall and connect the marks on opposite walls, preferably crosswise. If the rope does not come into contact with the surface, then the fill level has been determined. If the cord touches the surface in some place, you will have to repeat the previous step, placing the marks slightly higher than the previous ones. To begin with, add 2-3 centimeters and look at the result. In most cases, this is enough, and there is no need to move the level higher.
Types of cement screed and their characteristics
The choice of installation technology depends on the physical properties of the materials used.
| Type of screed | Compound | pros | Minuses |
| "Wet" | Components:
| The base is able to withstand vibration. It turns out to be very hard and durable, so it can withstand dynamic and static loads. The floor can be raised from 30 to 100 mm. |
|
| "Semi-dry" | The ingredients are the same as “wet”, but 3 times less water is taken. This is enough to hydrate the solution, but it is difficult to mix without a concrete mixer. |
| The height is “eaten up” up to 4 cm. Under a “warm floor” - 5 cm. The project is more expensive due to the high requirements for sand (only sifted and quarry sand). |
| "Dry" | Instead of sand, expanded clay, perlite or vermiculite are used. The first layer is covered with a sheet of plywood, chipboard, gypsum fiber board or OSB. The final coating is applied to the sheet material. | The technology is extremely simple - no small mechanization is involved. The load on supporting structures is reduced. High noise insulation. |
|
In terms of strength, the “wet” screed wins. It is most often installed in hangars for storing heavy special equipment, factory floors, industrial zones and open parking lots. The use of a complex of additional reinforcing materials makes the floor practically invulnerable.
How to reduce the consumption of levelers
The consumption of the building mixture directly depends on the total area of the uneven surfaces and the absorbency of the base itself. It is better to level overly porous and damaged surfaces using a regular cement or dry screed, since filling with a leveling solution will be too expensive. But if the base is dense and the uneven area is small, proper preparation of the floor will help reduce the consumption of the mixture without reducing the quality of the pour.
Elimination of irregularities
The smaller the number of recesses and cracks, the less mortar will be needed for filling. The main defects can be eliminated using available tools and putty.
Putty for concrete floors
To work you will need:
- grinding attachment;
- perforator;
- putty knife;
- primer;
- putty solution.
Concrete floor repair
In order not to miss a single crack, the base must not only be swept, but also vacuumed. The exfoliated concrete is cleaned off, and the tubercles protruding above the floor are knocked down with a hammer drill. Cracks with a width of more than 2 mm should be expanded along their length and removed from dust; on long cracks, perpendicular notches should be made with a grinder. It is convenient to remove roughness and small irregularities using a grinding wheel. After this, the floor is vacuumed again, all recesses and cracks are treated with a primer, dried and filled with polymer putty. When the putty areas have dried, their surface must be sanded.
| Name and packaging | Application base | Consumption kg/m2 | Maximum layer thickness | Drying time | Price RUR/pack |
| PVA-based putty, 4 kg | Plaster, concrete | 0,450 | 3 mm | 5 minutes | 154 |
| Putty stone flower, 25 kg | Concrete, wood, plaster, drywall | 1,4 | 10 mm | 24 hours | 138 |
| Ready putty Sheetrock, 3.5 l | Any | 0,67 | 2 mm | 5 o'clock | 350 |
Padding
Padding
Primers impregnate the top layer of concrete or screed, filling pores and microscopic cracks. Thanks to this, the leveler spreads better over the base and is consumed less. But keep in mind that the primer must match the surface to which it is applied and have high penetrating properties. For porous substrates there is a special strengthening primer, which is not suitable for ordinary floors. Before applying the primer, the floor must be cleaned of dust and oil stains must be removed. As a rule, the base under the self-leveling floor is primed twice; Until the first layer has dried, the surface cannot be treated again.
| Name, weight | Description | Drying time | Consumption kg/m2 | Price |
| Acrylic universal primer, 10 l | Suitable for concrete, cement-sand and gypsum bases; strengthens the surface layer, reduces diffusion capacity | 1 hour | 10 | 151 rub. |
| Soil BOLARS Betonkontakt, 12 kg | Suitable for concrete, stone, plastered surfaces, increases adhesion | 15 o'clock | 0,3 | 712 rub. |
| Primer for absorbent substrates CT17, 5 kg | Suitable for concrete and cement-sand screeds, has antifungal properties and elasticity | 4 hours | 0,2 | 251 rub. |
| Axton concrete contact, 18 kg | For treating smooth concrete substrates, increases adhesion | 2 hours | 0,25-0,3 | 788 rub. |
| Adhesive primer GLIMS BetoContact, 4 kg | For processing smooth concrete substrates, floor tiles | 24 hours | 0,3 | 272 rub. |
General information
A level for tearing out a floor is used when it is necessary to lay:
Linoleum;- Laminate;
- Tiles;
- Carpet.
Advantages of self-leveling mortar:
- Allows you to work in small layers;
- Gives a durable and smooth coating;
- The poured floor dries quickly and hardens.
Despite the fact that this type of mixture makes it relatively easy to obtain a perfectly flat surface, they are very capricious - a high-quality base is necessary.
Therefore, before starting work, you need to familiarize yourself with the technical features and instructions.
Preparing the leveling mass
In an ordinary bucket, fill two-thirds of the volume with water. Then pour the dry mixture from the bag and mix thoroughly with a construction mixer until a uniform solution is obtained.
To get the solution to the required thickness, you need to experiment. In order to fill the screed level with a thick layer, you will need a thick solution.
When obtaining a layer more than two centimeters thick, it is best to equip the screed using beacons. But due to the fact that we do not take into account the ideal zero, we do not need to install beacons. If you need a solution less than five millimeters thick, you need to make a mixture with a consistency reminiscent of sour cream.
We install beacons
At this stage, you need to install beacons for the self-leveling floor. To do this, you need to prepare a certain amount of cement mixture, with which you will secure the beacons to the base.
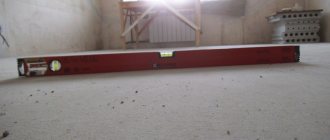
It is convenient to use aluminum profiles as beacons, suitable for correcting various height differences. The installation of beacons must be done with a liquid or laser level.
In this case, the surface uniformity will be most accurate, and this directly affects the quality of the final coating.
If you are leveling the floor in the bathroom and plan to lay porcelain tiles or floor tiles on it, it is especially important to make the base level.
On a screed that is not too level, the tiles may subsequently begin to crack, break and peel off. After installing the beacons, level the cement mortar with a spatula, filling all the voids between the beacons and the base. Wait for the cement mortar to dry, and then begin preparing the dry polymer mixture for pouring.
Carrying out work with large differences in the concrete base
Cement screed is the cheapest way to level floors and is required when there are large differences. And in order to further simplify the process, guide structures - beacons - are used. They are fixed to the floor at a distance of 500–800 mm, aligned in one plane using a level.
The next stage is to prepare a solution of the appropriate consistency, add plasticizers to it and place the resulting material on the concrete.
After the screed has set, the guides must be removed by filling the remaining grooves with solution. After 4 weeks, the surface of the screed is rubbed and strengthened by treating it with a primer. A faster way to level a large area is the semi-dry screed technology.
Installation of beacons
Beacons are lines along which the floor is leveled. Drywall guides, which are sold in any hardware store and cost little money, are suitable for this purpose. The main advantage is a flat surface.
Lay out the guides at a distance of 60-80 cm from each other so that their height reaches the marks made on the wall. After this, check for evenness. Place the plywood on top and use a level to make sure there are no distortions.
If the guides are not level, place plywood or drywall underneath them. After each manipulation, check the level again.
For reliability, you can secure the guides using long screws and a hammer drill. This way the lines will definitely not move during the filling process.