Natural wood lining is again gaining popularity; it can be seen not only in country houses and on balconies, but also in the interior of kitchens, bedrooms and living rooms of city apartments. And this is not surprising, because its advantages over other finishing materials are obvious and undeniable. It is durable, helps retain heat, and maintain an optimal level of humidity in the room. And everything has been said a long time ago about the aesthetic properties of the lining and the incomparable woody smell. However, wood requires special care, which includes processing and coating with various compounds. In addition, painting the lining solves the problem of a boring color or an undesirable association for someone with a sauna or a summer house and allows you to change the style of the interior without giving up this excellent natural material.
How and why is the lining painted?
The lining may need painting, varnishing or other compositions for several reasons, which determine the choice of a specific product:
- A tree needs protection, which can be different. For example, for lining on a balcony, you need to think about enhanced protection against UV rays, which cause photoaging (greying of wood). Some compositions make the lining more fire and moisture resistant and protect against pests.
Pine is often used as a material for interior decoration. If left untreated, the wood may darken over time.
- You need to preserve the color of the wood and make the design more expressive.
- It is necessary to change the color of the lining, but at the same time maintain the structure of the wood.
- The interior of the room does not involve the use of natural wood color.
The following products can be used to paint or otherwise process the lining:
- Protective compounds. Can be intended for different purposes. To treat lining on a balcony, especially one located on the sunny side, it is better to use a composition for external work. For the ceiling and walls indoors, a product for interior work is suitable.
Important! When choosing a protective product, carefully study the information on the packaging. Some compounds paint the wood pink and green, which can only be painted over with a very dark tint or opaque paint.
- Stains (compositions for tinting). They give the lining a certain shade, preserving the wood texture. By applying different numbers of layers, you can adjust the intensity of the coloring.
- Lucky. For lining, aqualacs are best suited - water-based compositions that allow you to maintain the vapor permeability of the material and protect the surface from absorbing contaminants. Varnishes can be glossy, matte, semi-matte, contain bactericidal additives and UV filters, and you can add color to them to change the shade of wood.
USEFUL INFORMATION: Panels on the wall: how to make them yourself from stones, wood, wallpaper and plaster?
- Paints. They can have a wide variety of compositions and are designed to completely paint over wood by creating a dense film on the surface.
- Wax compounds. They can be solid, liquid, water-based, provide excellent protection, and retain the distinct structure of the tree.
Important! In order for the wax to spread evenly, the surface of the lining must first be primed.
- Special oils. They can be transparent and pigmented, protect the wood from dirt and abrasion, and emphasize the structure of the wood. They do not create a film on the surface, like varnishes, but penetrate into the top layer of wood. Creates a matte finish or silky shine effect.
Depending on the purpose of application, these products can be used either independently or in combination with each other. For example, impregnation and paint can be used to protect and achieve a uniform painted surface.
Related discussions
Black ceiling - to do or not?
I really need advice on choosing furniture colors!
Need advice from designers who love working with wood
sapienti
Here a very similar option is described, albeit in English and with local materials, but Google will translate, and I think analogues can be found here too:
And here’s another technology (similar to what Dennis described):
- Like
- Save
Tatyana Tatyana
What kind of stain was it, water based? If yes, you can try Tikkuril paint, they have wood paint for exterior use, I won’t tell you the name, you need to consult with the sellers. The paint leaves the wood texture visible without covering it up. The covering one is called Vinha, there are very beautiful shades. Can I use it?
- Like
- Save
Choosing paint
If we are talking about painting directly, you will need paint for the lining of one of the following types:
- Oil paint. Penetrates deeply, protects from external influences, and is suitable for painting lining on the balcony. Disadvantages: takes a long time to dry, fades over time.
- Alkyd enamel. A universal paint that creates a dense, most often glossy coating that is resistant to external influences and durable. The disadvantage is the limited selection of shades.
- Acrylic water-based paint. Used more often than others, it creates a matte, translucent coating. When applied in a thin layer, it allows you to preserve the structure of the wood.
Choosing the “right” boards
Pine has significant knotiness, but in our case this is part of its attractiveness and uniqueness. Regular, non-rotten, hard knots, which are an integral part of the structure of the board, are not a hindrance, but “dead” such elements of wood should be avoided. That is, the rotten ones, those that stagger, fall out. Also, boards with accumulations of these formations near the core or with knots around which the wood grain lines sharply change direction should be rejected.
But even boards with these disadvantages are quite suitable for use. The problem can be solved in a simple way: by securing the falling knots with epoxy glue. Do not be afraid that over time its adhesive properties will weaken and the board element will fly out or crumble. This glue is based on epoxy resin, which is extremely durable after drying.
Choosing the color of the lining
We found out how to paint the lining; it’s time to decide on the shade of paint. Many of the shortcomings of the room can be advantageously turned in the other direction if you “play with color” a little. Need to expand your space? Choose paint in white or light beige shades. But remember that they are susceptible to rapid contamination. A dark tone, on the contrary, will visually reduce the size of the room.
You cannot make the ceiling, walls and floor contrasting in color. It is best to leave natural wood in the bedroom, and choose paint in subdued tones to decorate the office.
Stages
If the master has chosen pine as a material for the floor or other elements of the room, then you need to take into account the properties of this wood when processing it with stain and varnish. The steps for proper operation are:
- Buying high-quality “correct” boards.
- Grinding.
- Primer.
- Impregnation with stain.
Many carpenters and woodworkers love pine because it is easy to work with, light weight, and low cost. In addition, this wood is available everywhere.
When finished with transparent materials, the pine surface seems to radiate warm sunlight. This effect is rarely found in other breeds.
Fewer problems arise when the task is to preserve or emphasize the natural color. But if you need to give it darker shades, then the result of impregnation with stain will often be unpredictable. This is due to the fact that, due to resin substances, pine wood has different absorbency in certain areas. The unevenness of this process makes the surface mottled or with stripes that differ in tone.
Because of this drawback, you should not refuse to process such material. You can tint pine boards evenly if you know the technology and how to do it correctly. This will require only a few simple steps and a little more time to prepare the wood.
We paint the lining according to all the rules
Painting lining involves a certain sequence of actions that must be followed.
- Cleaning from dirt and dust.
- Surface grinding.
- Application of antiseptic and primer.
- Coating the lining with paint or other selected composition.
Ideally, the lining should be painted before installing it on the wall, painting each board separately; it is extremely difficult to properly apply paint on a ceiling or walls already covered with lining. Painting the finished surface is allowed only when the paint is renewed.
Uniform tinting of pine: 4 steps for a perfect result
In retail outlets, there are often many other related species in stacks of finished pine boards, but sellers do not make much distinction between them, calling everything “pine.” Such species are very close in botanical classification, but still, they are not quite pine and they have slightly different properties. That is, they will absorb stain differently. However, this is also observed in pure pine: even the same board can have a different resin content and different absorbency in different areas. What can we say if the boards chosen are from different trees.
Unpredictability is something to consider when starting to use stain for this breed. To determine its level and boundaries, test samples are used. This is the most reliable method to check the quality and parameters of the material.
Preparing lining for painting
If the lining is painted for the first time, the front side of the individual planks is sanded until smooth using a sanding machine or sandpaper mounted on a block.
USEFUL INFORMATION: How to waterproof the floor and walls in the bathroom with your own hands
In the event that already painted lining on a wall or ceiling is to be varnished or painted, the sequence of actions will be as follows:
- Using a scraper or brush, remove dust and remnants of old paint, and use sandpaper to make circular movements to completely clean the surface. If the varnish or paint holds firmly, you should wash the lining with a soda solution (take 300 grams of powder per bucket of hot water). There are special chemicals available to remove mold.
- If the dirt cannot be washed off, you can use bleach or stain. To ensure that paint or antiseptic sticks to the surface better, we treat the ceiling, floor or walls with detergents that contain alkali.
- We sand the wood. In order not to miss a single section, mentally divide the wall, ceiling or floor into several squares and rub them sequentially. You can’t press hard and grind one piece for a long time.
- It is not necessary to treat with a primer antiseptic, but it will increase the durability of the lining.
- All irregularities are covered with a special putty.
It is better to take a spatula made of plastic; unlike metal analogues, it does not leave scratches on the surface.
- We apply a layer of drying oil, which will perform a protective function.
- Finally, a primer is applied. It will protect the lining from temperature changes (if we are talking about an unheated balcony) and will fix the already applied putty, in addition, it allows you to achieve a more uniform distribution of paint.
We paint according to all the rules
After finishing the surface preparation, it's time to figure out how to paint the lining.
- Depending on the area, you can use either a brush or a roller.
- Painting lining with paint or a pigmented product involves applying the composition in small portions. You can only wet the brush generously when using transparent impregnations and primers.
It is important to mix the paint thoroughly both before and during painting so that the color applies evenly.
- Movements should be made along the boards, applying the composition with strokes, and then rubbing and shading until a uniform coating is obtained.
- It is better to apply several thin layers than one thick one.
- When working with opaque paint or varnish, after the first layer has dried, you need to sand the surface again.
- Do not start painting a second time when the first coat has not yet dried.
USEFUL INFORMATION: Gypsum plaster: leveling the walls correctly
In order not to be mistaken with the final result, you can first paint a small area of the board to check what color you will get in the end.
Application technology
Doors can be painted either manually or using a spray gun. This process can be described in the following sequential steps:
- Preparation. The door leaf is thoroughly washed beforehand. This is to remove any grease or oil stains. Do not leave large pieces of dirt on the surface. If the doors have been painted previously, then it is advisable to completely remove the old layer of paint. To speed up this process, you can heat it with a hairdryer.
- Primer. When the canvas dries, it is coated with special solutions. They help strengthen the wood structure. Experts recommend using deep penetration formulations.
- Treatment. Many experts recommend going over the top layer of doors with a wire brush. This will allow you to give the desired texture, making the surface more attractive and natural.
- Application of the solution. The first coat of paint should be thin. It is important to let it dry. To create a more attractive effect, you can use a mixture of varnish and enamel. When the composition has dried, apply the paint with a brush. It is important to move only in one direction in order to create parallel strokes. After they dry, they are treated with sandpaper, giving the desired texture. Then the whole thing is covered with a layer of protective varnish.
Painting doors to look like bleached oak requires some experience. Therefore, before carrying out such operations, you should practice a little.
Painting while preserving the structure
How to paint the lining to change the color but maintain a pronounced wood grain? You can use the brushing technique, which in this case involves processing the lining in several stages:
- First, pigmented oil, wax or glaze is applied to the surface.
- Then the selected varnish or paint for the lining is taken in a small amount, applied along the entire length of the board and gently shaded.
- After 10 minutes, use a soft, lint-free cloth to remove most of the oil.
The result of such manipulations will be a bright and expressive wood pattern, emphasized by the pigment remaining in the grooves and recesses. This method is great when using lining in different interiors: country, Provence and many others.
From cheap pine to noble oak - my experience in brushing and artificially aging wood
It started with the fact that I had nowhere to put my countless dearly beloved cast iron frying pans.
The result of diligent Google smoking was a stand for frying pans, which I made, spending a little over 500 rubles. So, I purchased two furniture panels made of pine measuring 200*1000 mm, a metal brush and a 0.5 liter bottle of non-aqueous stain Novbytkhim “Stained Oak” .
The store warned me that the plastic cap on the bottle is not the strongest and may leak from under it. The seller put the bottle in a bag and wrapped the neck with tape. As a result, she got home without any problems))
The remaining tools - a jigsaw, a piece of sandpaper, a sponge, a nylon brush and gloves - were already available.
✴️✴️✴️ PREPARING THE BOARD FOR PAINTING ✴️✴️✴️
We measure the required length of the shield and cut off the excess .
We clean the cut with sandpaper and begin processing. We use a metal brush - we move it with even force along the wood fibers, not forgetting about the ends. As a result, the soft part of the tree is removed, and the remaining hard fibers form a beautiful relief.
I cheated a little and used a wire brush to speed up the process. For speed, it is better to choose a stiffer and wider brush (with a cup).
Each board, 77 cm long, took me 20 minutes.
Next, use sandpaper and then a hard nylon brush to remove the burrs . The main thing is not to overdo it and not to sand the resulting relief.
It’s better to use a nylon brush for a drill or angle grinder for this, but I couldn’t find it on sale here. It took me 10 minutes for both boards.
The board is ready. This stage was the most dusty and labor-intensive - this is how much garbage I collected from the floor:
✴️✴️✴️ PROCESSING BOARDS WITH NOVBYTHIM STAINED OAK ✴️✴️✴️
apply the stain in one layer, since I don’t want a very dark board. If desired, painting can be repeated to obtain the desired color. The interval between layers is 2 hours.
You can paint with a brush or swab - I had a dish sponge. I’ll say right away that the idea was so-so - pretty soon the sponge began to fall apart, so it was better to choose a brush or a gauze swab.
So, apply stain to the board
The stain absorbs well into softer wood, but not into hard fibers. As a result, the contrast and texture of the aged board appears.
The stain is non-aqueous, so it smells like paint (xylene). You can work indoors like I do, but then there will be glitches, you will have to ventilate everything well, keep in mind))
We leave the boards to dry, and after 12 hours we get this result:
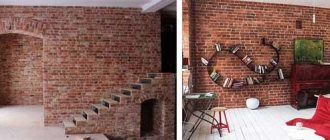
And here’s what these boards look like on the kitchen wall, already loaded:
All the work from start to finish took me 2.5 hours, not counting installation of the stand on the wall. Please do not judge strictly - this is my first experience, and my tools are far from ideal. However, I already like the result!
❤️❤️❤️ RESULT ❤️❤️❤️
Despite the smell, the stain turned out to be quite suitable. It is cheap, waterproof, does not cause wood to swell, does not require varnish protection afterward, and most importantly, it helped me achieve the desired result. Therefore I recommend it!
Bleached oak effect
The lining painted white looks very stylish and modern. If white wood is used in a Scandinavian or rustic interior, it is advisable to create not a dense, impenetrable coating when painting, but to preserve the structure of the wood, achieving the effect of bleached oak. This can be done using different means:
- Tints (stains) with the appropriate name - “bleached oak”, “frost”, etc. To create the desired effect, the product is applied in several layers, each of which must be very thin.
- Oils with wax of the required color. Can be applied in two layers to obtain a virtually opaque finish, or in one layer, which is subsequently wiped down with a cloth to obtain a distinct wood grain pattern.
Now you know how to paint the lining and how to process it correctly. On the one hand, this process is quite labor-intensive, on the other hand, it is exciting and enjoyable.
Preparatory work
Painting doors to look like bleached oak is not difficult. Before you begin such operations, you should stock up on several tools and materials:
- primer. Experts recommend selecting only special compounds that are suitable for the door material;
- varnish and white enamel. Buy only high-quality products that will be easy to apply and have the desired tone;
- sandpaper and brushes. Here it is better to use products that will not shed lint. Paper is needed to brush the surface of the door.
Please note that the structure of oak can be imitated on almost any surface. Here it is only important to choose the right tones of paints and varnishes.
Doors
Doors are a very important part of the overall living space: the choice of color and door design should be taken very seriously. A light door does not overload the space and creates a nice neutral background. Also, the texture of bleached oak will be wonderfully combined with glass. Additional lighting can be provided through the glazing in the door, which is very important for dark rooms. You can achieve an interesting effect by choosing different shades and degrees of glass transparency.
In general, the atmosphere of a home with light interiors and an entrance door will be lighter and airier. They are great for narrow hallways and cramped spaces.
Pine primer
Experience in processing pine wood shows that applying stain to its clean surface leads to uneven tone and staining.
The carpenters conducted an experiment with test samples to determine which primer composition would provide better color uniformity. The surface was treated with shellac for furniture, a factory primer-conditioner for wood with uneven absorption and a polyurethane composition. The latter showed the best result.
After applying and drying the composition, the surface is lightly sanded in the direction of the fibers with a sponge with abrasive No. 320 and a liquid stain is applied.
Advantages of laminate
- dust and stains from washing are not visible on a light laminate;
- bleached oak laminate has a noble, impressive and expensive look;
- a light tone visually expands the room;
- laminate has the appearance of a rough, uneven and embossed surface, which gives it a natural look.
The light color of the floor goes well in the interior with furniture made from natural wood, as well as their high-quality imitation. This combination is perfect for a classic style and a more modern one, for example, modern or hi-tech.
Bleached oak laminate in the interior will have an interesting and creative look if used in kitchens or bathrooms.
Kitchen furniture made of bleached oak in a country style will add a special highlight to the interior. Dark-colored laminate adds romance to the room. If you are not a fan of contrasting tones, designers recommend saturating your room with a light cream or coffee tone, where the floor and doors are light yellow.
When installing wenge-colored entrance doors, it is not necessary to purchase laminate of the same tone. Laying dark laminate will give the room a gloomy look.
Dust particles will be visible on a dark floor. Additional lighting will be required to give the room a decent look.
If the color of the laminate differs from the tone of the blind door, it is recommended to build a design based on contrast. For example, the laminate is bleached oak, and the door leaf is wenge. A skillful combination of tones will make the room more harmonious, stylish and comfortable.
Proper grinding
A step-by-step proven method on how to properly sand a pine board:
- to begin with, you can take coarse-grained discs for a grinder and, changing them in descending order, finish the procedure with disc No. 180;
- then, additionally sand it manually using a block with sandpaper No. 180. It is necessary to move along the fibers: this will remove marks from the sander;
- The final stage is sanding the ends with sandpaper with grit No. 220. This will prevent them from excessively absorbing the stain.
How to apply with a brush
It is advisable to use flat brushes: the wider the working part, the better - this will reduce the risk of layers of impregnation overlapping each other, which leads to uneven shade. Apply first along the length, then along the width, and then again along the length. That is, with cross-shaped movements. After 1 – 2 min. the remains are leveled with the same brush, but clean and dry - this additionally levels out the difference caused by the uneven absorption properties of the wood. A rich, even layer of impregnation left on the surface will provide a spectacular appearance to the treated surface.
How can Romatti radically change the interior of your apartment?
If you need to transform your living space to make it cozy and comfortable, cooperate with us. Our specialists will be able to develop any project drawings according to the footage of the room, lighting, and layout features. We will bring your wildest ideas to life and provide a free consultation with a designer. You can count on:
- a range of services, from the surveyor’s visit to showing the finished design project to the client;
- the ability to edit projects, when you can redo the original version of the sketch;
- selection of a repair team that will perform all finishing work;
- assistance in purchasing materials and their delivery;
- creation of documentation and strict adherence to repair deadlines.
In our portfolio section you will find photos of examples of finished work. You can calculate the cost of repairs per m2 yourself; the website has an online calculator and an open price list. To order repairs, call the number provided.
The style in which the interior is made
- Classic design is distinguished by its restraint. Decorative elements are selected in strict whitish tones.
- Vintage is, first of all, antiquity. In this case, bleached oak is chosen in a gray shade, or artificially aged, with scuffs.
- The high-tech style is distinguished by its modern character, so the color can have a lilac tint.
Dyeing process
Painting wood with your own hands is not a difficult task, but in order to achieve a high-quality result at the finish, the instructions must be strictly followed. As already mentioned, the general algorithm for such work is similar. Therefore, as an example, we will talk about how to paint a wooden table.
White bedside table.
Preparing the base
Painting furniture, like any other product, is best done disassembled, of course, if possible. All trims, handles, locks, metal or plastic parts, and stained glass must be removed or covered with masking tape and foil.
Working with a construction hairdryer.
Next you need to remove the old coating. We immediately reject the use of chemical reagents; wood is a hygroscopic material and, having absorbed the chemistry of solvents, such furniture will become harmful to health. If you have a hair dryer, then heating the surface with it and using a metal spatula can quickly and easily remove the old paint. You can take a blowtorch, but it will leave scorch marks.
Those who do not have a hairdryer can use sandpaper, although it is time-consuming and difficult. It is much faster and more convenient to take a relatively inexpensive attachment for a drill or grinder, made in the form of a metal brush.
The principle is shown in the photo. In this way, the old coating can be removed quickly enough, but there will be a lot of dust. And be careful with the veneer, it is easy to wear out.
When the old coating is removed, the surface needs to be leveled. Experienced craftsmen recommend using a grinder or regular sandpaper with a number of 180 or more, stretched over a block.
Advice: all work of this kind involves the need to periodically remove dust. So, for this it is better to use a vacuum cleaner, dry rags or brush. After sanding, the pores of the array open and with a damp swab, you will simply clog them with fine dust.
Do-it-yourself sanding.
Successful design solutions
- In order for the interior to look complete and complete, you cannot focus only on the flooring and furniture. To complete the interior, all surfaces of the room should be one whole and not fall outside the overall picture.
- Experienced designers recommend combining several elements in the same color (for example, flooring, furniture and walls) to create a unity of style in the interior. Let's look at several options for how to successfully combine class 33 laminate with other furnishings:
- Black furniture in the interior with light-colored flooring will give the room chic and respectability. This design is best suited for an office environment. For your personal office, you can paint the walls in a lilac or purple shade, which will emphasize your individuality.
- For home furnishings, various curtains, curtains, tablecloths, etc., designed in a single light color scheme, will be very useful.
- Bleached oak, laid as a laminate on the floor, looks great in combination with wall panels of various types of wood. The different structure of the fibers will emphasize the originality of the owner’s taste.
- A door made of mountain larch looks advantageous against the light background of the flooring.
- A dark door is best used in combination with walls painted purple or dark blue.
- Moisture-resistant laminate with strength class 33 is perfect for decorating a kitchen in a modern minimalist style.
- Artificially aged laminate is also produced, which has the shabby structure of bleached oak. This flooring is used in antique interiors, for example, a library, billiard room or recreation room.
- Naturally, the interior will look like furniture and doors in bleached oak color. This finishing option is more suitable for a classic setting in the kitchen or living room.
Advice! To create an interior in an ultra-modern style, glass and metal can be used in conjunction with bleached oak flooring. For example, a glass table with metal legs will fit perfectly into the proposed style.