Share on social media networks:
If after renovation you still have parquet boards, then this article is for you. Today we will tell you what you can make from leftover parquet for your home and garden. Unfortunately, no matter how you calculate the exact number of parquet boards for rooms, there will still be a surplus. Don’t rush to throw them away, but hide them in a secluded place, because even if everything was done well, over time one of the parquet parts may crack or deteriorate under the influence of a caustic substance, and this is where a couple of tiles saved for a rainy day will come in handy. And we, in turn, offer you several ideas that will help you use free boards for creative home decoration.
A little about the material
Parquet usually consists of three layers of wood, firmly bonded together. The upper part is either varnished and is the most dimensional in terms of thickness. Thanks to this, the product can be restored with help if, after years, the floor has lost its attractive appearance. Among the main properties of parquet it is worth noting:
- wear resistance;
- low thermal conductivity;
- withstand temperature changes;
- antistatic characteristics;
- moisture rejection.
Usually only high-quality material is endowed with all of the above characteristics. Therefore, before deciding what to make from old parquet, carefully read its properties.
Old new coating
Oak parquet is a durable floor covering. Its service life reaches 100 years, and the cost is very high. If the parquet is still durable, there are no rotten tiles, and there is no characteristic squeaking sound when walking, then you should not immediately change it to laminate. Even if the latter looks more beautiful. It is better to update the parquet. This floor will last for a long time. Even if you need to replace individual dies, the repair will be completely worth it. You just need to do everything to make the floor look new and fit harmoniously into the interior.
Sand and varnish
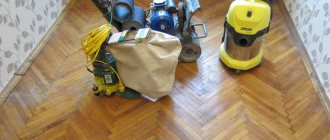
To restore parquet boards to their lost appearance, you need to completely remove the old varnish and the darkened top layer from the surface. To do this, the floor surface is subjected to scraping or grinding. The difference between these operations lies solely in the type of tool used. In the first case, cycles are used, and in the second, grinding machines are used. The result is the same - a smooth surface without varnish residues and dark marks characteristic of parquet.
The old layer has been removed!
Attention! The number of such operations is limited. Typically, boards are sanded 3-4 times. If the opportunity has not yet been exhausted, you should definitely take advantage of it to restore the parquet.
Working with a sander requires skill. Excessive force or improper tilting will cause streaks and pits, further degrading the appearance of the surface. Therefore, many give up the idea of doing this work on their own and turn to professionals for help.
Advice! Even before the restoration begins, it is worth covering the remaining things in the room with a special film. This will make subsequent cleaning easier.
If mechanical damage remains on the polished surface of the parquet, or gaps are found between the dies, they must be repaired. They do it in different ways. More often, preference is given to silicone-based compounds.
The prepared base is covered with a layer of varnish. The service life of the restored parquet depends on the thickness of the applied coating. Therefore, it is recommended to apply at least three layers.
Changing the color of the parquet
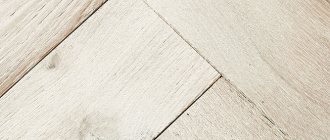
If after renovation the parquet does not fit into the interior, you should think about changing the tone. This is done using special compounds that are offered by manufacturers. The color can be changed from bleached oak to rich wenge.
The restoration technology is close to the previous version. Only in this case, after sanding, the surface is first coated with a coloring compound and then varnished. Another tinting option is varnish of a suitable shade. True, the boards in this case will not acquire such a rich color and will lose their presentable appearance much earlier.
Updating your tone is easy
Advice! When choosing a color, owners first of all pay attention to the natural shades characteristic of wood. But if you want to radically change the design, try choosing a non-standard solution.
Unusual shades for parquet::
- terracotta;
- green;
- grey;
- white;
- black;
- red.
White or gray is preferred by those who have chosen Provence, country, shabby chic or Scandinavian style. Black flooring is a universal solution that adds brightness and contrast to the interior.
Dark parquet is always beautiful
We use painting
For those who are good at drawing, it will not be difficult to add uniqueness to the floor covering by applying a design to the surface. Possible options:
- correct geometric pattern;
- beautiful pattern imitating a carpet;
- separate fragments with the help of which the room is divided into zones;
- artistic drawing - the choice of image depends solely on the stylistic design of the room.
We buy a carpet
If you don’t want to tinker with the flooring and restore the parquet, you can buy a new carpet. Tufting or carpet will immediately add coziness and comfort to the room.
The size of the carpet in this case does not really matter. It is not necessary to purchase a coating that will occupy the entire area of the room. It is enough to purchase a product of a small size in order to correctly place accents.
Kitchen accessories
When deciding what’s missing at home, head straight to the kitchen. Since parquet has good performance properties, it can be used to construct:
- cutting boards;
- stand for hot utensils;
- containers for dishes;
- container for sweets.
Parquet products such as coasters are especially practical. With their help, you can protect the surface of the countertop from damage and at the same time decorate the interior with a unique and original element. It is unlikely that any of your friends will make exactly such crafts from parquet.
How to make a cabinet from parquet?
To make furniture you will need:
- About 8 squares of parquet boards. The facade of the cabinet itself is laid out with dies.
- Sanded timber (several meters) for the frame. Crossbars and racks are made from it.
- Wooden lining for shelves.
- Plywood or 5mm fiberboard for doors.
- Plastic molding for framing.
Important! Furniture can be made across the entire width of the balcony. The height of the cabinet can be 1 m or higher, it all depends on the amount of material and your wishes.
The procedure for making a cabinet from leftover parquet is as follows:
- Make a furniture frame from timber. Each shelf requires four crossbars: two longitudinal and two transverse.
- Assemble the shelves from wooden lining.
- Make cabinet doors.
- Based on the furniture, make markings for indentations along the width of the frame.
- Place the dies on glue and cover the base of the furniture.
- Frame each door with plastic molding.
Important! A full-fledged and spacious cabinet made in this way will decorate the loggia, cover all defects in the balcony slopes and will please the eye for a long time.
Making boxes
Another original solution for using leftover flooring is to make a box for storing things and various items. Even if there is a chest of drawers in the house, the need for additional capacity still arises. Therefore, you shouldn’t even think about what you can make from parquet with your own hands. Just make small boxes that are ideal for storage:
- toys;
- offices;
- documents;
- clothes and other things.
Do you love gardening? Make seedling boxes for growing various plants. Using a similar principle, it is possible to construct a container for storing cereals, berries and vegetables. So you can do a lot of things with old parquet.
Stage 2 – sanding
- Cover old cabinet furniture with laminate and give it new life.
- Narrow cabinets for small items are very easily assembled from parquet. Oak has excellent resistance to temperature and humidity changes, so you can use cabinets on balconies and loggias. Below we will tell you how to make such furniture.
- Trays for armchairs and sofas. The tray can be placed on the wide armrests of the sofa and armchair in order to place a cup of coffee, a glass of juice, a book, put away remote controls and mobile phones. The tray can also be used for the bath. And it is not at all necessary that the board be made of oak, since it can always be painted to match the color of the furniture and then covered with parquet varnish.
- Shower bench.
- Boxes for seedlings. This is the simplest use of laminate leftovers. The only advice: protect the boards from the inside with oilcloth, since laminate cannot withstand prolonged exposure to moisture.
- Ceiling lamp.
- The parquet is very worn and has numerous defects and cracks. In this case, a complete replacement may not be necessary, but scraping is certainly not necessary;
- The parquet “swollen” after being heavily flooded with water. Since in this case some planks have probably come off the base, it will be necessary to re-lay the parquet (and possibly replace some elements), after which, again, resort to the scraping procedure;
- Over time, the parquet board has become dark and loose (it can be easily pierced with an awl). This is perhaps the most “sad” option, since in this case even sanding will not help the matter - a complete replacement of the parquet is necessary.
- Grinding. Depending on the overall condition of the parquet, it will need to be partially or completely sanded. This can be done either using a grinding machine or in “manual” mode.
- To attach the boards, use a water-resistant adhesive suitable for wood. Use a good brand of polyurethane compound for this purpose.
- After gluing the parts, additionally coat the seams.
- After drying, sand the wooden boards and coat them with waterproof varnish.
What else?
As you can see, it is not difficult to find a use for leftover or dismantled flooring. In addition to the above options, there are other ideas on what to do with parquet flooring. So, to make your home practical, functional and decorative, build several protective structures for:
- doors;
- furniture facades;
- heating batteries, etc.
If you have imagination and desire, you can actually make even:
- stool;
- table top;
- window sill and much more.
There are hundreds of options for how to use old parquet. Therefore, feel free to implement your design ideas and find a worthy use for such useful building material.
Parquet board
Another option for parquet flooring is parquet board. The material is somewhat reminiscent of laminate both in appearance and in the method of installation/disassembly. This coating can usually be removed quickly and easily, without even damaging the planks.
The structure of the parquet board
On a note! Parquet boards, as well as other types of parquet, if they are removed carefully, can be reused by covering the floor in another room. Therefore, some people take parquet with them when they move to another apartment, especially if the material is of high quality and was very expensive for its owner. However, this is only possible if no glue was used during installation of the coating.
Parquet board in the interior
Fortunately, the parquet board is usually not fixed to the base, and its dismantling is quick and easy - just carefully remove the locks.
Parquet board
Opinions
According to the rules, all repair work, even the most minor, must be carried out by professional builders.
But many people prefer to do it on their own.
In addition, modern construction technologies can significantly save time and money, achieving maximum results.
Is it so?
I tried to fight the squeak with polyurethane foam. I just threw my money away. The effect is practically zero. I lived with the floor without this nasty sound for only a month, and then it all started again. I decided to do a reupholstery. It helped.
Valery, Arkhangelsk
When selecting material for a plank floor, it is very important to consider the type of wood. Because then do whatever you want, but you won’t get rid of the squeak until you completely replace the entire floor with a new one. It is better to use ash or oak, but they are quite expensive.
Alexander, Moscow
I made my floor from pine. It is inexpensive and quite acceptable for an apartment. I used “Extra” class floor slats.
Dmitry, Kremenchug
Conducting a thorough subsurface inspection when replacing a wood floor
If you are installing a floor in an apartment on joists on which you plan to install a new plank floor, the system should be carefully checked for the absence of deformed, damaged or fungus-affected elements. All lags are tested under load. The element should not bend, dangle or creak. If any flaws are found, the linings are renewed.
Helpful advice! It is recommended to treat all elements of the log system with an antiseptic to protect them from biological decomposition.
If the joist system is in good condition and does not cause concern, it will be enough to carry out a general cleaning of debris in the spaces between the joists and install a new covering. The cavity between the joists can be filled with thermal insulation material, which will act as a sound insulator.
In most cases, the joists are quite worn and need to be replaced. Dismantling of products must be done carefully and carefully, since the elements are securely attached to the concrete base. As a result, the base cushion may be destroyed, the restoration of which will require additional financial costs and labor resources.
In most cases the joists are quite worn and need to be replaced
Before replacing floors, it is recommended to carefully inspect the concrete screed that is located under the finishing floor covering. The base is tapped in some places in order to detect delaminations that should be removed to a healthy layer. In addition, the surface is checked for loose areas. They can form as a result of a violation of the technology of pouring a concrete layer that has not gained sufficient strength or has been eroded by moisture. Such areas should be cleaned.
If the surface contains large cracks, the process of destructuring of the base may continue. These areas need to be expanded in depth and width by 10-15 mm to carry out further repairs.
After all defects have been eliminated and cracks have been sealed, small debris is thoroughly removed.
