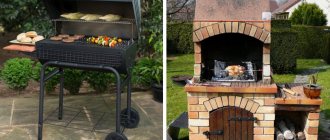
It is known that in the simplest classification, all fireplaces are divided into open and closed type devices. In addition to various technical nuances, the main distinguishing feature is the door for the fireplace. To emphasize its functional purpose, we will conduct a comparative analysis of some features of the operation of fireplaces of two different types.
Closed fireplaces are always associated with steel or cast iron models, which implement new technologies for the efficient use of released energy. But, despite this, classic fireplaces with an open firebox are not inferior to their popularity and occupy a certain niche among their consumers.
In addition, such a fireplace design provides some distinctive advantages. First of all, it is a living flame, which you can observe directly, admiring the magical dances of the tongues of fire.
Stove store assortment
The fireplace is a source of heat and it doesn’t matter how much of it is used to heat the room. Heat from the open structure is released using infrared radiation. This energy is believed to be more useful than heat from convection movement. Open fire can be adapted for additional purposes. They cook food on it by modernizing the fireplace design, and not the least important distinctive advantage is that an open fireplace can quickly warm up the owner who comes in from the street.
Naturally, such a fireplace has a lot of disadvantages, which are used by designers of closed types of fireplaces. The efficiency of a fireplace with an open hearth is slightly more than 20%. With such heat output, you cannot rely on a fireplace as a serious source of heat. Even during operation, the device is not capable of storing energy. This means that immediately after the wood burns out, the fireplace will stop heating the room. The low degree of fire protection should not be overlooked, especially when children are present. Sparks from firewood often fly outside the firebox and can cause trouble.
Finished design
Construction of a false fireplace from foam concrete
You will need:
- foam concrete blocks and slabs;
- hacksaw;
- adhesive for porous concrete;
- gypsum board putty;
- trowel;
- fiberboard sheet;
- putty knife.
It is easy to build a false fireplace with your own hands from foam blocks. This is a fairly light material that can be easily cut with a regular hand hacksaw. The first step is to decide on the location for the future hearth.
If you plan to simulate a fire in the firebox using electrical appliances, you should install wiring to this location in advance.
Example 1. Construction of a decorative fireplace.
The appearance of the fireplace will depend on your wishes, imagination and size of the home.
First, a foam concrete slab is laid on the floor; it can be placed on glue, but this is not at all necessary. It is advisable to round the external corners that will be located directly in front of the false fireplace for safety reasons. The height of the base should not exceed 10 cm.
Next, the side walls are made; the foam blocks can be installed vertically - in this case, the structure will be narrower - or laid horizontally - for a wider false fireplace. If you wish, you can cut foam concrete blocks and imitate brickwork. The parts are fastened together using a special adhesive for foam concrete or a sand-cement mixture.
After the side walls are installed, a foam concrete slab is glued on top of them, which will serve as a fireplace mantel. You have an almost finished frame for a decorative fireplace; the space for the firebox takes up too much space. In order to reduce it, the front part of the fireplace with a window for the firebox is cut out of a sheet of fiberboard or plywood.
If desired, the vault can be given the appearance of an arch or made smooth. The fiberboard is glued with the same glue as the blocks. If neither plywood nor hardboard is found on the farm, then the front panel can be cut out of corrugated cardboard, but in this case it must be treated several times with a solution of PVA glue and water, and also thoroughly puttied.
Next, you need to apply a thin layer of putty over the entire surface, paying special attention to seams and joints. Using a flat spatula, apply the mixture onto the trowel, then spread the putty at an angle - from bottom to top.
It is best to putty the corners using a spatula. Now you need to let the first layer dry, then apply the finishing layer of putty. After drying, they are sanded with fine sandpaper, the surface is completely ready for decoration.
Installation Rules
The rules for installing any fireplace require choosing a good location. For example, an essential detail for corner options is the presence of a quarter meter indentation from the fireplace wall. This space should be left for free circulation of oxygen. Although you will need quite a lot of space, installing this particular type of fireplace will significantly improve heat exchange.
The rules require an accurate calculation of the dimensions of the furnace unit. The heating part must correspond to the heat losses of the room.
In most options, the calculations assumed by SNiP must take into account:
- number of window openings;
- type of glazing;
- characteristics of the insulation used;
- number of storeys of the building;
- thickness and material of the walls.
The installation rules assume that one stove is used to heat a room no larger than 40 square meters. m. You should not expect to heat 100 square meters with one fireplace. m in a townhouse. The option with one fireplace on several floors is also undesirable. In this case, it is impossible to ensure uniform heating, since warm air rises. It is better to build different fireplaces on several floors, albeit smaller ones.
A significantly reduced size of the fireplace in relation to the dimensions of the room will lead to large temperature fluctuations in the room. A greatly increased size of the fireplace will lead to stuffiness in the rooms, as well as to excessive consumption of firewood.
The rules for choosing the size of a stove for a specific room require precise manipulation of numbers and indicators. The heat loss of the room is calculated from the heat loss of one cubic meter of room - 21 kcal/hour. For calculations, it is enough to multiply the external dimensions of the room by 21. For example, in a wooden house these indicators can be 5.5 meters wide, 6.5 meters long and 3 meters high. The conditional volume of heat losses is 107.25*21=2252.25 kcal/hour.
It is known that 1 cu. m of fireplace produces an average of 300 kcal/hour. This means that the heat loss of the room must be divided by 300. 2252.25/300 = 7.5075 cubic meters. m. The permissible height of the fireplace in the room is up to 2 meters. If you divide 7.5 by 2, you get a stove area of 3.75 square meters. m.
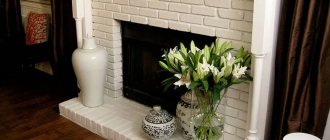
False fireplace decoration
Not everyone knows how to make a decorative fireplace with their own hands so that it is not much different from the real thing. The finishing plays a big role in the design of the portal. So, using the same putty, you can create a variety of textures. If you scoop up the putty with a foam sponge and apply it to the surface with jerky movements, you will get an interesting rough texture.
You can leave it like that, but it’s better to paint the surface with dark acrylic paint and immediately go over it with a damp cloth, this way the dark color will remain only in the recesses. Then apply silver or gold paint to the tip of a brush or foam sponge and walk lightly, barely touching the surface.
If you have leftover drywall, you can cut bricks from them to decorate a false fireplace. It is better to give them a not quite correct shape, then you will be able to make an imitation of old, already worn-out masonry. The surface and side of the bricks are decorated with putty, it is applied with a spatula, deliberately leaving unevenness, allowed to dry, then painted in a suitable color.
Using beech wood putty, you can imitate a stone surface. It is applied to the fireplace portal using a spatula with chaotic movements. Then they draw the outlines of the stones with some kind of stick, take a bristle brush and, as it were, pierce the still damp putty with it, thus obtaining the texture of the stone, and allow it to dry. To make the stones look more natural, they are shaded with dark brown and black acrylic paint.
Features of such products
Thanks to a high level of temperature resistance and no less strength, glass for fireplaces helps to realize most of the stylistic ideas and plans of designers.
However, there is one significant drawback of such products, and it lies in the large weight of the structure. But even here, craftsmen tried to find a way out, and therefore, if you make a product to order, combining the amount of glass and metal in the right proportions, the structure can be equipped with special lifting mechanisms. They are quite easy to use and do not make much noise, which is a significant advantage.
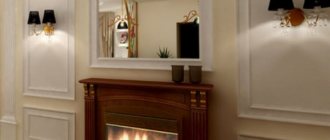
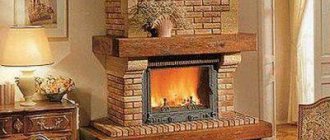
Factory-made fireplace door
As for closed-type fireplaces, their main feature is the firebox doors; it is in them that heat-resistant glass is built. Depending on the direction in design and stylistic idea, it will act as the main decorative element of the entire structure.
However, precisely because glass is installed in the door, more heat is retained inside the fireplace, draft improves, and there is no chance that a coal or roast will fall out. Open types of products cannot boast of such advantages.
Do-it-yourself false fireplace made of plasterboard
You will need:
- drywall;
- rack and guide metal profiles;
- self-tapping screws for gypsum boards and for metal;
- screwdriver;
- knife and metal ruler;
- gypsum board putty;
- putty knife.
Before you make a false fireplace from plasterboard, you need to decide on its dimensions. The width and height of the frame will depend largely not only on the area of the room, but also on the finishing material. If you are planning to tiling, then you need to take into account its width and height, add the distance between the seams, then there will be no need to cut the finish.
The first step is to apply markings for the guide profiles on the walls and floor, then secure them. If you find that the wall has significant deviations, then use fastening loops to attach the guides to the surface. Next, the rack profiles are inserted and connected to the guides using metal screws.
The first step is to install the base of the decorative fireplace, after which they begin to manufacture the portal. If you want the firebox window to be arched, then make cuts on the profile every 5 cm and bend it in a semicircle.
All that remains is to cover the structure with plasterboard; if you are planning tiled cladding, then opt for a waterproof option. You can use a utility knife for cutting. A metal ruler is applied to the drywall, then a deep cut is made along it.
After which the sheet is bent in half and tapped on it, the drywall should break exactly along the cut line. If you need to make a semicircle, then cut it out using a hacksaw. The sheets are secured to the frame with special self-tapping screws for gypsum boards, which have a countersunk head.
Example 2. Construction of a decorative fireplace.
After the structure is ready, it is necessary to putty all the seams. If the fireplace is tiled, the surface is not treated, but if it is painted, the fireplace is completely puttied. For cladding, tile adhesive is used, it is diluted according to the attached instructions. The work starts from the bottom, the glue is applied with a spatula with a smooth surface to a small area, then passed with the serrated side.
The thickness of the adhesive layer should not exceed 10 mm. Then apply the tile, press it a little, and tap it with a rubber hammer. Separating crosses are used for seams. After the masonry is completed, it is left until the glue dries completely. Then the joints are grouted.
Making a false fireplace from plasterboard is much more difficult than from foam blocks, but the result is worth the effort.
Portals made from this material almost completely replicate a real fireplace. The most popular blog articles of the week
Aerated concrete is a suitable masonry material for a fireplace, but with some restrictions: for example, it cannot be used to construct a firebox. Aerated concrete is used as a load-bearing and finishing material, and as thermal insulation of the side walls of the firebox. The advantage of aerated concrete over brick is its low price and high speed of work. However, if you do the work yourself, you need to know the features that will allow you to save money, but not lose quality.
What is this article about?
Basic requirements for materials
Brick for the construction of fireplace masonry must have certain qualities and properties.
It is mandatory to use only refractory bricks for masonry of the firebox; red ceramic bricks can be used for the body.- Products must be selected for the job without chips or cracks. When cutting and breaking, they should not crumble, and on the fracture plane they should have a uniform surface, without inclusions of stones, pieces of clay and voids. A high-quality brick will ring when you hit it with a hammer.
- The use of sand-lime brick for laying stoves and fireplaces is not allowed.
Before starting work, the brick must be soaked in water until no more air is released. A product treated in this way will not take water from the solution and will provide high strength of the connection.
- The clay is soaked in water several days before work begins; as it is absorbed, the required amount of liquid is added to it, and then sand.
- The solution should be moderately plastic and have the consistency of thick sour cream. The ratio of clay and sand is considered normal if a layer of about 2 millimeters thick remains on the planed wooden board after immersion in the solution.
Is it possible to use aerated concrete to build a fireplace?
The basic requirements for a fireplace come from its purpose: heating and interior decoration. Since fuel burns in the firebox and it is placed in a visually open space, the material for the fireplace must have:
- fire resistance;
- aesthetics.
Aerated concrete is a non-flammable material, but it is not fireproof!
Consequently, the choice of aerated concrete as a heat-resistant base for a fireplace - firebox - is impossible. But it is perfect for creating a place for a fireplace. Aerated concrete blocks are not used for laying an open fireplace, since with this design the heat goes far beyond the firebox and the aerated concrete blocks will heat up.
A decorative fireplace or a closed, finished fireplace insert can be lined with aerated concrete blocks.
Since aerated concrete is easy to process, the block is easy to saw, grind, and make complex rounded shapes. Therefore, it is most suitable for expressing complex design decorative solutions.
Furnace lining process
Heat supply and removal are very important aspects in the operation of any fireplace, so it is important to remember that in cast iron samples, about 30% of the heated air leaves through the base, and the rest leaves the firebox through the walls of the body. To equalize all indicators, a special pipe should be connected to the firebox, designed to remove air
For these purposes, a pipe made of PVC with a minimum cross-section of 150 mm is quite suitable. Next, the firebox must be equipped with a door on the back side of the entire structure for more convenient access to the fireplace and removal of combustion products. Upon completion of installation of the combustion chamber, it is necessary to take a responsible approach to the installation of the chimney.
Finishing
Aerated concrete masonry will be attractive if, at a minimum, its surface is smooth and the seams are even. Further finishing or cladding of the surface will provide aesthetic appeal.
Since aerated concrete is used at most as a material for lining a metal firebox, that is, it is not exposed to high temperatures, the surface finishing does not necessarily have to be made of fire-resistant materials. High-quality plastering or cladding is sufficient.
To give the surface an attractive appearance, the following materials are used:
- Plastering followed by painting. Plastering the surface is a budget option, the advantage of which is its low price.
- Facing with tiles or bricks. The costs of facing material are compensated by the representative appearance of a beautiful fireplace.
Thus, you can both save money on masonry finishing and turn the fireplace into the central piece of a chic interior.
Rules for installing a fireplace insert
The quality of the fireplace's operation largely depends on how correctly all instructions were followed during installation.
Thus, professional craftsmen recommend following the following rules:
when determining the location where the fireplace will be located, it is important to ensure that the adjacent walls and ceiling surface can withstand high temperatures; the arrangement of the fireplace requires the presence of a smooth stone or ceramic base; as a safety measure, the base of the firebox should be equipped with a sheet of steel, the thickness of which should be more than 2 mm; The role of thermal insulation material will be perfectly fulfilled by basalt-based cotton wool, which must be laid between the surfaces of the floor and ceiling. This type of cotton wool is highly heat resistant (heating to 900°C will not cause any harm to it); one of the features of laying the firebox is the need for its gradual rounding, for which each of the subsequent bricks must be laid 6 cm closer to the beginning of the previous brick; the remaining mortar mixture formed after laying a row of bricks must be removed with a sponge; speaking about such a parameter as the thickness of the firebox walls, it should be remembered that at the side walls this parameter should be 20 cm, and at the rear edge - 10 cm; provided that if the fireplace is installed in a structure made of stone, then its arrangement can be done near any desired wall
But if the main structural element of the house is wood, then before installation it is necessary to build a special layer of protection. For these purposes, you can use either standard bricks or building blocks; the diameter of the gratings mounted in the decompression chamber must correspond to the power of the firebox used; in order to prevent the surface from being damaged during the operation of the fireplace, it is important to extend the chimney pipe beyond the roof by at least 1 meter; those sections of the chimney that cross the attic must be treated with a layer of thermal insulation; the joint between the fireplace insert and the chimney pipe must be completely sealed; in order for the air necessary for ventilation to flow to the gas outlet channel, a gap of 5 cm must be provided at the fireplace outlet area; the minimum height of the firebox above the floor surface is 20 cm; control over the air supply to the firebox will be improved by installing a special throttle-type damper mounted in the ashpit; Excess condensate can harm the system, so it is important to provide for the possibility of its drainage from the pipe.
Protection from external influences
Since aerated concrete has high water absorption, its use outdoors requires protective measures. A canopy or gazebo will protect the outdoor fireplace from direct exposure to snow or rain. However, high humidity outside still exists. There are three common ways to protect aerated concrete surfaces:
- Facing;
- Hydrophobization;
- Waterproofing.
The cladding can be either tile or brick. In the first case, no additional protection is required; in the second, hydrophobic impregnation can also be applied to the brick.
Hydrophobization involves the use of a special water-repellent composition (impregnation), which does not form a surface film, but penetrates several millimeters into the protected surface.
Waterproofing is not suitable for decorative design elements, which is the fireplace.
An important rule for using aerated concrete blocks when building outdoor fireplaces is to build a high foundation 10–20 cm above ground level. Such that the earth and puddles do not come into contact with the blocks under any circumstances.
So, subject to the construction and finishing technology, the use of aerated concrete blocks allows you to save money on bricks and speed up the laying process.
The time has come to explain in what ways aerated concrete is superior to other technologies, and why is a fireplace made of aerated concrete?
Today in Russia there are three main methods of building a fireplace: plasterboard, brick and potted stone. In what ways are they inferior to an aerated concrete fireplace?
In a plasterboard fireplace, there is an RTK made of metal frame inside. During operation of such a fireplace, deformation of the RTK occurs. Which, in turn, leads to the appearance of cracks on the facade of the fireplace and on the RTK. Moreover, cracks on the facade of the fireplace do not depend on the amount of drywall with which the fireplace is lined. The RTK itself does not gain heat, since mineral wool does not accumulate heat, but reflects it. Adding to this the problem of installing decor and facing the fireplace, due to the fact that the RTK is not a load-bearing structure, a plasterboard fireplace becomes a more than unattractive option.
So maybe a brick fireplace? If you consider that due to the design of the fireplace, even the outer walls do not warm up, and heating the room will require a very large amount of time and resources, then it is unlikely that a brick fireplace will be able to satisfy all your requirements for a fireplace. The very labor-intensive process of laying a fireplace and the high cost of the material are also not advantages for this type of fireplace. Since the variety of brick appearances is quite limited, it becomes impossible to create a completely unique fireplace for your home. This fireplace will be quite standard and similar to others. For a brick fireplace, you will have to make a separate foundation, which leads to additional difficulties and financial investments.
What remains is the potting stone. Let's see how it can compete with aerated concrete.
RTK or only cladding is made from natural hydrotalcochloride stone. The production and manufacture of the fireplace takes place in Finland. In Russia, only the installation of the fireplace takes place. The potted stone no longer requires any finishing. Not bad? Of course, but since potting stone has an inconspicuous gray color, the range of colors for your fireplace is very limited. The production of fireplaces abroad also limits the appearance of the fireplace model. In this case, individual fireplace design is completely excluded. The large weight of the fireplace structure will also require additional installation of a foundation under the fireplace.
As you can see, a fireplace made of aerated concrete has undeniable advantages
in front of the other fireplaces.
Individual design, simplicity, lightness of the fireplace design, low cost of materials make this technology the best today. And only ArtBrown
will help you create
the fireplace of your dreams!
The question of how to make an imitation fireplace on your own is of interest to everyone who wants to make their home original, cozy and unusual. An imitation fireplace is a structure that can be installed in any city apartment without approval from the competent authorities. In addition, an imitation of a fireplace in an apartment can be done with your own hands without the involvement of hired labor, which will allow you to significantly save on construction. For such work there is no need to purchase special tools and equipment. As a rule, everything you need is in the pantry of every home. Considering that the decorative hearth will not heat up, you don’t have to be limited in the choice of material. You can use almost everything you have at hand. This also applies to finishing, for which you can even use plastic and wallpaper. It is worth dwelling on the options for constructing a decorative fireplace and the nuances that are worth paying attention to.
Advantages of gas silicate as a building material
Gas silicate blocks are a natural building material, a type of cellular concrete, and consist of a concrete mixture and silica sand. Manufacturers, to obtain larger volumes, heat the mixture to high temperatures. During the heating process, pores appear in the structure of the blocks. It is they who determine the main advantages of this material.
Gas silicate has low thermal conductivity. It does not let heat and cold into the house, so it is always cool in the summer and warm in the winter. Increased tightness of premises is achieved through the use of special adhesives.
The sound insulation of the material is also good. On average, the performance is 8 times better than that of brick. During construction, additional sound insulation may not be used.
Since gas silicate blocks are very light, they can be laid and moved independently without any problems. The light weight of the material also reduces foundation costs. Therefore, building cottages from gas silicate blocks is an economical and simple solution.
There is no need to use a drill to create small holes when working with gas silicate blocks: a nail or self-tapping screw can be easily driven into them. The drill is used only to create holes for sockets or communications. Thus, you can easily decorate the walls (hang pictures and other elements) and screw in furniture.
Gas silicate blocks absorb vapors and release them to the street, so the building will never feel stuffy or high humidity. Thanks to this feature, moisture is quickly removed from the premises, which reduces the risk of mold. For even greater reliability, you can waterproof it before erecting the first row of blocks. We recommend ordering gas silicate from the manufacturer here: https://belkirpich.ru.
Types of decorative fireplaces and their equipment
First of all, you need to decide on the place where the hearth will be built. The best option is to place it in the living room in the middle of the wall. Such a fireplace will be a place for family gatherings and friendly parties. A good solution is to use one of the corners. It is advisable to do this in a small apartment. Such a fireplace can also be used as a shelf by placing photos, books, souvenirs or a cocktail set on its tabletop.
Decorative fireplace in the middle of the room
It is worth thinking carefully about the size and shape of the future structure. An imitation fireplace in the interior should look harmonious and organic. A hearth that is too small will look awkward and funny. An excessively large structure will create a feeling of crampedness and monumentality, but not peace and comfort. In order not to make a mistake with the size, it is advisable at the design stage to create a life-size model of the fireplace and evaluate how it will look in the interior.
The choice of arrangement of the interior of its hearth is quite important for the realism of the fireplace. The simplest solution is to cover its inside with a canvas with painted flames. A more complex, but very beautiful solution is real logs, laid in different orders. For variety, firewood can be periodically rearranged, reduced or increased in quantity.
The next nuance is the imitation of fire in the fireplace. It is the flames that are associated with this structure. There may be several solutions to this issue.
You can create an imitation of fire in a fireplace with your own hands in the following ways:
- By placing several small incandescent light bulbs in the fireplace. They give a warm, even and dim light, reminiscent of the reflections of a flame.
- By placing a garland with a glow regulator in the firebox. By setting the appropriate mode, you can achieve the effect of flickering the flame, its intensification and weakening.
- By placing a special lamp in the hearth, which itself imitates a flame. The lamp should be placed so that its active element is in the middle of the pile of logs at the very top.
- By placing several large paraffin candles behind the logs. A real fire will look great at any time of the year.
Before starting work, you need to draw up a project. This will help determine the need for property for construction. Let's look at how to make an imitation fireplace with your own hands from various materials.
Metal doors
- low cost of material;
- the likelihood of making it yourself, which will significantly reduce the price of the device;
- a metal fireplace door represents this durable and reliable device;
- considered a good heat accumulator, equipped with the ability to regulate draft and flame height.
Making a door
fireplace door
- Straightens the material on a flat surface and marks the desired outline.
- We control the accuracy of connections using a square.
- We fix the joints of the component parts by welding.
- After welding is completed, it is necessary to measure the diagonal very accurately. The body you make must have a strict geometric shape.
- Only after all measurements have been completed, the remaining elements of the fireplace frame are welded.
- During welding, sagging may form on the surface of the frame, which can be removed using a grinder and a grinding wheel.
- Next, the frame is placed on a metal sheet and the outline is drawn, for which a special scriber is used.
- Provided that the sheet thickness is two or more millimeters, there is no need to weld a separate frame. After you mark the outline for the first time, you will need to draw a second outline, but no larger than the first. The metal should overlap the corner, so that volatile combustion products will not enter the room.
- Using a grinder and a cutting wheel, cut out a separate element.
- The curtains are welded to the fireplace frame.
- We carefully examine the frame to ensure that the curtains are installed correctly.
- We weld the curtains to the sheet.
- We open and close the door, thus checking how the fireplace door functions.
- We eliminate welding beads. We fix the handle and the bolt.
Imitation of a fireplace made of foam blocks
In a city apartment, it is not advisable to erect heavy structures made of brick and concrete in order to create an imitation. This will create excessive pressure on the floor slab, which can cause uneven shrinkage of the house and the appearance of cracks on the walls. Foam blocks are ideal for simulating a fireplace. They have low specific gravity, high volume and clear geometric shapes. Working with such stones is easy and simple. Their surface can be finished with almost any type of cladding.
Fireplace portal made of foam blocks
For work you will need the following materials and equipment:
- building level;
- roulette;
- hacksaw;
- steel spatulas;
- rasp;
- marker;
- concrete adhesive;
- paint brush;
- liquid primer;
- putty;
- sandpaper and abrasive mesh;
- baseboards and moldings.
In order to build your own apartment fireplace from foam blocks, there is no need to create a solid foundation or remove the flooring down to the concrete. It is quite enough to place a sheet of plywood on the floor.
You are offered step-by-step and detailed instructions for simulating a decorative fireplace made of foam concrete:
- Make markings on the floor and walls. Make a base and secure it to the floor. To do this, it is better to use double-sided tape so as not to damage the coating.
- Lay out the first row of stones without gluing them. If necessary, adjust the masonry fragments.
- Connect the electrical wiring to the base. There is no connection to the network at this stage.
- Glue the starting row of foam blocks to the base. Check its horizontal level. For gluing, 1 mm of adhesive solution is enough, since the edges of the blocks are perfectly smooth.
- Lay out the portal in accordance with the project. If an arched shape of the hearth is provided, then it is made with a narrow hacksaw. Remove roughness using a rasp.
- The table top is being laid. A large slab of aerated concrete or a custom-made product is used. It is fashionable to make a tabletop from a board or timber.
- Treat foam blocks with liquid primer. Since this material is porous, the procedure must be repeated twice. The primer will make the surface of the fireplace resistant to moisture.
- Mix the solution and cover the fireplace with a layer of 2-3 mm. After the putty has dried, it is sanded and polished.
- The portal is lined with finishing. It matches the interior of the room. Use adhesive film, wallpaper, paint, ceramic tiles or artificial stone.
The final stage of construction is the arrangement of the fireplace. One of the advantages of aerated concrete structures is its mobility. The light fireplace can be moved to a new location at any time. This need arises when installing new furniture or carrying out renovations in an apartment.
Advantages of aerated concrete barbecues
First, let's dispel your fears about the unreliability of such outdoor stoves. Both gas and foam concrete are quite resistant to thermal effects due to the presence of many air-filled pores in the structure of the material.
But this does not mean that a fire can be lit directly on the blocks in a closed chamber - they really may not withstand such a temperature. Therefore, real stoves and fireplaces are not made from them. But they are quite suitable for a grill or barbecue.
Advice. If you want to build an outdoor oven with a vault and a chimney with your own hands, its interior will have to be made of ceramic bricks.
Making such a barbecue with your own hands is much easier than making one from brick. Because:
- One block replaces several bricks , so construction goes faster, there are fewer rows, and it’s easier to align them;
- Aerated concrete blocks are easy to saw and mill with a wood tool , which also makes the work easier;
- They are quite light due to their cellular structure.
Plus, to all that has been said, this material is made from natural components, and therefore, even when heated, does not emit toxic substances that are harmful to humans or the atmosphere.
Advice. If you choose between aerated concrete and foam concrete blocks, the price of the former is higher, but they are also stronger. Foam concrete is cheaper, but you only need to buy factory-made blocks
We perform imitation from plasterboard
The use of plasterboard opens up almost unlimited possibilities for the master regarding the choice of design for a decorative fireplace. Thanks to this material, our imitation can be given a curved shape of any complexity. Drywall is easy to process and does not put much pressure on the supporting slab. The slabs are attached to the spatial frame. To create it, it is recommended to use steel profiles. It is easier to work with timber, but wood changes shape and size when air humidity changes. And this is fraught with the appearance of cracks in the finish.
The frame of the portal is made of plasterboard
To work you will need:
- perforator;
- screwdriver;
- electric jigsaw;
- roulette;
- level;
- hammer;
- plane;
- set of steel spatulas;
- serpyanka ribbon;
- liquid primer;
- putty;
- ordinary drywall;
- finishing;
- electrical wires and lighting.
An imitation fireplace made of plasterboard is a rigid structure that is attached to the floor and wall. Based on this, you need to carefully consider the place where the fireplace will be located.
The assembly of a plasterboard hearth is carried out as follows:
- Markings are made on the wall and floor and places for drilling are marked. Holes are drilled into which plastic dowels are inserted.
- Blanks are sawn from the guide profile and screwed to the load-bearing surface. For this, self-tapping screws or dowel nails are used.
- The spatial frame is assembled. To connect its parts, cross connectors and a flexible profile are used if curved shapes are provided.
- The frame is covered with plasterboard. The joints should be located only on the profile. To bend drywall, it is first soaked for 15-20 minutes. Fastening with self-tapping screws is carried out every 15 cm.
- After the sheathing is completed, the corners are finished with a planer. The semicircular hole of the hearth is made with a jigsaw.
- Plasterboard is being plastered. Without fail, all seams are reinforced with sickle tape.
- The dried putty is polished and primed. After it dries, the fireplace is finished.
The finished product is strong enough to withstand heavy loads and impacts. Drywall is resistant to high temperatures, which makes it possible to install heating elements inside the fireplace.
Step-by-step instruction
If you want to create a fireplace in your home yourself, you should consider several rules using the example of a plasterboard portal:
- Before you make a fireplace yourself, you will need to draw drawings for the future design. After the sketch is ready, decide which wall the portal will be located near in the room and make calculations, marking the location for the base of the portal.
- If you want your fireplace to be in a corner, you will need to first assemble the base and then mount the structure into the wall. Other types of fireplaces involve assembling the frame part directly onto the wall.
- Cut the metal profile taking into account the markings on the wall. Then you can assemble the back part of the portal. The base is attached using self-tapping screws; dowel-nails are useful for attaching the frame to the wall.
- Assemble the base gradually and constantly check the drawing. Otherwise, you may get confused in the calculations and end up with a crooked design. To give the portal stability, place spacers every 30 centimeters. If your fireplace has an arch, you should make cuts on the sides of the profile, after which you can begin to shape it into an arc.
- Now you can cut the drywall. A hacksaw or a regular jigsaw is suitable as a tool. If you do not have these tools, then take an ordinary knife. Measure each side before cutting. The parts are screwed to the base using a 25 mm self-tapping screw.
- Now you have the base for the decorative portal ready and you can begin cladding the structure.
- Many apartment owners install their fireplace in the wall unit. There is a TV above the “hearth”, which looks very impressive. To equip your project with lighting, you will need a connection to the power supply or regular candles.
Do-it-yourself imitation of a fireplace made of polystyrene foam
Choosing foam plastic makes it possible to create a lightweight, mobile imitation of a fireplace in a limited time and practically for nothing. To build a fireplace portal, you can use standard square slabs measuring 100x100x5 cm. The base and tabletop are made of slabs 100 cm long. Since polystyrene foam easily bends under load, it is advisable to reinforce the tabletop with plywood or boards.
To assemble a foam fireplace you will need:
- roulette;
- level;
- stationery knife;
- marker;
- square;
- rasp;
- glue or liquid nails;
- thick wire for making grates and pokers;
- finishing;
- rechargeable lamp simulating flame.
If you plan to finish the product with plaster, you will need a reinforcing mesh, a set of steel spatulas and a gypsum mixture. However, if a decorative fireplace is conceived as a mobile or temporary structure, then its decoration is carried out with wallpaper or adhesive tape.
When it is planned to build a stationary fireplace, the work is carried out in the following sequence:
- A project is being drawn up. It consists of a scheme for fastening the slabs, the type of finishing and calculation of building materials.
- The work site is being prepared. Carpets are removed from the floor, furniture and household appliances are covered with protective film.
- Blanks for assembling the portal are cut. They are attached to the base and glued together. The raised walls are covered with a table top.
- A curved opening for the hearth is cut. Irregularities are carefully removed with a rasp. The product is cleaned free of dust and foam grains.
- The portal is covered with reinforcing mesh inside and outside. A thin layer of plaster is applied to it. The putty is leveled and treated with a liquid primer.
The final stage is the finishing of the portal and the internal arrangement of the fireplace. The fireplace is covered with decorative strips and decorated with various crafts.
Preparation, list of tools
Before starting work, you need to determine and mark the place that the new stove will occupy.
The chimney pipe should be no closer than 15 cm from the roof rafters.
If you are doing masonry for the first time, professional stove makers advise you to practice in advance by making a model of the future stove from prepared bricks. Naturally, without a solution. This minimizes possible risks during real masonry, allowing you to learn from your mistakes, which can still be corrected in the layout.
The stove foundation requires preliminary waterproofing; its area must exceed the area of the stove.
When laying a new row, you need to control the absolute verticality of the walls.
To build a brick kiln, the following tools are needed:
- plumb line;
- trowel;
- roulette;
- putty knife;
- Bulgarian;
- knitting wire;
- building level;
- metal strips, corners;
- containers for cement and clay mortar.
Installing a manufactured door in a fireplace or stove with a brick body
The placement of the stove depends entirely on what exactly the owners expect from it. If it is installed in a small house and will be used as a fireplace for friendly gatherings, you can use the first scheme. This stove is a good option for cooking barbecue on the grill or kebabs.
Brick kiln placement options
The second scheme is for a house of solid square footage. In this case, the front side of the fireplace stove opens into the living room, the stove walls heat both bedrooms, and the heat in the remaining rooms is maintained using heat exchange.
The third scheme with a stove for heating and cooking is a budget housing option for a bachelor or a small family. Pros: a warm bed and the ability to place a dryer in the hallway.
Important: you should take care of the external insulation of the house in advance, because it greatly increases the efficiency of stove heating
- if the door is glass, then the glass is first removed from the frame;
- then the door is applied to the edge of the fireplace in such a way as to cover the entire surface of the firebox;
- a cutting line is drawn on the surface of the brickwork;
- grooves are cut out in the masonry using a grinder;
- a second cut is made from inside the furnace so that part of the masonry can be removed;
- unevenness of the chip is leveled with a chisel;
- the door is fitted into the slot;
- the door is removed and the fastening tape is screwed to it;
- a small volume of oven mixture is mixed (for half an hour of work);
- an asbestos cord is dipped into the stove mixture solution, which is then wrapped around the perimeter of the firebox;
- the combustion door is wrapped with a cord several turns;
- the door is installed back into the hole and secured with dowels;
- noticeable seams must be filled.
The structure is ready.
When installing fireplace doors without brickwork, you will need to drill 4 holes with a diameter of 4 mm. To do this, the attachment points are marked with a marker. The remaining stages of work are similar to those described above.
DIY Methods
When a user plans to make a device on his own, he will need certain knowledge of furnace equipment, its structure and principle of operation. Of course, it will not always be possible to make a high-quality glass product, but it is permissible to try the metal option. Preparations:
- First of all, you need to choose the material for making the product.
- Next, the type and size of the future product are determined. The user's financial budget must be taken into account.
If you don’t have any imagination about the shape and model of the door, you can go online and look for a ready-made solution there. As a result, the user will be able to receive an exclusive product.
Important! To have confidence in the advisability of creating a device yourself, you need to familiarize yourself with all the advantages
Types of fire doors
Today, all doors used in ovens can be divided into several groups, which differ in certain ways. For example, such products are made from a variety of materials:
- One of the most common materials for fire doors is cast iron. Such products have been quite popular for many decades. However, they have such disadvantages as large mass, inconvenience of use, and a significant volume of products.
- The second group includes iron doors. Typically, such products are used when arranging stoves in baths. Iron doors are not used for home stoves because they have a relatively small number of positive characteristics.
- Furnace doors are also made of panoramic glass. Today, such models are most widespread. They are quite light and also provide a full overview of the combustion space.
The last option for the oven door is worth paying special attention to. Their advantages and disadvantages should be described, as well as the types of similar products should be highlighted.
Door selection
The first thing to consider when choosing a door for a brick oven is the heating temperature that will occur in the firebox. Due to the increase in temperature, the product will expand. Other factors must also be taken into account
There is an important rule for choosing oven doors
The gap between the door and the oven wall should be minimal. It is filled with basalt wool or asbestos. In addition, it is worth considering some recommendations from professional stove makers:
- To look at the flame, you should buy cast iron products with glass inserts. However, you should prepare for the fact that the product will be expensive.
- For heating appliances using coal or mixed fuel, cast iron products should be chosen. If the stove is heated with wood, you can use glass or steel.
- To increase safety, it is better to purchase a metal structure that has a heat shield. In this case, the maximum temperature of the outer surface of the door will heat up to 40 degrees.
- To prevent cracks from appearing in the glass, when installing a door with a seal, you can leave a small space between the product and the walls. This will prevent cracks from appearing even with severe overheating.
These tips will help you install a door in any oven.
Wholesale trade
About glass for fireplaces, protective screens for fireplaces
The combustion chamber of a fireplace poses a certain threat to the room due to the large number of sparks, embers emitted by cracking wood and hot ash. It is inconvenient to close the opening with a steel or cast iron damper; in addition, all the beauty of the flame disappears and heat transfer decreases.
Therefore, modern fireboxes use glass for the fireplace, which is strong enough not to shatter when closed, and heat-resistant to withstand the heat of the flame.
FIREPLACE GLASS DOOR CONSTRUCTION
There is currently no alternative to using glass valves:
- Doors for fireplaces made of heat-resistant glass do not expand or deform from heat, like cast iron or steel, thanks to this it is possible to obtain minimal gaps and a high quality seal between the frame and the edge of the door;
- Fireproof glass for fireplaces does not burn or oxidize and retains its original appearance throughout its entire service life;
- The main thing is that a fireplace door with glass allows you not only to enjoy the play of fire, it is the only possible way to control the combustion process so that the flame does not turn into smoldering with the formation of carbon monoxide.
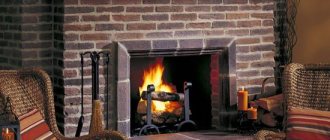
For a small country house or cottage, a cast iron fireplace with glass is most often chosen. In addition to the beautiful appearance, this choice has a purely practical advantage - heat-resistant glass for the fireplace ensures faster and more uniform heating of the room. The champion in terms of heating efficiency is a round fireplace with glass, which is capable of heating and simultaneously lighting the room.
MAIN VARIETIES OF HEAT-RESISTANT GLASS
- Quartz glass options are among the most heat-resistant and refractory;
- Borosilicate glasses;
- Multilayer glass sheets coated with cerium oxide.
Characteristics
The designs of all stoves, unlike most fireplaces, require the mandatory closing of the hearth. The furnace door for the stove has several functions:
- protects the room from open fire;
- ensures heat transfer from burning fuel to rooms;
- prevents sparks from entering the room;
- increases the efficiency of the combustion process;
- decorates the structure as a whole.
All elements of furnaces must be fire-resistant, mechanically strong, and prevent the occurrence of fires.
Conventional doors for the combustion chamber allow air to pass through because they are not sealed tightly with a regular handle. Compacted types have a clamping mechanism, which reduces the amount of air entering the interior.
An eye-pleasing feature of some doors is a glass insert mounted in the center; it does not perform any important functions, but it makes it possible to enjoy the sight of a burning fireplace, which many owners really like.
Installing a manufactured door in a fireplace or stove with a brick body
- if the door is glass, then the glass is first removed from the frame;
- then the door is applied to the edge of the fireplace in such a way as to cover the entire surface of the firebox;
- a cutting line is drawn on the surface of the brickwork;
- grooves are cut out in the masonry using a grinder;
- a second cut is made from inside the furnace so that part of the masonry can be removed;
- unevenness of the chip is leveled with a chisel;
- the door is fitted into the slot;
- the door is removed and the fastening tape is screwed to it;
- a small volume of oven mixture is mixed (for half an hour of work);
- an asbestos cord is dipped into the stove mixture solution, which is then wrapped around the perimeter of the firebox;
- the combustion door is wrapped with a cord several turns;
- the door is installed back into the hole and secured with dowels;
- noticeable seams must be filled.
The structure is ready.
When installing fireplace doors without brickwork, you will need to drill 4 holes with a diameter of 4 mm. To do this, the attachment points are marked with a marker. The remaining stages of work are similar to those described above.
Stages of work
The first thing to do is cut out the corner. And then give the desired shape to the structure. In order to carry out this operation, you need to lay the corner on a flat surface, check the correctness of all connections, and then weld all the necessary parts. After finishing the work, you need to inspect the door again for correctness and compliance with the form.
Then you need to mark the inner contour of the frame on a sheet of metal. After finishing the markings and receiving all the measurements, you need to increase them slightly and leave a small allowance on each side. Taking these marks into account, it is necessary to cut out the part using a metal grinder. Since the door is planned with glass, it is necessary to have a piece of heat-resistant material that will be mounted.
Using the same tool, glass is cut to the required dimensions. Next, you need to weld the curtains to the frame. After this, you need to grab them to the common door frame. When this operation is completed, you need to make sure that nothing interferes with the opening and closing of the door. If this condition is met, then final welding can begin. The door handle is attached last.
Classification of furnace units
Most often, homemade stoves are made with cooking surfaces.
According to the characteristics of the device they are made:
- chamber;
- duct;
- bell-shaped
In chamber stoves, flue gases enter a special chamber and are completely burned there due to natural circulation. Their design creates a similarity to the burning of an ordinary fire in a confined space. In domestic models, the combustion compartment is connected to the afterburning compartment into a single module called the crucible. Its vaulted shape ensures complete combustion of fuel. An example of such a design is the classic Russian stove.
In a ducted unit, the flue gases first burn out, then gradually cool down and move through the channels located between the partitions. When moving, they give off heat to the furnace body. There is no afterburning inside until the temperature in the combustion chamber reaches 400 degrees. The efficiency of these devices does not exceed 60%.
In a bell-type furnace, combustion products move to the roof of a special bell and linger there, burning out completely. Then the gases sink to the bottom and give off heat to the body. To kindle such a unit, it is enough to warm up only a small area of the hood. Its efficiency can be 75%.
Pros and cons of ready-made stove ideas
Let's look at several reasons why people often choose the old type of heating for their home:
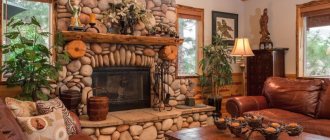
The first undoubted advantage is maintaining heat with a brick oven. Judge for yourself - such a stove keeps heat for at least a day, provided that you need to add firewood once every six hours.
The ability to store heat makes a brick stove very economical, because it does not require a constant source of fuel, moreover, they are much more environmentally friendly than their metal “brothers”.
The surface of such a stove does not heat up to such a high temperature that could leave a burn on the human body; on the contrary, if you lean your hand against it, you can feel pleasant warmth and comfort.
In addition to all of the above, a brick stove has aesthetics; look at the photo of a homemade stove and you will understand everything for yourself.
The downside, perhaps, is that a cold room takes a long time to heat up, but you can heat it up a little earlier or purchase special heaters that will warm the room at least a little while the main power warms up.