The stages of installing separate gas equipment - a hob and an oven - are similar to installing a conventional gas stove, but they also have their own characteristics. Sometimes users only connect a gas hob because they do not use an oven or prefer an electric model.
If you decide to carry out the installation work yourself or want to supervise the work of specialists, we suggest that you take a closer look at how to connect a gas hob with your own hands.
Working conditions
In an apartment, the installation location of the gas panel is determined by the location of the gas pipe. A shut-off valve must be installed on the gas pipe. It is worth noting that moving a gas pipe over any distance should only be done by gas company specialists. At the same time, no one forbids installing a gas panel at a certain distance from the pipe, using a flexible gas supply (gas hose).
bellows hose, flexible gas connection
You might be interested in:
Electric hobs, which ones are better? — Electric hobs: which ones are better (we rely on reviews)
Combination hob - Combination hob: the best choice for a modern kitchen
3-burner electric hob, built-in - 3-burner electric hob: built-in golden mean
How to clean a glass ceramic hob? — We reveal secrets about how to clean a glass-ceramic hob.
Page tags:
Measurements
Before purchasing a panel, you need to know the width of the tabletop. The dimensions of most panels are standard and do not go beyond 55-57 cm. The documentation for the panel must indicate not only the dimensions of the panel, but also the size of the hole in the countertop for installing the panel.
Panel installation diagram
Related article: You can remove the threshold of the balcony door
What do experts advise when connecting hobs?
- The film from the seal must be torn off gradually;
- The equipment is tried on in a niche until it lies flat and beautiful;
- The fewer gaps, the safer it is to use the panel;
- Before installation begins, the stove must be connected to the electrical network according to the complete circuit;
- Gaps on the front part can be masked with silicone;
- You can place drawers and metaboxes under the panel, so indentations should be made so that they do not touch the device;
- Two-burner models are installed along the countertop if they correspond to the dimensions of the box;
- The minimum installation depth is indicated in the equipment passport;
- The sole of the jigsaw should be placed at a right angle - this way the surface of the tabletop will not be scratched;
- The hob should be installed only after assembling the kitchen, so as not to deform the table;
- You need to apply sealant over absolutely all end cuts - this will save the material from delamination.
Watch the video about installing the hob
How to install a gas panel - Carrying out the work
Tabletop markings
Mark the wooden tabletop according to the template, which should be in the documentation for the panel. If there is no template, the dimensions of the cut must be indicated in the passport.
Drilled holes in the table top
Important! You can only cut wood tabletops (chipboard, MDF) with your own hands. It is better to order cutting of countertops made of artificial stone from a company, or even better to order a countertop with a ready-made hole for the panel. Sawing stone requires special tools and complex templates.
Gasket for convenient installation of the gas panel
The tabletop is cut according to the markings made using an electric jigsaw. To start cutting, holes are drilled in the corners of the markings to insert a jigsaw saw.
The diameter of the drill is greater than the width of the jigsaw blade
To protect the surface of the tabletop from the movement of the jigsaw sole and from chipping when cutting, masking tape is glued next to the markings or along the markings.
To prevent the cut from falling and breaking the tabletop, you need to support it from below, as in the photo, with clamps.
Cut the table top with a jigsaw
Related article: How does an induction cooker differ from other electric models
Connecting the hose to the gas pipe
Connecting the hose to the gas pipe is done before installing the furniture; it is more convenient. The panel is connected to gas using a flexible hose specially designed for gas supply.
not to connect a flexible gas hose (bellows hose) directly to the gas valve. The connection must be made through a plumbing pipe or fitting.
The connection must be made using a fitting
- Before connecting the gas hose, flax, pre-twisted into a thread, is wound onto the thread of the hose. Rewinding is done clockwise.
- After winding, the flax is coated with a thin layer of Multipak gas paste. It will seal the connection.
Important! Do not forget to insert an O-ring into the flexible gas supply nut;
- The supply nut is tightened by hand and tightened with a gas wrench, all the way without zeal.
connecting the hose to the gas
Note: To increase safety, a thermal shut-off valve can be installed on the gas pipe. Its purpose is to shut off the gas supply in case of fire and temperature rise above 80˚C.
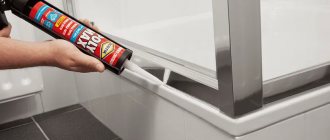
- It is better to coat the cut edge of the tabletop with plumbing silicone; it will protect the cut from moisture.
Treatment of cut ends with sealant
Preparing the panel for installation
The panel kit includes jets for the main connection. If they are not installed, they need to be installed in place. The installation diagram for the jets is glued to the bottom of the panel or indicated in the passport.
If the gas panel is connected to a gas cylinder, you need to buy different jets.
Jets
Installation of jets
Connecting the hose to the hob
To connect the gas panel, its kit must include a plumbing corner. The corner must be installed on the panel immediately. There is no need for winding for the corner, but don’t forget about the gasket.
Attach a flexible hose to the plumbing corner, not forgetting about the winding. At the same time, do not forget to pass the flexible liner through the cut in the tabletop.
The panel comes with mounting strips that need to be attached to the panel.
Related article: Domino hobs: features of selection and installation
Fastening the table top
The cut in the tabletop is ready, it’s time to secure the tabletop in place. The fastening of the tabletop must be strong and reliable.
Preparing the cut (sealing)
I repeat, coat the cut walls with sanitary sealant. Additionally, you can protect the ends of the cut with heat-reflecting tape or foil.
Installation and fastening of the hob
- Place a seal along the cut (it should be included in the kit);
- Place the hob in place.
- Align the panel borders;
- Tighten the panel fastening strips from below, hooking them onto the tabletop;
- Use a sharp knife to cut off the protruding edges of the seal without damaging the surface of the countertop.
Checking the functionality of the hob
- Open the gas valve.
- Use your sense of smell to check for gas leaks;
- After some time, turn on the panel valve, check its combustion;
- Turn off the panel valves and install a pan support on the panel.
Connecting the hob to the mains
Experts note how to correctly and quickly install a new hob into a kitchen countertop and connect it to communications. The device can be connected to a separate power line if there are RCD circuit breakers for the stove on the panel. In houses with a power supply of 380 volts, you need to make a uniform load per phase.
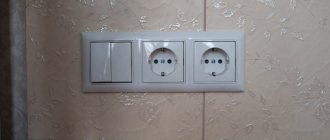
The panel may require a separate outlet, so first you will have to dismantle the headset. The canal is prepared, strengthened, and covered with a layer of putty or cement. After this work, they move on to cutting holes and installing the slab.
The hob may require a separate outlet
Pros of installing a kitchen stove in a corner
- Cosiness . Most people associate this arrangement of equipment with a home fireplace. This is especially true for private houses. The tile attracts the attention of guests because of its non-standard idea. The hostess enjoys cooking in such an environment.
- Triangle . The entire work area has a triangular shape, which includes: tiles, sink, refrigerator. All equipment and accessories are located close to each other, which simplifies the cooking and cleaning process. There are situations when you need to quickly find an ingredient or monitor the operation of an appliance. If the work area is completely visible to the owner, it will be easier for her to control all processes. Being in the kitchen will be a pleasure.
- Space saving . The angular location of the slab allows for efficient use of room space. This applies to owners of small kitchens, where each place serves a specific function.
- Placement of the headset . When the tiles are angled, space is freed up for additional cabinets and shelves. You can arrange the room so that all the utensils and tools fit. It is possible to use kitchen utensils for decoration, for example, hang ladle, holders and tongs on hooks. They are easy to take when necessary, and in your free time they serve as decoration.
- Ventilation . In a sloping corner it is easy to hide ventilation pipes from prying eyes. To do this, cabinets are installed where there is practically no space to store kitchen utensils. If the ventilation is visible, it complements the effect of the fireplace. An association with the stove appears, which adds coziness to the room.
- Design ideas . In the corner you can create a functional and stylish work area. Brickwork or fine wood is often used. This emphasizes the effect of the fireplace. A simple kitchen can become a real creative corner with high functionality.
Functional Features
One of the main functions is gas control of the burners, which is designed for safe use. Gas stoves are equipped with a timer, a digital display, and there is a thermometer inside the oven that shows degrees. The presence of additional functions leads to an increase in price, but they are not always used, for example, this applies to an alarm clock and an Internet access zone.
A gas stove with electric ignition is necessary for those who constantly cook and do not want to use matches or a lighter. This function helps to light the gas in a matter of seconds. Today, all well-known manufacturers produce models with built-in electric ignition.
Sealing and sealing
Before installing a gas stove, you need to treat all cuts with nitro varnish or silicone sealant, which will protect the countertop from premature damage, getting wet, dirty, and swelling. You can also use a self-adhesive seal that performs the same functions. It is glued on top so that the edges of the hob rest on it.
To seal the edges, you can also use aluminum tape, which will also protect the tabletop from temperature changes. Remember that a high-quality seal can extend the life of the countertop, and it will not need repair or replacement.
Safety precautions when dismantling heating surfaces
When removing the hob, be sure to do everything correctly. During this process, you must follow the safety precautions listed below:
- operation of a built-in electrical appliance involves only cooking and heating food;
- It is prohibited to use the induction panel for defrosting and cooking food packaged in metallized packaging;
- Full protection from contact with live elements is ensured by compliance with current electrical safety standards;
- if the device does not work correctly or operates with deviations from the specified parameters in the factory instructions, contact the service center;
- if cracks, chips, or crevices appear on your hob, you must turn off the power to the device to avoid electric shock;
- During the cooking process, dishes and burners become very hot, it is necessary to limit access to the device for small children and ensure complete safety in relation to thermal and electrical burns;
- Contact of the electrical cable with the hob is strictly prohibited;
- It is not recommended to place any flammable or combustible materials on the surface of the cooking structure, as this may lead to a fire;
- It is also prohibited to remove blockages and contamination with alcohol-containing liquids;
- It is prohibited to repair equipment independently or by persons who do not have a special license to perform this type of work.