Rainwater is a renewable resource that many gardeners simply ignore. And completely in vain.
In this unpredictable summer, when the weather every now and then interferes with sunbathing, but still sometimes pleases us with warm days, you can get no less pleasure by building a convenient and economical country shower. You don't have to spend your last savings to do this. An old barrel or container can become a water reservoir, and, as a rule, there is no need to fill it; the warm summer rains will do this for you. Read about how else you can use rainwater and how to collect it correctly in our material today.
What types of water collection systems are there?
The main thing you will need is a suitable tank and a water supply running from it, as in the numerous photos of rainwater collection that are presented in our article. Additional filters may be needed if water is intended to be used for washing dishes and for hygiene purposes.
Bacterial safety
Bacterial safety is an important factor for the use of process water. Work on disinfecting the liquid takes place at the last stage, after filtering from all mechanical impurities.
There are two methods used to purify rainwater from bacteria:
- Chemical. Installation of special disinfection cartridges.
- Disinfection using ultraviolet systems (Figure 8).
Figure 8. Ultraviolet rainwater disinfection systems
Elements of the water collection system
Storm water inlet. Usually plastic is used, but cast iron is also possible (grate, garbage bin and partition included). Drainpipes are connected to the rainwater inlet.
A reservoir for storing water (placed under pipes on the surface or buried in the soil next to the dwelling). The material from which the tank is made must not oxidize water and have a certain degree of safety.
A container buried in the ground is preferable. It is more practical; the water is stored refrigerated, which slows down the growth of bacteria. But, you need to take into account the depth of groundwater and the degree of soil freezing in winter.
Pipeline. To allow precipitation to get into the storage tank, and from it into the home or garden, a pipeline is laid; on the outside it can be PVC products. The pump supplies water to the house. Submersible pumps are usually used.
Where to place containers
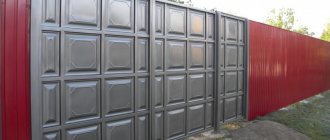
Barrels are an item that is more functional than decorative. And they should be placed based on practical considerations.
- This location should be suitable for long-term storage and efficient use of water with convenient supply for further use.
The most obvious solution is to place the container under the roof: near buildings and houses under drainpipes in the place of the most intense drainage.
- Experts recommend installing containers at an elevated location.
Even a small rise to a height of half a meter allows you to use water without a pump or additional equipment. It flows out of the tank by gravity. Its supply is regulated by mechanical (automatic) valves. This is convenient for washing tools, shoes, and for organizing drip irrigation of the garden.
- If you install the container even higher, you can get an impromptu gravity shower in the countryside with natural heating - the sun. You will have to work a little to build a reliable frame and support for the water barrel.
- Storing the container in the basement. In this option, the water will be reliably protected from sunlight. But it can only be used from such a storage location using a pump.
- The reservoir can be dug into the ground.
The purpose of this complex and time-consuming work with preparing the pit and gravel-sand base is to hide the container from the sun and eyes. In this case, you cannot use a tank made of any material: only those intended for storing liquids in such conditions. Maintenance becomes more difficult. A pump will be required to supply water.
Such a storage system with the tank located below the freezing level or in a warm basement cannot be called free. Although you can use it all year round.
Water collection tanks
When installing a water supply system, the question often arises: where to collect water? The material from which the tank is made can be polymer, as it is the most resistant to various factors of damage; containers made of galvanized steel, concrete, etc. are also possible.
The main properties of a suitable material are: its insolubility with water, the composition of water remains unchanged when interacting with it.
You can purchase a decorative tank that will not only be functional, but also look aesthetically pleasing.
It is unacceptable to use containers containing copper and zinc. The consequences of exposure to direct sunlight on the water storage can be negative; this will cause rapid growth of microorganisms.
Construction of an eco-mosque in Turkey
Details Created on 02/08/2013 09:34
Written by Natali
Surrounded by mountains, Turkey's fourth largest city, Bursa is already one of the country's greenest metropolises and is set to become even greener.
An eco-mosque is planned to be built in the western part of the city, where it will produce 120 kW of electricity from solar and wind energy. The building will consume 50kW, selling the rest to the national grid. Construction is scheduled to be completed in 2015.
Turkey already has one eco-mosque that generates and uses solar energy. The mosque is located in a village in Akkuyu province.
But the Bursa mosque will be the first mosque designed to produce and consume renewable energy.
Which planes are suitable for collecting water?
Flat roofs are not designed to collect water, or water from such roofs can be used for irrigation or washing floors. Water on such a roof collects in puddles and cannot be effectively used for various purposes, especially hygienic ones. It is more accessible to collect water from the roof if it is tilted by at least 8-10 degrees.
It is strictly not recommended to use sediment from a roof made of materials containing copper, asbestos or lead. Clay tiles are considered environmentally friendly. Roofing iron and PVC are favorable for collecting rainwater.
The remaining elements of the catchment should also not contain hazardous substances; suitable materials for them are stainless steel and plastic. You need to remember - the larger the roof area, the more water will be collected in the end.
Urban rooftop farm on an industrial scale
Details Created on 08/25/2013 09:50
Written by Natali
A few years ago, the idea of a large-scale commercial urban farming operation that could provide locally produced food seemed impossible. Increasingly, urban farms or “rooftop farms” have appeared on the roofs of high-rise buildings, municipal buildings or just small residential buildings, helping people get the fresh fruits and vegetables they need and pleasant coolness during the hot season.
This business development model seemed very attractive to the agricultural company Lufa Farms and now it is opening its second, largest to date, urban farm north of Laval, Canada.
The farm is located on the roof of a building that houses a furniture store and other commercial tenants, and occupies 4,000 square meters.
Articles tagged
Maintaining your rainwater harvesting system
The drain should be cleared of dirt and leaves from time to time. It is advisable to equip the drainage system coming from the roof with a metal grating. It is better to install such a mechanical filter, not on the neck of the drain, but in the place where it passes from vertical to inclined, on the way to the water storage tank.
If there has been no rain for a long time, during the first rain it begins, you need to disconnect the pipe from the tank so that it can be properly washed. This action takes about an hour. Then the pipe is returned to its place and the water collection tank is filled.
It is necessary to change filters as they become dirty, and periodically clean the grids of mechanical filters, then the water will delight you with its unusual purity.
In order to collect water at the dacha, you do not need to spend a lot of money and time.
Expert advice
To ensure that the water is always fresh and clean, you will need:
- Clean the tank with soda solution twice a season.
- Clean screens, filters, and gutters regularly. To prevent debris from getting into the container, you can install a lid on it with the embedded end of a drainpipe or mesh.
- Use several containers at the same time, placing them under each drainage point. This way you can make a large reserve.
- To drain excess water into a reservoir or drain, a drainage base (pebble drainage or drainage grate) and a drainage ditch are required.
- Over time, sediment will certainly form in the tank. To prevent it from getting into the water, you should not collect it (by pump or gravity) from the very bottom of the container.
- Containers must have an overflow system. With its help, excess will be drained into the drainage system or storm sewer.
- Before freezing, it is recommended to drain the remaining water and store the pumps and hoses for storage.
It seems that there is no vital need to use rainwater at the dacha. There are very few regions in which precipitation is almost the only source of fresh water. Nevertheless, the old tradition is not forgotten today. No matter how a person uses this accessible and free source, the cost of water consumption can be reduced by up to 40-50%. Plus – care for the environment and rational use of valuable natural resources.
Consequences of condensation
The constant presence of moisture on the surface of the drain tank is not only a small nuisance - it is a big problem, which in a few years can cause a lot of discomfort for the safe living of the family.
This is fraught with the following consequences:
- The microclimate is deteriorating;
- condensation promotes corrosion on metal elements;
- any cosmetic repairs made with expensive materials will be reduced to zero due to prolonged exposure to moisture;
- Mold and mildew will appear in the room.
And if you leave the bathroom unattended for a long time, then puddles formed from condensation can penetrate to the neighbors on the lower floor. And this threatens not only damaged relations with them, but possible financial expenses for repairs.
Installation of drainpipes
Installation of the drainage system is done before roofing work - then the fastening elements can be easily attached to the rafters or roof sheathing. They can also be fixed to a special mounting board. When attaching to the sheathing, use longer hooks, and if the brackets are installed on a board, then you should choose fasteners of a shorter size.
We advise you to read about how to independently install a instantaneous water heater, a septic tank, as well as how to make water supply from a well.
Made of plastic
Many elements and components of this lightweight structure can be assembled at the bottom and then only lifted up and properly secured. To cut plastic elements, use a hacksaw or metal saw. The edges are smoothed with a hacksaw or sandpaper. Fastening elements (brackets) are installed ahead of time.
When installing plastic drainage systems, the following work is done:
- First, mark the places for attaching the brackets, while moving 15 cm away from the corner of the roof. The distance between them is no more than 0.5 meters. The height difference should not be more than 5 mm per meter. In this case, you should also take into account the slight slope of the gutter towards the drain pipe. The optimal slope is considered to be 3-5 mm per 1 meter;
- The outermost elements are attached first - the topmost bracket and the bottom one;
- Plastic gutters are installed on brackets and connected to each other. The connections must be completely sealed;
- cut holes for drainage;
- install drain funnels;
- all joints are sealed;
- Under the drain funnel, clamps are attached for installing pipes at a distance of 2 meters from each other. To mark the fastening points, use a plumb line;
- First, an inclined elbow is attached under the drain funnel;
- Pipes are secured under the inclined bend, connecting them to each other using couplings and securing them with clamps;
- A discharge elbow is installed at the bottom of the drain pipe.
You may also need to know how to build a cellar in a garage, how to get rid of groundwater in the basement, and how to make lighting for a country house.
Metal system
When installing a metal drainage system, the following steps are performed:
- fasten the brackets at a distance from each other of no more than 0.6 meters, taking into account a slight slope (2-5 mm per 1 m). A pair of brackets are installed at the drainage point for the funnel;
- installation of gutters. They are inserted into the grooves of the brackets and clamped with a latch. Metal gutters are cut to the required length with a hand metal file and then the cut area is processed using a fine file. Two gutters are connected with an overlap of 5 cm, and the upper part of it should be directed towards the slope to avoid leakage;
- plugs are installed on the edges of gutters that do not lead to drains and sealed with rubber gaskets or sealant;
- install drain funnels and protective nets;
- a drain elbow is attached to the drain funnels;
- mark the mounting locations for the pipes, first attaching them to the drain elbow;
- installation of clamps in the designated places on the wall;
- pipe installation. The pipes are connected to each other to the required length and secured with clamps, fixing the removable part of the clamp with bolts and screws;
- drain elbows are attached to the lower ends of the pipes, draining water from the roof away from the walls and foundation.
How to make a water filter with your own hands: 5 options for survival and autonomous existence
We regularly tell you about various things that are useful for survival, but few of them compare in importance to clean drinking water.
Yes, of course, not all extreme situations are associated with a lack of fluid, but solving this problem is necessary for long-term survival or autonomous existence. Especially in the conditions of the post-apocalypse we all love so much.
And an effective homemade water filter is perhaps the only thing that will save you.
Why do you even need to know how to make a water filter with your own hands?
So, imagine a classic post-apocalyptic wasteland, so carefully described in numerous films, books and computer games. Is it easy to find water there? Apparently not.
In addition, any active source may be destroyed or polluted, or simply dry up. And you will have to look for a replacement for it, which is quite energy- and resource-intensive.
However, it is not a fact that you will be lucky, so you will have to be content with not the best sources - puddles, collecting rainwater and trying to cleanse what is at your disposal. The last one is the most difficult, since you will have to somehow get rid of dirt, bacteria, debris and various not very useful chemical impurities.
Alas, simple boiling will not help you in this matter. Yes, the water will improve, but not to a safe level, which can only be achieved by using a full-fledged homemade filter.
Cleaning, disinfection or filtration?
All these terms are related to the production of drinking water, but they do not mean the same thing.
- Filtration is the physical removal of contaminants by passing liquid through a filter or several filters of different sizes. This is exactly what we will talk about next.
- Disinfection or disinfection is exclusively the elimination or destruction of biologically active organisms and substances that can harm humans.
- Treatment is the physical and/or chemical removal of unwanted substances from water. Chemical pollutants, radioactive molecules, dissolved gases, particulate matter, biologically active pollutants.
In most survival situations, you have to use a combination of these methods. For example, once you have access to a pond, you will first need to filter out the sludge and solids and then boil the water for disinfection purposes.
How does a water filter work?
Filtration is accomplished by passing liquid through barriers that trap particles above a certain size. Chemical filtration does the same thing, only with particles of a certain nature due to the formation of persistent chemical bonds. In any case, the output is water purified from all excess.
The type and size of objects that a filter system can capture depends on both the size of the filter itself and the size of its pores (measured in microns). This means that even bacteria and protozoa can be removed through really small pores.
What to filter first
The first rule is that no body of water is truly clean, even if there are no visual signs of pollution. Water always needs to be treated. And don’t believe those who think that additional cleaning is a waste of time.
Main attention should be paid to the following types of contamination:
- Sediment or sediment. Small physical particles that may be dissolved, suspended, or precipitated. Their sizes range from microscopic to simply small - the size of a grain of sand. And yes, they are present in all natural bodies of water.
- Toxins. Substances that are in themselves harmful to a living organism. They can be of both organic and inorganic origin. Examples include salts of heavy metals, industrial wastewater, pesticides and much more. As a rule, these substances are not visible to the naked eye.
- Microorganisms. Both harmless to humans and dangerous. The second category includes dangerous bacteria (E. coli, salmonella), protozoa (Giardia), viruses (rotavirus, polio) and much more.
Making your own water filter
If you consider yourself a survivalist, then you absolutely need knowledge about homemade water filters. If only because they require materials that you are unlikely to be able to obtain in a power supply environment. So it’s better to find out in advance what exactly you need to stock up on. So.
Berkey water filter
Big Berkey is one of the best water filters you can buy. If you can afford it, then neither you nor your family will have any problems with clean water.
However, if you can’t, it’s okay, since the body of such a filter itself is just a beautiful package, for which they charge most of the money. The main thing is the filtration system, which is much cheaper - you can find a pair on Amazon for $128.
And then – you just need to figure out how to connect this very system to a homemade case. So.
You will need:
- 2 large plastic buckets with lids (used for storing food)
- 1 tap
- 4 to 8 Black Berkey Purification elements
- Drill with ½" and 3/8" drill bits
Get two BPA-free plastic buckets. It is best to choose the same ones, with a volume of 10 liters or more.
Wash and dry them thoroughly. Using a 3/8" drill bit, make 2 (or 4, depending on the number of pieces) holes in the lid of the first bucket. And in the bottom of the second, and so that these holes can be combined without problems.
Take the first bucket and drill a ½ inch hole about 2 inches from the bottom. This will be the hole for the tap. Do not forget about two insulating washers during its installation - one on the outside, the second on the inside.
Next you need to prepare the cleaning elements. Inside each bag you will find washers with holes in the middle. Threaded rods from Berkey elements will need to be inserted into this hole. Hold the rod in your hand and place it under a faucet with running water. It should flow for about 10 seconds to completely moisten the filtration system. Repeat the same for each element.
Now you need to mount the entire structure. Insert the filter rod through the hole in the bottom of the second bucket and secure the system with a screw washer. Turn the structure over and place it on the first bucket.
It is strongly recommended that you drain the first portion of water purified in this way to ensure that there are no contaminants that could accidentally enter it from the filters.
According to manufacturers, each filter is enough for 13.2 thousand liters of water.
Ceramic water filter
They are quite easy to make and relatively cheap. It works similarly to the previous option, except that they use their own ceramic filters.
Activated carbon granules are placed in a ceramic body with grids made of a similar material. The pores in the shell filter out solid particles, suspended matter and even large microorganisms, and the charcoal removes chemical contaminants, unpleasant tastes and odors.
This system has been well tested in practice - it is what is most often used by missionaries forced to work in Africa.
You will need everything the same as for the Berkeley filter. And you need to do everything the same, except that there are not two (4 or holes, but only one - in the center.
This system has one small problem - it works slowly. A 5 gallon (18.9 liter) bucket can only filter 12-15 gallons (45-57 liters). The speed can be increased by using a larger “top” bucket that provides more pressure.
Emergency water filter
The emergency filter is a fairly well-known thing, and quite functional. This is relevant in situations where you have to use only available materials, and you can only dream of ready-made filtration systems.
You will need:
- Large plastic bottle
- Container for receiving clean water
- 1 piece of cotton fabric
- 1 coffee machine filter (or fine pore cloth)
- charcoal
- Coarse and fine sand
- Gravel
- Diatomite (aka “mountain flour” - the fossilized remains of diatoms)
- Scissors and cutter
Cut off the bottom of the plastic bottle, clean it and dry it.
Make a small hole in the cap of the bottle - clean water will flow out of it.
Now it's the filter's turn. First there is a layer of thin fabric and a coffee filter - they will be located at the very bottom of the bottle.
Above them is 5-7 centimeters of diatomite. Next is 7 cm of crushed charcoal. Next 3-4 cm of fine sand, 3 cm of coarse sand and another 3 cm of fine sand. And on top - another 5 cm of diatomite. On top of this whole thing is 7 cm of gravel. Cover the top with porous fabric and secure it with adhesive tape or rope.
You need to pour water slowly so as not to mix the filter layers. In addition, a flow that is too fast may not have time to be processed and the desired effect will not be achieved. The resulting water still needs to be boiled.
“Wooden” water filter
The design is as simple as possible - you just need to take a branch, insert it into the hose and start getting clean water. The point is that xylem, one of the layers of wood used to transport juices, can easily be used to filter water. And yes, this discovery belongs to researchers from MIT.
You will need:
- Small living tree branch
- Knife
- Clamp
- Hose
- Plastic bottle
- Adhesive tape
You need to remove the bark from the branch using a knife. Leave 7-10 centimeters from the branch, and also grind it so that it can fit tightly inside the hose. Insert the branch at one end and secure with a clamp. Make sure everything fits snugly.
Cut off the bottom of the plastic bottle. Then make a hole in it the size of the hose. Insert the hose and seal the joints with duct tape.
There is, however, a problem. This installation works unusually slowly - only 4 liters of water per day. But it is clean in terms of physical and chemical indicators. So you will need several of these setups. Plus the branches need to be changed regularly.
Bandana tripod filter
In the most extreme survival scenarios, you won't even have buckets, plastic bottles or hoses. However, you can still put together a homemade water filter. To do this, you will need a piece of cotton fabric (bandana, T-shirt, sheet) and sticks. Well, a lot of improvised material. All.
The point is to get a multi-level filtration system. As each layer passes, the water will become cleaner - and that's all you need. The fabric will hold the filter media together, and the branches will serve as a base for the entire structure.
You will need:
- 3 pieces of fabric (cotton)
- 3 strong long poles
- Rope
- Fern or any other foliage with a large surface area that does not contain substances hazardous to humans.
- Sand
- Crushed charcoal
Three branches are tied together at the top with rope to form a tripod or three-legged tripod.
Tie the largest piece of fabric to the branches about 10 centimeters above the ground. Do the same with other pieces of fabric, but at different levels. The result will be a “pyramid”.
Place a couple of pebbles in the topmost piece of fabric to create a funnel shape, and cover them with the extracted leaves on top. Fill the middle level with sand, and the largest bottom level with crushed charcoal. Don’t forget about the pebbles so that the levels take on a conical shape - it directs the flow of purifying water.
Place a container under the structure to collect the purified liquid. But it still needs to be boiled before use.
The design is slow, but that's how it works - the charcoal takes time to absorb harmful chemicals from the water.
Original article: How to Build Your Own Home Water Filter System [4 Types]
What is drainage
The purpose of the drainage system is to collect excess moisture from the soil, that is, to drain it. The task of the system is to prevent an excessive rise in the groundwater level so that the site does not turn into a swamp. Most often, drainage is done on swampy soils.
The way to check the humidity level is to dig a hole half a meter deep in any area of the dacha. If after a short time (without rain) water accumulates there, you need to build a drainage system. Otherwise, the water will begin to wash away and destroy the foundation of all buildings.
Types of drainage
There are surface and deep drainage sewers.
The first option has two subtypes:
- Linear system. Trenches are dug on the soil surface along the entire perimeter of the site. Snow and rainwater flows into the depressions. The network works on flat surfaces without sudden changes in height. The depth of the trenches is up to 30 cm, the bottom and walls are covered with fine gravel. Advantages: simplicity and efficiency of arrangement. The downside is the need to clean the ditches from debris.
- Point drainage. The simplest type is to install water collectors at points where liquid drains abundantly. These can be drains, natural depressions in the soil. Barrels are placed under drains, and in ravines open containers are buried in the ground.
Expert opinion Vladislav Ponomarev Design engineer, inventor
To form surface drainage, no complex calculations are made. The system is equipped “by eye”.
Deep drainage is a complex network of channels and pipelines that drains moisture into special structures or ditches outside the site. Sewerage is carried out with preliminary accurate calculations in accordance with geological survey data. Deep drainage is required in areas with sharp changes in relief and abundant groundwater at shallow depths.
Loading …
Micro-house Ecocapsule enters the market
Details Created on 02/09/2018 13:28
Written by Natali
Facepla.net has been following the Ecocapsule solar and wind micro-home since the prototype stage. Now, almost 10 years after the fantastic concept was conceived, its Bratislava-based designers are finally making their international debut with the exclusive release of 50 off-grid micro-homes that can be installed almost anywhere.
While this set of smart, self-sufficient tiny homes will only be available to customers living in the United States, Japan, Australia and the EU, a second production series will follow in late 2018.
Articles tagged