Design and principle of operation
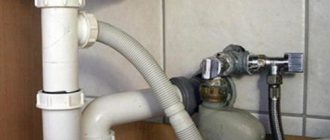
Sewage equipment, consisting of 2 mains, is responsible for the continuous circulation of water. Through one pipe the liquid is supplied to the point of consumption, through the other it is drained and removed from the system.
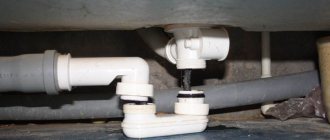
A siphon is a special design that regulates the level of inflow and outflow of water.
The second function of the drainage device is to prevent the spread of unpleasant odors emanating from the sewer system by forming a special seal. It is created by liquid retained in the system after passing siphon bends. The operating principle is based on this.
In addition, the drainage device performs a filtration function. Dirt and mechanical impurities contained in the water supply line settle at the bottom.
Structurally, the siphon is made from a small flask-shaped container filled with water. Pipes are connected to the device on both sides. When the permissible level is filled or exceeded, an overflow occurs and excess liquid goes into the sewer.
An effective folk method
A time-tested folk remedy will also help eliminate the problem. A solution of soda ash and vinegar gives a good effect. When baking soda reacts with acid, it produces large amounts of carbon dioxide. In a closed space, it pushes through the congestion.
To enhance the effect when carbon dioxide is released due to the interaction of soda with vinegar, after filling the components, you need to tightly close the drain hole
Instead of vinegar, you can use citric acid or freshly squeezed juice of one lemon. In any case, the prepared product will not “hit your wallet” much.
Sequence of actions:
- Pour ½ pack of baking soda into the drain hole.
- After 10-15 minutes, when the powder is compacted, half a glass of vinegar is poured into the hole.
- When the chemical reaction begins, the hole is covered with a stopper.
- 60-90 minutes after the “seething” is completed, the tap is opened and 5-6 liters of hot water are poured into the hole.
The method using soda and vinegar is only effective for clearing blockages located close to the drain. The further away the plug is, the lower the pressure of the released gas.
Image gallery
Photo from
Step 1: Load the Drain with Baking Soda
Step 2: Boiling water to pour into the drain
Step 3: Add Vinegar to the Pot
Step 4: Pouring the solution into the drain hole
Types and features of siphons
Depending on the material, plumbing siphons come in 2 types:
- plastic;
- metal.
The advantages of polymer drainage devices include:
- ease of installation;
- low cost;
- resistance to mold growth;
- resistance to corrosion.
Disadvantages of plastic siphons:
- Limited service life. Often, a metal cable is used to deal with a clog in the sink; if handled carelessly, it can destroy the fragile polymer material.
- Insufficient tightness. To solve the problem of loose fitting of the nuts during assembly, the fastening structures are supplemented with rubber seals.
- Increased likelihood of leaks caused by manufacturing defects. Small irregularities on the surface during operation lead to the appearance of cracks.
Copper, brass, cast iron, and stainless steel are used for the production of metal siphons. The reliability and durability of cast iron drains explain the high cost. The chrome plating adds an aesthetically pleasing appearance. The disadvantage is the complicated installation technology.
Based on design features, drainage devices are divided into 3 types:
- Tubular. Manufactured from a curved hose with an S- or U-shape configuration.
- Bottled. They are made in the form of a flask, which is filled with water during operation. To carry wastewater into the sump, a pipe of smaller diameter is connected to the tank. Having reached a given level, the liquid overflows and flows into the sewer. Siphons do not dry out during interruptions in water supply.
- Combined. The design consists of a corrugated hose connected to a flask. The systems are installed in bathrooms of multi-storey buildings.
According to the principle of operation, drainage devices are:
- Universal. Standard siphons are characterized by the absence of unnecessary elements. A plug is used to regulate the water level. A simplified installation technology is provided.
- Semi-automatic. They differ from the previous version by the presence of a special mechanism that remotely controls the drainage. The fragility of the semi-automatic device requires extreme caution during installation and gentle operation.
- Automatic. The systems lack most standard parts. Regulating the sewer connection area is the task of the built-in mechanism. According to the control principle, they are divided into 2 categories: with a manual lever and “click-clack”.
It is recommended to install a universal siphon. Drain repair is simple and can be done with your own hands.
Faithful helpers - chemicals
The modern market offers many ready-made preparations that allow you to decide how to effectively remove blockages in the bathroom. The active ingredients of the compositions are able to soften and destroy plugs of organic deposits.
They are available in the form:
- liquid concentrates;
- semi-liquid gels and foams;
- dry powders.
The main thing when working with chemicals is to maintain the concentration and waiting time specified by the manufacturer. Even the safest cleaning compounds can only have a beneficial effect within a certain time period.
With prolonged contact, they can even cause deformation of the material from which the pipes are made.
Granular and powder “blockage removers” are considered the most effective, but gels are less dangerous for the condition of pipes and human health
It is quite easy to use ready-made preparations. They are simply poured into the drain hole and wait for the time specified by the manufacturer. Then open the tap and rinse the pipes generously with a stream of water.
If a powdered composition is chosen for cleaning, after pouring it into the drain cavity, fill it with a small portion of water and wait for the time specified by the manufacturer. Next, as when working with liquid compounds, rinse the system with a generous portion of warm water.
Image gallery
Photo from
Means for removing clogs in the sewer
Powder composition for sewer pipes
Gel solution for sewerage
Granules for filling into the drain hole
The most popular drain cleaning products from leading manufacturers that have proven themselves in removing blockages:
- “Mole” is a liquid concentrate based on sodium hydroxide and modified acetic acid that easily removes fatty deposits. Due to the aggressiveness of the components of the composition, it cannot be used for processing plastic pipes.
- “Tiret” is a gel-like composition that quickly and effectively removes any kind of blockage. It suits both metal and plastic pipelines.
- “Floop” - a granular preparation that easily removes limescale, collagen fibers and fatty deposits.
- "Mr. Muscle" is a universal gel-like product suitable for all types of pipes. In addition to its main function (destroying dirt plugs), the drug kills bacteria, thereby helping to get rid of the unpleasant odor from the drain.
- "Bagi Pothan" - a product based on caustic soda effectively removes even the most severe blockages, which include food debris, hair and lime deposits. Its only drawback is the strong chemical smell.
Under the Tiret brand, a line of products is produced designed to dissolve organic accumulations in pipes of different composition and condition:
Image gallery
Photo from
Tiret sewer cleaning gels
Tiret Professional
Effective gel Tiret Turbo
Tiret Antibacterial - preventive option
Most of the described preparations are based on acids and alkalis, for example, caustic soda. Therefore, when working with them, it is important to observe safety precautions.
To protect yourself and your pets when using chemicals in the bathroom, it is important to provide not only natural ventilation, but also create forced ventilation
In order to protect the mucous membranes and skin from chemical burns, when working with reagents, you should be properly equipped, wearing safety glasses, an oilcloth apron and rubber gloves.
How to assemble a bath drain device
Assembly methods vary according to the type of structure. In a pipe device, the parts are connected one by one. To properly assemble the bottle system, measure the distance between the floor surface and the bathtub.
Next steps:
- First, a flask is built. By sealing the fixation with a rubber gasket, the bottom is attached to the cylinder. Fixing nuts with a seal are screwed onto both ends of the drain pipe. One side is inserted into the top hole of the container, the second is connected to the neck. The joints are sealed with silicone compound.
- The overflow hose is fixed to the corresponding outlet of the flask. The required length is formed by stretching the corrugation. The telescopic design allows you to adjust the size of the prefabricated pipe by extending individual elements of the part. After creating a given configuration at a fixed bend point, the outlet is connected with a nut to the overflow pipe.
A prerequisite is that the hole in the bathroom matches the diameter of the hose. The factory package of the bottle siphon includes a gasket. The seal is placed between the surfaces when securing the overflow.
Design
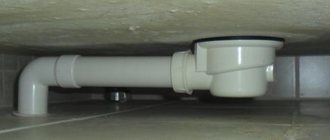
Before you get interested in how to remove a siphon from a shower stall, let’s get acquainted with its features. This element is also called a “ladder”. This product can be used to connect various plumbing fixtures. It is not used for structures with a built-in water lock and those that are connected directly to the sewer system. The following elements are suitable for shower trays: 1. Bottle (flask) trays. The functional element here is a special compartment with the shape of a bottle. These siphons are installed for high shower trays. 2. Pipe. They are assembled from several pipes of different lengths, which are connected by adapters. They are characterized by compact dimensions, therefore they are in demand for almost all shower cabins. 3. Corrugated. These are also pipe devices, but instead of hard ones, soft pipes are used that bend easily. They have a rough inner surface, which causes them to become clogged faster, which is why they are less popular. The best option for a shower stall is a pipe siphon, which has suitable characteristics and small dimensions.
Drain design
How to choose the right siphon for a shower stall?
Required materials and tools
To change the drain device, you will need a minimum set of tools consisting of a screwdriver, pliers and a wrench.
Before starting work, the completeness of the factory delivery of the sanitary siphon is checked, including:
- frame;
- drain pipe;
- decorative grille masking the drain;
- cuffs made of rubber and polymers;
- fastening hardware (bolts and nuts);
- elastic gaskets for sealing joints.
If one or more items are missing, the missing parts must be purchased separately.
In addition, high-quality installation work is impossible without additional materials:
- tow or rags;
- sealing composition based on silicone or rubber;
- FUM tapes.
When dismantling, you will need a container to drain the water. A large bucket or basin will do.
Replacement
Let's move on to how to change the siphon under the shower stall. It is not recommended to buy cheap products, since in order to replace a failed siphon, you will have to remove the pan. And to do this, of course, not in all cases, you have to dismantle the shower stall. Not all parts can be reused later, so you should immediately choose a reliable product that will not require frequent maintenance. No matter how reliable the equipment is, it cannot last forever. To replace the siphon, first remove the decorative panel from the bottom of the tray. It is often secured with snap-on clips. To open them, you should press the panel around the periphery with slight force. Dismantling is carried out as follows: 1. The elbow is detached from the external sewer pipe. 2. The elbow is unscrewed from the pallet, for which an adjustable wrench or washer is suitable. 3. The overflow, if any, is disconnected. 4. The drain is removed.
Element dismantling
The next step is how to disassemble the shower siphon for cleaning. The sequence of work looks like this: 1. Place a container under the siphon into which the remaining dirty water will drain. 2. Unscrew the union nut. It is better to do this slowly so that the liquid does not get on the floor. 3. Pour out the remaining water. 4. Remove the gasket from the rubber.
Appearance of the disassembled device
Read also! Maybe
Installation of a new drain
At the preparatory stage, you need to remove the old siphon. Access to the device opens after removing the decorative grille. You will need to unscrew the screw that secures the masking. With prolonged use, the threaded threads wear out. In difficult cases, a grinder will help to disassemble the structure.
You should take into account the large amount of dirt that comes out of the siphon after removing the plug. Before you begin, you should consider ways to protect your bathroom flooring.
The method of installing the drain piping depends on the design features of the plumbing fixture.
Installing a simple overflow system
Procedure:
- Plumbers advise starting installation from the bottom of the siphon. Having coated one of the 2 gaskets included in the factory package with silicone sealant, it is placed on top. The structure is brought to the drain hole on the outside of the bathtub.
- Having put on the second seal, the upper section of the trim is screwed into the lower one. Use pliers to tighten the fastener.
- Fix the overflow socket. The neck with the gasket on is inserted from the outside into the overflow hole. Another seal is secured and clamped with a special cap-nut.
- The drain pipe is connected to the sewer. The siphon parts are connected with a flexible hose.
The final stage of installation is system diagnostics. The bathtub is filled with water above the overflow hole. The absence of leaks indicates that the work was done correctly.
Installation of a semi-automatic siphon
When installing a semi-automatic machine, follow the instructions:
- Having pushed the pipe all the way through, connect the collector pipe to the central overflow. A rubber seal is used to seal the joints.
- Having secured the double gasket to the drain, install the filter device on the overflow hole.
- Flat metal covers are connected to an adjusting cable, which moves during operation, and are carefully secured to the drain. Bolted fastenings secure the structure to the overflow.
The central joint is sealed with a butterfly seal. Standard thin rubber gaskets are applied to the side connections.
Installation of an automatic siphon
The installation technology differs from previous options due to the large number of additional parts.
The work is performed in the following order:
- The harness is assembled. The elements of the factory-delivered kit are connected in the order specified in the manufacturer's manual.
- In the click-clack system, the automation mechanism is located between the siphon and the drain. Therefore, installation is carried out according to a scheme similar to the installation of a simple overflow device.
- In machines with a rotary hand lever, the handle is first fixed, securing it to the outlet of the bathroom. An adjustment cable is attached to the base of the handle, connecting it to a corrugated hose. At the next stage, a control mechanism is installed that controls the opening and closing of the plug in a given mode. The automation is securely fixed to the drain and connected to the cable.
- The final step is the installation of a tubular or bottle-type siphon body that forms a water seal. Assembly is carried out at the preparatory stage, and at the end the assembled structure is fixed in the drain-overflow system.
To prevent leaks during operation of the siphon, ensure reliable tightness of the connections. Reduces the likelihood of leaks in the drain system by additionally treating the joints with a silicone compound.
Finding out the cause of blockages
Any blockage is formed as a result of violation of the established rules for sewerage operation. In multi-storey buildings, the blockage can be local - within one apartment, or general, when the common sewer line is clogged.
The cause of a clogged pipe in the bathroom may be:
- settling on the walls of mud lumps formed from particles of small debris and hair;
- layering of fatty deposits on the pipes;
- insufficiently maintained pipe slope during installation;
- deterioration of the sewer system as a whole.
Household members cannot always keep track of what settles on the drain grate. Animal hair, fabric fibers and long hair, along with waste water, flow into the drain hole and get stuck in it.
If the fibers are not removed in time, then with the next portion of drained water they fall into the sewer pipe, where they gradually layer, forming a lump that delays the passage of water
The choice of the optimal method for eliminating a local sewer blockage within an apartment depends on the size of the mud “plug.” The general blockage will most likely have to be eliminated using professional equipment.
Solution No. 2. Removing blockages using household chemicals.
To clean the siphon in the bathroom, manufacturers of household chemicals offer special compositions. It is imperative to choose exactly those products that are intended for cleaning pipes; such products do not contain aggressive components that can adversely affect the condition of the equipment. The product should be poured into the drain for the time specified in the instructions, and then rinsed with a strong stream of water. This method turns out to be effective even in cases of severe blockages, but you need to take into account that many ready-made compositions have an unpleasant aroma and are prone to vaporization, so it is better to leave the bathroom while the product is working.
Answers from experts
Chairman:
Did you get everything right? The sink is HANGED on the wall, but the pedestal is ATTACHED freely and the sink does not lie on it
Oleg Zhestov:
The sink lies on a pedestal. Third support point, two on the wall. It is necessary so as not to break off the shell by accidentally leaning on it. the pedestal itself is not attached, with rare exceptions.
Nikolay Ryaposov:
attach only to silicone (((and no nails
Lommaster Honored:
We need to secure it! Brackets 250x250. Self-tapping screws - weaving, through and through!
Yuri Protskiv:
You need to attach the sink to the wall, there are holes at the back for fastening, and the pedestal can be glued to the floor with silicone sealant….
val Franco:
There should be enough silicone - on the back of the leg you can have a couple of points on top, so that it doesn’t creak, and more on the bottom, so that it’s convenient to cut it off with a blade if necessary. Fasten it after the plumber has connected everything and checked for leaks.
Anatoly Gorbachenko:
First you need to make a silicone pad 2-3 mm thick at the bottom of the pedestal, wait until it hardens. The sink is hung on the wall using two brackets. between the sink and the wall, the sink and the foot - a layer of silicone. Remove excess either with a rubber spatula or a sponge with soap. with normal dexterity - with a finger. the seam turns out to be the most aesthetic.
Beebooboo:
She pulls herself forward, you can
EVIL CLOWN:
The stand is designed to hold the sink. You can remove it, but it can fall at any moment.
ip:
Of course, you can use it if you remove it. For example, you can crack nuts... And they already wrote how to remove it)))
Vladimir Petrov:
It is easily removable and the sink will hang without a pedestal. It is needed to hide all communications and for beauty
Sergey Dmitriev:
If the sink is not large, then the “leg” can be removed. But I suspect it’s not for nothing that your “leg” is there - it’s an additional support for the sink. If you decide to remove the support, then you need to install additional brackets to support the sink. Without support, the sink will fall, okay, you won’t be there, but if you wash your face and a 3-4 kg sink falls on your fingers, what will happen? It’s good if there’s a fracture, but what if he cuts off his fingers? Ceramic shards cut as well as glass
Trachenskauskas:
the sink is held on by 2 bolts, remove the leg, lean on your elbows and the ears will break off, there are special sinks without legs, there are iron fastenings
Grabber Claw
You can look for such a device in hardware stores or order it from a well-known Chinese online store.
The principle of using the claw-grabber:
- Insert the tool into the sewer hole up to the siphon.
- Press the spring located on the handle - the “claw” will compress.
- Pull out any dirt caught in the tool.
- Repeat the procedure until the siphon is clear.
- Author: iarriba
Rate this article:
- 5
- 4
- 3
- 2
- 1
(1 vote, average: 4 out of 5)
Share with your friends!
