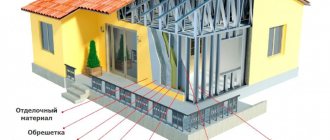
A metal pergola is an architectural structure designed to support climbing plants and create a natural flowering canopy. A metal pergola can look different, but most often there are designs in the form of several arches or frames connected by upper transverse crossbars.
Metal pergolas are durable and reliable structures
Overview of species
There are many types of trellises. Let us dwell in more detail on the most popular design options.
Single-plane
Grape bushes are planted in straight parallel rows, so the trellises are placed on one edge of the plants. A single-plane trellis is a simple design in which the pillars are installed in one row, and trellis wire is stretched between them, always in a single plane.
When installing such trellises, it is important that the supports are located at a short distance from each other; the distance from the bush to the support should be 30-35 cm. This arrangement makes it easier to care for the grapes and subsequent harvesting
Biplane
In a two-plane design, the vine, together with young shoots, is located on two planes of stretched diameters. This type of support greatly simplifies the care of developing bushes, and due to the fact that the growth of young shoots increases, it contributes to a significant increase in productivity. Such designs have become widespread in the cultivation of vigorous grape varieties.
However, it is important to keep in mind that a two-plane trellis is used exclusively for staking vines growing in the direction from north to south. If the orientation of the plants is different, one row of grapes will be greatly obscured by the other
Such trellises are placed at a distance of 50-80 cm.
Other
U-shaped structures have become very popular. Similar supports are placed on both sides of the bushes and a wire is pulled on each side. Two supports are placed at an equal distance from the plants and at equal distances from each other - the distance should be 50-60 cm.
V- and Y-shaped designs are slightly less common. Such trellises require the installation of a pair of rows of supports with a slight slope and the presence of wire. In this case, the angle does not have any effect on the parameters of illumination of leaves and branches by sunlight.
It is extremely important that the posts are connected to each other by jumpers - this will prevent them from falling under the weight of the fruit. Due to the optimal tilt of the structure, the grape clusters hang freely, this has the most positive effect on the speed of growth and development of the plant
The dimensions of such a support are selected based on the individual preferences of the winegrower.
L-shaped structures, better known as pergolas, deserve attention. With this design, the planes with the wire are located horizontally, and young green shoots grow along them. The pergola has a height of 2-2.5 m, with plant shoots placed parallel to each other.
When growing grapes on a pergola, gardeners note rapid growth of the vine and an increase in crop yield - this is due to the fact that the leaves are illuminated by the sun throughout the day. Forming a culture on an L-shaped support ensures full air circulation and thereby minimizes the risk of infection by fungi and viruses.
A pergola is often installed in small areas, since it simultaneously solves two problems - it acts as a supporting structure for grapes and at the same time decorates the area around the house. In a short period of time, the vine on the trellis reaches the top of the trellis and creates a beautiful landscape. By the way, a pergola can be used under wild grapes to arrange a recreation area - you just need to decorate the place under the vine with benches, put a small table or hang a hammock.
Some winegrowers prefer T-shaped trellises.
Arched pergola created on a small summer cottage
Arches are a popular support for flowers in small dachas. More often they are used to shade paths, passages, or simply to support climbing plants in flower beds. In a wooden structure, it is the arched part that is relatively small, this is explained by certain limitations in manufacturing - the size of the workpieces. The ability to carve this material, use the burning technique, and decorate it with various shades of varnish and other coatings make the pergola a real work of art.
Arched type pergolas look good not only metal, but also wooden
Helpful advice! When determining methods for artistic processing of an arched wooden structure, it is necessary to carefully select the means for protective and decorative coatings. They must be intended for external work.
When installing a structure, a mistake is often made: massive supports are chosen. Then the composition as a whole looks heavy and rough. And delicate flowers with graceful carved leaves climbing along it are lost among the large amount of “wood”. The diameter or (if it is timber) thickness of the supports should not be allowed to significantly exceed the width of the arch. The distance between the arches connected by transverse beams should not be less than 50 cm. Otherwise, it will not be possible to decorate the structure with abundant green mass, and it will look like an unnecessary element of the garden plot.
A small arched pergola can be used to shade paths or passages
Metal pergola arches are also installed in small areas. They are much more elegant than wooden ones. If the design is intended for grapes, then the main aesthetic requirements are straight lines, proportionality, and high-quality material. A metal arch for flowers can be decorated with decorative elements. Advantages of arched structures:
- possibility of placement in a small area;
- increasing the length of the support for plant development due to its rounded shape;
- visual perception of upward direction, which creates a vertical level of landscaping on the site.
To make a pergola-arch made of wood look elegant, you need to avoid massive structures
Arched structures, even not decorated with additional design elements, are decorative structures in themselves.
How to make pergolas for grapes: instructions
For example, we will use wooden pergolas for grapes.
- You need to prepare all the necessary tools: shovel, saw, drill, building level, container for mortar.
- Make markings. This must be done directly on the site where the desired structure will be located.
- Prepare the structural elements. You can find more detailed information on the Internet (a separate article is needed to select the necessary elements).
- Also take two packages of cement, crushed stone and bolts with nuts, self-tapping screws and screws.
- Dig 4 holes 50 cm deep and 30 cm wide.
- The bottom of this hole must be filled with crushed stone, and then thoroughly compacted.
- Treat the supports, then install them in the hole and fill them with cement. You need to be extremely careful here if you do not want the structure to resemble the Leaning Tower of Pisa in appearance. In order to do everything smoothly, use a building level. It is advisable to do this together, so that one can hold the structure, the other can measure.
- Wait for the solution to dry.
- Install the main beams and crossbars. This is done using special fasteners. At this stage you also need to install most of the decorations such as bars, etc.
Advice. By the way, in order for the cross beams to be fixed as best and as tightly as possible, you need to make a small cut on them. Moreover, this will not be difficult to do: only 2-4 centimeters in depth.
Pergola for grapes made of metal
- First you need to choose a suitable configuration. You can make the simplest ones yourself, but if you want to make such a curved structure, for example, a forged pergola for grapes, you need to order it from a craftsman.
- Before installation, process and paint all parts of the future structure. If rust is found on any of these parts, it must be removed. You can choose any color, but there are some recommendations. The fact is that the green color will blend in with the foliage and will not be noticeable. White color will give a feeling of airiness and lightness to the gazebo.
- Prepare the necessary tools (shovel, grinder, metal profile 2.5 cm x 2.5 cm, welding machine).
- Also prepare the materials from which the pergola will be created. They differ very much, depending on the shape and intended purpose of the structure, so you can contact any master for such advice.
- Dig holes 80 centimeters deep for supports (remove the turf layer and fill it with water, and after 10-20 minutes the ground will become very soft, which will make the digging process very simple).
- Fill the bottom with a 15-25 cm layer of sand. This can be measured either using elementary physical formulas or with a simple stick (on which you need to put a mark of 20 centimeters, then pour sand to this very mark and pull out the stick).
- Start cooking.
When you have done everything correctly, begin to distribute the desired plants around the perimeter of this pergola.
For your information. In a few years, the plant, which grows in the form of a vine, will completely entangle the pergola from the ground to the ceiling, and perhaps even the roof, but this depends on its type.
To make your building look more beautiful, attractive and, most importantly, cozy, add any decorative elements. We won't give any instructions, because it's just stupid.
Each person has his own individual taste, and how you decorate your building depends only on your imagination. As an example, we will give only a weather vane, special tubes that react to the wind, making a pleasant sound, and other garden trinkets.
Advice. You can also install a table, chairs, bench. Yes, even a sofa.
Often, grapes are grown not only for harvesting, but also to create a beautiful, cozy and homely environment. And it is with the help of a pergola that you can emphasize the beauty of this plant.
We also recommend that you familiarize yourself with arches for grapes.
Main nodes
Despite the fact that the design is simple, it is necessary to correctly assess the load that plants can create. For our country, the pressure of snow should not be taken off the scale. Especially after the plants entwine the structure. Therefore, all connections and fastenings are made reliable; it is better to play it safe and install corners than to dismantle a blockage of plants and a collapsed arch. In this regard, the supporting columns and beams of the arch must be strong and reliable.
If you plan to build from wood, support posts for a medium-sized pergola use at least 200*200 mm. Beams are made of boards of at least 40 mm thickness. Be sure to make stops and jibs: they will add rigidity. If you build support pillars from brick or stone, they are placed around a pipe - round or square - your choice, but there must be one.
Dimensions
A little about the sizes of pergolas. They must be proportional to the site. If it is small, then the distance between the posts can be one and a half meters. There is no need to do less: taking into account the foliage, only one person will pass through such a passage. For larger areas, a larger width is required - too narrow will appear short.
The standard height of a garden pergola is 2.2-2.4 meters. Then the whole structure is harmonious, and the foliage and flowers will not crush.
How to connect the parts at the top
When building an arch, special attention should be paid to the joints. See the photo for how to make them.
A simple way to connect posts to main beams
For those who are not very good at carpentry, it can be difficult to cut recesses for installing beams. There is a simple and reliable way to do without this work: connect the posts and main beams using a decorative buttress. This is not only a decoration, but also a way to make the connection more reliable.
A beam is placed on top of the support post (rack) and nailed through with nails or long self-tapping screws. However, with lateral forces they can turn out. To eliminate this, after the auxiliary beams have been laid and secured, a decorative buttress is nailed. It holds together three elements into a single whole. Even greater rigidity of the structure is given by a spacer placed diagonally, which is often called a jib.
In the simplest case, a pergola is four posts connected by main and auxiliary beams.
The simplest pergola design
Beam edge decoration
You can slightly diversify the appearance by different designs of the ends of the auxiliary and main beams. Several ways to wash it down are shown in the photo below. So that they all turn out the same, make a template from a small piece. Then you apply it to the workpiece, trace it with a finely sharpened pencil as close as possible to the template. Cut along this outline.
How to make the edges of beams
Cheaper design
The timber for the columns must be of large cross-section, and this is not cheap. The main beams must be no smaller in size, which further increases the cost of the structure. But you can save money if you nail two thick boards on both sides to the racks at the top. How it looks from above, see the following figure.
To reduce the cost, you can use two boards as the main beams
They can be connected with nails and screws, or with bolts. This is even more reliable: bolted connections can be tightened if necessary. Look at the photo to see what such a structure looks like “live”.
Pergola with double boards instead of main beams
Installation Rules
Metal wire structure
The most budget-friendly hanging product is considered to be a canopy made of pipes and wire.
It is very easy to do, just follow the steps below.
- First of all, metal profile piles are fastened with a square cut. The supports are mounted on concrete or buried deeper into the ground. The average gap between the supports is two to three meters, the height of the structure is 3 m.
- The roof for the vineyard is made from a metal profile, which must be secured with several self-tapping screws.
- Between the supports you need to stretch the wire to the very top of the head. The approximate distance between them is half a meter.
- Grape bushes should be planted along a row of wire. After some time, the vine itself will begin to grow in the right direction.
- Many owners fasten the opposite side of the structure flush against the house, but experts do not advise fastening the beams to a load-bearing wall. After a few years, your vineyard may ruin all the plaster.
Welding structures
A metal frame for a vineyard, created by welding, is considered the most reliable structure that will serve you for a very long time.
However, creating such a design is quite difficult. This deficiency is made up for by the durability of the structure.
A metal canopy is created using iron profile pipes of different diameters; the choice of cross-section depends on the wishes of the owner of the site. Pipes are welded into a solid frame.
Let's look below at the rules that should be followed when creating a welded structure.
- The canopy support is fixed in the ground using concreting, which guarantees the reliability of this solution.
- If you use jumpers between the support piles, you can further secure the entire structure.
- Before welding, all pipes, supports and other elements must be coated with a special anti-corrosion substance to avoid rust after rains.
- The roof can be left open, there is no need to be afraid of the sun. After the grapes grow, they will create shade for you. However, if you are afraid of rain, then the roof can be made of polycarbonate. Since it is transparent, your plant will also receive the right amount of sunlight.
Arched canopies
Speaking of attractiveness, arched vine canopies will be an excellent addition to any country house design.
You can also build them yourself.
- At the very beginning, a columnar foundation is created, onto which the support elements are subsequently fixed.
- To create an arch passage, you need to weld together a semicircular arc and iron piles fixed in the ground.
- The supports must be the same length. They are installed at equal depths parallel to each other so that your canopy does not turn out to be crooked.
Some specialists can make such a structure from wood.
Gazebo-vineyard
Relaxing in a gazebo covered with grapevines is a good option for spending time in the courtyard of a country house.
You can create such a canopy yourself or buy a ready-made one on the market.
Below we will consider the stages of building such a gazebo.
- At the very beginning, you need to take measurements of the area.
- Next, remove the top layer of soil.
- After marking the area, you need to dig several holes to install supports.
- Side piles are installed and concreted.
- Vertical posts are connected to each other using a metal profile or wooden planks. It all depends on the type of structure you have.
- The roof of the vineyard can be made either acute-angled or round. It all depends on the imagination of the homeowner. Also, instead of a roof, you can stretch several layers of wire along which your vineyard will wind.
If your structure is metal, then it needs to be coated with a special anti-corrosion substance. For wooden options, a wood coating primer is sold on the market.
Blueprints
It is worth noting that all of the presented options can be made of wood or metal, or the columns can be made of stone, concrete or marble.
The idea is important, but the implementation may be different. Simple rectangular with strong beams Chinese style
Pergola drawing with dimensions
The columns are interestingly designed - an excellent option for installation near the house
You can make an entrance to a garden or rose garden. Instead of wooden columns, steel ones covered with wood are used.
Pergola for grapes
To build a pergola for grapes, you can use a wide variety of materials. Various rolled metal products are widely used for these purposes: pipes, fittings, metal rods, etc. Wood is no less popular when making pergolas for grapes with your own hands. In particular, the main supports of the pergola are created from wooden blocks, and the lintels into which the vines are woven are made from slats.
Types of pergolas
Initially, before building a grape pergola with your own hands, you should decide on its main purpose.
Of course, the main purpose of a grape pergola is to form the correct development of the bush, however, you should know that there are different types of pergolas for grapes.
Decorative pergola is designed both to ensure the sustainable growth of a grape bush and to embellish the territory of a summer cottage.
Practical pergola - the main purpose is to provide convenient harvesting of grapes and care for them in the process of growth and development.
In addition, grape pergolas differ in their shape, they can be:
- Rounded;
- Fan-shaped;
- Regular rectangular;
- Openwork.
When building a pergola for grapes with your own hands, you should definitely take into account some nuances. For example, the height of a grape pergola is very important. Low structures will look awkward and clumsy, so you should give preference to a pergola with a height of at least 2.5 meters.
As a material for building a pergola with your own hands, it is most advisable to choose wooden beams. For load-bearing structures, its cross-section must be no less than 12x12 cm, and the cross-section of the beams that will be used as side crossbars must be no less than 5 by 10 centimeters.
After the material has undergone appropriate preparation for disinfection against damage by insects and rotting, you can begin building a pergola for grapes with your own hands.
Stages of building a pergola for grapes with your own hands
The process of building a pergola for grapes begins with marking and installing supporting elements, which are a wooden beam of the above section. To install the supports in the ground, depending on the markings, you will need to dig holes with a depth of 50 to 60 centimeters.
When installing the supporting elements of the pergola, you can not use cement mortar, but only compact the pillars with earth and stones
However, in order for the pergola to be beautiful and even, which is most important, during the installation of load-bearing elements it is very important to always use a building level to control
Also, in order to prevent damage to the part of the timber that is in the ground, before placing it in the hole it should be carefully wrapped in several layers of roofing felt or other rolled waterproofing material.
After the cement mortar has completely hardened, if it was the same that was used to strengthen the pergola posts for grapes with your own hands, you can begin installing the side and top crossbars for weaving grapevines.
The crossbars are nailed in a horizontal position at a distance of no more than 40 cm from each other
In this case, just as when installing support pillars, the use of a building level is extremely important
Creating a modern relaxation area using a pergola-awning
A canopy tightly woven with climbing plants that create a pleasant shaded space is often a theoretical definition. It takes a lot of time for the shoots to reach the top floor and fill it. And not every plant can create such a dense coating through which ultraviolet rays and precipitation will not penetrate.
Pergola-awning functions as an awning for protection from the sun and rain
To solve the problem of scorching sun and rain, pergolas-awnings are used. These structures serve as awnings. They can be installed both above and below the top floor of the pergola. Usually these are retractable control options. Separate frame structures are also used. If it becomes necessary to remove the awning cover, it is folded, wound, gathered in wavy folds, etc. During use, the fabric can be fixed at the optimal extension line.
Awnings are used mainly to cover large areas:
The top cover of the pergola-awning can be easily removed when not needed.
- summer cafes;
- open areas of restaurants;
- recreation pavilions;
- large adjacent terraces.
An awning usually does not have massive supports, significant thickness of guides and other mechanisms. But its aesthetics are important for the overall perception of the design. The fabric is matched to the overall color scheme of the surrounding objects. This type of protection is a summer version, collapsible. A metal pergola is the most convenient model.
The covering of the pergola-awning is chosen based on the overall color scheme of the landscape design
Helpful advice! When choosing fabric for an awning, you should pay attention to whether it has an antibacterial coating and a Teflon layer. This will extend its life and keep its appearance presentable for a long time.
The space, tastefully decorated and reliably protected by an awning from the scorching sun and rain, will become a real lounge area - a place of calm, complete rest and relaxation.
In order for the covering of the pergola-awning to last for a long time, it must have an antibacterial coating and a Teflon layer.
Single-plane trellis
Among the “advantages” of this type of support are the simplicity of the design and ease of installation. One of the planes of the two-plane version can be used as a one-sided trellis. It should be installed according to the same diagram (see above).
There are also wooden single-plane trellises - even easier to install.
For a wooden support you will need:
- wooden beams (pillars) 2-2.5 meters high;
- long iron pipe with a diameter of 5-6 cm;
- aluminum wire;
- shovel, nails, hammer, tape measure.
The installation script is simple. We dig in pillars at a distance of 2-3 meters. We attach an iron pipe between the pillars to secure the structure and the pillars do not lean to the sides. Now we stretch the wire using the same principle.
This trellis will fit perfectly into any country interior.
The process of creating a decorative trellis
Options
In modern design, wood and metal are widely used to make pearl. Let's consider the advantages and disadvantages of each design option.
Wood
Wooden pergola is most often used for arranging parks and gardens. The construction is made from various wood species. Designs made from:
- oak;
- deciduous;
- pine;
- beech;
- birch boards.
The most cost-effective option would be to use aged wood. They will highlight the Provence style. When using rough unhewn boards and timber, you can create attractive country and classic styles.
There is an excellent compatibility of wood with a large number of other materials. A structure with stone or brick pillars and wooden crossbars will look attractive. Such a canopy will be able to show how advantageous the design looks for bringing to life the style of a chalet or half-timbered structure.
Wood is often combined with metal inclusions. This combination looks beneficial, especially in the Art Nouveau style.
When planning to install a pergola, you need to pre-process the material. Otherwise, the wood will quickly rot and lose its attractive appearance.
Metal
When using metal, you must first contact the services of an experienced craftsman. He will first prepare a drawing based on the customer's taste preferences. After preparation, the master will weld the structure using thin reinforcing rods.
A metal pergola can quickly lose its attractive appearance in unfavorable conditions. For this reason, the surface should be regularly treated to prevent the negative effects of rust. The structure is covered with paint and varnish. In this condition, it can be used in modern, high-tech and other styles.
What is a pergola and what to do with it?
The word "pergola" comes from Italy, and it means an extension or canopy. Initially, the pergola was used in garden plots as a support for climbing plants and a protective canopy, allowing one to dine outside in a pleasant shade on a hot summer day. The structure was not distinguished by any design refinements and consisted of a series of arches held together by beams.
Four seasons pergola over the well
Climbing plants planted near them gradually entwined the arches and completely covered the open spaces with their greenery. The architectural component of the pergola changed under the influence of the designers’ imagination. Variations of the building appeared, such as arches with swings, trellises, trellises, berso, fancy arches, and cozy gazebos. Note that the latter have their own characteristics in purpose, as well as in design, and are discussed by us in separate materials.
An interesting option for a pergola made of bamboo and reeds
Important information for site owners on placing a pergola in the garden will be knowledge of its differences from an ordinary canopy or trellis. When starting to build a pergola yourself, start by answering the following questions:
- how to organically fit the building into the design of your site;
- what functions it will perform;
- what materials do you plan to use;
- what plants will surround the pergola.
Textiles can be used to decorate the pergola
The main purpose of a pergola is to provide its owners with a comfortable rest. If you look at the photos of finished gazebos, you will notice that not only plants, but also textiles are used to decorate them. In addition, a swing is often located under them.
To decorate a “young” pergola that has not yet had time to grow green vines, it is convenient to use hanging flower pots. Also, an openwork summer building will perfectly hide your family gatherings from strangers and help in zoning the space.
Gazebo-pergola for a comfortable family holiday
Almost everyone wants to have a pergola in the form of a gazebo in their suburban area. This is an opportunity to communicate with loved ones in the fresh air, surrounded by a riot of colors and aromas. The designs of this structure can be very diverse:
The main difference between a pergola-gazebo is the presence of supports on all sides
- square;
- rectangular;
- round;
- oval;
- hexagonal;
- irregular shapes: zigzag, with overlap at different levels.
The main difference between a pergola-pergola and other similar structures is the presence of supports along the entire perimeter or circumference of the upper floor and the presence of a light side fence. Typically, such buildings have a base - a covering made of wood, stone, concrete, which serves as a floor. Plants are planted in the ground along the supports or along most of the perimeter.
Pergolas are made from a variety of materials
If the structure is installed on soil that is unsuitable for planting plants (clay soil, sand), they can be placed in special tubs, the dimensions of which must correspond to the necessary growing conditions for the flowers planted in them. Furniture is always installed in gazebos: tables, chairs, benches, sofas. The dimensions of these structures are significant, so the gazebo often becomes the dominant element of landscape design on a site.
It is very important to decide on the design style of the site as a whole, then it will be easier to choose a pergola option. Incompatible in one area:
A pergola in the form of a gazebo is a great place to relax with loved ones in the fresh air.
- wooden pergolas, gazebos and metal arches;
- metal gazebos and wooden arches;
- the presence of stone, metal and wood in one structure.
Related article:
DIY pergola: support for plants and a place for comfortable rest
Purpose of structures. Design, materials used. Examples of landscape design solutions. Manufacturing tips.
A gazebo is a free-standing building, so its surroundings play an important role when creating the design. If it is not possible to contact a specialist for advice, you can view photos of the design of gazebos in the country, where buildings made of wood, metal, and stone with various design elements are presented. Among them you will certainly be able to choose the appropriate option.
To make the gazebo-pergola more comfortable, it can be decorated with light curtains
Single plane design
Making a canopy for grapes with your own hands from metal is not difficult if you strictly adhere to all stages of the work. So, let's look at how to make the simplest type of support - a single-plane structure.
Such a canopy for grapes is suitable if the vine is not very large-fruited. Well, quick and uncomplicated installation will allow you to mount everything very quickly. Moreover, such a do-it-yourself grape trellis has a lot of advantages, namely:
- simplicity and convenience in caring for the plant;
- fruits ripen evenly;
- You can easily grow other crops between the rows.
To make trellises for grapes you will need to stock up on the following supplies:
- cement, sand and water for mortar;
- 4 columns up to 2 meters high;
- copper wire 20 meters;
- crossbars for supports 8 meters long - 4 pieces.
First, dig a hole 50 cm deep. Then mix the solution and pour a layer of sand parallel to the bottom. After all the work done, it is time to install the pillars. They are installed in the center and filled with cement mortar. In this case, it is advisable to first secure the pillars with tension so that they become level.
After the cement has set and the pillars stand securely and firmly, we begin a process such as horizontal wire tying. First, four rows of wire are stretched horizontally.
You will later tie grape branches onto the resulting rows. As for the crossbars for supports, they are mounted between concreted pillars so that the resulting frame looks like an opening lintel. This jumper will serve as support for the entire single-plane structure.
Climbing plants for pergola
By selecting plants, you can control the appearance of the pergola in your dacha; the photos will show us how elegant such buildings look. Most often, girlish grapes climb along the lattice of the building. Climbing plants, ornamental vines, and hanging plants are excellent. When choosing flowers, consider how long they bloom and how they fit in with other plants in the garden. The arch is used for roses, wisteria, clematis.
Chinese lemongrass and ivy, honeysuckle and nasturtium, hops and actinidia intertwine beautifully.
A simple design and affordable consumables will allow you to build a pergola with your own hands. A beautiful building will decorate your site and be a source of coolness on summer days.
Single-plane supports
The result of tying grapes to a single-plane structure will be the development of the bush in one plane. This type of support consists of a series of pillars, between which a metal wire is stretched. Pros:
- low manufacturing complexity;
- relatively low cost;
- facilitating plant maintenance;
- the possibility of planting flowers and vegetables between the rows of trellises.
The downside is that it is impossible to tie a large number of bushes to one support. It is also undesirable to use such structures for placing vigorous varieties of vines - there is a possibility of thickening the plantings, which will negatively affect the yield.
A single-plane trellis is suitable for cultivating technical varieties or producing cuttings. For growing table grapes, it is recommended to choose a different support structure.
Stage 4. Installation of the pergola roof
To install the pergola roof on the base pillars, you will need the help of two more people; if it is not possible to invite assistants, then you can build auxiliary scaffolding from wood.
To enhance the rigidity of the structure, it is recommended to additionally weld corner bridges between the canopy square and the base pillars. They are made from waste pipes, adjusted to size and ends at a 45 degree angle using a grinder.
The photo below shows how they are located on the finished structure:
The finished upper corner of the pergola looks like the photo below:
How to make simple trellises for grapes with your own hands.
The simplest (single-plane) trellises for grapes can be made with your own hands from wooden stakes with a diameter of 12-15 cm or metal pipes. The length of the supports is 2.8 m - 60 cm are dug in depth and 2.2 m is the height of the finished trellis. The distance between the supports in the trellis is 3 m. We stretch a wire between the supports - the first at a height of 50 cm from the ground, the rest at a distance of 30 cm from the previous one. The grapes on the first wire will be able to receive heat from the heated ground, but will remain clean after the rain.
The direction of the trellis is from south to north. When planting grapes next to a bush, a pipe is dug to a depth of 80 cm to feed the bush - watering and fertilizing of the grapes goes through it. These trellises are best suited for covering grapes - they can be easily removed from such a trellis and covered for the winter.
But there are more effective trellis designs - two-plane ones, which provide maximum sparseness and illumination of the bushes; a more powerful bush is formed on them and, consequently, the yield increases.
What materials is the pergola made from?
These structures are assembled from parts made of wood, plastic, metal pipes and polycarbonate. But the most common, of course, is a wooden pergola.
If rough boards are sufficient for old houses, then treated timber will be suitable for more modern buildings. To avoid decomposition, the surface is covered with linotex or nitro-enamel.
Oak beams with brick support are a very attractive option, and birch logs can be used to create a rustic feel.
What types of trellis designs are there?
First, let's figure out what types of trellis designs are available today. So, types of trellises for grapes:
- the simplest structures, consisting of pipes and wire tied to them horizontally, are called single-plane;
- for professional areas for growing grapes, two-plane stands are used;
- if decorative grapes are grown on the site, then a frame of various shapes is used, for example, an arch for grapes.
The main task of all of the above types of support for grapes is to enable the crop to develop properly. The fact is that with the help of such a design as a support for grapes, you can significantly increase the amount of harvest and reduce the risk of fungal defects. After all, the plant is well ventilated, which means it gets sick less.
Metal pergolas: from graceful flower arches to massive structures for grapes
Choosing a wooden or metal structure is a matter of taste and following the chosen style of landscape design. For those who prefer metal buildings, there are no restrictions on either shape or size. The lightest and most elegant arch for delicate climbing flowers can be made only from this material. A comparison of wood and metal cannot be considered objective, but it is worth highlighting certain features of the latter:
Using metal you can create an elegant and lightweight design
- the ability to create light, airy structures;
- flexibility of the material under certain conditions;
- strength;
- durability;
- easy care.
A metal pergola can be built in the form of a canopy, gazebo or other structure. Often there are options that have metal supports, and the remaining parts of the structure are made of a different material. As a rule, a strong metal pergola is installed for grapes, since it must bear a large load from the weight of the vine and fruit.
Metal pergolas can be of any design, shape and size
Forged pergolas are a special artistic addition to landscape design. Such structures consist of supports (profile, tubular, reinforcement), to which patterned fragments of forged metal are attached by welding. Decorative elements can be arranged symmetrically, asymmetrically, and also serve as a sheathing. The overall composition is a real architectural work that can decorate any landscape.
Helpful advice! When creating an interesting model of a forged pergola on your site, you should take into account that the compacted metal will be strong and durable. It is worth choosing the appropriate supports so that the structures do not have to be dismantled prematurely due to their corrosion damage.
The main advantages of metal structures are strength and durability
Photos of metal pergolas demonstrate how varied the design of structures made from this material can be.
Pergola for grapes
To build a pergola for grapes, you can use a wide variety of materials. Various rolled metal products are widely used for these purposes: pipes, fittings, metal rods, etc. Wood is no less popular when making pergolas for grapes with your own hands. In particular, the main supports of the pergola are created from wooden blocks, and the lintels into which the vines are woven are made from slats.
Types of pergolas
Initially, before building a grape pergola with your own hands, you should decide on its main purpose.
Of course, the main purpose of a grape pergola is to form the correct development of the bush, however, you should know that there are different types of pergolas for grapes.
Decorative pergola is designed both to ensure the sustainable growth of a grape bush and to embellish the territory of a summer cottage.
Practical pergola - the main purpose is to provide convenient harvesting of grapes and care for them in the process of growth and development.
In addition, grape pergolas differ in their shape, they can be:
- Rounded;
- Fan-shaped;
- Regular rectangular;
- Openwork.
When building a pergola for grapes with your own hands, you should definitely take into account some nuances. For example, the height of a grape pergola is very important. Low structures will look awkward and clumsy, so you should give preference to a pergola with a height of at least 2.5 meters.
As a material for building a pergola with your own hands, it is most advisable to choose wooden beams. For load-bearing structures, its cross-section must be no less than 12x12 cm, and the cross-section of the beams that will be used as side crossbars must be no less than 5 by 10 centimeters.
After the material has undergone appropriate preparation for disinfection against damage by insects and rotting, you can begin building a pergola for grapes with your own hands.
Stages of building a pergola for grapes with your own hands
The process of building a pergola for grapes begins with marking and installing supporting elements, which are a wooden beam of the above section. To install the supports in the ground, depending on the markings, you will need to dig holes with a depth of 50 to 60 centimeters.
When installing the supporting elements of the pergola, you can not use cement mortar, but only compact the pillars with earth and stones
However, in order for the pergola to be beautiful and even, which is most important, during the installation of load-bearing elements it is very important to always use a building level to control
Also, in order to prevent damage to the part of the timber that is in the ground, before placing it in the hole it should be carefully wrapped in several layers of roofing felt or other rolled waterproofing material.
After the cement mortar has completely hardened, if it was the same that was used to strengthen the pergola posts for grapes with your own hands, you can begin installing the side and top crossbars for weaving grapevines.
The crossbars are nailed in a horizontal position at a distance of no more than 40 cm from each other
In this case, just as when installing support pillars, the use of a building level is extremely important
Origin and purpose of the pergola
Initially, back in Ancient Rome, the pergola was used as a purely utilitarian structure on personal plots. It supported the vines, strengthened them and made harvesting easier later. Later, ease of manufacture, functionality and attractiveness transferred it to the category of an element of landscape design.
These days, the extension performs many tasks:
- decorative: serves as a decoration for the landscape due to the shape and plants on it, creates a vertical green area;
- practical: still makes it easier to grow and harvest grapes;
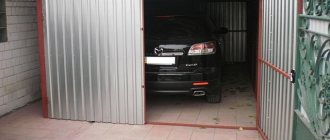
- utility room: covers a garage or utility structures that do not fit into the design concept;
- helps to design a recreation area and protects from sunlight;
- divides the site into zones;
- used to decorate entrance groups (gates, gates, entrances).
The advantage of a pergola is its lightness of construction, which is achieved due to the small amount of building materials used. Most of it is vegetation cover. However, it will not protect you from bad weather and is quite difficult to care for.
Arches are varied in style:
- country, or rustic style : functional and natural, with geometrically correct shapes, a minimum of finishing;
- hi-tech: a reminder of high technology, something cosmic in silhouettes, originality of form and functionality;
- modern: designs are refined and functional again, with clear lines and contrasting combinations;
- eastern: pyramidal roof, concave sides, colors red and brown;
- chalet: a building with a barbecue or stove, reliable and comfortable;
- half-timbered: a practical arch made of the highest quality materials.
It is important that pergolas are combined with the style of the garden as a whole.
Making a trellis for grapes yourself
Both one- and two-plane trellises are installed in the same way. Therefore, as an example, we will consider the more complex of the two options. The “simplest of complex” way to create a two-plane support is to install two metal pipes in a V-shape. We invite you to present our actions in more detail.
A two-plane trellis allows for the most rational placement of the growth of grape bushes. It allows you to place from 4 to 12 sleeves, which, accordingly. increases the amount of harvest
Let's determine the materials for 3 meters of trellis:
- 4 metal pipes 2.5 meters high;
- crushed stone, cement;
- aluminum wire (approximately 30 linear meters per 3 meters of trellis);
- wooden beams for marking;
- tape measure, chalk
According to the materials, we will calculate the installation of one 3-meter block of trellis. Your vineyard will consist of such blocks; you can determine their number at your discretion.
Step-by-step instructions for installing a two-plane trellis for grapes
- In the selected location for the trellis, draw a rectangle with one side 3 meters (length of the trellis) and the other 80 cm (width). Drive wooden beams into the corners of the rectangle.
- Instead of each of the beams, dig holes 40-50 cm deep. The width of the hole should be about 30 cm. The axes of our trellis will be installed here.
- We install metal pipes in pairs. If the distance between the bases of the axes is about 80 cm, then to the top of the pipe it is necessary to expand and increase this figure to 1 meter 20 cm.
- We pour crushed stone into each hole with an axle (about half). We dilute and fill the holes with cement. Now you should wait until the cement hardens.
- It is recommended to pull the first aluminum wire at a distance of 50-60 cm from the ground. For large-fruited varieties, this distance can be increased to avoid the risk of fruit contamination by microbes and diseases. The remaining wires are pulled 40-50 cm to the top.
There are several ways to secure the wire
For better fixation of the wires, many experts recommend welding metal hooks to the axles. This allows you to avoid bends and broken wires during operation.
A support with two planes has certain advantages:
- ventilation of bushes improves;
- sparse bushes receive more nutrition and sun, and produce a larger harvest;
- convenient shelter for grapes for the winter between the planes of the trellis.
Where should it be installed?
Before starting construction work, carefully consider where the structure will be located. It can be placed in a central place, favorably shading the area and decorating its appearance.
Some craftsmen recommend making a pergola in order to hide unattractive elements present on the site. Place the structure on a flat or slightly elevated area where you can see a beautiful view.
Experts recommend making the structure away from highways, cesspools, toilets, compost heaps and other sources of unpleasant odors.
Features and techniques of tying vines to a support
When gartering a grape bush, you need to consider the following:
- During work, it is forbidden to bend the branches excessively, so as not to block the access of nutrients to them.
- To tie the vine, it is recommended to use a special wire rope covered with paper.
- To properly tie the bush to the support, you need to pass the garter flagellum in a figure eight. This way the branches will not be damaged by the wire.
- For grapes with buds, laying in an arc or horizontally is necessary.
It can also be used when growing other plants, for example, raspberries and climbing flowers. Therefore, it is useful to master the skills of creating it in artisanal conditions.
Selecting the right varieties
Not every type of grape is suitable for creating a beautiful, well-formed arbor. We need frost-resistant, fast-growing, bulky varieties. The “Wild Maiden” grape is a favorite decorative variety among many summer residents. This is a great solution if you don't need berries. It is unpretentious, easy to care for and very beautiful. One plant can occupy an area of up to 20 square meters. It easily climbs without trellises along brick and stone masonry to a height of up to 15 meters. The oblong carved green leaves light up scarlet, crimson, and purple in the fall.
Of the fruit-bearing arbor species, actively growing Amur varieties are frost-resistant (withstand frosts down to -30 degrees). Fruits with a pronounced taste. Unpretentious in care, with strong development and pleasant taste, varieties are “Lydia”, “Valiant”, “Alpha”, “Concord”, “Isabella”. The bushes are undemanding to plenty of sun and tolerate shade well. Universal table varieties that produce a bountiful harvest have proven themselves to be excellent - Prairie Star, Victoria, St. Croix, Timur. They are frost-resistant, but in some regions they need shelter.
You will learn how to select and secure grapes for a gazebo in the next video.
Step-by-step assembly instructions
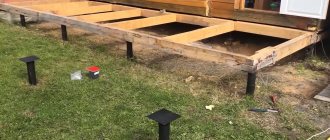
First of all, you need to decide how you will attach the support pillars. If your pillars are made of larch, there are no questions, you can simply bury them in the ground. With other wood, everything is more complicated: direct contact with the ground is extremely undesirable. You can, of course, treat the ends of the posts buried in the ground with antibacterial impregnation such as SENEZH or Senezh Ultra, and put them to work for a couple of hours.
The second option is to make a concrete pile with an embedded stud (or several studs, depending on the size and weight of the structure). Attach the stand to the stud with a gap of 5-8 mm.
Another way is if the site is concreted or a covering is laid on it. Then they take metal bearings. Most often they are found in the form of an inverted letter “P”, attached to the surface of the site. The post is secured with bolts through these plates. This type of fastener is suitable for a garden where the error will be covered by plants. If construction is taking place in an open area, other bearings are used.
Methods of fastening poles (racks)
After the method of installing the pillars has been chosen, all wood that will be used in construction is coated with a protective composition - antibacterial and insect repellent. Formulations must be intended for outdoor use (not for indoor use, but for outdoor use only). After processing, you can begin construction:
- Site marking. Using pegs, laces, a tape measure and a building level, an area of the required size is marked. A place for the pillars is marked in its corners, and they are installed using the chosen method.
Marking the site and installing poles
- Two main beams are nailed to the evenly aligned pillars. To reduce the cost of construction, we use two boards instead, which are attached just below the top - 5-6 cm lower. The beams must be fixed strictly horizontally. As already mentioned, you can use nails, screws or bolts. If you connect with self-tapping screws, take white ones, not black ones: they are much stronger and can withstand greater loads.
We fasten the main beams. We make them composite - from two boards 50 mm thick
- Now the auxiliary beams are installed. If possible, make cuts for the main ones: this will make it easier to attach them. Otherwise, you will have to use corners, one part of which will be attached to the lower beam, and the other will hold the transverse beam.
Installation of auxiliary beams
Beam shape
- Actually, all that remains is the installation of the jib. They will give the structure greater stability.
- To make the shadow thicker at first, even thinner planks can be placed on top - 5-7 cm thick. To ensure they hold well, cuts 2-3 cm deep are made under each auxiliary beam.
Installation of crossbars
That's it, the wooden pergola is assembled with your own hands. You can see the assembly sequence in the following video.
Support for grapes in the form of an arch and semi-arch
The semi-arched type option is more often implemented in summer cottages, where there is not too much space for growing grapes. In these cases, crop planting is combined with a recreation area, where a canopy provides protection from the scorching rays of the sun. Semi-arch involves planting bushes in only one row. Such supports give the gardener the opportunity to grow several varieties of crops with different ripening periods.
Arranging supports for crops in the form of an arch is much more difficult to do independently. A two-row planting of grape bushes is used. But the arched version requires quite a lot of space. Therefore, it is more suitable for spacious areas where there is enough free space.
Arch support for grapes
There is no waste in the garden
An original pergola is made from branches using simple materials and tools (an ax and rope). To do this, one of the edges of the shoots is sharpened, then tied with a strong rope and installed in the form of a tent.
The climbing plant will be able to freely climb the structure, creating shade on a hot day.
Selecting a grape variety for growing on canopy supports
There are several criteria for choosing a variety for growing on openwork canopy supports, but the most important of them is winter hardiness. Branches intertwined through the frame cannot be lowered to the ground for shelter from frost.
The following varieties are considered the most winter-hardy:
- "Lydia";
- "Aleshenkin"
- "Lady fingers";
- "Tukay";
- "Isabel".
Caring for these unpretentious varieties is quite simple; they are well adapted to frost and provide dense shade in the summer. In addition to the above-mentioned varieties, structures entwined with wedge-leaved and Japanese grapes look nice. With good winter hardiness, they provide dense shade and beautiful clusters of berries.
Where they are located: for the garden, park and other options
Forged pergolas find their place in the arrangement of local areas and gardens . Metal products harmoniously complement the space around mansions, cottages, country houses and country houses . They allow you to create a cozy corner for relaxation, where you can place a barbecue and furniture.
Wrought iron pergola in the garden. Photos Kovan
Forged pergolas, located in gardens and parks, serve as an excellent place to install benches, benches, and swings. Metal products, tightly entwined with plants, allow visitors to a public place to shelter from rain or scorching sun.
Forged pergolas can be installed in the courtyards of multi-storey residential and commercial buildings. This technique will allow you to create a green corner among the concrete jungle.