Some types of houses do not have balconies on the first floors. However, you have every chance to get this additional space. You can add a balcony with your own hands. It can be suspended, on struts, or supported on piles. In this article we will describe the construction of balconies on the first floor: suspended and piled.
Installing a balcony with your own hands may seem like an impossible undertaking. This is wrong. Homemade balconies are, of course, a troublesome task: you will have to physically work and tinker with papers.
First you will have to draw a sketch, and then draw up a design for the balcony on the first floor, then coordinate it with the authorities responsible for these issues. For the extension on the second floor, the design is done in the same way. The work itself will not take very much time.
Preparation for repair
To consider the option of a major overhaul, it is necessary to open all surfaces for inspection.
Remove the attached elements, dismantle the casing and cladding. Clean the walls and ceiling from plaster and paint coatings. It makes sense to preserve a smooth and durable sand-concrete screed that “rings” when struck by a hammer and successfully withstands the level test. Once removed, you should carefully examine and identify the problems: damaged areas of the load-bearing slab, cracks at the junction of vertical and horizontal structures, the strength of the fence, water leakage from above.
If damage is noticed at the base, it is necessary to determine whether the balcony is in emergency condition (this can happen!), or whether these errors do not affect the load-bearing capacity of the slab. For example, these could be temporary technological holes that appeared during the construction process and were not repaired by forgetful builders. The same construction negligence can cause cracks to appear at the junctions, which can cause rain or melt water to flow from the upper balcony to the lower one. These minor defects can easily be solved using polyurethane foam, sealant or repair mixtures - depending on the size, location and operating conditions. Now you can move on to a specific solution to the question: how to make a beautiful balcony in an apartment functional, comfortable and appropriate for its intended purpose.
How to create a project
Without a project, you will not succeed in any construction. First of all, draw a sketch of the future extension. You can already calculate materials using it. It is important to fit the design in such a way as not to disfigure the appearance of the building and take into account all the needs. It is better if you contact an architect or builder, since mistakes in this matter can be quite expensive, both in terms of materials and time. But now there are excellent programs that give an idea of the construction in full. What is important is the appearance, the strength of the selected materials, and well-chosen dimensions.
Detailed design and calculations
The preparatory stage of construction work begins with the development of a detailed design of the future loggia and calculation of the dimensions of the material.
The working draft includes the following details of the balcony:
- marking the installation of supports on the ground;
- marks for the depth of entry of support pillars into the ground;
- marking the future frame of the loggia;
- marking the location of sheets of material on the sheathing;
- layout of the balcony room relative to the living rooms;
- type of cladding;
- location of window opening, door;
- glazing decision;
- type of roof and its fastening;
- detailed diagram of fastening corners.
Correctly carried out, detailed calculations eliminate the risk of irreparable errors during construction, damage to the material, and additional payments due to incorrect calculation of materials.
How to obtain a building permit?
It will be impossible to build a balcony yourself without obtaining the appropriate permission. It will be necessary to collect a package of certain documents and submit them to the necessary authorities.
List of documents required for building a balcony yourself:
- Apartment plan and living space design.
- Balcony construction project (it is better to entrust this stage to professionals).
- Written and legally certified permission for construction received from neighbors.
Next, you need to contact lawyers for advice and receive notification that the construction is completely legal. For illegal construction, the court may impose fines and demolition of the structure.
After receiving permission from a lawyer, you will need to contact the BTI on the same issue.
In no case should you neglect legal assistance, since in order to add a balcony to an apartment on the ground floor, you may also need permission to use the land located underneath it (its purchase or privatization).
Why can they refuse to install a balcony?
In principle, installing a new balcony or expanding an old one is theoretically a completely feasible task that can be carried out by the owner of any apartment. But as for the practical side of the issue, it is much more difficult to solve. And the reason here lies not at all in the complexity of the tasks, but in obtaining all the necessary permits for construction work. There are many reasons why installation of a balcony may be refused. So, you won’t get permission if:
There are many reasons why installation of a balcony may be refused.
- A certain authority will decide that after installing a balcony/loggia, the appearance of the building will change, which will affect the overall aesthetic appearance of the entire structure. This is the reason most often voiced if a balcony is planned to be installed on a façade facing an avenue or a central street with busy traffic;
- The building or its individual parts have become dilapidated and unusable. This is especially true for houses built in the 70s and 80s, as well as buildings made of fragile building materials, which neither theoretically nor practically can withstand additional loads in the form of installed balconies/loggias;
- After installation, the living conditions of your neighbors will worsen. Most often, this reason for refusal is heard by the owners of apartments located on the upper floors of high-rise buildings.
In addition, there are some other reasons why you may hear a refusal to install a balcony. For example, they will not issue a permit for construction work in houses that are architectural monuments. The refusal may be heard by owners of non-privatized apartments, tenants, and so on.
Advice. Before you start collecting the necessary documents for installing or reconstructing a balcony, be sure to consult with a specialist who will probably tell you whether there is any point in dealing with this issue at all.
Balcony options
Methods for attaching a balcony:
- The most suitable option for multi-storey buildings is a cantilevered slab.
- In cottages, cantilever beams are most often purchased.
- Brackets are good for high loads.
- Attached balconies are typical for ground floors, when the structure is simply attached to the house.
If you decide to build a balcony yourself, it is best to use extensions or brackets.
Creation of the design:
- manufacturing a frame (you need to make a base from metal corners in the shape of an isosceles triangle; this structure is attached to the wall with anchor bolts; a metal frame is welded onto the triangles)
- the parapet is strengthened
- the window is dismantled, a doorway is formed
- a metal sheet is placed on the floor to protect against fire and burglary
- carry out flooring and insulation
- the balcony is often sheathed with sheets of corrugated sheets
- the balcony is insulated and glazed
There are already ready-made and made balcony frames; they just need to be welded to the wall. Be sure to decorate your balcony with aesthetic decorative elements.
You can make a foundation under an attached balcony, this can really expand the area (the structure is safer than a suspended one).
First, the foundation itself is built. A pit is dug under it, into which blocks for the foundation will then be installed. The depth of the pit is best calculated by a professional; it is important to calculate the level of soil freezing. The depth of the foundation itself should not exceed this parameter. The height of the foundation and the future balcony must correspond to each other. From a decorative point of view, you need to combine the balcony and the building.
Then the brickwork is erected, which will be the main walls of the extension. Try to do this as close to the facade as possible. The extension must comply with waterproofing standards. It is better to carry out double waterproofing. It is important to protect the extension from groundwater and high humidity levels. The roof usually coincides with the slab of the upper floor, or is made independent. The entire structure must be insulated and glazed. It is very fashionable now to use panoramic glazing. Cold and warm glazing is suitable for such a balcony; for additional comfort, you can install radiators or electric heaters. Don't forget to tidy up your balcony externally. Think over the design and additional elements.
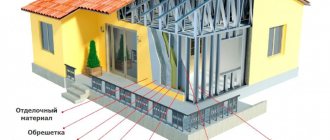
Types of balcony structures
The supporting slab of the attached loggia can be attached to the wall of the building in different ways.
Exterior view of the cantilever slab
In this regard, the following options for the arrangement of architectural elements are distinguished:
- Balconies with a cantilevered slab, which in one part fits into the wall, as if “pinched” into it. This is how most balconies in standard high-rise buildings are built.
- With a stove on console blocks. They are inserted into the structure of the wall. Such structures are used to add balconies to private houses.
Balcony with supporting structure on cantilever blocks
- Supporting the base plate on brackets. Such add-ons are quite durable.
Supporting the load-bearing wall of the balcony on brackets
- The base of the future loggia can be attached to the wall on one side, and rest on the column on the other. Such designs are convenient to use for wide load-bearing slabs.
- Extended balcony. This type of extension is a separate structure supported solely by columns. In this case, the attachment to the wall of the building is only partial or completely absent.
How to make a balcony on a foundation?
A balcony on the foundation is naturally built only in apartments on the ground floor. This structure is quite cumbersome, but its layout is unlikely to be too complicated.
The construction of balconies of this type is carried out on a strip foundation, which is a kind of closed circuit made of reinforced concrete beams. This foundation must be erected under the load-bearing walls and foundations of the future structure.
After the foundation is erected, markings are made, all necessary excavation work is completed, then a strong frame is welded, screed is poured, walls are constructed, glazing is installed and external and internal finishing work is carried out.
Remote balcony
A remote balcony is the frame of a room placed outside. It is a separate part and has nothing in common with the walls of the room, with the exception of the adjacent central wall in which the entrance is located.
To build an external balcony, you need to build a frame and take care of the reliability of the fastenings, especially the supporting ones. After constructing the frame, it will be necessary to build a floor slab; it is best if it is reinforced with reinforcement and made of concrete.
It is necessary to screed the open balcony to ensure the reliability of the floors.
Good ventilation is necessary to ensure the circulation of fresh air in the room. Few people think about this when building balconies, so it often happens that a damp smell appears in an insulated room, fungal microorganisms develop and windows often fog up.
There are two types of balcony ventilation:
- special valves responsible for the supply and exhaust of air, mounted in the frame of the window frame on the balcony;
- electric fan.
It is worth noting that the system with a fan is more powerful.
Frame
The construction of the structure begins with the arrangement of the frame.
First step
Attach a 5x15 cm beam to the load-bearing wall. Use anchors for fixation.
Second step
Install the main supporting structure on the previously fixed beam. Fasten it so that after installing the floor, its total height is 50-100 mm below the door threshold. This will eliminate the risk of atmospheric moisture entering the room.
Third step
On the opposite side, mount a longitudinal support element and install transverse beams on it. The supporting element is located on the columns. At the same time, its installation level should be made with a slight slope (2-3 degrees will be enough) to ensure effective removal of precipitation from the house.
Struts
Perform additional strengthening of the frame using struts. In such a situation, the function of struts will be taken over by inclined elements, resting their lower edge against the supporting column or load-bearing wall, and with their upper part against the transverse beams.
Thanks to the struts, the stiffness of the balcony will be significantly increased.
In some situations, it is more convenient to use wooden triangles with right angles, made from thick and durable boards, as struts. At this moment, be guided by the situation.
Support columns
The main support of the structure under consideration is a strip-column foundation. Recommendations for its arrangement were given earlier.
A wooden beam of square section will perfectly cope with the functions of supporting columns. Select the parameters of the timber individually. Most often, supports with a side of 100 mm are sufficient. Instead of timber, you can use another suitable material at your discretion.
The columns must be installed strictly vertically, otherwise there will be no question of the reliability of the balcony structure. To ensure verticality, support the columns with temporary struts while the foundation dries.
Floor
Lay a 4 cm thick planed board on the floor. Pre-treat the material with an antiseptic and fire retardant.
Lay the boards across the support beams. Leave a 2-3 mm gap between the boards to drain precipitation.
Use self-tapping screws to secure the boards. The heads of the fasteners should be slightly recessed into the material.
Railing
And the last structural element of the balcony is the railing. The choice of manufacturing material, design features and appearance of the railing remains at the discretion of the owner. If you wish, you can do without them altogether by making fences of suitable size from concrete slabs.
Glazing
For glazing, you can use wooden frames or metal-plastic structures. At this point, everything also remains at the discretion of the owner.
Technology
When deciding to install a balcony yourself, you need to understand that this is quite labor-intensive work. And given the fact that this must be a very durable structure, the technology for installing a balcony or loggia should be strictly followed.
To realize all your ideas, listen to the advice of experts below.
Tools and materials
Any business begins with the preparation of all the materials that are necessary for its implementation, and the tools that will be difficult to do without. So, to install loggias and balconies you will need:
- pipes, channels, fittings, binding wire;
- formwork boards or plywood sheets;
- concrete mixture;
- Master OK.
Preparatory work
Work should begin with the layout of the future structure being built. The location of the balcony, size and type are determined. If the balcony structure is planned on the second floor, then the concrete slab must be installed at the level of the reinforcing belt. To learn how to obtain permission to add a balcony, watch this video:
It is best to pour the channel into the reinforcing belt in advance. This will significantly increase the strength of the structure.
Also, for the stability and strength of the base, it is advisable to arrange supports on which the slab will rest. These supports can then be finished as columns. An alternative method could be supports that rest against the wall of the building. In this case, the placement of the supports should be designed so that they rest not on the wall, but on the corners of the house.
Step-by-step instruction
To facilitate the work required by installing a balcony, we provide a detailed step-by-step algorithm. So, the sequence of installation of the balcony structure:
- We place the channel on the edge in increments of up to two meters. Their number depends on the length of the balcony. The length of the channel should not exceed one meter, since the width of the balcony, according to regulatory data, is about 80 cm.
- The channels are fixed and poured together with the reinforcing belt so that they subsequently form a single structure.
- Start laying the reinforcement. This process must be carried out along the length of the balcony at a distance of 10 cm and the rods must be connected to the channels using metal wire.
- Then the reinforcement is laid along the width of the balcony structure with a similar spacing. Connections are also made using wire.
- Next, formwork is installed along the perimeter of the reinforcing mesh. It is better to knock it down in advance, and once installed, secure it with supports made of boards or pipes.
- We begin pouring the balcony slab with concrete. To give greater strength and even distribution of the mixture, it is better to use a vibrator.
- The concrete is given time to harden, and after that the formwork is dismantled.
- The installation of the balcony slab is completed by installing the supports using any method described earlier. For more information about adding balconies, watch this video:
Finishing the loggia with wooden paneling
Replacement of double-glazed windows
First, you should replace the double-glazed windows on the loggias. Window installation should be carried out by professionals. It is better not to do this work yourself; during operation it will be difficult to correct errors made during installation.
New glass unit Rehau 60 Blitz design. Each door of the two-chamber design opens. This will make it easier to keep the windows clean, since there is a road next to the house and dust accumulates on the surface quite quickly.
Glazing estimate. The total cost of installing windows was 18,220 rubles.
Material purchase
Tools:
- Construction knife and pencil;
- Concrete drill;
- BOSH bit;
- Yardstick;
- Jigsaw files;
- Set of wood drills;
- Stainless steel carpenter's square;
- Building level;
- Miter box with saw for cutting at an angle.
Power tools needed for work.
Lumber:
- Bars: 11x19x2200 (knot-free spliced), 20x20x2000 (dry planed, category 1), 40x40x2000 (planed, category AB);
- Eurolining 12x95x2700 (category B);
- Furniture panel 18x400x800 (BB grade);
- Skirting board 12x40x2200 (1 grade);
- Corner 27x27x2500 (external);
- Glazing bead 10x10x500 (category 1).
Selecting quality glazing
The balcony is the most open room to natural light in the apartment. But while allowing light into the room, bad weather cannot be allowed to enter. To do this, it is better to glaze it, choosing cold or warm glazing. Cold is intended for insulated from the apartment, uninsulated and unheated.
“Cold glazing” is supported by its cost. If you do not plan to use it as a warm extension or winter garden, you can limit yourself to windows of a simpler design and with single glazing. Moreover, they also use cold ones, but closed from rain and wind. Another argument in favor of “cold glazing” is the wide variety of opening options, since single-pane sashes are much lighter than double-glazed windows used in warm glazing. In addition, an aluminum profile is used, which is lighter than steel in heavy “warm” structures. In good weather, such windows can even be folded, opening up maximum space to fresh air. Windows are mounted resting on a concrete, brick fence or on the base plate itself, if the fence is not solid. In the latter case, the glazing can be from the base or part of the window structure can be covered with a sandwich.
Modern light-transmitting structures can save heat. When choosing warm glazing for a balcony, it is important to pay attention to elements that are specially designed to reduce heat loss through windows:
- glazing must be made with multi-chamber double-glazed windows;
- The design must use a heat-saving profile with gaskets that protect against freezing.
Detailed information about these window design features must be included in the certificate. And for these improvements to work, it is necessary that the installation of the glazing be done efficiently, with careful sealing of joints and junctions. Even if you decide to repair the balcony yourself, you will have to contact a specialized company for glazing. It is important to get as much information as possible about it in order to make a quality installation.
Video master classes on the topic
Detailed videos that will help even a beginner install a balcony block with a window sill and slopes on their own:
Tuning the opening and installing the BB:
Independent installation of a window and door unit on a balcony is a labor-intensive process that requires a lot of time and financial costs. Directly installation is preceded by a large amount of preparatory work. Both are based on certain theoretical knowledge and practical experience. If you are not willing to risk a PVC structure by installing it yourself, consider hiring a professional.
YOU MAY ALSO BE INTERESTED
Electrical installation
Electric lighting is a necessary element of modern comfort. It’s not out of place on the balcony either. It is not difficult to install electricity there. For example, a sleeve is mounted in the corner of the door frame and a wire from the nearest outlet is pulled through it. If the arrangement coincides with renovations in the adjacent room, the corrugated wire is laid in a groove along concrete and brick walls, and a groove is also made in the slope of the balcony door. Without any problems, the wire can be placed in a cable channel or in a special plinth with a cable channel.
The wiring is carried out taking into account the finishing: on a cold balcony without insulation, the easiest option is to use a cable channel; if the balcony is insulated, then it makes sense to hide all the wiring in a groove under the cladding.
Sockets may also be needed on a cold balcony, but on an insulated one they will definitely be needed, not only for a TV or floor lamp, but also for heating the room, to connect heated floors or electric radiators. The effect is achieved when using both heating options. The controls of the devices are sometimes moved to the next room - whatever is more convenient for you. If there is no special need, it is better to mount all installation products on the main wall rather than on the cladding.
How to make a floor on a balcony with your own hands?
As easy as pie! For a level floor, a screed must be poured onto the balcony concrete slab. After the screed has dried, you can begin finishing the surface with tiles or other finishing materials. If desired, you can leave the floor concrete.
Now we can make a beautiful balcony with our own hands - if you wish, you can cover the balcony with wooden panels. This will add a little coziness to this room. In the summer, when the tree warms up and gives off its heat, you will feel the pleasant aroma of the tree.
In order to make a wooden balcony with your own hands, you will need very little - desire, imagination and the necessary materials. Remember not to overload the space with details.
Documenting
Before proceeding with calculation and construction work, it is necessary to obtain permission to build a loggia.
Documents for installing a balcony in a country house with your own hands include:
- permission from the company on whose balance sheet the house is listed;
- official written agreement of the residents of the house for construction;
- a finished loggia project from an architectural agency;
- construction agreement from supervisory and municipal services of the city;
- ownership of the house;
- BTI certificate;
- owner's application for redevelopment;
- photo of the cottage.
For advice and a detailed list of documents for the construction of a balcony room in your home, contact the planning inspection in your city.
Wall and ceiling cladding
Installing lathing on walls and ceilings solves the same problems as floor joists: leveling surfaces and insulation. Galvanized or aluminum profiles are used, which are not subject to corrosion and are more durable than wooden beams. But if the balcony is well protected from moisture, there is no particular reason to worry that the wooden sheathing will quickly rot. Structural elements made of wood can be additionally protected with antiseptics. Wood does not conduct cold, is cheaper than metal profiles and is easier to work with.
Mineral wool or expanded polystyrene insulation is laid between the guides, and a vapor barrier is attached. The supporting structure is sheathed with panels for painting, pasting or with a decorative coating. More attention should be paid to the ceiling covering: protection against leaks must be ensured, and the fastening must be more rigid to avoid sagging.
Balcony finishing
Carefully completed preparation and careful cladding of walls and ceilings allow you to choose any design options. However, the finishing of floors should be consistent with the functioning of the heated floor. Or, if the floor is not heated, it is better to use warm materials to cover the floor: parquet, laminate, floorboard with underlay.
When working with walls, the only limitation is that finishing is done along the sheathing. A glazed balcony is a dry room; the walls can be painted and wallpapered. If you don’t forget to turn on the heating, you don’t have to worry about the finishing materials peeling off due to temperature changes.
The ceiling is usually the load-bearing slab of the upper floor. If the upper balcony is insulated, the finishing options are cladding or painting. But the usual option for finishing the ceiling is suspended or hemmed on a lathing. The false ceiling made of sheet material is finished in accordance with the quality. For drywall, it is enough to process the seams, finish putty and paint. For painting, it is recommended to use paint for wet rooms.
When working with window slopes, the main thing is not to damage the window structure. There are no window slopes when glazing the balcony. The finishing of the junction of the glazing to the walls is carried out either as part of the window structure, decorative elements, which are selected in accordance with the chosen design. In the same style, it makes sense to choose decorative corners. The plinth is selected according to the floor covering.
Main stages of construction
After obtaining permission for construction and planning work, choosing the type of structure, preparing tools, you can begin work. The construction of a balcony includes several stages.
Stage 1 - installation of struts, foundation
Base frames and struts are the basis on which the entire structure is supported. They are made by hand from galvanized metal, or purchased in a specialized store. The size of the struts is 50x50 mm.
There are a number of requirements for the installation of struts:
- one side of the slope protrudes up and down by 50 mm;
- the distance between the struts corresponds to 100 cm;
- Anchors are used for fastening;
- tying the struts with metallurgical angles;
- mandatory jumpers are created across the triangles;
- Additional anchors are attached to the adjacent wall.
A metal frame made of struts is a reliable basis for a hanging or attic balcony.
Stage 2 - installation of floor, frame
The floor of the future loggia is laid on the base frames. Due to the limited load-bearing capacity of the frame, casting a concrete base is excluded.
The floor of the structure is performed in two ways:
- Fastening metal sheets under base frames. A layer of expanded clay is poured inside, a reinforcing mesh up to 5 mm thick is attached with wire, and welded around the perimeter. A layer of cement mortar is poured on top.
- Sheets of rigid material are laid on the base frame, a waterproofing layer is laid, and covered with wooden boards secured with self-tapping screws. Logs are attached to the top, an insulating layer with a vapor barrier is laid, and a subfloor is laid.
The metal frame is welded on the ground, then placed on the prepared base. The side edges of the frame and the top lintel are secured to the wall with anchors. This increases the durability of the structure and reduces the load on the base.
Stage 3 – insulation, finishing
The finished balcony frame is sheathed with profiled sheet material. The type of finishing material depends on the type of construction and design of the house. After cladding, an additional insulating layer and sealing are laid to prevent moisture from penetrating into the room.
Stage 4 - roof construction
A support-cantilever roof is mounted on the finished frame. Attached to the wall with metal corners with lathing. The roofing material must be strong, reliable, withstand heavy loads, resistant to temperature fluctuations, and have a high reflection coefficient. Corrugated sheeting, seam roofing, and metal tiles are suitable for this.
Stage 5 – glazing, cladding, wiring
The final stage of construction and planning work is interior decoration, cladding, glazing of the balcony (in most cases, laminated plastic windows with a wood look are used). Finishing material is laid on top of the insulation for additional comfort indoors.
For internal lining use:
- lining (more details in the article “lining a balcony with lining“);
- drywall;
- plastic panels (discussed in detail in the article “finishing a balcony with plastic panels“);
- MDF, chipboard, plywood;
- Tiles (we recommend the article “tiles for the balcony“);
- PVC.
At the stage of covering the loggia, electrical wiring is installed, electricity is supplied, and heating is connected inside the room.
Lighting
When installing a suspended or false ceiling, the simplest lighting option is built-in lamps. If there is no danger of leaks from above, they will last a long time and will not take up unnecessary space. The use of wall lamps is limited by the reluctance to have unnecessary elements in a cramped room. You can simply provide mounting points and connect portable lights when necessary. In this case, there should be enough sockets on the balcony so as not to bother with inconvenient extension cords.
Use a balcony when lighting is of particular importance - as a winter garden or a small apartment greenhouse. This can be a place for winter-spring growing seedlings, relaxation or creative pastime. A warm, sunny room provides comfortable conditions for the growth of citrus or exotic plants. A prerequisite is the organization of additional lighting. To do this, you can use powerful but economical modern LED lamps. And on the most stormy evenings your balcony will stand out as a bright spot against the background of a dark facade.
Balcony ideas
- A stylish and functional idea for decorating a balcony room is a bookshelf, presented in the form of numerous diamond-shaped cells.
- A high table top and bar stools will be an excellent solution for a balcony. In such an environment it will be pleasant to start the day with a delicious breakfast and end with a romantic dinner.
- A soft comfortable chair, decorative light bulbs, a coffee table and a floor lamp are what you need to spend cozy evenings on the balcony reading interesting books.
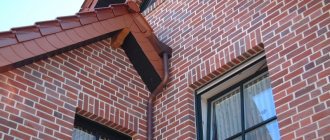
Basic materials
A loggia in a private cottage is built from natural, artificial materials with high strength, load-bearing capacity, and long service life:
- tree;
- metal;
- concrete;
- glass.
Balcony with concrete floor
The design, type, and choice of material for the balcony room depend on the type of decoration of the house and its material. It should fit into the overall design, without standing out or resonating.
Photo instructions on how to make a balcony with your own hands
Sources
- https://maximusokna.ru/stati/kak-sdelat-balkon-v-kvartire/
- https://na-balkone.com/89-kak-sdelat-balkon-v-kvartire-realnye-foto.html
- https://stroy-podskazka.ru/balkony/svoimi-rukami/
- https://stroyday.ru/stroitelstvo-doma/pridomovye-postrojki/kak-sdelat-balkon-svoimi-rukami.html
- https://na-balkone.com/44-primery-otdelki-balkona-svoimi-rukami-poshagovaya-instrukciya-s-foto.html
- https://svoimirykamicentr.ru/kak-sdelat-balkon-svoimi-rukami/
- https://svoimirykamiinfo.ru/kak-sdelat-balkon-svoimi-rukami/