A pit is a excavation in the ground intended for the installation of buried structures or parts thereof: tunnels, wells, building foundations. Their variety is trenches, which have a small width and are long, and shafts that go deep with small dimensions in plan. The depth of the pit is determined by calculation, and the development project is an integral part of the overall design of the facility.
Dug trench for foundation
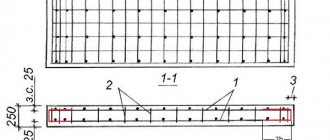
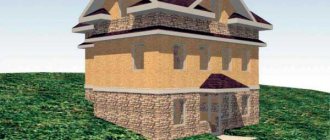
Types of strip foundation
Before proceeding with the construction of such a foundation, it is necessary to carefully consider its features and varieties. This will allow you to choose the right foundation for the construction of a particular structure. This will also make it possible to carry out all the necessary work correctly. A strip foundation is not just one way to make a foundation for a house; there are several types:
Solid cast
A monolithic or solid strip foundation is constructed directly at the construction site. To begin with, formwork is constructed into which a reinforced belt is laid along its entire length. After this, concrete is poured.
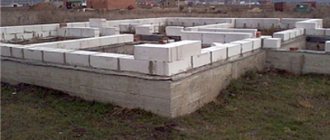
The base is a closed monolithic contour made of reinforced concrete. Thanks to this, you can create a solid frame that is suitable for any soil, including unstable ones. On such a foundation you can easily build a country house or a stone fence.
Among the advantages of this design are ease of construction and reliability. In this case, the base can have a different shape. As for the disadvantages, there is a large mass of the monolithic structure.
Solid strip foundation - concrete is poured in one go into the prepared formworkSource sazhaemvsadu.ru
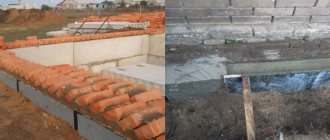
Made
Ready-made reinforced concrete blocks are used to construct the foundation. They are used to lay out a tape of the desired shape directly on the site. They are held together using cement mortar. They are optimally suited for the construction of low-rise buildings. It is quite easy to purchase ready-made blocks, since many factories are engaged in their production.
Among the advantages, it is worth highlighting the ease of assembly, which can significantly save time on foundation construction. But, at the same time, prefabricated structures have some disadvantages. The non-solid structure and the need to attract heavy construction equipment reduces the popularity of this type of strip foundation.
A prefabricated strip foundation is assembled from ready-made slabs, and the joints between them are sealed. Source kinozavr.info
Shallow foundation
This type of foundation is mainly used in the construction of light buildings. So, these can be frame houses and structures made of timber and logs. The peculiarity of this foundation is that it is located slightly above the soil freezing level. Therefore, it is often used on less problematic soils.
Shallow structures can easily withstand soil heaving that occurs in winter
During construction, special attention is paid to waterproofing and thermal insulation. This will protect the base from the negative effects of the environment.
The advantages of a shallow foundation include its low construction cost. At the same time, there is no need for complex earthworks. It has several disadvantages. First of all, it is worth noting that this design cannot be used on all types of soil and for the construction of not all structures.
The design of a shallow foundation is standard - it is simply buried into the ground no more than 50-70 centimeters. Source novostroika93.ru
Deep strip foundation
The construction of a strip foundation of this type is carried out below the freezing level of the soil. This makes it possible to distribute the load from the future structure onto a stable layer of soil. Due to this, deep foundations are used for the construction of multi-story buildings that have significant weight.
The advantage of this design is that they are suitable for the construction of heavy structures. It is also possible to equip the basement and basement. Of course, arranging the foundation will require significant physical and material costs. This is especially true for excavation work.
A deep strip foundation is buried below the soil freezing level - this can be 1.7-2.2 meters or lower, depending on the region. Source diagnostika.spb.ru
Digging a trench by hand, how the price per linear meter is determined
Nowadays, when mechanization has reached a high level of development, when machines and mechanisms are actively used, the need for manual labor still exists.
Manual excavation work is still in demand, and there are objective reasons for this.
Dig by hand
The work of a digger is not easy. Work such as trench digging is considered unskilled and primitive, but there are often cases when manual labor is indispensable. Manual digging is recognized as the most effective for the following tasks:
- laying trenches in places hard to reach for equipment,
- digging wells,
- laying communications in the constructed building,
- installation of a subfloor in a private house.
It is also believed that wells need to be dug only by hand. This is explained by several reasons. Here are some:
- precisely stop at the aquifer,
- do not get into the sand so that the water does not drain away later,
- stones and dense clay are dug only by hand,
- It is unacceptable for engine oil to enter the well barrel.
In a word, digging a well is not easy; in addition to having specific knowledge, it requires attentiveness and accuracy. There is no automatic or mechanical way to dig a well.
What determines the cost of 1m³
Analysis of the earthworks market indicates that the ratio of the costs of manual and mechanized labor is the same. How much it costs to dig up 1m³ of land depends on several factors:
- soil type,
- urgency of the order,
- volume of work,
- seasonality,
- terrain,
- trench parameters.
It is also taken into account whether backfilling of the soil is necessary. Pricing takes into account all factors, plus the qualifications and experience of the team.
Pricing depending on a separate factor
It’s clear why the prices of different teams vary - the training and dexterity of workers has its price. Prices are formed differently in the capital region and in the periphery.
The cost of the work is determined after a direct study of the location of the work to be done and its features. They evaluate the location and how convenient it is to dig a hole, for example, for a cellar.
They are looking at how to lay a ditch for the sewer system. They decide how to calculate the cost of work more correctly, taking into account a linear meter or a square meter. Determine the volume of the trench, depth and width, add to this the length of the object and how hard the soil is.
In winter, prices are higher, which is understandable. Frozen ground requires more effort, the creation of additional conditions for workers, and special delivery of people.
Price per meter
Moscow and the Moscow region have the highest prices; on average, a cube costs from 1000 rubles. Wholesale prices, which come into force for large volumes of work, will reduce the price by about 100 rubles, no more. Winter doubles the cost.
The price for a trench, 100 cm deep, for a cable, for example, will be 300 rubles per meter in the Moscow region. In a small regional center, for example, Lipetsk region, the same work will cost 140 rubles.
Rocky terrain with complex terrain has its own higher prices; digging there can only be done by hand, because equipment cannot approach there. This circumstance increases the cost of manual labor.
The cost of manual labor on land work and payment for special equipment are approximately the same. Therefore, whether to hire a team of excavators to dig a foundation pit, whether to rent drilling rigs, excavators for laying water pipes or laying cables must be decided according to the situation. And cost is far from the main factor here.
Digging a trench by hand - how the price per linear meter is determined
Nowadays, when mechanization has reached a high level of development, when machines and mechanisms are actively used, the need for manual labor still exists. Manual excavation work is still in demand, and there are objective reasons for this.
Step-by-step action plan
It is recommended to dig a hole with three or four people - this way the work goes faster. After preparing all the tools, workers should have a plan.
Step-by-step sequence of actions when performing excavation work:
- Marking.
A preliminary plan must be drawn up on paper or electronic media. It needs to be moved to the ground. To do this, control the position and dimensions of the hole using a geodetic level. The dimensions are checked along the axes and diagonals - they should not deviate from the norm by more than 2 cm in any direction. If there is no level, use the Pythagorean theorem and the point of intersection of two curves. To mark the depth, use a measuring rod with marked marks. Pegs are installed at the corner points, and a cord is pulled between them. - Removing the top layer. To remove the fertile layer of soil, first cut off bushes and uproot trees. To determine the volume of the fertile layer, multiply the length and width of the pit on top by the thickness of the plant layer. This layer is removed using garden and bayonet shovels.
- Excavation and soil removal. During digging, personal protective equipment is used - gloves and goggles, special suits. First, safe areas for excavation are formed, and as development progresses, space is made available for normal movement of labor.
- Export of rock. The soil is loaded into large buckets using a shovel and removed from the mining site. Later it can be removed using special equipment.
- Alignment of walls and bottom. Compaction of the base must occur with proper humidity. Soil that is too dry will take a long time to compact. Too wet soil will interfere with the compaction procedure. Sandy soils are compacted by vibration; compaction is suitable for manual leveling. The process is carried out by lowering a heavy tamping plate to the bottom of the pit.
Interior arrangement of the cellar
Marking
When marking, it is necessary to take into account the thickness of the walls so that the size of the cellar is correct. Usually its size is 2*3*2 meters, where the larger value is the width
It is important to maintain equality along the diagonal of a rectangular room
Dismantling the screed
The labor costs for dismantling the screed depend on its thickness. If the floor is made of a rather thin layer, then the necessary tools will include a grinder, a hammer drill and a concrete disc.
Along the edges of the rectangle of the future cellar, seams are cut with a grinder, and then the inner perimeter of the form is dismantled using a hammer drill. If the screed is made with reinforcement and a thick layer, then when you reach the rods, they need to be cleaned of dust and cut off with a metal disc.
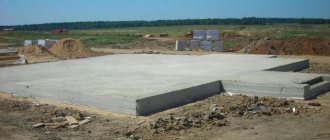
Pit
You need to dig a hole to the depth of the basement that is planned to be made, adding 30 centimeters for the ceiling and backfill. The walls should be as smooth as possible in order to reduce the amount of concrete during their construction. The bottom is leveled, covered with 10 centimeters of slag, compacted and spilled to compact it.
Next, a reinforced concrete slab or asbestos-cement slabs is laid. The walls and the base need to be covered with waterproofing in two layers, securing the upper layers at the junction with the base of the house with a gas burner.
Formwork
The formwork can be either removable or non-removable.
In the case when the formwork is planned to be removed, it is made from boards or panels of the required size. They make a rectangular box, slightly smaller than the size of the cellar, and place it on the bottom of the pit. Square-shaped bars are placed in the corners to add rigidity to the structure.
If the floors are not concrete, you can lay reinforcement bars so that the edges protrude beyond the formwork frame and secure them with screws or nuts. When the formwork is removed, the ends are sawed off with a grinder, and the part inside the concrete serves as reinforcement.
If permanent formwork is being made, then the spacers will be jumpers that are placed between the walls of the formwork. When pouring concrete, you need to tap the frame with a hammer to avoid the formation of voids. In this case, the wall will truly be monolithic.
Overlap
The concrete screed is removed along the entire perimeter of the cellar, and a new floor is poured with I-beams. The beams are attached by welding to the mortgages. The formwork will be USB sheets that are placed under them. Vertical fastening is done with spacers, often sliding ones.
Filling and installation of floors is carried out only after the walls have completely dried. As a rule, this is a period of up to 3 weeks. Concrete should infuse and gain strength within a month. The formwork is removed after 2 weeks.
Time for work
Beginning builders often think about what time is best to carry out work on digging a pit. There is only one obvious fact on the surface - this should not be done in winter, since digging frozen ground is extremely difficult. However, this does not mean that all other seasons of the year are suitable for work.
A good specialist will answer that there are two suitable seasons: summer and autumn. This type of work cannot be carried out in the spring. At this time of year, the processes of thawing of the earth begin, resulting in the release of a large amount of water that will need to be pumped out. Consequently, additional costs will be required for specialized equipment.
The autumn season is not entirely suitable for this activity. You can only work in its first, warm part. In late autumn, frosts already begin, the soil behaves unstable - it freezes at night and thaws during the day. This can leave an imprint on the progress and quality of work.
Of course, it is impossible to unequivocally prohibit digging a pit in the cold season. If there is an irresistible need for its urgent creation, it is possible. However, you have to take into account that this “pleasure” will cost you one and a half to two times more.
If you want to make a pit for the basement or the foundation of an ordinary house with your own hands, first of all, you need to prepare a drawing and a work plan.
Preparation and calculation
Before starting work on digging a pit, it is necessary to calculate its length and width. Of course, they depend on the parameters of the building itself (its length and width), as well as on the depth of the base of the structure. There is a rule for determining the size of a building: the dimensions of the foundation must be 40 cm greater than the width and length of the facade, since a foundation is also required for the facade finishing. Therefore, you need to add another 20 cm to the size on each side.
As already mentioned, the size of the pit also depends on the depth, since in cross section the pit should have the shape of a trapezoid. This is due to safety precautions. The walls (when excavating soil from a pit) must have slopes. The dimensions of the house, increased by 40 centimeters, will be projected only onto the lower part of the pit. In this case, the top must exceed these dimensions by an amount equal to the depth of the sole. This will help ensure proportion with the walls sloping at 45 degrees. This is done in order to protect the walls from soil shedding.
The zero level will look like this: the dimensions of the pit (length and width) will be equal to the dimensions of the house (length and width, respectively), increased by the depth of the pit. The dimensions of the pit at the base level will be the same as the parameters of the facade, increased by 40 centimeters. If the base is deepened by 0.5 m, you don’t have to adhere to this rule, since then the walls of the pit will be vertical.
To determine the area of the sole, it is recommended to divide the pre-calculated load by a certain soil value and the level of its permissible load (this data is obtained through an examination). Once the size of the foundation pit has been calculated, you can begin digging it.
The process of digging a pit is divided into several conventional stages of work.
- Prepare the area for the foundation, remove 40 centimeters of the top layer of soil.
- Pump out moisture, if it has formed, remove excess water from the area.
- Remove the soil (to the depth calculated earlier). If the pit is deeper than 125 centimeters, special support beams are installed to prevent the earth from sliding along the walls.
- They arrange steps in the pit if the soil depth is approximately 500 centimeters (it is better to entrust the calculation of the step depth to an experienced specialist).
Site marking
Includes the following steps:
Taking into account the boundaries of the site and the location of the neighbors, they place a peg. It defines the first corner of the building. Here they use a plumb line to maintain verticality.
Having tied a tight rope to the peg, pull it tight and mark the second and third corners perpendicular to it.
From the second and then the third the fourth peg is obtained. All of them are set strictly at an angle of 90 degrees. This is how the outer walls of the house are made.
To check whether the foundation is skewed, all diagonals are measured. Their sizes must match.
The stretched ropes are not removed, because on the basis of them they mark all the internal walls of rooms and other premises, installing additional pegs everywhere and pulling the ropes.
Thus, a diagram of the future foundation is obtained.
Why do you need to clean the bottom?
Cleaning the bottom of the pit is necessary to level the earthen surface to create a flat and solid platform on which the foundation structures will be placed. At this stage, elevation differences in the earthen foundation and places of excessively loose soil, where deep subsidence of the soil is possible during compaction, are eliminated.
Mechanized excavation by earthmoving machines is constantly monitored by levels. When 100 - 200 mm remains to the design mark, soil excavation by machinery is stopped. Subsequently, the foundation is prepared by reworking the soil and cleaning the bottom to the design mark, manually or mechanized with the use of special construction equipment.
What technologies can be used to produce?
Cleaning of the excavation pit is carried out manually or mechanized: with bulldozers, levelers, excavators or scraper machines. The choice of method for planning the bottom of the excavation depends on the following factors:
Dimensions of the pit and the volume of the proposed excavation. In small areas with a small amount of uncollected soil, it is best to use manual cleaning. In this case, they begin to finish cleaning the base along one of the main axes, gradually moving along the pit
During work, it is important to focus on the control mark marked on the wooden peg. For the simplest control of stripping the base to the design horizon, it is recommended to stretch a steel wire or a strong polyester thread between two opposite pegs. Using a construction tape measure, measure the stripping depth every 1–2 meters.
In this way, the bottom is cleaned manually by one person. When performing work by two or three workers, the site is divided into equal adjacent areas and the base is cleaned layer by layer. For large areas and significant volumes of excavation of uncollected soil, it is recommended to use a mechanized method for completing the earth masses.
The tightness of the pit. If the horizontal platform of the earthen foundation of a building is located on a complex terrain, is in contact with other buildings, structures or particularly valuable architectural monuments, cleaning is carried out exclusively by hand.
Soil category. On soft soils, the leveling of the earthen foundation is carried out using bulldozers and mini-bulldozers. During the work, the bulldozer moves from the extreme slope in a spiral, moving towards the center line of the excavation from the earthen slope. The movement of the mechanism is forward-shuttle, with alternating working forward and reverse idle. Type of foundation and depth of its foundation. If the project provides for the installation of a monolithic slab foundation placed over the entire area of the pit, a mechanized method of leveling with a bulldozer or a light excavator with a straight shovel is excellent for clearing it. Wide trenches prepared for strip foundations are cleared manually or with an excavator, constantly monitoring the level of soil cutting to the design level marks. Excavations for columnar foundations are usually cleared manually; the mechanized method is practically not used.
Features of constructing a pit for a slab foundation
To construct a pit intended for the construction of a slab foundation, a rectangular hole is dug. The dimensions of the pit correspond to the overall parameters of the façade of the building. This rule is relevant when constructing shallow foundations. In other cases, the dimensions of the pit increase.
Work procedure:
- A layer of fertile soil is removed from the surface to a depth of 30 cm. This soil can be effectively used in the future. In the future, sprouted plants can destroy the concrete foundation.
- Marks corresponding to the dimensions of the slab plus its height are applied to a flat and clean surface.
- Along the marked boundaries, the first excavation of soil is carried out to a depth of 0.5 m. This must be done from the center of the pit, gradually moving to the edges.
- After excavating the first layer, they move on to the second, retreating 0.25 m from the previous boundaries on each side. Step depth 0.5 m.
- Work continues until the bottom of the foundation slab is reached.
Video description
The construction of a pit for a slab foundation is described in the following video:
Choosing the time of year to dig a pit or trench
Experts recommend planning the development of soil for the foundation in the summer or autumn. At this time, the soil is as soft as possible and lends itself to digging.
In winter, foundation construction is impossible due to frozen soil. If you plan work for a given period, their cost increases several times. Also, constructing a trench or pit in winter becomes more difficult due to the need to complete the laying of foundation blocks or pouring a monolithic structure as soon as possible. They should not freeze, which will negatively affect their load-bearing capacity.
Also in winter, it is important to immediately provide for the process of removing excess soil. Otherwise it will freeze and it will be very difficult to remove it.
Video description
The features of excavation work in winter are described in detail in the following video:
It is also undesirable to dig a foundation in the spring. During this period, the soil is oversaturated with moisture from melted snow, and the groundwater level rises significantly. To cope with this problem, it is necessary to additionally use equipment to pump out the liquid.
It is also not recommended to start excavation work in late autumn. At this time, regular frosts are observed, which leads to freezing of the top layer of soil.
Briefly about the main thing
Before digging a trench or pit to construct a foundation, you must first perform all the calculations. Their parameters depend on the characteristics of the soil, the depth of soil freezing and the level of load from the load-bearing structures of the building.
To carry out excavation work, you can use an excavator or dig everything by hand. The choice of method depends on the volume of soil excavation, the need to load it for further removal and other nuances.
When constructing a pit for a foundation slab, soil development is carried out in stages. The soil is dug out layer by layer, taking into account recommendations for strengthening the walls.
For columnar base
A columnar foundation includes supports in the form of pillars sunk into the ground, which are connected to each other by a grillage (an element for uniformly distributing the load on the pillars) along the entire perimeter of the structure. Taking into account the specific design, digging a foundation pit for a columnar foundation is carried out in the following order:
- Preparatory work - cleaning, leveling the area, removing the fertile layer.
- Marking. A trench and places for erecting support pillars are marked along the perimeter of the entire structure. They must be installed in the corners, as well as at the junction of internal and load-bearing walls, as well as along the perimeter of the structure in increments of 1.6-2.2 m.
- Digging a trench for a grillage 30-40 cm deep over the entire area of the building. Width - 80-100 cm.
- In marked places, square holes with a side size of 50-70 cm are dug for the construction of columnar supports. The depth is determined according to the general rules for a buried foundation.
- Secure the walls of the pits, if necessary, using wooden panels.
Work on constructing a pit for a columnar foundation is often done manually using a shovel, and in case of heavy soil, using a crowbar and a pick.
Features of the pit device
Digging a pit with an excavator
Few people know that a feature of dug soil is that it increases its volume by 30-40%. In this regard, when digging a pit with an excavator, it is necessary to organize uninterrupted work to remove excess soil, and also leave a certain part for filling the constructed foundation.
As for the shape and size of the pit, these indicators are directly dependent on the type of foundation chosen. So, in the case of making a slab foundation, you should equip a recess with a clear rectangular shape. When making a foundation using strip technology, it is necessary to construct a foundation pit in the form of a trench, and in the case of constructing a columnar foundation, in the form of pits or wells.
Depth
The height of the future pit is calculated based on two important quality indicators of the soil: the freezing level and the groundwater boundary. An important point when arranging the foundation is the location of the foundation 40-50 cm below the identified soil freezing line.
The groundwater boundary must be at a distance of at least 50 cm from the foundation being developed. Otherwise, you will need to carry out additional work to install foundation waterproofing and a drainage system to drain excess water, which will significantly complicate construction and increase costs.
Side dimensions
When digging a pit, it is important to take into account that its length and width depend on the size of the future structure and the depth of the foundation being built. Everything is simple with the dimensions of the building - the length and width of the base must exceed the declared parameters of the structure being built by 40-50 cm, 20-25 cm on each side
This distance is necessary for the subsequent placement of the facing layer, which must also be supported and not suspended.
In accordance with safety regulations, it is necessary to pay attention to making a pit in the shape of an inverted trapezoid, the slopes of which will subsequently be protected from unintentional shedding or sliding of the soil. The lower point of the slope of the pit is considered to be a base increased by 40-50 cm, and to calculate the upper one, it is necessary to measure a segment equal to the depth of the foundation in the opposite direction from the house at the zero ground level
The end result should be an isosceles triangle with two internal angles of 45º
The lower point of the slope of the pit is considered to be a base increased by 40-50 cm, and to calculate the upper one, it is necessary to measure a segment equal to the depth of the foundation in the opposite direction from the house at zero ground level. The end result should be an isosceles triangle with two internal angles of 45º.
What to consider before starting work
You shouldn’t start work with the primitive attitude of “take more, throw further.” To save yourself from unpleasant surprises and problems in the future, you need to think not about how to quickly dig a trench for a water supply by hand, but about how to do it efficiently and accurately.
To do this, you need to decide on the parameters of the “trench,” find out whether its route intersects with the lines of other communications, decide where to store the excavated soil, mark the most convenient and shortest path from the source to the house, etc.
How to make a trench section
The question of choosing the shape of a trench is far from idle. It depends on its depth, type of soil, groundwater level.
Types of water trenches Source ibb.co
Rectangular.
This configuration is chosen for dense, non-flowing soil, a small trench width and a depth of no more than 1.5 meters.
Trapezoidal.
Form for deep excavations over 1.5 meters or more than the height of the digger at the shoulders. Prevents collapse and shedding of loose soil into the ditch.
The optimal shape for laying trenches in areas with high groundwater. The soil is removed to the level of their occurrence to form flat inner walls of the ditch, then a narrow rectangular pit is dug to the required depth, which is filled with a drainage mixture of crushed stone or gravel.
What should be the width and depth
Construction codes and regulations strictly regulate only the width of pits with a depth of more than 3 meters. For laying a home water supply, it rarely exceeds the specified value, therefore, when deciding how to quickly dig a trench, the width is chosen arbitrarily, focusing only on the ease of operation and subsequent installation of pipes.
Manual digging of a trench Source ivbb.ru
As a rule, for rectangular recesses it does not exceed 50 cm, and often even equals the width of a shovel. The trapezoidal ditches in the upper part are 70-80 cm wide.
The situation is different with depth - it cannot be chosen arbitrarily, since it is necessary to dig a trench for uninsulated pipes to the level of freezing of the soil plus another 30-50 cm. Otherwise in winter the water in them will freeze, which will lead not only to the cessation of its supply to the house, but and the need to replace the depressurized route. This means repeating all the work, since it is impossible to determine the location of the frozen pipe break without excavation.
The depth of soil freezing depends on the climatic conditions in the region and varies from 30 to 300 cm. You can find out what it is in your area from the architectural department, utility services or local construction organizations. Or use the table of average values by region.
Table of average soil freezing depths for CIS cities Source izchegopostroit.ru
The found value is taken as the initial value and an amendment is made in one direction or another depending on the type of soil.
- Sandy and clayey soil does not freeze so deeply, so before digging a trench for water supply, the calculated depth can be reduced by 30-40 cm.
- Dusty and rocky soil freezes to a great depth, which means that the level of the pipe must be lowered to the same distance from the average mark.
If the water supply is laid from a centralized pressure source, the depth of the ditch along the entire length may be the same. If the source is an autonomous well or a well with a pump, the route is laid with a slight slope towards it, so that in the event of an accident the water does not remain in the pipes, but flows back by gravity.
Scheme of laying a water pipeline with a heating cable from a well Source aquacop.ru
How to calculate the cost of constructing a pit?
When constructing pits, building materials are practically not used. Accordingly, costs will be completely determined by the amount of payment for work and rental of special equipment, if it is used. It all depends on the area, since the construction market in each region has its own prices. In addition, there may be various factors specific to a particular one, which can affect the cost of work towards higher prices. This:
- Difficult landscape. If the site is located in a forest, there will be costs associated with clearing it of trees and root systems. If the area is swampy, land reclamation will have to be carried out, and this also requires serious expenses.
- The characteristics of the soil often make the construction of a pit more labor-intensive and, therefore, more expensive. So, when working on sandy soils, be sure to specially secure the walls when digging a pit. Groundwater, the horizon of which is too close to the surface, also complicates and increases the cost of work.
- The main factor determining the cost of work is the size of the pit and its type
- The total amount of expenses is influenced by the costs of delivering a team of hired workers, as well as rented equipment and special equipment to the location of the event.
Arranging a foundation pit, despite its apparent simplicity, is a very important stage of the entire construction. The size of subsequent expenses largely depends on its quality and accuracy of execution.
Formwork for the foundation
The formwork is made:
- from boards 3-4 cm thick,
- waterproof laminated plywood,
- particle boards (for example OSB),
- made of metal (for example, 2 mm iron sheets on a frame of corners).
If you plan to use boards, it is better to take them that are not very wide (less likely to cause cracks) and planed on one side (this side is mounted towards the concrete).
In the case of columnar foundations, the formwork is assembled on the surface of the ground, and then lowered into the hole and wedged in it with spacers (the concrete pressure is very high, without spacers the structure may not withstand). It is necessary to ensure that the formwork is strictly vertical (checked with a plumb line at all 4 corners).
Sometimes metal and asbestos pipes with a diameter of 100 mm or more are used as formwork. In this case, the pipes are aligned vertically, concrete is poured into them and the entire structure is left in the ground.
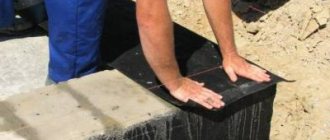
In rare cases, when the soil is dense and does not collapse, it is allowed not to make formwork, but to pour concrete directly into the soil. However, before pouring, the pit must be reliably waterproofed in order, firstly, to minimize the influence of groundwater on the future foundation, and secondly, to prevent the soil from drawing water out of the concrete during pouring.
Wooden formwork also needs to be waterproofed to prevent it from drawing water out of the concrete and causing it to swell. Sometimes they do it differently - they wet the boards generously for a while so that they are saturated with water in advance and do not deteriorate the properties of the concrete.
The use of ready-made complete systems can significantly simplify the installation of formwork. However, they are expensive and their purchase is not justified in individual construction. A good solution would be to rent such formwork during the construction of the foundation.
Calculator for calculating the pit and the volume of excavation work
Enter the dimensions in m:
Instructions for the pit excavation calculator
We present to you an online calculator that calculates and determines the volume of excavation work for a pit.
All parameters are indicated in meters
The whole process includes digging a pit for the foundation of a house, sewer system for a cottage, a reservoir or swimming pool, water supply or drainage for a villa.
During preparation and production, the main stage is the correct assessment of the amount of excavated soil.
Design and cost of earthworks
A full assessment will consist of digging a hole and removing the volume of soil removed. It is recommended to carefully plan where the fertile layers of soil will be moved, which can be used for a personal plot. Infertile soil can be used to fill the foundation, plan a garden, vegetable garden, or simply take it outside. You should find in advance the places where the excavated or waste soil will be transported.
Important! During the digging process, the price per 1 m³ of soil may increase with increasing trench depth. Thus, the cost from the surface of the earth up to 1 meter deep, and deeper often doubles
Soil removal is often an additional expense. In order to avoid unforeseen waste, all stages and their costs should be discussed in advance with the contractor.
Before installing the formwork for pouring the foundation, it is necessary to take into account the size of the pit.
Call a technician or dig it yourself?
Before deciding which way to dig a hole, let's consider the advantages and disadvantages of each method.
If the process is carried out manually, then you will get a neat and precisely sized hole.
If the volumes of land are relatively small and with available labor, then the final price of manual work will be much cheaper than when renting special equipment or an excavator. This method also makes it easier to control the geometry and parameters of the future trench for the foundation.
If you plan to dig up a large volume of soil, then in terms of productivity and in order to save time, it would be preferable to order an excavator. But in any case, the choice is yours.
First, we carry out markings for the future foundation pit. The best way to do this is to use pegs that need to be stuck around the perimeter of the area and connected with a thin colored cord, marking the location of the work. To control the geometry of the future pit, it will be necessary to measure two diagonals, which must coincide.
This method is not professional and is best suited for relatively flat plots of land.
If you need a more accurate marking of the planned excavation work, then it is best to use the following method.
At a short distance from the pit, you will need to dig in wooden posts or metal rods in groups of 2 pieces (castoffs). On these posts the boards will be fixed in a horizontal position, onto which we pull the cords. Try to fix the boards relative to each other at the same level.
By moving the cords, you can achieve perfect markings. The remaining cast-offs can be used when installing the formwork under the strip foundation.
If you have a laser level, theodolite, or level, they will make your work much easier.
Perform geometry control
To get an exact angle of 90° we use a tricky method. We take a triangle whose sides have a ratio of 3:4:5 meters with one angle of 90°. On one side we set aside 3 meters from the corner, and on the other side 4 meters, while the distance between these points should be 5 meters.
If you plan to go very deep or there is weak soil in the work area, then first of all it is necessary to ensure safety. It is best to make the trench walls with a slight slope, which will prevent the soil from collapsing.
To control the bottom and walls, you can use a level and slats of sufficient length.
Trench dimensions
The dimensions of the trench and pit directly depend on the design dimensions of the foundation. The dimensions of the trench will be larger in any case. To construct the foundation, formwork panels and the ability to assemble and dismantle them are required; space so that waterproofing can be done. For the installation of formwork panels, 200-300 mm on both sides of the foundation markings will be enough. To install waterproofing, the width of the trench is increased by 600-700 mm from the outside.
When digging a trench for a strip foundation, its depth is increased by 350 mm - to install a cushion of crushed stone and sand. If the soil under the foundation is loose, then the walls of the trench will have to be made with a slight slope. In light, dry soils, the deviation from the vertical can be up to a quarter of the depth of the hole. In loose sandy soils - up to half the height (i.e. up to 30°).
Planning our possibilities
Do not leave the pit until next year - this may reduce its strength
Before starting any construction, it is necessary to carefully plan the entire course of work. To do this, you need to know how to carry out the work correctly and in what sequence. The most common mistake is soaking the pit or installing a strip foundation without a house.
Sometimes, a foundation pit is dug ahead of time, and the construction of the foundation itself is postponed until next year. This is usually done to save time, so that you can start pouring the foundation in early spring into a dug trench, without waiting for the soil to completely thaw. Such actions can lead to a decrease in the strength and load-bearing characteristics of the foundation. The full cycle of work on installing a strip foundation, from digging a trench to backfilling, should be completed in one season as quickly as possible. To learn how to prepare a foundation pit, watch this video:
Sometimes there are situations in which, after installing a concrete foundation, construction is frozen for several years. If the object is properly preserved, losses will be minimal.
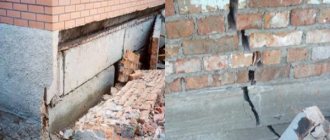
But more often, due to improper preservation, the foundation rises as a result of frost heaving of the soil.
When designing, the mass of the entire house is taken into account, so the lightness of the concrete base is not designed for heaving forces. In such a situation, physical damage to the foundation is quite likely.
When planning to build a house, calculate your strengths and capabilities.
When starting to implement the question of how to dig a foundation manually, you need to be sure that the construction work on at least the first floor of the building will be completed this season.
Necessary actions when constructing a trench manually
Remove the turf from the area before digging trenches.
In accordance with the design dimensions, mark the area, and do not forget to add an external 0.2 meters to the width. Marking begins from the corners. They drive in reinforcement or stakes, tighten the fishing line and, checking the degree of the angle, determine the length of the walls. After marking, everything is measured again, including the diagonal size.
When marking the strip foundation, it is necessary to determine the lowest level of the perimeter. This is easy to do using a water level. A drainage system is installed at this point.
So, having marked the area for digging, but before you start digging the foundation manually, you must:
- clear the construction site of any objects, as well as tree roots;
- remove the turf along the inner perimeter of the foundation;
- move the top fertile soil layer into the garden;
- determine a location for dumping soil from the trench.
When digging a trench, throw the soil 1.5 m from the hole
The soil is thrown at a distance of up to 1.5 m from the edge of the pit. They start digging from the outer perimeter, then dig transverse trenches under the base for load-bearing walls. If necessary, compact the bottom of the trench, fill it with water, add a sand cushion and compact it again.
After this, waterproofing material is laid or formwork walls are installed to prevent collapse of the trench walls.
Some practical tips:
- It is not recommended to dig a foundation pit for an extension, removing soil from under the adjacent foundation of the finished building.
- When installing a drainage system, expand the trench taking into account the diameter of the pipe, adding 20 to 30 cm to the value.
- In loose soils, it is worth digging a trench in a trapezoidal shape with an expansion towards the top. In this case, the calculated width must correspond to the bottom of the trench. For details about marking the foundation and digging a trench, watch this video:
Preparatory activities
Preparing the site for digging a pit
Development of a foundation pit includes the following steps:
- drawing up diagrams and drawings of excavation work on the site (qualitative analysis of the soil for its composition and density, determining the level of groundwater);
- clearing the area for construction from old communications, buildings, debris and other obstacles (in the case of existing communication systems, it is necessary to coordinate their relocation);
- performing geo-survey of the site and marking.
Having finished carrying out these types of work, you can begin to directly dig the pit. The presented construction procedure is carried out both manually and through the use of special equipment.
Of course, the first method will significantly save money, but it greatly affects the installation time. Fast shipment, removal of excess soil, combined with high-quality soil leveling, significantly simplify the procedure for preparing a pit, so it is most rational not to skimp on this issue and use the services of special equipment.
Execution of work on the construction of pits
This process is divided into certain stages:
- on the site allocated for the construction of the building, a check is carried out for the passage of communication lines, the diagrams of which can be clarified with local administrative authorities. If such systems are available, you will have to obtain written approval for the procedure for performing excavation work from the organizations servicing this site;
- a site is being prepared for the construction of a private house or other structure, the fertile composition of the soil is removed to a depth of forty centimeters;
- water is pumped out and a drainage ditch is installed;
- Excavation work is being carried out. If the depth of the pit for a monolithic or other foundation exceeds 1.25 m, support beams are installed to prevent the soil from crumbling, and steps are arranged.
Under strip foundation
If you have to build a foundation pit for a strip foundation for a garage or other building, it looks like a buried trench, its dimensions allowing for the installation of formwork panels.
The dimensions are determined as follows: the length and width parameters increase by thirty to forty centimeters, the width of the trench is equal to the sum of the same value of the walls and a gap of fifty centimeters for the installation of shields.
First, the boundaries of the future foundation on the ground surface are determined, and the highest angle is determined. After this, you are allowed to dig using a shovel or tractor and periodically checking the depth with stakes.
The soil is poured nearby so that there is something to cover the backfill and drainage system.
Slab
Step-by-step instructions for installing such a foundation in a rammed pit are as follows:
with a slight recess, the dimensions correspond to the façade parameters of the object. If a slab foundation with insulation to a great depth is to be poured, sum up the dimensions of the load-bearing walls of the building and the height of the foundation;
the soil is developed gradually, in the first layers of fifty centimeters with a gradual decrease in their thickness. As a result, steps are formed on the walls. By the way, if someone doesn’t know how to dig a foundation on a slope, use this technology.
This type of foundation is convenient to pour for standard buildings - a house 8 by 8 or a house 10 by 10 m. It is an ideal solution for the construction of three-story buildings; it is a solid reinforced concrete structure that has almost no shrinkage and is not afraid of heaving of the soil composition.
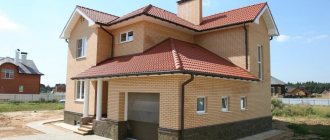
Construction of houses
The foundation is the main part of any structure, so the lifespan of the building depends on the quality of its manufacture. The initial stage of foundation construction is digging and arrangement of a foundation pit. The shape of this element directly depends on the type of foundation. We invite you to familiarize yourself with the features of preparing a foundation pit.
Table of contents:
- The main types of foundation pits
- Calculations and development of a foundation pit
- Do-it-yourself foundation pit: manufacturing technology
- Construction of a foundation pit: recommendations
- Foundation pit price and design features
The main types of foundation pits
Depending on what type of foundation is used during the construction of a house, the type of pit, its size and depth are determined. There are certain criteria for dividing pits into certain subtypes. We invite you to familiarize yourself with them:
- slopes - their number or absence;
- the need to construct corner fastenings;
- the presence of inclined vertical walls;
- pit or trench, this factor is determined by the foundation: strip or slab.
If a strip-type foundation is being built on the site, then the foundation pit is a trench that runs along the perimeter of the house and in the places where load-bearing walls are installed. When building a slab foundation for a house with a basement, you should dig a pit around the perimeter of the house and in the location where the basement is installed.
Before starting work, certain earthworks should be carried out, which include:
- determining the type of soil that is present on the site, conducting a special examination, this stage is mandatory, since it is with its help that it is possible to determine the optimal depth of the foundation, which will ensure its strength and reliability during operation;
- carrying out an analysis of the building that will be erected on the site, in this case, the weight of the building, its load on the foundation is determined, at this stage the smallest details should be provided, down to materials for finishing the roof, walls and floors;
- performing a calculation of the pit depth, this stage depends on previous calculations and is preferable if it is carried out by specialists;
- analysis of the climatic state of the region, determination of seasonal ground movements.
Calculations and development of a foundation pit
If you are planning to build a pit yourself, then keep in mind that in this matter you will need a lot of effort, patience and time. However, in this case, you will be able to save significantly.
The work begins with calculating the depth of the foundation pit. In order to determine the volume of the pit, use the following formula:
v= n/6 (2a+a1)b+(2a1+a)b1
- n - determines the height of the pit;
- a and b are the size of the sides;
- a1 and b1 the length of the pit at the top;
- t is the slope coefficient.
After calculating the volume of the foundation pit, the process of determining the volume of backfill follows. To do this, you should subtract the total volume from the volume of the pit itself.
Please note that the depth of the pit is determined directly by the soil and its bottom, and not by the rough mark. Before starting to excavate the soil, the depth at which the digging will be done is determined. It is this value that determines the depth at which the digging will be done. This value determines the soil and its composition, as well as the loads that come from the house itself. To calculate the pressure of a building on a future foundation, use the formula below:
In this case, the load from the house is divided by the area of the lower part of the foundation.
In order to determine the area of the foundation base, the load should be divided by a certain value of the soil and the level of its permissible load. After determining the size of the pit for the foundation, it should be dug.
In the process of digging a pit, several stages should be distinguished:
- preparing the area for the foundation, removing its top layer, about forty cm in size;
- if there is additional moisture or cages, remove them from the site;
- removal of soil to a previously determined depth, if the pit depth is more than 125 cm, special supports in the form of beams should be installed, they will help prevent the soil from sliding along the walls of the pit;
- when the soil depth is about 500 cm, certain steps should be built in the pit, the depth of which is determined only by specialists.
Do-it-yourself foundation pit: manufacturing technology
Digging a foundation pit is a rather difficult process, for which one person will not be enough. Working deep in the ground is particularly difficult, as one must be wary of soil sliding. We invite you to familiarize yourself with the main stages of working on a pit:
1. Removing the fertile soil layer. Since this type of soil is characterized by high biological activity, it cannot serve as a load-bearing base. Since from time to time, it changes in volume, so it cannot serve as a reliable foundation for the foundation. To remove this layer, use ordinary tools or special construction equipment. The choice of one option or another depends directly on the financial capabilities of the owners of the future home.
2. If there is a basement under the house, the foundation pit is built over the entire area of the house. In this case, special equipment will be required. The soil excavation process is carried out gradually, while construction equipment is installed at least 80 cm from the beginning of the foundation. All soil is placed near specialized equipment.
3. If there is no basement on the site, it is enough to equip a regular strip foundation, the depth of which depends on the type of soil and the load from the building. In this case, the pit is built directly along the perimeter of the walls and in the places where load-bearing walls are installed. This option for constructing a foundation is much cheaper than installing a slab-type foundation.
Digging a pit should be treated with extreme caution. Its depth is determined by the type of soil and the following indicators:
- if the soil consists of sand or gravel, the minimum foundation value is 100 cm;
- sandy soil implies the construction of a foundation with a depth of 125 cm;
- loams and clay - 150 cm;
- particularly dense soil requires a deeper foundation, at least 2 meters deep.
In order to prevent the soil from crumbling while digging a pit, a certain slope should be installed on the foundation walls. If the height of the foundation walls is about 150 cm, then the following values should be applied:
- if the work is carried out on sandy soil, then the slope is about 60 degrees, and the ratio is one to half, and if the soil slope is about 45 degrees, then the ratio is one to one;
- if the soil is characterized by a large amount of sandy loam, then with a slope of 75 degrees the ratio is one to one quarter, and with a slope of 55 one to half;
- if the soil consists of clay or is characterized by hardness, then the ratio at a slope of 90 degrees is one to zero.
Before starting to fill the pit, to prevent the soil from sliding, it is recommended to use special wooden supports. In this case, building them with your own hands is quite easy. In addition, the process of filling the sinuses should also be considered. This process is very important, since it is carried out with minimal soil pressure. Backfilling is carried out gradually, while the material is carefully compacted. The optimal thickness of each layer during backfilling is 20 cm. Soil compaction is carried out only by hand.
The production of the blind area is carried out from the beginning of soil compaction. Do not forget to waterproof the pit before installing the formwork. For these purposes, roofing felt or material in the form of flat sheets of asbestos cement is suitable.
Construction of a foundation pit: recommendations
The pit should be constructed in accordance with regulatory documents, such as SNiP. It clearly indicates the permissible norms for the size of the pit for each type of soil. In addition, all work must be carried out with special safety and technologically correct methods. If you do not adhere to the rules for constructing a foundation pit, the building will end up being unreliable and of poor quality.
It is preferable to entrust the digging of a pit to experienced specialists. Since without experience in this industry, you can make irreparable mistakes that will lead to wasted time and effort. Please note that the degree of load on the horizontal walls of buildings located near the site directly depends on the depth of the pit.