Methods for finishing walls with plasterboard
There are three ways to finish walls with plasterboard sheets. They are clearly represented in the figure and marked with numbers 1-2-3. I will explain each of these methods.
- This is a method for single-layer or two-layer cladding. Direct hangers, ceiling profile 60/27 and guide profile PN 27/28 are used.
- This is a cladding method for single or double layer cladding. Rack profiles for plasterboard PS 50/50 or 75/50 or 100/50 are used. You also need direct hangers and a guide profile 50/40 or 75/40 or 100/40.
For apartments, the first method of finishing walls with plasterboard is more suitable.
- Firstly, this method “takes away” minimal space from the wall;
- Secondly, the frame for the rooms does not require transverse profiles.
Application of LGKL
The scope of application of this material is quite diverse. With its help you can quickly create an original and durable interior of any room. Most often, laminated plasterboard is used for the following purposes:
- Installation of interior and zoning partitions.
- Assembly of cabinet furniture of classic or non-standard type.
- Creating an original and non-standard interior of an apartment or room.
- Wall and ceiling cladding.
- Finishing door and window slopes, giving them the desired shape.
- Creation of individual design structures or decorative elements.
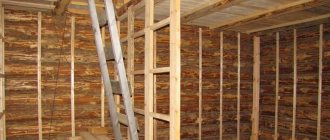
Steps for finishing walls with plasterboard
The plasterboard sheet has a width of 1200 mm. Therefore, vertical guides must be fastened every 1200 mm. With this step, the edge of the sheet will fall in the middle of the profile. For single-layer cladding, a sheet of plasterboard with a thickness of 12.5 mm is taken.
Marking the frame structure
- Take the ceiling profile PP 60/27.
- The first profile will be located in the corner of the room. Mark its middle on the wall. The line must be strictly horizontal.
- Next, in increments of 1200 mm, mark the fastening lines of all profiles that will touch the longitudinal edges of the plasterboard sheets.
- Then, between these marking lines, mark the fastening lines for additional profiles, in increments of 400 mm for single-layer cladding and 600 mm for double-layer cladding.
The marking is done. We move on to attaching guide profiles and direct hangers.
Installation of metal profiles on the wall surface
- Attach the guide profile PN 28/27 to the floor of the room. For fastening, use dowel-nails (dowel-K). Use soundproofing tape between the profile and the floor. Don't forget to leave the required distance from the wall. To level the profiles, use a plumb line or laser level.
- The profiles to which the plasterboard sheets (PP 60/27) will be attached are attached to the wall with direct hangers. That is, the suspension is attached to the wall, its edges are bent, and a profile is attached to them.
- Using the markings made, attach the hangers to the wall (use dowels and screws).
- Cut the PP60/27 ceiling profiles to length.
- Next, inserting the profile into the lower guide (with the profile flange facing outward), attach all the profiles to the hangers.
- Electrical wiring in the structure must pass under the racks.
Tool for the job
To cover surfaces using frame technology you will need:
- The material itself is plasterboard sheets.
- Pencil, knife for cutting plaster sheets, blades.
- Tape measure, building level, preferably laser
- Metal scissors
- Dowels 6x40, 6x60.
- Galvanized profiles CD, UD.
- Perforated hangers (CD bracket)
- Grinder, drill, screwdriver.
- Metal self-tapping screws for gypsum boards
- A cutter, or self-tapping screws (bugs) for attaching profiles to each other
- Planer for smoothing edges
- Spatula and bucket, gypsum glue (if we glue plasterboard)
- Everything for finishing plasterboard seams
Covering walls with plasterboard with your own hands involves not only installation, but also preparation. Before covering the surface, you need to perform several preparatory work:
- Remove old finish. Before you begin finishing, you need to remove all previous layers from the walls to the base.
- Treat the walls. This procedure is not considered mandatory. However, experts recommend priming the walls and treating them with a special antiseptic.
- Make preliminary markings. Mark boundaries above the floor and below the ceiling where the slabs will begin and end. Usually a distance of 5 cm is maintained.
Covering the frame with plasterboard sheets
The first sheet of drywall is attached to the corner of the room. The distance between the fastening screws is 250 mm (for single-layer cladding) and 750 mm for the first layer of single-layer cladding. Use a TN type fastening screw (self-tapping screw). Recess the screw heads into the plasterboard by 1-2 mm for further puttying.
After covering all the walls, you can proceed to puttying the walls.
©Gipsokart.ru
Other articles in the section: Plasterboard structures
- Architectural terms
- Types of wall cladding on a metal frame
- Soundproofing tape
- How to cover a curved wall with plasterboard
- How to connect drywall profiles
- Frame made of metal profiles for plasterboard
- Plasterboard structures in wet areas
Complex plasterboard structures
Designs with angles other than 90 degrees are considered complex. Design skills, accurate calculations and installation will be useful for design. Complex structures include:
- Two-level ceilings with volumetric figures, such as circles, in the center.
- Multi-level ceilings with radius corners.
- Segmental ceilings.
- Various built-in niches.
- Arches.
- Any non-standard elements or openings.
Thanks to plasterboard, such structures are light, strong and reliable. They allow you to make the interior original. Moreover, material costs will be minimal. During the installation process, you can think through the illumination of a structure of any complexity.
The main advantage of drywall is its ability to be reused. It is enough to carefully dismantle the existing building and redraw the parts.
13 732
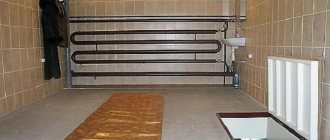
Suspension for gypsum board
To hang furniture and household appliances on a gypsum board-covered wall, you must pre-provide embedded parts made of wooden beams or OSB in the frame. If the suspension point accounts for up to 20-30 kg, the mortgages can simply be attached to the profiles, as in the figure:
Embedded parts in a frame for plasterboard for hanging furniture and household appliances
If there is more weight at the suspension point or expensive equipment (TV, microwave) is suspended, then the mortgages must be framed with crossbars from the profile of the racks. Well, if the suspension point is less than 15-20 kg, then the suspensions can be attached through the skin, see, for example. video clip:
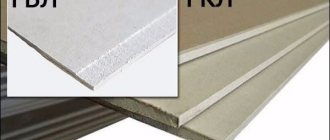
Advantages and disadvantages of frameless installation
You can make quick repairs using GVL panels. This type of construction work has a large number of advantages, among which the following should be highlighted:
- no need to spend additional materials on the sheathing;
- You can glue or nail the panels yourself, without the help of specialists;
- It is permissible to use GVL even in rooms with high levels of moisture, for example, in the bathroom;
- if you don’t use a frame, the room does not lose its volume (this is very important especially for a small living space);
- the repair process is quick and does not require large financial investments;
- The material is lightweight and has a long service life.
Before gluing the panels, you need to calculate the amount of material used and prepare the room. Otherwise, the reliability of the repair is significantly reduced.
However, among the positive aspects, the following disadvantages should be noted:
- heavy objects must be mounted on a reliable base, so in some cases it is necessary to secure the sheets with a rail;
- installation is carried out by several people (without proper experience it is difficult to glue the material evenly the first time);
- It is necessary to use special grooves for electrical wiring.
The material is affordable and will last a long time
Let's sum it up
If you need to carry out quick but high-quality repairs, you can use GVL. The material tolerates moisture well and will last for a long period. Using self-tapping screws saves money and time.
Installation can be carried out by following a simple list of works:
- prepare the room, remove all finishing materials;
- prepare tools that may be useful during the work process;
- use screwdrivers or glue to mount drywall;
- Use a level to level the material.
Drywall is laid gradually. It is important not to rush in this process, as the slightest mistakes can lead to joints appearing.
However, if joints do appear, they can be sealed with polyurethane foam. After the foam has dried, the remains are carefully cut off using a stationery knife.
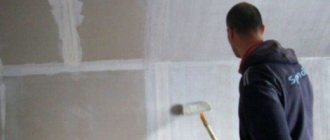
Dyeing technology
Before painting drywall, you should prepare the paint by mixing it thoroughly and, if necessary, diluting it with water or a recommended solvent. The volume of liquid for dilution should not be more than indicated in the instructions.
If you decide to tint the paint, then it is better to do it in a store where there are special machines. It is impossible to achieve the same shade in each jar on your own; you will have to pour them into one large container and tint the entire volume.
Advice! Before painting plasterboard walls, it is recommended to do test paints and let them dry to evaluate the actual color of the future coating. If necessary, you can adjust the shade by adding a little color or a white base.
After drying, the paint may slightly change shade Source forum.ivd.ru
To work, you will need a paint bath, a spatula for mixing paint and masking tape. To avoid staining floors or furniture, they are covered with film.
- A portion of paint is poured into the bath.
- First, paint with a brush all those areas where it is impossible to reach with a roller or where it can stain the adjacent surface - internal corners, the area along the baseboards and cornices, niches, etc.
- The main area is treated with a roller, which is dipped in paint and rolled along the ribbed surface of the tray to remove excess paint.
- Drywall paint for walls is applied from top to bottom, the ceiling is painted in parallel stripes from one to the opposite wall.
- After treating a small area, immediately roll it over again without dipping it into paint - this technique allows you to remove drips.
If individual areas need to be painted a different color, they are covered along the border with masking tape Source interieurdesigner.be
The minimum number of layers of paint is two. The second and subsequent ones are applied to the dried surface in a direction transverse to the previous one. The quality of painting is checked using a bright lamp directed at an angle to the surface. If necessary, the defective area can be sanded and repainted.
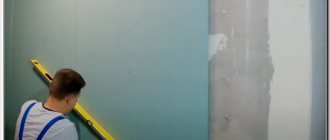
Surface preparation algorithm
Since the answer to the question of whether it is possible to paint drywall without preparation is definitely negative, you need to figure out how to properly carry out this preparation. The whole process can be divided into several stages.
- Inspect the surface for cracks, protruding joints, poorly screwed screws protruding beyond the surface.
- Treatment with acrylic primer for better adhesion to putty.
To prevent the paper from absorbing moisture from the solution, the surface is primed Source obustroeno.com
- Reinforce joints with masking tape and reinforce corners.
- Puttying joints, corners, fastening holes and surface defects.
- Rubbing the putty after drying.
- Applying a continuous thin layer of putty.
- Sanding the surface after the putty has dried.
- Re-priming with 2 layers of penetrating primer.
For leveling, use gypsum or polymer finishing putty. Source gipsmontaj-st.ru
A detailed description of all these processes is in other materials on the site; if necessary, you can familiarize yourself with them.
See also: Catalog of companies that specialize in paints and varnishes and related work