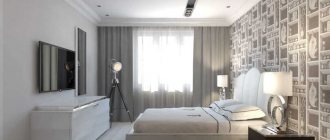
Hood as a basic functional attribute of kitchen premises
It’s hard not to agree that no matter how high-quality materials and expensive repairs are made, everything is useless if you don’t take care of it.
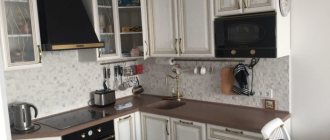
Kitchen care is the main function of the hood. When cooking on an electric or gas stove, various vapors are released, which subsequently remain on all surfaces in the form of soot.
In addition, the unit acts as a remover of foreign odors, which also contributes to a favorable environment in the apartment.
When you open a window, the smell goes deep into the room and is eliminated over time when mixed with new air masses, but the technology allows you to draw out odors immediately, preventing them from spreading throughout the rooms.
The hood contributes to a favorable atmosphere and cleanliness in the kitchen
Ostrovnaya
The most unusual hood, it is perfect for a large kitchen. As a rule, it is placed above the stove, which in turn is installed in the center of the kitchen. This type of hood not only purifies the air, but also serves as decoration.
Types of models and sizes
As already mentioned, today manufacturers offer hundreds of different options that differ not only in appearance aesthetics and size. The fundamental difference can be noticed by the presence and absence of a pipe for the air duct. That's what they are called - with or without a tap.
Kitchen hoods with outlet
When constructing buildings and structures, sanitary standards provide for the mandatory installation of ventilation ducts that work both for air supply and air intake. It is to the latter that the hood is connected, and the fans enhance the effect of “drawing in” air masses, and with it harmful impurities.
It is quite easy to distinguish a model with a tap. In addition to the dome, which contains built-in fans and electronics, the kit includes a decorative pipe, which hides an outlet for connecting to the ventilation hole.
Kitchen hoods with vent photo
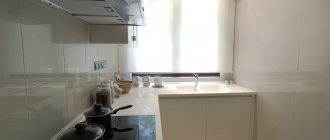
Kitchen hoods without outlet
As is already clear, a hood without an outlet does not interact in any way with the ventilation ducts of the building. Why is this necessary? The question is quite obvious. In old buildings, for example, in Khrushchev-era buildings, soot accumulates over decades of operation and over time, or rather already now, there is practically no air inflow and outflow.
Therefore, on sale you can find “stand-alone” models with carbon filters, which are called recirculation ones. They have a more attractive appearance, but are much more expensive. In addition, filters periodically require replacement.
Also on sale you can find combined options that work with and without a tap.
Model without outlet
Criteria for selecting kitchen hoods
In addition to the operating principle, it is also worth considering such a criterion as the installation method. Depending on the headset project, you will have to give preference to one of the following options:
- Wall
The most common option (dome-shaped, hidden, retractable). The main thing is that they are mounted “against the wall”, right above the stove. Often built directly into a kitchen wall cabinet. There is also a pipe hidden there.
Wall model
- Ostrovny
In large kitchens, the hob is often placed on the “island” work area, where a wall cabinet cannot be hung. Connection to the building's ventilation system occurs through vertical flexible air ducts, which are usually hidden under drywall.
Photo of island hood
- Angular
If a gas or electric stove is installed in the corner of a kitchen unit, it is worth considering this installation option, which differs from the wall-mounted one only in the form factor.
Corner model
There is no difference in terms of work efficiency. Each option can be recirculation, combined or simply with outlet.
Types of hoods and their photos in the interior
The form factor has already been partially touched upon above, but given the huge variety of the model range, it is worth exploring this issue in more detail.
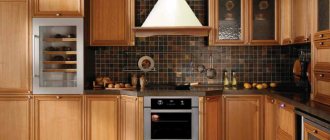
Traditional (classical)
In the interior of the kitchen, it is also called a fireplace hood (or dome), because its shape is very similar to the upper part of the fireplace.
It is often found in the classic style, since it was in this form that it was first presented. True, at the beginning there weren’t even fans in it, and the connection was made directly to the exhaust pipe of private houses.
Traditional form factor
"Island" hood options
As mentioned above, this type is installed above the island part of the kitchen unit.
Considering that hidden installation is impossible here, manufacturers began to offer various interesting form factors in the form of a cylinder, a ball, “flying saucers”, etc., as in the photo.
Traditional island hood
Built-in kitchen hood
Not all designers and customers like to see a hood, which usually does not harmonize with the kitchen set. So manufacturers began to offer mechanisms built into wall cabinets.
In terms of functionality, this option is practically in no way inferior to traditional form factors and even wins in terms of practicality in cleaning.
Built-in hood
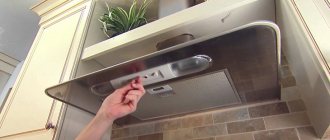
Retractable hood
Almost the same as the option above. The only difference is that these models have an additional retractable element. Due to this, such a hood is partially visible from the facade.
The advantage of this model is that when the additional panel is pulled out, the fans turn on automatically. No buttons need to be pressed.
Retractable hood in the kitchen interior
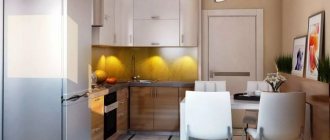
Examples for small kitchens
The main task in a compact kitchen is to save space. The hood must also meet this parameter. The most laconic models are built-in or flat. Moreover, if they are circulation, there will be no need to place a bulky pipe.
For all their advantages, models built into a closet or placed under it are not the most economical. There are more invisible, but no less effective technologies.
Embedding it in the ceiling will solve the problem of saving space in cabinets. If you place the hood inside a tension or hanging frame, it can go completely unnoticed - only the decorative grille will be visible from the outside.
In a private house it is possible to place ventilation equipment in the wall. Remaining practically invisible, it copes with its functions perfectly.
When it’s too late to make changes to the design or finishing, installing a model built into the countertop helps out. The hood is located in close proximity to the cooking area and efficiently draws in polluted air. And getting to it for cleaning grease or replacing filters is much easier.
The photo shows the placement of appliances in a small kitchen
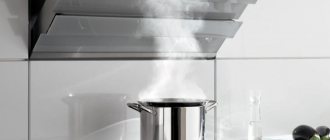
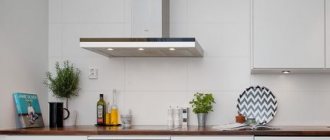
Differences between an inclined hood and a traditional one
Studying manufacturers' catalogs, you can also notice a subtype of wall-mounted hood, in which the working surface is located at an angle. It’s worth noting right away that this form factor does not have any special features, but it does have several important advantages:
- the noise level is lower here due to the way the fans are installed;
- saves space and provides easy access to the stove;
- more convenient access to the control panel;
- looks stylish (especially black glass models) in comparison with other options.
This hood will decorate any interior in modern styles.
With similar characteristics, an inclined model will cost more than a domed one.
Kitchen with an inclined hood photo
How to choose an inclined hood for your kitchen interior
Before purchasing equipment, you need to calculate the required power. There are special formulas for this. It will be different for each type. Specifically for the inclined model, the calculation is as follows:
- First, the volume of the kitchen is calculated.
- The resulting number is multiplied by 12 (according to sanitary standards, the air in the workroom must be completely replaced within 12 hours when the stove is on).
- What happens is again multiplied by the following coefficient - 1.3. This number determines the ratio of the required efforts to “pump” air for the ventilation duct of a multi-story building.
For the rest, you should focus on the dimensions of the stove (the hood should be a couple of cm wider), the interior design and the functionality of the equipment.
It is also worth giving preference to options with LED backlighting. Relevant for large kitchens. Many owners of such models practically do not use the main light when cooking late in the evening.
Several placement rules
Since there is nothing complicated in the hood installation scheme, many homeowners prefer to do the installation themselves. It is worth knowing that:
- the distance to the gas stove should be 75-85 cm for a straight line, and 55-65 cm for an inclined one;
- for an electric stove the figures are slightly less than 65-75 cm and 35-45 cm, respectively;
- there must be a socket above the wall cabinet;
- Grounding is required.
You can deviate from the standards by 5-10 cm only if the design features or height of the cook do not allow it.
Additional features
When choosing a hood, an important factor is the additional functions that the device is equipped with. Among them we can highlight such a program as switching on at certain intervals. That is, the hood will start on its own and function for some time, regularly purifying the air in the kitchen.
There is also a residual run function, when the hood will be able to work for some time after switching off. This usually lasts from five to fifteen minutes, which allows you to make the air in the room perfectly purified. For more expensive models, there are programs that may not be the most necessary, but also no less useful. For example, an LCD screen for watching videos or connecting a computer. The weather system allows you to monitor the weather, while the fume hood is connected to a weather station on the street, and the results are displayed on the display.
Kitchen design with a hood: 4 best ideas
Finally, it’s worth citing some kitchen hoods, photos of which you rarely see in real life in traditional interiors:
A striking example of original models of the “island” form factor, which is perhaps the most diverse today.
Island split hood
You can also find a hood in a completely different guise, which will fit perfectly into the original loft or country style.
Antique island hood
For more modern interiors, they also produce original versions that, at first glance, do not look like hoods.
White hood, designed as a wall cabinet
You can also find designer models with completely incomprehensible shapes, in which, however, functionality suffers.
Designer form factor
Designer models are good in those kitchen interiors where the installation of wall cabinets is not provided. However, when choosing, it is worth considering which stove will be installed and selecting a ventilation unit based on the area of the burners.
A kitchen hood is an indispensable attribute of a modern kitchen. The model range allows you to implement any design solutions without compromising the aesthetic component. The most popular option today are inclined models due to their original appearance, convenience and less noise during operation.
Working with the bottom shelf of the cabinet
Preparing a kitchen cabinet for installation of a built-in hood
When installing a built-in hood in a cabinet, you can go in several ways.
- Order a kitchen cabinet without a bottom. To bring out the air duct, you will need to make appropriate holes for it in the middle shelf and the top.
- Make a cabinet for the hood with your own hands, based on the dimensions.
- Remodel an existing piece of furniture, first remove the bottom or cut a hole according to the existing dimensions.
There is no need to disassemble the cabinet. You need to remove it from the wall and disconnect the doors. It will be more convenient to perform your actions on the floor. “Unstitch” the back wall, unscrew the side fastenings, then the bottom shelf will easily come off on its own.
When you cut out a place for a hood, you need to do it so that the body of the device fits tightly to the front wall, and not vice versa. Mark the place where you will cut with a marker, drill holes in the corners of the mark, and then cut.