Exhaust devices have individual performance, which depends on many factors. One of them is the height of the hood above the gas stove. Correct installation and connections will bring the greatest benefit from the operation of the equipment, so it is important to consider in this article the basic criteria for marking the location and find out at what distance from the stove to connect the hood.
Also, today we will look at the principles of selecting the distance of each type of hood - from horizontal to inclined devices, and also give examples for each type of device.
Types of kitchen hoods
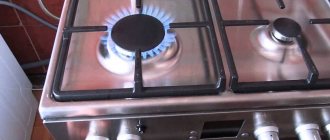
Hoods are used to forcefully remove combustion products, various impurities (nitrogen oxide, carbon dioxide, various carcinogens) and unpleasant odors that appear in the air during cooking. This system operates on the principle of a vacuum cleaner.
A standard hood consists of the following elements: housing, electric motor, air intake, ventilation system, grease (sometimes carbon) filters.
An island hood is an ideal solution for large kitchens, as well as wide stoves and hobs. In this situation, it is important to take into account the height of the cook
Depending on the method of removing processed air, devices can be either circulating or flow-through . In the first case, the air, after purification and filtration, again enters the room, and in the second, it is discharged outside. Circulating ones are suitable if there is no ventilation in the house.
Not long ago, hoods began to appear that combine these two air handling technologies.
There are several types of hoods based on the installation method. Island ones , they are mounted on the ceiling. Corner ones are fixed in the corner of the kitchen. Such models are suitable for small kitchens.
As for installation, the built-in hood model can be easily hidden in a wall cabinet. Dome ones are mounted on the wall. They perfectly complement the interior, but often come in large sizes.
The built-in hood is suitable for kitchens of any size. It is mounted in a special cabinet. Furniture for this purpose is made to order or existing furniture is remodeled.
Conclusions and useful video on the topic
From the video you can find out at what height you should install the hood and why it is important to adhere to these standards:
Calculating the required height of the hood above the surface of the slab is important for each case. Use the tips given in the article, do the calculations and then there will always be fresh and clean air in your kitchen .
Do you still have questions after reading our publication? Ask them in the comments block - our experts will try to help you.
Or maybe you have comments, additions, or have you noticed inaccuracies in the material presented above? Please write to us about this below the article.
Factors influencing the distance between the stove and the hood
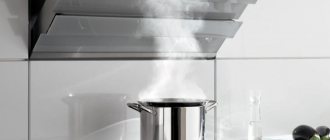
The hood located above the stove should draw in all the air and steam and not be heated by the burners and pots and pans standing on them. The distance from the slab is determined by calculation and experiment. The main factors influencing the right choice:
- unit power;
- principle of operation of the hood;
- hob type.
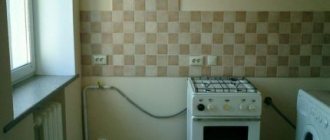
The distance between the hood and the gas panel according to GOST is 65–85 centimeters. Above the induction stove, the ventilation equipment can be lowered lower, to a distance of 60–80 cm.
A color scheme
Horizontal appliances, domed and flat, must hang exactly in the center of the stove surface and be at least as wide as the hob.
The width of the lower plane of the air intake is determined by the power of the air-purifying equipment fans. The dimensions of the slab must be taken into account. The vertical deviation from right angles can be within 5–10° to the side of the air intake.
A large ventilation device will interfere with cooking. With lower parameters, there will be no vapor capture on the sides, as a result of which the vapor will partially remain in the room. Or the fans will have to constantly operate at maximum loads. Therefore, the hood should be selected with the required power for the given volume of the kitchen.
Electric stove
The standards for the power of the hood relative to the volume of the kitchen and its minimum distance above the hob are developed with the condition of maximum absorption by the equipment of the ventilation system of the air that rises above the stove during cooking.
At the same time, the air purifying device should not be heated by the burners. If you hang the hood low over the gas stove, the heat from the burners will be added to the heat generated by the ventilation mechanism during operation, so the equipment will quickly overheat and fail.
The design of kitchen hoods also influences the minimum distance. Vertical and inclined ventilation panels are mounted behind the stove; their distance from the upper edge of the stove is reduced to 35 cm, since the lower edge is not located directly above the burners, but is mounted behind the panel at a certain distance.
Bright hues
What determines the location of the hood
The correct choice of height for installing a ventilation system is an indispensable condition for its effective operation. When determining this parameter, the following are taken into account:
- manufacturer's recommendations;
- dimensions and power of the device;
- architectural features of the premises;
- distance from the hood to the ventilation hole;
- type of hob;
- regulated standards for the placement of hoods.
Deviation from generally accepted norms is fraught with undesirable consequences. At an excessively large distance, the hood will not be able to actively capture air and fat particles, which will settle everywhere. The device will run idle and it will take much longer to clean the air.
It is also undesirable to place the hood too close to the hob. It is necessary to leave a gap of at least the minimum recommended by the standards. Failure to comply with this condition may result in:
- inconvenience in work - if the hood hangs too low, it is difficult for the cook to inspect the contents of the pans and control the cooking process. There is a high probability of frequently hitting the device with your head and causing injury;
- reduction of service life - lack of distance between the exhaust equipment and the stove causes overheating of the device and its rapid failure;
- fire - there is a danger of ignition of fat accumulated on the filter elements;
- decrease in efficiency - the rate of filter clogging increases, due to which derivatives of combustion and cooking will settle on all surfaces.
At what distance should the hood be installed?
The sanitary standard and the technical passport for the equipment determine the distance from the gas stove to the hood - at least 65 cm. This is the manufacturer’s standard. The maximum distance from the gas stove to the cabinet with built-in ventilation is 85 cm, but it is a recommendation. It can be increased by installing more powerful equipment, and thereby ensure complete air purification.
Recommended distances
The minimum distance from the hood to the stove with electric burners, without an open flame, is 5 cm less. Filtration method: recirculation or with outlet to ventilation, this does not affect the established norms of the lower horizontal.
Built-in horizontal models are installed at a distance specified for wall-mounted and hanging models, namely: from electric stoves - at least 60 cm, from gas stoves - 65 cm.
Air filter location diagram according to standards
It is necessary to take into account
To correctly calculate the distance from the hob to the air intake, you need to consider:
- power;
- Type of equipment;
- location of the air intake plane – inclined or horizontal;
- type of stove;
- the height of the hostess.
At what distance to hang a kitchen air filter above the stove depends on the power of the hood. When installing low-power circulation-type models, maintain the minimum permissible distance. They are suitable for kitchens up to 10 m2.
Basic rules and regulations
Fireplace hoods can be hung higher than recommended by standards. Such models are characterized by a large air intake area, high performance and power. They have 4 fans that drive the air flow through the filters and discharge it into the exhaust duct. At the same time, the cleaning of a kitchen of any size and the dining room combined with it is carried out efficiently. Not only above the stove, but also from the entire room, air with soot, grease and steam is discharged into the exhaust system.
Recirculation-type installations filter air masses and return them in purified form back to the kitchen. They are suitable for small rooms where it is difficult to provide air flow from outside. In fact, only mechanical impurities and water remain on the filters. Carbon dioxide comes back. Oxygen levels in the air remain low.
Before choosing an air filter model, you should consider the size of the kitchen. It is also necessary to correctly determine its location. It is important at what distance from the stove the ventilation equipment is installed. The power of the device is determined by the volume of air in the room where it is installed.
Options and standards
Experts recommend purchasing hoods with one fan for small rooms; its operation is sufficient to clean the kitchen 10–12 times per hour.
The location of the bottom horizontal of the device is selected to be minimal for the existing hob.
The volume of a large room requires powerful equipment. The ventilation device in the kitchen is hung at the maximum distance from the stove surface recommended in the technical data sheet of this model.
Standard sizes
For ease of use of the equipment, the installation of a hood in the kitchen is carried out taking into account the height of the housewife. The front edge of the panel should not touch the head when a person leans over food being prepared on the stove. You shouldn’t hang the hood very high above the stove; it’s enough at the level of a raised half-bent arm. While cooking, you can easily switch ventilation modes without distraction.
Ergonomics experts recommend positioning the hood taking into account the height of the person who stands most near the stove. They calculated the most convenient size of the filter device from the floor of the bottom panel at a distance: human height minus 35 cm. The standards established by GOST should not be violated; they are based on the safe operation of the equipment.
Watch a useful video on this topic below.
Types of hoods by functionality
To determine at what distance from the stove the air ventilation device is installed, just look at the technical data sheet. Each manufacturer gives recommendations on the height of the air purifier. But this will not give an answer when purchasing how effectively the steam trap will work in specific conditions. In many ways, performance characteristics depend on design features. Operational characteristics divide the entire model range into two categories - flow and recirculation.
Flow-through
Hot air rises to the filter, is cleaned and discharged into the ventilation shaft. In some cases, depending on individual settings, clean air will flow back into the room through a separate channel. Combined models have a recirculation mode. Combined systems have 3 operating modes.
The disadvantage of flow-type ventilation catchers is that the quality of their work depends on the efficiency of the general house ventilation, in which the ventilation hose is usually mounted - a corrugated foil or plastic pipe of square cross-section. Flow ventilation works better if there is a separate outlet, from where the cooled air is returned to the room.
Recirculating
Recirculation systems do not require ductwork. The principle of their operation is to return purified air into the room, and not to remove polluted air outside it. They use two-stage air purification systems - a filter that captures grease and a carbon filter that removes odors from the air.
This is where the air is cleaned and cooled. Many people consider it not effective enough when it comes to quickly cleaning the kitchen from smoke.
Calculation of the minimum required exhaust power
Before purchasing a new device for air purification in the kitchen, you should make some measurements and calculations in order to know exactly what power equipment will be able to efficiently purify the air in the kitchen.
Before purchasing a kitchen hood, it is necessary to accurately determine the volume of air in the ventilated room. Then make the calculation yourself. You can contact the seller with these measurements. It will determine the performance of the equipment. The minimum required power is determined by the formula:
Pb = Vk × 12 × 1.3 = (a × b × h) × 12 × 1.3
Where:
- Vk = (a × b × h) – kitchen volume;
- The air must be completely changed 12 times in 1 hour;
- 1.3 – actual power coefficient, it takes into account power losses when air passes through ventilation holes, filters and pipeline bends;
- Pb – design hood power.
All necessary measurements and power calculations can be made independently. It is enough to determine the length and width of the kitchen, as well as its height, using a tape measure. The numbers are written in meters. Then calculations are made using a simple calculator. By multiplying three numbers, you get the volume in cubic meters (m3). When multiplied by other coefficients, the resulting power is m3/hour.
Scheme and drawing
Model performance does not always match estimates exactly. The nearest higher value should be selected. A less powerful device costs less. But it will constantly work at maximum load, as a result of which it can quickly fail. There is also a possibility that the air will not be completely purified, and then odors will penetrate into the rooms.
Equipment with air exhaust into ventilation usually has high performance. It can be installed above an electric stove above the standard size. As a result of powerful exhaust ventilation, the kitchen and even living rooms will be completely cleaned not only from steam and grease.
Ventilation with exhaust to the outside removes moisture, carbon dioxide, and unpleasant odors from the apartment. The peculiarity of exhaust ventilation is that for its normal implementation it is necessary to ensure access of air from outside into the apartment.
Accounting for distances from the slab according to standards
You cannot install powerful equipment above a gas stove and hang it at a minimum distance from the heating elements. A close hole with a large air flow can blow out the burner flame.
Kitchen ventilation
An anti-return valve is present in a modern kitchen ventilation system.
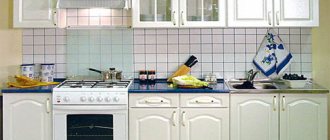
What does “good ventilation” mean in the kitchen? It is clear that a modern kitchen is a whole set of kitchen appliances that makes it easier for the housewife to prepare food. This includes: stove, oven, microwave, toaster, multicooker, bread maker and other “helpers”. To prevent various odors from entering other rooms from the kitchen, you need to equip it with a high-quality ventilation system. It can be general or local.
- The general exchange provides air exchange throughout the kitchen. It can be supply, exhaust, supply and exhaust and is aimed at removing odors, burning, and excess moisture.
- Local – rids the room of odors from the immediate area. For the kitchen area, this is a hood that is installed directly above the hob. A device such as a kitchen umbrella is often installed in private homes where there are large kitchen areas or they are connected to the dining room, or where food is often prepared.
Important! Whatever type of ventilation is chosen, it is necessary to remember its supply and exhaust purpose. That is, when arranging a hood, take care of the flow of fresh air.
Device installation rules
The hood, which filters the air and returns it back, is easy to install. You can install it above an electric stove yourself.
- It is necessary to draw a horizontal line above the hob at the height of equipment installation - the distance between the gas stove and the hood.
- A vertical line is drawn on the wall in the center of the slab. The standard provides rules for installing the hood exactly above the hob.
- The template from the packaging is applied to the lines, and 4 points are marked - the locations of the mounting bolts. Depending on the model, the distance between them is set as standard 200×200 or 200×100 mm.
- Make holes, hammer in dowels and screw in screws.
- The design without a filter grille and housing is hung on the wall.
- Install the remaining parts of the mechanism.
Spacious kitchen with electric stove
In cases where you purchase a hood with air exhaust into a ventilation pipe or chimney, the structure itself with fans is mounted on the wall in the same way as a model with a circulation method of air purification. Then you need to install the air duct, taking into account the minimum distance from the hood to the gas or electric stove. For normal ventilation, in order to prevent the effect of recirculation, that is, the return of air masses from the ventilation ducts back into the pipe, it is advisable to invite specialists.
Basic requirements for the air duct:
- the cross-section of the pipe is designed to allow air masses to pass through it at maximum equipment performance;
- the safety factor is taken into the formula for a specific design;
- the optimal distance to the outer wall or ventilation duct should be no more than 5 m;
- a maximum of 3 bends are allowed in the duct;
- pipes of different sections are unsuitable for the exhaust structure;
- All turns are made smooth, from radii.
At the stage of planning the placement of equipment in the kitchen, the stove should be placed closer to the outer wall or opposite the ventilation ducts in an apartment building.
Kitchen with gas stove in a country house
The socket must be grounded and located on the side of the edge of the hood body at a distance of 25 cm. The safest option is to install a switch that can quickly turn off the equipment.
What else to consider during installation?
Before installation, you should consider the specifics of connecting the device to the network.
Any hood is connected to the electrical network. Therefore, the socket should be installed at a height of 2 -2.5 meters from the floor and 15-25 cm above the wall cabinets.
Such an outlet must be grounded so that the hood does not burn out due to power surges. Never install an outlet in line with an air duct. Aim for about 15-20 cm from it.
Also, when taking measurements, it is worth considering the distances to the side cabinets. Aim for 5-10 cm in both directions.
We have provided diagrams of the location of sockets in the kitchen and the details of their installation with our own hands in the following material.
When making calculations, it is very important to take into account all pieces of furniture and wiring in the kitchen and draw a diagram of the location of each item
For example, let's look at a specific situation. The dome hood must be installed above a 5-burner gas stove in a 31-cu.m. kitchen. m, ceiling height 2.8 m. Cooking is done on the stove every day, the kitchen is closed with a door.
First, let's find out the approximate power. Let’s take the coefficient 20 due to the number of burners and the frequency of use of the stove: 31 * 2,8 * 20 = 1736.
Thus, this kitchen requires a hood with a capacity of at least 1800 cubic meters. m/hour.
The stove will be used by a person with a height of 170 cm, the height of the stove is 75 cm, and the height of the hood is 60 cm. Therefore, we compare all the data and get an approximate range of 77-80 cm for the height of the hood.
It is important to carry out such calculations to avoid errors during installation. But it’s best if you have the opportunity to check the conventional arrangement of equipment in the kitchen and the ease of its use.
General recommendations for safe installation
But in order for any model of hood to work efficiently and fulfill its functions, it must be installed correctly. This task is best left to professionals.
So, the following factors influence the height of the hood:
- standard recommendations;
- type of stove or hob;
- the presence or absence of ventilation, as well as its power;
- device performance;
- hood dimensions;
- user height.
Since the main task of the device is to purify the air above the hob, when calculating the height you should base it, first of all, on the type and size of the stove itself.
There are stoves: gas, electric, induction and halogen. A special feature of the latter are Hi-Light burners.
To operate effectively, the hood must completely cover the hob area. Thanks to this, all polluted air will be recycled. If the stove is wider, then harmful impurities and unnecessary odors will remain in the kitchen.
For fire safety reasons, standard height parameters between the hood and the burners have been developed.
When compiling them, the type of stove and the design of the lower part of the hood are taken into account. It can be straight or inclined.
For gas stoves, the height from the burners to the straight hood is from 75 to 85 cm, and to the inclined hood – 55-65 cm.
For electric, induction and halogen surfaces, the height from the burners to the direct hood is from 65 to 75 cm, and to the inclined hood – from 35 to 45 cm.
This difference in height is explained by the absence or presence of open fire and the risk of ignition of fat and soot particles on the filters
Often the manufacturer himself prescribes the required height. This is dictated by the characteristics of the materials from which the filters and the device itself are made. The material may be particularly flame resistant and/or have some special features.
You can deviate from the established standards by a maximum of 5-10 centimeters. The distance can only be increased, and reduced only if the power allows and the height of the cook requires it. In any case, before making a final decision, you should consult a specialist.
Professional installation will allow the device to perform its functions better and more efficiently (to extract all excess and purify the air), and will also save energy, since you will not have to turn on the hood at maximum power.
In addition, the height between the hood and the hob is affected by the performance of the hood itself. Sometimes this indicator is called power and is measured in cubic meters. m/hour. Before purchasing a hood, it is worth calculating at least an approximate value.
The quality of air purification directly depends on productivity. Also, if the device has sufficient power, you can adjust the height of the hood above the hob.
It is worth noting that power is also affected by the presence or absence of ventilation and the number of family members who smoke. Additional creases and right angles of the duct can only reduce the performance and increase the noise of the hood
No. 1 - installing a hood over a gas stove
There are many requirements for appliances that are installed above a gas stove. First, you need to accurately measure the distance from the bottom of the device to the hob. As mentioned above, it should be within 75-85 cm.
This distance is slightly greater than when installing the device above an electric model due to the fact that an open flame can ignite the hood filters, especially if they are heavily dirty.
Also, we should not forget that in the case of gas stoves, natural ventilation must work. Therefore, during installation, you cannot completely block the ventilation hole in the kitchen.
To avoid this, you can purchase special grilles for air ducts, divided into two parts: one for connecting the hood, and the other for natural ventilation.
The extraction power is also a very important parameter. Before purchasing a unit, it is necessary to accurately calculate it. A little below will be written about how to do this correctly.
Having carried out the necessary calculations and measurements, it is worth remembering that you cannot buy a device with less power than that obtained in the calculations. Otherwise, it will just be money thrown away; such a device will not cope with the task assigned to it
Do you want to install a hood over a gas stove yourself? In this case, we recommend watching the step-by-step installation instructions.
No. 2 - distance to the electric stove
More lenient requirements are being put forward for electric models. First of all, this concerns the installation height of the hood above the device - it can be reduced slightly, since these models are considered safer to use than gas models.
If the kitchen space is small, then the best option would be to opt for a built-in or flat hood model. In addition to convenience, the prices for such devices are affordable for most citizens.
Another important factor that needs to be taken into account when placing the device above the hob is the dimensions of the stove. So, the width and length of the hood should not be less than the same parameters of the slab. Otherwise, grease and soot will accumulate on the furniture.
The hood above an electric stove can be placed a little lower than above a gas stove, since the former are a little safer to use
Carrying out measurements and calculations
As you can see, it is quite difficult to take into account all the factors and make an accurate calculation. But you need to try not to regret purchasing a device that cannot cope with the tasks assigned to it.
There are criteria developed by manufacturers:
- A device with a capacity of 200 to 300 cubic meters. m/hour is suitable for those who cook little or have a small kitchen. That is, 1-2 burners are constantly used.
- Hood with a capacity of 300 to 400 cubic meters. m/hour is recommended for families of 3-4 people, or for a medium-sized kitchen, as well as where 2-3 burners are used daily.
- A device with a capacity of 500-600 cubic meters. m/hour will clean the air in a large kitchen and cover the needs of a large family. Such a hood will be indispensable if the stove is actively used every day and all burners are turned on (there may be 5-6 of them).
For approximate indicators, you can use special tables or data from manufacturers.
To quickly calculate productivity, two values are used: kitchen area and ceiling height. These approximate data can be multiplied by the slab coefficient
If the kitchen has non-standard dimensions or its area does not exceed 40 cubic meters. m, then calculate this value for a specific room by simply multiplying the length of the kitchen by its width and the height of the ceilings. The result must be multiplied by 10 or 12
The numbers 10 or 12 are constant coefficients based on sanitary standards. They mean that the air must be cleaned every 5 minutes, that is, 10-12 times per hour. Therefore, productivity exceeds the volume of the kitchen by at least 10-12 times.
Sometimes this coefficient increases due to the frequency of switching on and the characteristics of the stove used. For example, for a gas stove with large burners that are turned on every day, this number can reach 20. For an electric stove, you can take a factor of 15.
If the stove is non-standard and is cooked daily, then to calculate productivity it is worth using additional coefficients for the number of floors, for the stove, for smokers. But you should not purchase a device with a large power reserve
For example, the length and width of the kitchen are 2 and 3 m, respectively, and the ceiling height is 2.5 m.
Therefore, the estimated productivity will be: 2 * 3 * 2.5 * 10 = 150 cubic meters. m/hour .
This figure can be multiplied by the number of storeys factor of 1.3. It meets sanitary standards.
If someone smokes in the kitchen, then another 15% is added to productivity for each smoker of the total number.
The data obtained is correct for enclosed spaces. If the kitchen is not closed by a door, but is separated from other rooms by a passage, then another 30% of the received power should be added.
On our website we have detailed instructions for calculating a kitchen hood.
The next indicator is the height of the cook . It is very important that the hood does not touch your head and does not interfere with reaching distant burners or placing large pans.
Therefore, before purchasing and installing, take measurements and simulate the process of working behind the stove. To avoid mistakes when taking measurements, remember that an inclined hood should be measured from the lowest point to the burners.
All straight hoods (dome or built-in) should be measured from the filters to the slab surface.
Experts recommend choosing inclined hoods for electronic, halogen and induction cookers. They do not require much space and do an excellent job of purifying the air.
You should also take into account the length of the hood . Determine how far it will protrude above the hob, how convenient it will be to cook and replace charcoal and grease filters, as well as wash the stove and reach distant burners.
All described factors affecting the distance must be consistent. Otherwise, there is a risk that the hood will not cope with its tasks. Even the most powerful device installed too high will not cope with all the impurities in the air. Or soot that has settled on the bottom of a hood that is installed too low may ignite.
A competent choice of installation height will extend the life of the hood and allow the device to work at full capacity with minimal costs. In the worst case, the device may not cope with its functions or simply burn out.
General requirements, rules and standards for installing hoods
There are general rules that should be followed during the installation of any exhaust systems. The main thing is compliance with the manufacturer’s requirements and established standards. The instructions for any model always contain recommendations on the optimal distance to the stove. As a rule, you can vary these parameters within 10 cm depending on the height of the housewife or the characteristics of the furniture design. The standards were developed to prevent fires to maintain fire safety. The width of the hood must match the width of the hob. If the suction surface is smaller than the area of the stove, effective air purification will not occur.
Installation features and height above the gas stove
Of all types of stoves, it is the gas stove that puts forward the most serious requirements for the installation and placement of the hood. It is unacceptable to ignore standard recommendations, since their failure to comply creates a real threat to the lives of both the individual family and the other inhabitants of the building.
Let's start with the fact that using a gas stove implies the presence of an open fire in the room. Any devices and structures placed above them must be removed from the surface at a distance of 75-85 cm.
When installing the air duct, you must remember that it is unacceptable to completely close the ventilation hole. Gas accumulated in the room as a result of an accident or improper handling of the stove must be able to escape freely. If a separate outlet to the ventilation duct is not provided, the existing one should be divided into two parts. This is achieved by installing a special grille divided into two sections. In one part there is a hole for the pipe, the second has standard jumpers.
Installation features and height above electric and induction hobs
The requirements for installing hoods over electric and induction hobs are somewhat milder. This mainly relates to recommendations for placing the device at a certain height above the stove. In this case, it is allowed to install the hood a little lower - at a distance of 65-75 cm.
Installation features and height of inclined hood
Inclined hoods are indispensable in miniature rooms, where the issue of maximizing the preservation of free space is acute. When installing an inclined hood over a gas stove, the requirements are slightly different. The lower edge of the surface should be at a distance of 55-65 cm from the gas oven. You only need to step back 35-45 cm from an induction or electric stove.
Hood installation options
There are several installation methods. The first involves placing an exhaust hood inside a hanging cabinet that does not have a bottom. An exhaust device is attached to the central shelf. In the same shelf, as well as in the ceiling of the cabinet, holes are made for the hose outlet.
One end of the hose is attached to the hood, and the other is inserted into the holes and out into the ventilation duct. In filtration mode, the hose is cut off as it exits the hole in the ceiling of the locker.
The built-in type of hood is mounted according to the diagram presented in the instructions for it. The model is designed for installation in a box or in a hanging cabinet.
Requirements for air ducts and electrical networks
Parameters such as air ducts and electrical networks directly affect the performance of exhaust devices. That is why it is necessary to take a responsible approach to the design of ventilation ducts and electrical networks.
It should be immediately noted that for recirculation type hoods there is no need to lay ventilation pipes. They absorb air and simply filter it, after which they return it back to the room. That is why this chapter will consider the flow-through type of exhaust equipment.
If you do not plan the air exhaust system correctly, a person may get a number of the following problems:
- Changes in pressure in the channels;
- Load on the hood motor;
- Poor air permeability;
- Large air flow from the street.
To avoid this, it is best to use the help of professionals who will install ventilation ducts according to GOST standards. Only in this case will the hood be able to reveal its full potential and not cause problems during long-term use.
Also, attention must be paid to electrical networks. The position of the socket must correspond to the length of the factory hood cable. Under no circumstances is it recommended to extend the equipment wire yourself; this can lead to cable oxidation and overloading the hood.
The socket is also installed in accordance with GOST standards. It is best to plan the wiring and power points in advance after the hood has already been purchased. Of course, you can always use an extension cord.
Where to put the socket
So, in order to correctly design and install ventilation ducts, it is necessary to adhere to the basic opinions of experts, which will help increase the performance of the hood and reduce the pressure on the device’s motor.
The first thing to avoid when laying communications is excessive bends. First of all, they force the exhaust air to create additional pressure in order to deliver the exhaust air outside the house. Hence the conclusion: the fewer knees, the less force the device will need to expend to perform its basic functions. Also, the pipes must be sealed. Under no circumstances should holes be allowed in them, which could lead to a loss of pressure and, accordingly, to overload of the hood motor.
It is important to make the distance from the hood to the street as short as possible so that the exhaust device spends less energy working with a large volume of air. Also, narrowing and expansion should be avoided - the pipe must be of the same cross-section throughout its entire length, which will allow maintaining constant pressure for normal operation of the fans.
It is also recommended to install ventilation communications strictly at level. There is no need to make the air rise at an angle through the pipe; it is better to maintain a strict horizontal line and use a 90-degree elbow to move to the vertical level.
The diameter of the ventilation pipes must match the hood connector. It is best to use pipes made of environmentally friendly plastic or galvanized, they will last longer, and the cost will not hit the budget too much.
It is important to note that the installation of ventilation ducts should be carried out by a specialist who has extensive experience working with hoods and knows the basic subtleties that can improve or, conversely, worsen the performance of the exhaust device.
Distance for ventilation ducts
According to GOST standards, the outlet for the exhaust device is installed at a height of 2.5 meters from the floor level. This is the optimal indicator that specialists will use during the installation of electrical communications.
Also, it is necessary to step back 15-20 centimeters to the left or right from the hood so that the equipment body does not block the access point to the electrical network. Some hoods are connected directly to the network using terminal blocks or plugs, so installing an outlet is not always necessary.
It is very important to provide grounding for the outlet. Grounding prevents the device from burning out due to voltage surges or other unpleasant situations. Considering that some hoods cost a lot of money, it is best to take every precaution and know that the equipment will not be damaged.
If the wiring and sockets are old and the hood is already installed, you can use an extension cord. However, it is recommended to purchase an extension cord with a fuse (a device that will disconnect the carrier from the mains in the event of power surges or other situations).
What are the dangers of incorrect height?
If the height of the hood above an electric or gas stove is chosen incorrectly, the user may face unpleasant consequences. In particular, if the hood is located too low, the following problems may occur:
- Constant overheating of the device;
- possible ignition of deposits accumulated on the filter;
- Difficulties in servicing the appliance and cooking due to its inconvenient location.
Negative consequences also occur if the exhaust system is located too high. They are listed here:
- Highly installed units will either suck in air much worse or will be forced to work at the limit of their capabilities;
- Such devices are inconvenient to maintain due to their high location.
An alternative to a grounded outlet may be a 16 A residual current circuit breaker. Such a device must be installed in the distribution board.
Self-installation
A hood is not the most complicated device, so if you have a little experience and a set of necessary tools, it is quite possible to install it yourself. Self-installation is a great opportunity to save on the services of specialists.
Installation of a hood attached to the bottom of the cabinet
Hanging models are attached directly to the bottom shelf of the cabinet. Installation is simple, installation is carried out using self-tapping screws and a screwdriver. Since connecting the air duct to the recirculating device is not required, the installation ends by connecting it to the electrical network.
Installation of a hood in a wall cabinet
Installing a hood into a cabinet yourself requires certain carpentry skills. For a new set, the device is purchased at the furniture design stage. In order for it to fit into an already used hanging cabinet, it is necessary that the dimensions of the hood correspond to the internal dimensions of the case.
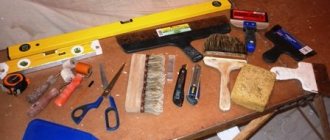
To work you will need:
- jigsaw, you can also use a manual one;
- hacksaw for wood;
- pencil;
- screwdriver (preferably a screwdriver);
- awl;
- construction angle, tape measure;
- clamps.
Installation steps:
- First of all, you need to free the cabinets from the facades, and not only the specific cabinet for the hood, but also the adjacent drawers. Next, remove the cabinet and fasten the adjacent cases together with clamps. Do not skip this point - the boxes may fall and be damaged.
- We unscrew the bottom shelf and apply it to the upper plane of the exhaust device. We outline the outline of the air duct and the holes for the outlet of the wire with a plug to connect the device to the network. Cut out the marked holes.
- We insert the hood into the housing and mark the upper boundaries of the device. We fasten the bottom shelf along the marked lines. We drill 4 holes in it.
You can ensure exact alignment of the fastening points with the holes using a stencil.
We fix the hood inside the cabinet and install the air duct. We use it to connect the ventilation hole and the system. We install shelves and fronts. It is worth checking the functionality of the equipment before installing the facades.
Installation of a hood with an air duct
The installation procedure for such a hood includes:
- fixing the hood;
- development of air duct and electrical wiring diagrams;
- box fitting;
- installation of the box using sealant.
The air duct is assembled from a plastic box or made of aluminum corrugation. The first option is stronger, more aesthetically pleasing and more reliable. Therefore, it is worth giving preference to it. Plastic is easy to saw and joined with special elements. Additional strength is added to the joints using sealant. Corrugation also has its advantages - its flexibility allows you to lay the air duct along a curved path.
How to determine the mounting height of the hood
To determine the ideal installation height for the hood, it is often enough to refer to the hood manufacturer's instructions. There is usually no fixed distance specified, but rather a range within which the hood should be located.
It is necessary to take into account such important facts as the height of the housewife and the interior of the kitchen. But even if the instructions are lost, there is another option. There are standards that allow you to determine the height at which the hood should be located above the hob or stove.
It is necessary to take into account the type of hob, each type of hob has its own height characteristics. Recommended height for hood:
- On a gas burner it is placed at a height of 75-85 cm,
- Above electric stoves, 65-75 cm.
If you choose a model with a sloped surface, the distance from its bottom to the hob should be about 55-65 cm for gas hobs and about 35-45 cm for electric hobs.
The height may vary, but only within the specified 10 cm and depending on the power of the model and its technical characteristics. These restrictions cannot be ignored, since not only the quality of the device, but also operational safety and fire protection depend on them.
Tips for use
- Keep the device clean and wipe it free of dust and grease after each use.
- Do not turn off the device immediately after cooking, as steam particles can spread throughout the kitchen faster than the device can absorb them. Therefore, you need to leave the hood running for a few more minutes so that it draws in all the fumes.
- Replace carbon filters regularly - at least 2 times a year.
Features of installation in non-standard situations
The most common case is when a gas pipe interferes. The beam can be secured using dowels and long screws. At a distance, the gas pipe is fixed using a spirit level so that the cornice can be installed without distortions. The block is then attached to the beam. There should be no slippage.
Screw the screws into the bar until they stop, then hang the cap and secure it to the end. To ensure a strong fastening, install the second beam below the level. This way you can bypass the gas pipe and secure the hood above the gas stove.
When renovating a kitchen, many people wonder what appliances to choose. What devices to choose so that they are of high quality and easy to install? How not to get lost in the kitchen maze? Wall-mounted kitchen hoods are very popular. In addition to their main function, they improve the appearance of the room. They are available in a wide range of materials, shapes, colors and sizes. Installing a hood over a gas stove is simple.
Feb 14, 2018ventsyst How an air conditioner works for heating and cooling residential premises: the principle of operation of air conditioners Popular models of Supra air purifiers and humidifiers: reviews and technical specifications
What do you need to know?
When installing a gas hob into a countertop, be sure to maintain a distance to the edges of the surface. It must be at least 5 cm on each side, otherwise when sawing it will be possible to destroy a wall that is too thin. The thickness of the tabletop itself also matters. It is not recommended to install embedded equipment in structures thinner than 38 mm due to low load-bearing capacity.
To check the tightness of connections when starting gas, a soap solution is used. Cover all nuts and joints thickly with it, checking these places for the presence of swelling bubbles - they indicate a leak.
Before starting full-scale operation of the stove, you should check its operation with different adjustment modes. The flame should not go out in any of them - this is very dangerous. If, when trying to check the change in combustion intensity, the adjustment does not change the supply of blue fuel, you need to turn off the stove, contact the service center or the seller. The product may be defective. Proper installation of a gas hob into a countertop in an apartment or private house allows you to comply with all regulations and ensure efficient operation of the equipment.
How to properly install a gas hob is described in the video below.
Installing an exhaust system over a gas stove
First, communications and furniture arrangement are noted on paper—planned or finished data. For absolute accuracy, draw lines on the walls.
Electrical safety must be taken into account. You cannot do without grounding, and if there is no corresponding outlet in the kitchen, then a 16-amp residual current device (RCD) is installed in the electrical panel.
The device is connected to the power network with three wires: phase, neutral and ground. In the shield they find a blank neutral with nuts and wires. It carries its own wire with a cross-section of 2.5 mm². The core is placed separately or on top of others, if technically possible.
You cannot disconnect an already secured wire yourself - you may get an electric shock. The exhaust system is connected via a 6.3 ampere machine.
The ground wires are yellow-green in color, this is the so-called protective zero, and the working zero is indicated by blue wires
The new apartments have Euro-type sockets and a grounding circuit. The device is connected to a terminal marked GND (Ground) or with three lines of different sizes. On exhaust devices without a grounding socket, the wire is attached to a metal part.
Safe models are considered to be hoods with automatic shut-off, which stop working after a short circuit or fire.
After the initial steps, they move on to marking the space for the exhaust device and counting the fastening parts. For the last time, measure the distance from the hood to the stove and compare it with the standard height above gas appliances.
The exhaust duct is made as straight and short as possible, but without violating the relative straightness of the connections and without angles that differ significantly from straight. Transitional parts between sections are used with a slightly rounded shape. Ideally, turns consist of many short parts.
The cross-sectional area of the passage is changed only if there are no other options. In total, no more than three bends are made. With a clogged ventilation shaft, the hood will not work well, and then they use circulation systems and do without an air duct.
Installation of a hood between cabinets
First, the ventilation sleeve is assembled. Air ducts come in square and round sections, and the typical size is 13x13 cm. The diameter is selected to match the hole made in the ventilation grille or wall, and is kept constant along the entire length.
Preference is given to air ducts made from plastics or metals, with a smooth interior and a check valve.
A ventilation sleeve assembled from short fragments and a long pipe: thus creating rigid structures with smooth linear transitions
Stages of installation of the exhaust device:
- We drill holes for hardware or screws to secure the hood.
- We screw in the fasteners.
- We check the horizontalness between the screws with a building level.
- We tighten the fasteners to the working position.
- We hang the hood on the screws. We make sure that the fastenings can withstand the load. We tighten the screws more tightly if necessary.
- We connect the exhaust device to the air duct, which is already attached to the ventilation or other outlet.
- We plug the device into a power outlet. Let's check how it works in different power modes.
Devices with a decorative box are installed without a frame. After successful start-up of the hood, the decorating part is put in place.
Detailed instructions for connecting a hood to ventilation can be found in our other article.
Other mounting options
Hoods are mounted not only between cabinets, but also inside. Furniture sets sometimes include modules for an exhaust hood.
Installation in an unsuitable section includes three stages: preparing a wall cabinet, securing it and connecting communications, and installing a working device.
A special section for a built-in hood: the unit can be hidden when not in use, but such cabinets almost never have any storage space
Preparing the hanging box:
- We unscrew the doors.
- Remove the module from the hinges on the wall. A second person must support the locker to prevent it from falling. You can also make a temporary mount with adjacent walls of other boxes.
- We dismantle the lower shelf of the case. We make sure that the equipment and the cabinet are compatible. We trim the sides if necessary.
- We determine what the depth of the air duct in the cabinet will be. Then we cut out parts from the top and inner shelves according to the outlines of the air channel and the depth of their location. We also provide a place for the power cord.
- We make four holes in the inner shelf for fixing the hood - if the configuration of the device allows for such fastening. In other cases, we install slats.
The cabinet is installed back and the connection to the electrical network is organized. The hood is built into the allocated space and secured with self-tapping screws. Then they are connected to the air duct, and the shelves are temporarily removed if necessary.
At the end, the door is returned to its place, but, if possible, converted to a lifting one. Gas lifts can be added if desired.
An example of calculating the dimensions (mm) for installing an exhaust hood in the bottom of a cabinet with four screws attached to the inner shelf
It makes sense to equip a cramped kitchen with a hood without a shell like decor or a built-in cabinet, which gradually lose their attractive appearance. The role of the supporting structure can be assigned to a homemade frame made of metal corners.
The parts are assembled into a rectangular structure and then everything is finally measured and the location for the load-bearing self-tapping screws that will hold the frame is determined. Even before installation, a grounding wire is connected to the frame. In the end, all that remains is to fix the hood in the frame, hang the device, connect it to the finished air duct and run it for testing.
How do equipment dimensions affect?
The dimensions of the kitchen ventilation are different; this should be taken into account when choosing a hood. It should be installed after measurements of the kitchen itself.
Necessary:
- calculate the size of the room;
- determine the position of interior items in the kitchen;
- measure the dimensions of the slab;
- take into account the height of everyone living in the apartment;
- select the desired type of ventilation and efficiency;
- consider where the device will be installed.
Such a ventilation system is invisible in the kitchen; visually you can only see the surface into which the air enters. Of the various types of built-in ventilation, telescopic ones are especially popular. Such hoods have a powerful motor with a maximum capacity of 1000 cubic meters. m/hour. To install models of this type, you will need a wall cabinet without a bottom. The dimensions of the cabinet and ventilation must match.
When installing ductwork, it is recommended to avoid unnecessary bends in the pipe to avoid loss of power. It is necessary to install check valves for exhaust ventilation to prevent contaminated air from getting back into the room. Installation of this type of hood begins with the assembly of the cabinet or box. The box is made of wood. The box is assembled as follows: the top of the box and its side parts are fastened together immediately, and after that the dimensions of the box and the hood are compared. Then the lower part of the cabinet is installed, where a hole is cut for the air duct. For silent operation, it is recommended to use plastic air ducts.
Standards
There are some rules and recommendations related to the safety and efficiency of the hood. On the one hand, it should absorb odors as much as possible, and on the other hand, the distance between it and the stove should not interfere with the housewife’s work and create a fire hazard. We invite you to look at the table for installation standards for hoods.
| Stove type | Approximate height, cm |
| Gas (direct exhaust) | 75-85 |
| Gas (inclined) | 55-65 (bottom) |
| Electric (direct) | 65-75 |
| Electric (inclined) | 35-45 (lower part) |
The height range is not random. When choosing the exact level, you will rely on three factors:
- extraction power;
- design, room configuration;
- the height of a person who most often stands at the stove.
At your own discretion, you can slightly increase the installation height, but you cannot reduce it.
Firstly, it will make it difficult to work at the stove; the cook will constantly hit his head, and it will be inconvenient for him to look into the pots. Secondly, the hood can become very hot, and in some cases there is a risk of soot deposited on the filter catching fire.
The instructions usually indicate what the distance from the stove to the hood should be, which greatly simplifies the choice. In addition, if a specialist deals with this issue, he will advise you on how best to install the entire system, including the location of the outlet and air duct.
When choosing a hood, it is necessary to take into account that in most cases manufacturers indicate in the technical data sheet the ideal parameters at which free air flow passes through the blades. In reality, the operating efficiency will be less due to the resistance of the filters (for recirculation units) or the insufficient cross-section of the ventilation ducts (in the case of installing exhaust-type systems). In the first case, it will be enough to calculate the productivity using the classical formula P=Qx12, where Q is the volume of the kitchen in cubic meters, and the number 12 corresponds to the recommended air exchange per hour and increase the resulting value by 30-40%.
If a household appliance operates in exhaust mode, then calculating its performance based on the volume of the room will not be entirely correct. The fact is that no matter how large the kitchen is, the hood will only allow a certain amount of air through it - it all depends on the pressure created, as well as the cross-section and configuration of the ventilation duct. According to the existing SNiP, exhaust lines have a cross-section of no more than 150x150 mm, which means that if you need to remove 500 cubic meters of air, the exhaust unit must create a pressure of at least 8 Pa. If we take into account the complex configuration of ventilation shafts, as well as obstacles in the form of broken bricks that fell during construction, protruding mortar build-ups and thresholds at the junction of reinforced concrete blocks, then the channel capacity will decrease by more than 10-20%.
You can calculate the parameters of the hood using special formulas (the method can easily be found on the Internet), or use a graph of the dependence of productivity on the pressure of the unit and the cross-section of the exhaust duct. One such diagram is shown below.
When choosing a hood based on performance, you should rely on the maximum pressure indicators and the cross-section of the ventilation duct
How does it work?
The principle of operation of the hood is quite simple and similar to ventilation. When you turn on the device, you can remove fumes, unpleasant odors and fumes from the room. In order for the hood to quickly cope with the task, its structure includes special filters, which should catch any contaminants. Another feature of the structure is forced ventilation, which is turned on for effective air exchange when the amount of pollution exceeds clean air masses.
Additional functions will be good helpers for any housewife, so it’s worth choosing a model that will create optimal conditions for working in a small room
When choosing a hood for the kitchen, it is worth studying its internal structure, paying special attention to the filter system. According to this criterion, there are two types of device:
- recirculation - allows you to clean the air from dirt and grease through filters, after which the same air mass is returned to the room;
- flow-through - thanks to it, the air is purified, which is drawn in from the kitchen and released outside the apartment using ventilation.
The flow hood should be connected to the general ventilation of the house. Thanks to the presence of an air duct, this process is carried out conveniently and quickly. Access to clean air occurs through windows or air masses coming from other rooms. A recirculating hood has no connection with ventilation, so the same air circulates in the kitchen, being cleaned thanks to the device. To ensure that air masses are drawn in and out efficiently, the hood has a powerful motor.
The choice in favor of one type or another will help to make a ventilation duct, which is available in any kitchen of a multi-storey building. If it is located near the cooking area, then it makes sense to install a flow-through hood, but if it is far away, then a recirculation one. If the house is very old, the ventilation may be clogged and air will pass through it with difficulty, in which case it is also worth using a recirculation device or purchasing a combined one that can work in both directions.
This option includes both an air duct and filters that can be used seasonally. For the winter period, it is better to use the circulation principle so as not to cool the room, and in the summer use an air vent.
Depending on the appearance of the hood, it can be installed on the ceiling, wall or built into the kitchen unit. Ceiling and wall variations usually have a design that allows you to make this device organic and easily fit into the room.
Types and peculiarities of exhaust devices
Principle of operation
All products currently on the market can be divided into two large classes based on their operating principle: circulation and exhaust.
Circulating
Circulation units provide filtration of kitchen air through a built-in system of multi-stage filters. After this, the purified air is returned to the kitchen.
As a rule, they consist of a separator filter that traps large particles and a carbon filter that absorbs odors.
The polluted air above the stove is drawn into the exhaust hood by a fan, passes through the filter system and ends up back in the room.
The efficiency and productivity of such systems is low. They are recommended to be used only in cases where it is not possible to connect the hood to the ventilation system.
Exhaust
Exhaust structures ensure the removal of polluted air from the premises through the ventilation duct of the building.
In devices of this type, mechanical grease filters must be used to prevent “clogging” of the ventilation duct.
Before choosing a model, it is necessary to calculate the required power of the exhaust hood.
As a rule, many modern models are universal. They can operate in both circulation and exhaust mode, depending on the connection method.
Design
Based on the type of design, hoods are divided into the following types.
- With a flat surface.
- Domed.
- Inclined.
- Built-in.
Flat surface devices
The simplest and most cost-effective type of exhaust devices, characterized by compact size and low price.
These models are able to work most efficiently autonomously in circulation mode, thanks to the filters built inside.
The disadvantages of these devices include the need for regular cleaning and replacement of filter elements
. In most cases, technology is not aesthetically attractive enough. These shortcomings are partly compensated by the relatively low cost of the product.
Dome
Another type of device that has become widespread in our kitchens.
The main operating mode of devices of this type is exhaust. They capture hot air rising upward, which is saturated with water vapor and fat particles. And then it is removed from the room through the ventilation duct.
The effective operation of these models depends on proper installation. In this case, it is provided even in passive mode, without turning on the built-in fan.
Some models of exhaust hoods provide the possibility of installing carbon filters to ensure operation in circulation mode with reduced efficiency.
Oblique
Devices with an inclined surface are a type of dome exhaust devices.
They are considered the most aesthetically perfect and modern. These devices combine an attractive appearance, excellent workplace ergonomics and high efficiency.
The main disadvantage of these devices is the relatively high cost.
Built-in
The main difference between these models and those listed above is that the structure itself and the air ducts are hidden from view in the wall cabinet.
Influence of hood characteristics
The choice of distance between the hood and the gas stove is significantly influenced by the power (performance) of the equipment and the area of the air intake, as well as the type of its location. Weak hoods with a capacity of 240-300 cubic meters. m/h will have to be hung no higher than 75 cm. Modern powerful installations are capable of cleaning more than 600 cubic meters. m/h, which makes it possible to increase the height of the working area.
You can calculate the hood power using this table
Another important parameter is the size of the hood. The width of the hood should not be less than the width of the gas stove, otherwise it will not cover the entire surface of the source of air pollution. Why is such an installation needed? On average, the width of the slab is 60 cm; therefore, hoods measuring 60-70 cm cannot be raised high. To increase the distance, install a device measuring 90 cm.
When choosing a safe distance, you should take into account the fact that the material of the device body practically does not affect this value, since the risk of fire is determined by the deposition of fats, soot and other substances that can ignite from an open fire or overheating of the material on the surface of the air intake. The minimum distance is set based on this condition.
DIY installation - basic steps
For those who are used to carrying out repair and installation work on their own, you can install a ventilation system by going through three stages of work:
First step
The first step involves preparing the premises for the start of work. If there is no ventilation hole at the installation site, then it is necessary to make one.
After the hole is prepared, it is necessary to proceed with the actual fastening of the ventilation system. Installation features depend on the type of hood being mounted
It is important to do this efficiently so that there are no misunderstandings during operation.
Second step
If the installation body does not have enough holes for mounting, you can make them yourself. Having completed the installation, you can proceed to connecting to the central ventilation system.
It should be remembered that for smooth operation you need a channel for removing air masses and a stable power supply.
High-quality connection work will allow the system to operate for a long time without failures. However, the installation work did not end there. All that remains is to launch the system and improve its appearance.
Third step
Having completed the work, you need to check the build quality; to do this, you need to check all operating modes of the device in test mode.
The backlight is turned on, the noise level is measured, which must correspond to the indicators specified in the attached instructions. If all standards are observed, you can use the device without fear of it breaking.
It is not always enough just to install the system: if the device is located at a fairly large distance from the entrance to the shaft of the central system, then the connection must be disguised so that the interior of the room does not suffer because of it.
Over long distances, this can be quite expensive, so it is worth considering the design of the camouflage before planning the costs.