The self-leveling floor has high mechanical strength and resistance to chemical and aggressive external environments, which allows it to be used in many rooms. The duration of operation depends on the correct implementation of preparatory work, compliance with installation requirements and the quality of the mixture.
Glossy self-leveling floor in the kitchen
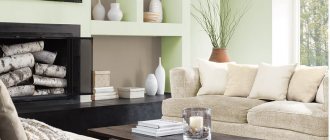
White self-leveling floor in the living room
Classification of self-leveling floors
To obtain a high-quality floor covering, 2 layers of self-leveling floors are usually used:
- the main one, which smoothes out all unevenness and is made up to 8 cm thick;
- finishing, which determines the appearance of the flooring in the room.
Decorative self-leveling floor
In some cases, linoleum, parquet boards or similar floor coverings are placed on the base layer instead of the finishing coating.
When choosing a floor covering, you should pay attention to the composition of the included components.
According to this criterion, mineral mixtures are distinguished, which are used for the most part for the main layer, and polymer mixtures, which ensure the creation of the top layer.
3D self-leveling floor with design
Glossy gray kitchen floor
In turn, polymer coatings are:
- polyurethane, which, depending on the structure, are divided into thin-layer and highly filled;
- methyl methacrylate, the most resistant to overload and aggressive external environment;
- epoxy, with brittleness and increased moisture resistance.
Mineral self-leveling floor red
Self-leveling floor in the living room of a country house
Selection rules
Sometimes choosing the right product for your concrete floor can be a little challenging. Simple rules come to the rescue.
- Surface color and texture. When polymer is needed for high-tech residential premises, you can take glossy surfaces. If we talk about the Provence style, then it is better to take matte options.
- Application environment. When a polyurethane floor will suffer from heavy loads, it is best to take a two-component product. Due to this, the coatings are dense and do not suffer from abrasion. The most important thing is not to forget that this specificity is related to the thickness of the polymer itself. Each type of floor is suitable for different load forces.
- Price.
The cost of products is directly related to their technical properties. It varies over a wide range, so you can choose the best variations to solve various problems. When choosing materials, be sure to pay attention to the color and texture of the surface, manufacturer, as well as cost - Firm. Here you need to look exclusively at the reviews of people who have already tried such products. Only they allow us to really judge how good a specific type of polymer is.
Advantages of self-leveling floor
Due to the operational characteristics and installation features, the following advantages of self-leveling floors are distinguished:
- high aesthetic indicators, which are manifested in a wide variety of design solutions, for example, the use of 3-D images;
- mechanical strength, allowing the floor covering to remain intact even after exposure to heavy loads;
- durability, providing up to 15 years of comfortable operation;
- high moisture resistance, allowing the use of self-leveling flooring in the bathroom;
- resistance to ultraviolet radiation, as a result of which the self-leveling floors in the apartment do not fade from exposure to sunlight;
- environmental friendliness, allowing the use of self-leveling floors in a room where there are children or people prone to allergies;
- no odor emission, despite the influence of external factors, for example, heating from an electric heater;
- compliance with fire standards, since all types of self-leveling floors are fire resistant and do not emit harmful substances when burning;
- quick installation, largely depending on the type of mixtures used;
- the ability to complement any room design, for example, by using decorative self-leveling floors;
- seamlessness, as a result of which the floor in the apartment does not allow spilled water to pass down.
Blue stone-look self-leveling floor
Disadvantages of self-leveling floors
When choosing self-leveling floors for an apartment, you should take into account the possible disadvantages of this floor covering that you will encounter. For example, the cost of flooring, which is especially high when using imported flooring mixtures. Also, you can fill the floor only at a certain humidity, which is quite difficult to control.
Two-color self-leveling floor
When repairing, it is necessary to carry out complex dismantling of the old coating to ensure good adhesion to the base. Scratches may appear as a result of improper filling or operation; glossy self-leveling floor becomes slippery after washing, which is especially dangerous for older people;
Polymer self-leveling floor in the kitchen
In addition, a self-leveling floor with a pattern can become boring or cause difficulties when changing the design.
Matte black self-leveling floor
It is quite difficult to fill a self-leveling floor alone, since the solution quickly hardens and loses its properties, so the work should be done as a team.
Self-leveling marble floor
Basic rules of preliminary preparation
The basis for the self-leveling floor is a concrete slab, cement screed, and ceramic tiles. The floor in a private house is often made of wooden floorboards and the main advantage of self-leveling coatings is the ability to fill without dismantling if the old floor is in good condition and has high strength. At the same time, to prevent the self-leveling floor from leaking through the cracks, you should carefully putty all the holes between the boards.
Self-leveling floor in black and white design
For good adhesion, it is important to carefully remove all traces of oil, glue and other contaminants on the substrate. If possible, it is necessary to eliminate all irregularities on the surface.
Polymer self-leveling floor in the hallway
To improve the adhesion of the polymer to the base, the surface should be primed. Depending on the porosity and absorption rate of the primer, the priming process may need to be repeated.
Zebra pattern self-leveling floor
Safety precautions
Since the mixture contains chemical ingredients, some rules must be followed during the work. It does not matter whether it is paint, primer or the main composition of the coating.
Leveling the floor
All work must be carried out in a well-ventilated room.
The worker must wear protective clothing on his body, shoes on his feet, gloves on his hands, and goggles on his eyes. The respiratory organs should be protected with a respirator or medical mask.
If the mixture drops onto an open area of skin, rinse the area with plenty of clean water. And if paint or primer gets into your eyes, wash it off immediately and consult a doctor.
Keep open flames away from the material. Smoking while working is strictly prohibited.
Tools used for pouring
To perform the filling you will need the following set of tools:
- Low-speed drill or hammer drill for mixing the solution. It is necessary to ensure that the power of the tool is sufficient and that it does not fail due to overload or overheating. Filling should be carried out continuously in the room, so there will be very little time for the drill to cool down.
- Mixer attachment. It is important to decide in advance whether a drill or hammer drill will be used to mix the solution, since they have a different cartridge. As a result, the stirring attachment from the drill will not fit the hammer drill and vice versa.
- Buckets. The volume of buckets must be at least 20 liters. Do not use dirty buckets, as the filling will be interspersed, which will result in poor performance.
- Putty knife. Although the mixture is called self-leveling, it is better to pre-level it under the radiator and in hard-to-reach places to obtain a better-quality floor covering.
- Needle aeration rollers. The presence of air bubbles significantly reduces the mechanical strength of the self-leveling floor and, as a result, its durability. Therefore, air should be removed by carefully rolling the surface with a roller. For greater convenience, you should choose a roller with a telescopic handle.
- Wet feet. Special shoes with spikes that allow you to walk on a self-leveling floor that has not yet hardened to distribute it evenly over the entire surface and perform other operations.
- Laser level. Most important for large premises or if 3D self-leveling floors are planned.
How to make your own polyurethane coating
The strength, durability and quality of the laid polyurethane coating will depend on the preparation of the base.
First of all, the surface must be cleaned of dust, dirt and debris. Then carefully inspect the clean base - it may have cracks and other defects that need to be removed. Polyurethane putty can handle them. Failure to comply with the above requirements will result in bubbles or swelling on the surface of the coating.
To ensure that the polyurethane floor pleases you with its appearance and does not cause problems during operation, be sure to prime the repaired and clean surface.
Making a 3D floor
Thanks to this, a polymer film is formed on the floor, which will serve as a protective layer and a connecting link between the base and the coating.
If you decide to use a one-component mixture for your work, then you can buy it ready-made in the store. If it is decided to use a two-component mixture, the composition should be mixed as indicated on the package. Continuously stirring the solution with a construction mixer, add filler if necessary. You need to mix the components for 3-4 minutes with an electric drill operating at low speed.
It should be remembered that there is no need to mix the ingredients in advance - the finished mixture is viable for only half an hour. You shouldn't be distracted by talking either. Otherwise, you will have to throw away the ready-made solution. The consistency of the resulting composition should resemble oil paint or sour cream. The higher the room temperature, the faster polymerization occurs. The optimal temperature is 20–23°C above zero.
The finished mixture must be poured onto a dry base and spread over the surface with a notched spatula. You should start from the far corner and then move towards the front door. At this stage, it is much more convenient and faster to do the work together. A second person, wearing paint shoes, will use a needle roller to evenly roll out the composition on the floor. After the surface of the underlying layer has dried, you need to apply another one - the finishing one. The mixture is called quick-drying, but for full operation of the coating it must take at least 3-5 days.
Features of floor coverings in rooms with high humidity
Rooms with high humidity include the bathroom and toilet. The self-leveling floor in the bathroom must withstand constant high air humidity, frequent contact with water on the surface, including hot water, it must be easy to clean, but at the same time remain non-slippery; do not allow microbes to multiply quickly, which is especially important for the floor in the toilet.
Choosing a self-leveling floor for a wet room is the most difficult. For example, it is prohibited to use thin-layer polyurethane floors due to their tendency to delaminate when exposed to moisture for a long time.
Black self-leveling floor in the bathroom
The floor in the toilet, made of methyl methacrylate polymer, will have a color limit. In order to depict a pattern or create an exclusive colored self-leveling floor, you should use an epoxy polymer base.
Self-leveling floor with floral pattern
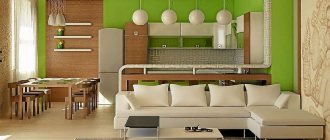
Self-leveling floor in the living room
Turnkey polyurethane floors: cost of work per m2
| Name | Price per sq. meter |
| Polyurethane self-leveling floor | from 1700 rub/m2 |
| Self-leveling polyurethane flooring in an apartment | from 1700 rub/m2 |
| Self-leveling polyurethane floor for garage | from 1700 rub/m2 |
| Self-leveling polyurethane flooring for parking | from 1700 rub/m2 |
| Self-leveling polyurethane flooring for car service centers | from 1700 rub/m2 |
| Self-leveling polyurethane floor for warehouse | from 1700 rub/m2 |
| Industrial polyurethane self-leveling floor | from 1700 rub/m2 |
| Polyurethane-cement self-leveling floor | from 1600 rub/m2 |
| Decorative polyurethane self-leveling floor | from 1700 rub/m2 |
| Transparent polyurethane self-leveling floor | from 1700 rub/m2 |
| Colored polyurethane self-leveling floor | from 1700 rub/m2 |
| White polyurethane self-leveling floor | from 1700 rub/m2 |
| Glossy polyurethane self-leveling floor | from 1700 rub/m2 |
| Matte polyurethane self-leveling floor | from 1700 rub/m2 |
*Estimated prices may vary. The price depends on the area, distance of the object and working conditions.
Polyurethane self-leveling floor, 5 / 5 (3 votes)
Features of self-leveling flooring in the kitchen
The main factors that distinguish self-leveling floors in the kitchen from floor coverings in other rooms are:
- presence of high humidity near the sink;
- drops of fat and oil near the kitchen stove;
- there is a risk of spilling aggressive substances, for example, vinegar essence, which can damage the self-leveling floor in the kitchen;
- increased requirements for hygiene.
Self-leveling floor in Art Deco design
If desired, you can make a white self-leveling floor in the kitchen, but various stains will be too noticeable on it. Therefore, for ease of cleaning in the kitchen, it is recommended to choose a colored self-leveling floor. To create a creative design in the kitchen, a self-leveling marble floor can be used.
Gloss can often be slippery, so it is preferable to choose a slightly rough self-leveling floor in the kitchen to prevent injuries due to falls.
Self-leveling floor in a country house
Self-leveling floor in a country style kitchen interior
Features of self-leveling floor on the balcony
The self-leveling floor on the balcony is most susceptible to external factors. For example, in sunny weather, a black self-leveling floor can heat up to a high temperature, which is impossible in a living room. For this reason, for the floor covering on the balcony, it is important that the linear thermal expansions of the base and the finishing coating coincide.
Glossy self-leveling floor in the bedroom
Self-leveling floor with design in the dining room
Regardless of which self-leveling floor is chosen, compliance with the manufacturer’s requirements, the choice of high-quality materials and tools will allow you to comfortably use the floor covering without flaws for several decades.
Self-leveling floor in a loft interior
Self-leveling floor in the bedroom of a private residence