The ceiling is an important part of the building that separates the floors. This structure, located horizontally, can be a ceiling or a floor. It must effectively withstand different loads, be strong, fireproof and have soundproofing properties. Reinforced concrete floor slabs meet all these conditions.
Most often, two types of products are used: hollow and solid (monolithic). Each of them has its own advantages and disadvantages.
Solid slabs have a lot of weight, high cost, and insufficient noise insulation, but they have an increased margin of safety.
Installation of floor slabs and coverings
Installation of floor slabs and coatings.
Composition of operations and controls
— availability of a quality document;
— surface quality, accuracy of geometric parameters, external slabs;
— cleaning the supporting surfaces of previously installed structures (crossbars, stiffening diaphragms, column support tables) and mounted slabs from debris, dirt, snow and ice;
— availability of an inspection (acceptance) certificate for previously completed work;
— the presence of markings that determine the design position of the slabs on the supports.
Visual, measuring, every element
— installation of slabs in the design position (deviation from the symmetry of the depth of support of the slabs in the direction of the span being covered, the difference in elevations of the front surfaces of two adjacent slabs);
— depth of support of the slabs;
- thickness of the mortar layer under the slabs.
Measuring, each element
- the actual position of the mounted slabs (deviation from the markings that determine the design position of the slabs on the supports, the difference in elevations of the front surfaces of adjacent slabs, the depth of support of the slabs);
— appearance of the front surfaces.
Measuring every element
Technical requirements
SNiP 3.03.01-87 pp. 3.5-3.7, table. 12
Limit deviations:
— differences in elevations of the front surfaces of two adjacent non-prestressed floor panels (slabs) in a seam with a slab length, m:
- St. 4 to 8 - 10 mm;
- St. 8 to 16-12 mm.
- from symmetry (half the difference in the depth of support of the ends of the element) when installing slabs in the direction
— overlapped span with element length, m:
- St. 4 to 8 - 6 mm;
- St. 8 to 16 - 8 mm;
—St. 16 to 25 - 10 mm.
The thickness of the mortar layer under the floor slabs should be no more than 20 mm.
The brand of mortar is according to the design, the mobility is 5-7 cm.
The surfaces of adjacent floor slabs along the seam on the ceiling side must be aligned.
The depth of support of the slabs is according to the design.
Not allowed:
— the use of pads not provided for in the design to align the laid elements according to marks without agreement with the design organization;
- the use of a solution whose setting process has already begun, as well as restoring its plasticity by adding water.
GOST 9561-91. Reinforced concrete hollow-core floor slabs for floors of buildings and structures. Technical conditions. GOST 12767-94. Solid reinforced concrete floor slabs for large-panel buildings. General technical conditions.
Deviations from the nominal dimensions of the slabs indicated in the working drawings should not exceed the following values:
- St. 4 to 8 m – ±10 mm;
— according to the thickness of the slabs — ±5 mm;
The non-flatness of the bottom surface of the slab should not exceed for slabs of length:
Deviations from the nominal position of steel embedded products should not exceed:
— in the plane of the slab — 10 mm;
- from the plane of the slab - 5 mm.
The quality of surfaces and the appearance of the slabs, depending on the established category of surfaces, must meet the requirements given in the table
(cavities), mm
Upper, singing linoleum
Instructions for carrying out work
SNiP 3.03.01-87 pp. 3.18-3.21
Installation of floor slabs is permitted only after the design fastening of columns, crossbars and stiffening diaphragms and the concrete of the embedded joints has achieved the strength specified in the PPR, as well as after acceptance of the supporting elements, including geodetic verification of the compliance of their planned and altitude position with the design one with the preparation of an as-built diagram.
Before lifting each slab, it is necessary to check its compliance with the design grade, clean the supporting surfaces of the slab, columns, crossbars and stiffening diaphragms from debris, dirt, snow and ice.
First of all, intercolumn (tie) slabs should be installed and secured by welding, and then row slabs.
The laying of slabs in the direction of the overlapped span must be carried out in compliance with the dimensions established by the design for the depth of their support on the supporting structures or the gaps between the mating elements. The installation of slabs in the transverse direction of the span to be covered should be carried out according to the markings that determine their design position.
Floor slabs on trusses (beams) are laid dry on the supporting surfaces of load-bearing structures.
Floor slabs must be laid on a layer of mortar no more than 20 mm thick, aligning the surfaces of adjacent slabs along the seam on the ceiling side.
Embedding of joints should be carried out after checking the correct installation of the slabs, acceptance of welded joints of elements in mating units and anti-corrosion coating of welded joints and damaged areas of the coating of embedded products. Concrete mixtures used for grouting joints must meet the requirements of the project. The largest grain size of coarse aggregate in a concrete mixture should not exceed 1/3 of the smallest cross-sectional size of the joint.
Floor slabs delivered for installation must not have:
— grease and rust stains on the front surfaces of the slabs;
— cracks on the surfaces of slabs, with the exception of shrinkage and other surface technological cracks with a width of no more than 0.1 mm;
concrete sagging on open surfaces of steel embedded products, reinforcement outlets and mounting loops.
Furnace laying
Use high quality materials. Masonry work must be carried out at positive ambient temperatures: brick and mortar must have a temperature of at least +5*C, water +15°C. It is not recommended to lay out the oven using the freezing method, or to handle cold brick and mortar with your hands. 25 kg of dry mixture is intended for laying 35-40 bricks with a joint thickness of 4 mm.
Before laying the stoves, the bricks are pre-selected and sorted. For the fireboxes, channels and vaults of the furnace, bricks are used without cracks and chipped places, of regular shape, with a flat bed, flat side edges, straight edges and sharp corners. Before laying, clean the bricks from dust, dirt, oil stains and other substances that reduce the adhesion of the mortar to the base. When tapped, the brick should emit a clear metallic sound, pound well, and when dropped, not crumble, but break into large pieces.
Installation of floor slabs: installation instructions
The ceiling is the most important element of a building structure, during the construction of which it is necessary to use a pre-agreed project drawn up taking into account the requirements of SNiP (3.01.01-85).
Advantages of concrete floor slabs:
- reliability;
- strength;
- good sound insulation;
- fairly simple installation of floor slabs.
Disadvantages of floor installation
- impossibility of use in wooden houses;
- concreting process extended over time;
- weight of the structure;
- the need to use additional structures: formwork, supports, etc.
Masonry work
The work operations performed during the masonry process are of unequal complexity. Accordingly, they are performed by masons of various qualifications. Depending on the task at hand, the composition of the units is determined.
So:
- Masons with a higher rank are engaged in installing lines and moorings, laying beacons, and performing face masonry (outer verst).
- Low-skilled workers are engaged in laying out bricks, laying out a mortar bed, laying backfill rows, and filling voids in the well masonry.
- The specific number of masons in the units, and the division of responsibilities according to their category, depends on the thickness of the wall and its design features.
- For example: to lay a wall of 2 bricks, five masons are required: one V or VI category, one IV category, and the rest not lower than III category.
So, we can’t talk about independent work here. The partition is another matter - if there is an efficient assistant, the owner can easily erect it himself. However, he still must have an idea of the work performed by hired workers.
Features of lightweight walls
The main advantage of houses built of brick is their durability. Therefore, when a person wants to build, as they say, to last, he gives preference to this particular material. Moreover, in a low-rise building, even walls just one solid brick thick can withstand loads from reinforced concrete slabs.
- The reliability of structures in this case depends only on the correctness of their installation and the quality of the masonry.
- The only disadvantages of brick walls include their solid weight and low thermal performance. However, both of these disadvantages are eliminated through the use of lightweight masonry technologies.
- This includes the use of hollow (slotted) bricks, and the construction of wells in the walls, filled with lightweight concrete liners, liquid cellular concrete, foam or bulk insulation.
- These technologies can not only reduce the load on the foundation and make the walls warm, but also significantly reduce the cost of construction.
To reduce the thermal conductivity of brick walls, masonry can be done using warm mortars prepared not with quartz, but with perlite or pumice sand. In this case, masonry technology with widened seams is often used, which makes it possible to reduce the thickness of the walls as a whole.
In the process of such masonry, the thickness of the longitudinal-vertical joints increases significantly, and due to this, the brick is not laid flat, but on the edge. Let us only note that this version of lightweight walls is not suitable for independent work. It is carried out only according to the project, in which the required thickness of the seams is assigned.
- Masonry with layers of heat-insulating materials is always carried out with a gap corresponding to the thickness of the liner. His place is between the front milepost and the back row.
- In this design, the slab insulation must be provided with a tight connection to the masonry, for which it is first placed on glue and then fixed with dowels with a disk head.
- By the way: today on sale there are not just dowels, but basalt-plastic anchors, which allow you to simultaneously connect the walls to each other while attaching the insulation.
- One end of the anchor is mounted through the slab into the main masonry, and the second end, after installing the disk washer, is embedded in the seams of the outer wall.
Polymer boards are not afraid of moisture, which means they do not need ventilation.
Types of concrete floor slabs
- Often ribbed floors are used in private homes. Installation of floor slabs is more common in Europe than in Russia. The slab consists of beams, hollow blocks, a crown, and concrete screed. They are usually made right on the construction site. Plates can be made by production.
- Monolithic reinforced concrete floor slabs consist of concrete and reinforcement. Self-laying of such slabs is a rather labor-intensive process, because it requires preliminary construction of formwork, laying of reinforcement, and concreting. However, such slabs can be given any shape depending on the purpose of use.
- Prefabricated reinforced concrete floor slabs are manufactured using the production method. They can withstand all necessary loads and are easy to install. To reduce the weight of construction products, cavities are made in it, which make the finished structure lighter without loss of strength. Under the influence of additional loads, hollow core slabs exhibit special strength, rigidity, fire resistance, and efficiency. They have good sound insulation, waterproofing and gas insulation. The production of such plates is automated and therefore widespread.
- Filigree reinforced concrete floor slabs combine the features of a prefabricated and monolithic floor, and consist of reinforced concrete slabs, additionally reinforced with concrete and reinforcement. They are made either directly where they are used, or by a production method. Production slabs can be ordered by independently determining the shape of the slab. They are easy to install, the appearance does not require additional leveling or plastering.
Advantages of a monolithic ceiling device ↑
Monolithic reinforced concrete floors are classified as the most reliable and versatile building materials.
- Using this technology, it is possible to cover rooms of almost any size, regardless of the linear dimensions of the structure. The only thing when it is necessary to cover large spaces is the need to install additional supports;
- they provide high sound insulation. Despite their relatively small thickness (140 mm), they are able to completely suppress external noise;
- on the underside, the surface of the monolithic casting is smooth, seamless, without changes, so most often such ceilings are finished only with a thin layer of putty and painted;
- One-piece casting allows you to build remote structures, for example, to create a balcony that will form one monolithic slab with a ceiling. By the way, such a balcony is much more durable.
- The disadvantages of monolithic casting include the need to use specialized equipment, for example, concrete mixers, when pouring concrete.
Attention! It is possible to install a monolithic floor in a house made of aerated concrete only after installing additional supports made of concrete or iron. As for wooden buildings, the use of this type of casting is prohibited.
For structures made of lightweight materials such as aerated concrete, prefabricated monolithic floors are more suitable. They are made from ready-made blocks, for example, expanded clay, aerated concrete or other similar materials, and then filled with concrete. It turns out, on the one hand, a lightweight structure, and on the other, it serves as a monolithic reinforced belt for the entire structure.
Supports for floor slabs
Installation of floor slabs is carried out according to the developed technology, defined by SNiP standards, and depends on the expected future load. The thickness is at least 10 cm when using reinforced concrete floor slabs, and no more than 29 cm when using frequently ribbed floor slabs. The thickness of the ceiling is chosen depending on the functional purpose of the future ceiling.
Scheme of laying the floor slab and Mauerlat on the reinforced belt
Features of calculating wall thickness
- The thickness of the walls according to thermal engineering calculations does not always coincide with the calculation of the value based on strength characteristics. Naturally, the more severe the climate, the thicker the wall should be in terms of thermal performance indicators.
- But in terms of strength, for example, it is enough to lay out the outer walls in one or one and a half bricks. This is where it turns out to be “nonsense” - the thickness of the masonry, determined by thermal engineering calculations, often turns out to be excessive due to strength requirements.
- Therefore, laying solid brick walls from the point of view of material costs and subject to 100% use of its strength should only be done in the lower floors of high-rise buildings.
- In low-rise buildings, as well as in the upper floors of high-rise buildings, hollow or lightweight bricks should be used for external masonry; lightweight masonry can be used.
- This does not apply to external walls in buildings where there is a high percentage of humidity (for example, in laundries, baths). They are usually built with a protective layer of vapor barrier material on the inside and solid clay material.
Now I’ll tell you about the calculation used to determine the thickness of external walls.
It is determined by the formula:
B = 130*n -10, where
B – wall thickness in millimeters
130 – size of half a brick, taking into account the seam (vertical = 10mm)
n – integer half of a brick (= 120mm)
The calculated value of the solid masonry is rounded up to the whole number of half-bricks.
Based on this, the following values (in mm) of brick walls are obtained:
- 120
(a brick floor, but this is considered a partition); - 250
(into one); - 380
(at one and a half); - 510
(at two); - 640
(at two and a half); - 770
(at three o'clok).
In order to save material resources (bricks, mortar, fittings, etc.), the number of machine hours of mechanisms, the calculation of wall thickness is tied to the load-bearing capacity of the building. And the thermal component is obtained by insulating the facades of buildings.
How can you insulate the external walls of a brick building? In the article insulating a house with polystyrene foam from the outside, I indicated the reasons why brick walls cannot be insulated with this material. Check out the article.
The point is that brick is a porous and permeable material. And the absorbency of expanded polystyrene is zero, which prevents the migration of moisture outward. That is why it is advisable to insulate a brick wall with heat-insulating plaster or mineral wool slabs, the nature of which is vapor-permeable. Expanded polystyrene is suitable for insulating concrete or reinforced concrete bases. “The nature of the insulation must correspond to the nature of the load-bearing wall.”
There are many heat-insulating plasters
– the difference lies in the components. But the principle of application is the same. It is performed in layers and the total thickness can reach up to 150mm (for large values, reinforcement is required). In most cases, this value is 50 - 80 mm. It depends on the climate zone, the thickness of the base walls, and other factors. I will not go into detail, since this is the topic of another article. Let's return to our bricks.
The average wall thickness for ordinary clay bricks, depending on the area and climatic conditions of the area at the average winter ambient temperature, looks in millimeters something like this:
- — 5 degrees — thickness = 250;
- — 10 degrees = 380;
- — 20 degrees = 510;
- - 30 degrees = 640.
I would like to summarize the above.
We calculate the thickness of external brick walls based on the strength characteristics, and solve the heat-technical side of the issue using the method of wall insulation. As a rule, a design firm designs external walls without the use of insulation. If the house is uncomfortably cold and the need for insulation arises, then carefully consider the selection of insulation.
Formwork when installing slabs
The formwork can be homemade or ready-made. Ready-made from the manufacturer, made of wooden materials or metal. They have a height adjustment mechanism. The process of installing factory formwork is not labor-intensive; the technology for its use is described in detail in the instructions. It is more difficult to install the formwork yourself, since for this it is important to cut all the parts evenly. The quality of the finished slabs depends on the accuracy of cutting and constructing the formwork. The size depends on the dimensions of the floors and the location of future installation. Formwork is not needed when constructing floors using slabs made in production and when installing wooden floors (in these cases, supports are sufficient).
Pouring concrete floors using permanent formwork
Types of formwork
Floor slab diagram.
To assemble the formwork, you can use either factory-made telescopic racks or wooden boards or timber.
Telescopic racks, which are rented from construction companies, have a load capacity of 1.2 tons to 1.5 tons. They are equipped with tripods that give them stability. Telescopic racks allow you to cast floors up to 4.5 m high.
If the house is planned to have ceilings higher than 4.5 m, then self-assembled wooden formwork will not work here. For casting high floors, either scaffolding from racks or formwork elements such as blocks and tours must be used.
For low ceilings, not exceeding 3.5 m, formwork made of wooden beams and boards is quite reliable. In addition, timber and boards can be used in the future to build a roof or the next floor.
Additional construction equipment
The use of construction equipment is necessary only when beams more than 6 m long and heavier than 20-30 kg are used in construction (usually when constructing often-ribbed and wooden floors) and when installing reinforced concrete floors weighing more than 150 kg, with an area of more than 2 square meters. m.
The crown is a structure that is a belt of reinforced rods. This is one of the types of reinforced concrete floors that are erected along the external walls to increase the rigidity of the entire building. Used in buildings with prefabricated, reinforced concrete and filigree floors.
Permissible load values, in strict accordance with SNiP (2.03.01-84), are determined taking into account the established strength and reliability coefficient, provided there are no cracks, compliance with the norms of permissible deflections, and uniform distribution of loads.
Plaster on reinforced concrete and frequently ribbed floors may crack soon after completion of work. The reason for this is the inconsistency in the location of floor slabs and beams in one structure. To prevent cracking, for example, in frequently ribbed floors, one or two additional beams reinforced with reinforcement are added perpendicular to the beams.
SNiP 2.01.074-85 establishes maximum norms for movements and deflections of floor slabs. They should not be more than 1/150 of the span size or 1/75 of the console overhang. Therefore, the maximum deflection for a slab less than 9 m long can be about 6 centimeters.
To check the quality of all floor slabs completed, you need to follow the SNiP standards. All materials used must be provided with a passport clearly indicating all characteristics and possible deviations. The geometric dimensions must match the declared ones up to 1 mm. Products with properties that do not comply with the instructions are rejected and not used in construction.
Transportation is carried out only in accordance with the technical conditions regulated in SNiP.
The supporting location for installation is pre-prepared in accordance with the developed project. The technology in this case involves, in some cases, the use of lifting construction equipment. In this case, you need to ensure that the hook is not removed until the strong stability of the transported element is ensured using special fasteners. The joints between the elements are completely filled with a special fastening solution.
The technology for constructing floor slabs is regulated by SNiP 3.03.01-87 clauses 3.18-3.21. According to which, slabs are installed only after strengthening columns and other elements on concrete, and checking them for strength and compliance with their developed project (plans and drawings). To do this, a geodetic check must be carried out. Before installation, the supporting surfaces must be cleaned of all foreign objects and dirt, and the intercolumn slabs, including ordinary ones, are fixed, taking into account the depth of the support. The elements are installed transversely according to the markings previously applied along the layer of solution. The final fastening is carried out after control measurements and anti-corrosion measures. The concrete must be exactly as planned. The thickness of the fastening solution is no more than 2 cm. The surfaces of adjacent slabs must be perfectly aligned with each other. The depth of their placement is determined by the project. Quality requirements must comply with the standards and technical conditions provided for by SNiP standards.
Safety standards for the installation of floor slabs are regulated by SNiP III-4-80, according to which construction equipment must undergo a compliance check by the Gosgortekhnadzor inspection. Equipment for rigging and installation must also comply with the Rules for the Safe Operation of Load-Lifting Cranes.
Builders over 18 years of age who have completed safety training and have the appropriate certificate and permit are allowed to carry out installation. This applies to welders, electricians and crane operators. The presence of unauthorized persons in the areas where work is being carried out is prohibited.
The permissible maximum wind speed during work is 15 meters per second. SNiP III-4-80 prohibits carrying out work in insufficient visibility (fog, twilight, drizzle, etc.).
In accordance with preliminary calculations, thermal insulation work is carried out; it must be made of fireproof materials.
To prevent changes in the position of the finished slabs, they are adjusted on the sides using locks filled with a concrete mixture. For example, the technology for installing a filigree ceiling involves laying reinforcing mesh or reinforcement rods.
When installing floor slabs, the question often arises about the hardening time of poured concrete.
In the warm season, you can walk on poured concrete after just one day, in the cold season – after 2-3 days. But to start laying the next floor, it takes at least 10-14 days. During this period, the concrete surface must not be subjected to any loads. Such floors acquire their final strength only after 28-30 days.
Seal seams in brickwork
The painted facade of a brick house often hides unfilled seams between the bricks. The reason for such defects is the insufficient amount of cement mortar when laying bricks.
Often such a defect becomes noticeable only when, under the influence of atmospheric phenomena, the plaster falls off and unclosed seams between the bricks become visible.
If the damage is isolated, the defect can be easily eliminated by filling the seams with new mortar. To do this, use a screwdriver or chisel to remove all pieces of old mortar in the seams. Just don't push them inside. Then wet the bricks, since dry brick absorbs a significant amount of moisture from the mortar, and only then, having prepared and cleaned the space in the masonry joints, fill them with new mortar.
The new solution must be thick and contain a minimum amount of water, otherwise it will easily leak out of the joints. First of all, you should fill the vertical seams, followed by the horizontal ones. Fill the seams all the way in and press flush. The solution should set well over the entire surface of the joints.
Closer to the outer wall, the solution should be drier than for the internal space of the seam. The seams should be embroidered in such a way that they do not differ in shape and structure from the rest of the wall. We recommend using a piece of hose along with a trowel to join the seams. The seams are leveled especially carefully if the wall must have an absolutely flat surface.
At the end of the repair, remove any remaining mortar, pieces of gravel, etc. After drying, scrape off excess mortar.
1. Visible holes in the masonry. It is necessary to check the neighboring areas to see if there are any unfilled seams.
2. Remove any loose cement with a chisel, but do not push it inward.
3. A stream of water washes away the remnants of the old mortar and wets the surface of the bricks.
4. Using formwork, you can prevent the solution from crumbling.
5. Compact the mortar into the seams using a narrow trowel, supporting it with a regular trowel.
6. Smooth out the mortar in the seams with a piece of hose.
7. Whiten the treated areas with a soft roller.
Tools:
A paint roller, two trowels - a narrow one and a wide one, a piece of hose, a scraper, an old screwdriver or chisel, a brush and a water hose.
Installation of floor slabs according to SNIP
Even hollow products have a very impressive weight, so the technology for laying them necessarily includes the use of specialized equipment. In addition, mandatory requirements include the presence of an entrance to the building under construction. You cannot do such work on your own.
Prices largely depend on the distance and size of the building.
To lay ceiling coverings, you need the following tools and materials:
- reinforced concrete slabs;
- concrete or cement mortar;
- truck crane;
- grinder in cases where the material needs to be trimmed;
- crowbar and sledgehammer.
The installation technology itself is very simple.
- A layer of cement or concrete mortar is applied to the place where the ceiling covering is laid.
- The truck crane is installed so that from the selected area it can serve the largest possible surface of the future ceiling.
- A truck crane is used to hook the reinforced concrete slab by its hinges and place it in the desired area. As a rule, this cannot be done in one go. Usually the position is corrected with a crowbar. Since the concrete solution does not set immediately, this process is quite feasible.
- Prices for installation of floor slabs depend on the need to cut the material. Cutting is done with a grinder with a diamond blade and a sledgehammer.
- The laid floors are secured to the walls with anchors through hinges.
- The rusts that form between the slabs are carefully sealed.
In the video, the installation of the coating in accordance with the requirements of SNIP is examined more clearly.
Types and dimensions of bricks
Building material with this name is produced from different types of raw materials, and therefore can have completely different sizes, but we will discard adobe and other blocks, focusing on brick in the classical sense - the one that is white and red. Theoretically, blocks of any size can be made to order, but there are also standard dimensions, which in table form look like this:
- a simple single brick is 25 cm long, 12 cm wide and 6.5 cm thick;
- the thickened version has all the same parameters, except for the thickness, which here is already 8.8 cm - by the way, in the usual horizontal masonry it is perceived rather as height;
- a single brick of modular dimensions is slightly larger than a simple brick in length and width - 28.8 cm and 13.8 cm, respectively, but in thickness it is 2 mm less - it is 6.3 cm;
- a thickened brick of modular sizes has the length and width of a single modular size, and the thickness of a simple thickened one;
- the thickened version with a horizontal arrangement of voids has dimensions completely similar to the simple thickened one - 25 by 12 by 8.8 cm.
Requirements for installation of floor slabs
When laying, you must follow several rules.
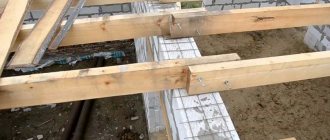
- Load-bearing walls must be as even in height as possible before installation. For this, a beam is used: it is placed on two opposite walls and checked with a building level. Measurements are taken every 1–1.5 m. If necessary, height differences are leveled with concrete mixture.
- If the material is selected for foam concrete, aerated concrete, or cinder block walls, then according to the technology, reinforcement is first carried out. The height of the belt is at least 15 cm.
- Before installation, voids are sealed to avoid freezing. According to SNIP requirements, voids are filled with expanded clay or broken bricks, and then filled with concrete mortar.
The roof is a rather complex multi-layer structure. So errors during its construction or incorrect choice of material can lead to seal failure, etc.
The main indicators of indoor comfort are temperature, oxygen level and humidity level. If the first 2 factors are relatively easy to regulate, then.
Installation technology
The entire process of laying a brick wall must be carried out in accordance with the standards and according to the drawing. It is recommended to use masons of 2-5 categories. The work is performed in strict sequence, according to established standards:
- Marking walls, installing wooden openings on the base.
- Installation of the ordering rail (if necessary).
- Pulling the cord along which the wall will be built.
- Preparing bricks for laying.
- Preparation of cement mortar.
- Laying bricks on mortar (building a wall).
- Inspection upon completion of construction work.
- Installing channels over wooden openings to reduce the load on the tree.
Specialists of different categories are involved in the construction process. Specialists K1 and K2 carry out the laying of the outer wall and its further cladding. Masons of categories 2 and 4 carry out the laying of internal walls and resort to the help of K3. The stringing of the cord is carried out only by masons of the highest category, since the quality and slope of the building depend on them.
They often resort to reinforced masonry walls. It is worth noting that this method is only suitable for external walls. A reinforcing mesh is made from reinforcing wire by welding, which is placed between each level of brick.
Supporting floor slabs on walls
Hollow-core floor slabs are used in the construction of buildings and structures to divide them into floors. They are made of reinforced concrete, with different design features. The strength of the house and its durability depend on the correct choice of structures. When designing and installing, it is important to know the minimum and maximum depth of support of floor slabs on walls made of your material.
For different types of buildings, certain types of interfloor ceilings are used. During the installation process, it is necessary to follow the installation technology, which is regulated by regulatory documents (SP 70.13330.2012) .
Requirements regarding materials used
Bricks and other ceramic stones used in construction must comply with state standards for these types of building materials.
So, for example, the facing brick used for the outer verst must have a rectangular shape; it cannot have chipped corners and edges. The quality of materials must be checked by visual inspection by a mason. As for the mortar used for laying bricks, it must have a mobility of more than 7 cm. In winter construction conditions, lime, plasticizing and air-entraining chemical additives in the amount of 0.8 g per kilogram of cement must be added to the composition.
In the winter season, the temperature of the solution should be observed; it should be above +25C. The solution itself should be taken one grade higher than the one provided for by the project, if the ambient temperature is below -15C.
The regulations prohibit the use of bricks for which the appropriate documents confirming their quality have not been provided. carried out on metal pallets with a gap between pallets of at least 100 mm.
Every 3-4 rows between pallets there must be passages with a width of at least 70 cm. Packages with bricks can be stored in plastic bags in stacks on special pads with a stack height of no more than two tiers.
Delivery of the construction mixture to the site is carried out using dump trucks. To prevent delamination of the composition, the mixture must be supplied using a screw mechanism, which provides the ability to maintain the required temperature and the procedure for continuous mixing of the masonry mixture.
Types by method of support
The slab used for interfloor separation is a reinforced reinforced concrete structure with voids. The holes in the slabs come in various shapes and sizes to lighten the weight of the structural element.
The choice of interfloor slab and the depth of its support depends on the design features of the building. The following parameters are taken into account :
- purpose of the building (residential, industrial, public);
- the material from which the structure is constructed;
- wall thickness;
- types of loads acting on both the slabs and the building;
- seismic characteristics of the development area.
Based on the type of support, interfloor slabs are divided into three categories . Their selection is carried out at the project planning stage, taking into account calculations of the loads acting on the load-bearing elements of the building.
On both sides
The support for such slabs is two opposite load-bearing walls. They are laid on capital elements, with narrow (transverse) sides. Most often, for this type, interfloor slabs with round voids are used, marked PK, 1PK, 2PK. They can withstand loads of up to 800 kg/m².
On three sides
They have reinforced end reinforcement and are laid on three load-bearing walls. They are mounted in the corners of the building, which have a U-shaped structure of load-bearing walls. They are marked PKT and can withstand loads of up to 1600 kg/m².
On four sides
Such slabs are reinforced with reinforcement at all ends, they are more rigid and have increased load-bearing capacity. They are used only in complex structures where maximum distribution of high loads is required, or in cases where the construction of additional superstructures is planned. They are marked PKK, indicating increased strength. They are practically not used in low-rise construction.
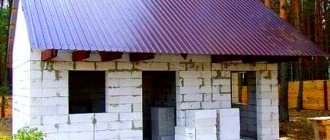
Construction of houses
Floor structures must meet the requirements for strength, fire resistance, sound insulation and thermal insulation. Slab-type reinforced concrete products have all these characteristics. They are used in the construction of industrial, multi-apartment and individual buildings.
Content:
They serve as interfloor ceilings, where their lower surface acts as the ceiling, and the upper surface acts as the floor of the upper room. The slabs are also laid on garages, sheds and other outbuildings, thus forming a roof. They are often used as a foundation.
Types of floor slabs
There are 2 types: monolithic floor slabs and hollow core slabs. The former are distinguished by a large margin of safety and load-bearing capacity. Serious disadvantages include their weight, high thermal conductivity and low sound insulation properties. Such products are often used for the construction of public and industrial buildings.
Depth of the establishment on the walls
All floors, regardless of installation method, can be laid on a foundation or load-bearing walls made of brick, reinforced concrete panels, aerated concrete or foam blocks.
It is important to know how much you can support a hollow reinforced concrete product. This depth depends on the material from which the supporting structures are constructed :
- brick - from 9 to 12 cm;
- panel - from 5 to 9 cm;
- aerated concrete or foam block - from 12 to 25 cm.
Failure to comply with the recommended laying depth can lead to the destruction of walls due to improperly distributed loads. Insufficient depth leads to coloring of the inner layer of masonry and plaster, or to cracking of the panels. Excessive distance taken for support will lead to the destruction of the outer part of the wall.
What should be the optimal width and height of the masonry?
Masonry bricks differ in size, design shape and material of manufacture. Therefore, the width of the masonry should be calculated taking into account these parameters.
For ceramic, clinker, silicate or hyper-pressed models, the dimensions are similar.
The brick size for them is divided into :
- single (250x120x65 mm),
- one-and-a-half (250x120x88 mm),
- double (250x120x138 mm).
There are types of products with greater length or width, for example, single and thick bricks of modular sizes have parameters (288x138x65 mm) and (288x138x88 mm), respectively.
Let's look at a table with the types of masonry and the width they have when taking into account the thickness of the mortar joint:
| Type of masonry | Width and recommendations |
| Half | 120 mm. This type of masonry is used to build internal partitions or dividing fences on the site. It is not used when constructing load-bearing walls of a building. |
| Single | 250 mm. Most often used in the construction of auxiliary buildings (sheds) or fences. |
| One and a half | 380 mm. The most common type of masonry for warm regions. This width is suitable for the construction of small residential buildings in subtropical climates and non-residential ones in temperate climates. |
| Double | 510 mm. This type of masonry is used to build load-bearing walls in temperate climates, but with additional insulation it can be used for colder places. Also, structures are made from double masonry, the height of which does not exceed 5 floors. |
| Two and a half | 640 mm. This type of masonry is used for buildings that will be built in cold climates, as well as for buildings with 5 or more floors. |
As you can see above, the thickness of a brick wall depends on how many bricks will be laid in the masonry. This will change the total volume of material used for construction. Also, the width of the masonry may change depending on the decorative component or additional insulation.
For example, smooth red brick is used to line an external wall . An insulating layer is most often placed between the load-bearing and decorative parts. Depending on its thickness, the width of the masonry can increase by 130 mm or more.
External insulation can also be used by sheathing with decorative wooden boards with a layer of insulation or sheathing external walls with polystyrene foam boards.
There are types of masonry larger than 640 mm, but these are used for houses that are located in cold climates with temperatures dropping to -40 ° C or lower. For such buildings, the width of the masonry can be 770 mm or more.
Bricks, both red and silicate, can be solid or hollow . Depending on this indicator, the width of the wall decreases for hollow ones and increases for solid ones. This is due to the fact that products with voids inside conduct heat worse than monolithic ones, so the freezing zone shifts to the outside of the building.
The optimal width of the walls is also calculated from the height of the structure and should be at least 1/20. Most often, for houses made of brick masonry, the height of the masonry is from 2.8 to 3 m, since the construction speed is very low and requires additional reinforcement with reinforcing layers.
The maximum height of a brick wall also depends on its width, for example, for unreinforced masonry with a thickness of 12 cm it is 3.25 m with a free length of the partition up to 8.1 m, and for a reinforced one 3.9 m. The optimal possible height for construction is 10 floors .
The minimum ceiling height according to SNiP should be 2.5 m, but 2.4 m is allowed, and for public buildings it should be 3 m. It follows from this that the height of the wall to the ceiling cannot be less than 2.4 m .
The external load-bearing structure has a common height with the entire structure , but is strengthened by floor slabs. Therefore, if you count from the floor to the ceiling, then it will have a common height with the internal partitions.
All building stones that are used in the construction of structures must be selected in accordance with the standards for various types of building materials, which is also determined by SNiP. The brick used for external masonry must have a rectangular shape and clear edges. Each building stone is visually inspected by a master before laying.
Support nodes
They are designed for reliable and correct fixation of floor slabs on permanent elements. Laying the slab and fixing it to the wall is done using mortar and rigid reinforcing compounds.
Nodal connections must meet the following requirements:
- the end sides of the slabs should not be closely adjacent to the masonry;
- thermal insulation is performed between the masonry and the ceiling;
- It is recommended to close the hollow holes with special liners to prevent heat loss;
- The connection between the ceiling and the reinforced belt is made by rigidly connecting the reinforcement belt reinforcement with the reinforcing rods of the slab by welding.
The nodes depend on the number and type of capital elements. For support on two sides, they are made on transverse load-bearing walls, and for support on three or four sides - on both transverse and longitudinal walls. The nodes are also performed when the load-bearing elements are columns, trusses and floor beams.
When laying floor slabs, it is necessary to take into account all the parameters necessary for correctly supporting them on the load-bearing elements. The selection of slabs, calculation of nodes, reinforced belt and support depth are made at the building design stage.
After installation, do not forget to seal the seams.
How to strengthen the mortar joint between bricks?
The solution is old and crumbling. You can secure it somehow.
There are many different ways, but try my, dare I say it, recipe. Initially, of course, clean the seam from any crumbs of old mortar. Then make a new mortar (cement/sand = 3: 1), and most importantly, the highlight of the method, add construction PVA to it (for 1 bucket of mortar, 1 liter (kg) of PVA glue). And before preparing the solution, simply coat the cleaned seam with glue twice (the interval between coats is at least an hour), after which you can apply the solution to the cleaned seams, naturally removing the excess. It will hold strong!
In my opinion, it is necessary to first assess the whole situation as a whole.
The bricks of the entire masonry are laid on the same mortar, the mortar is not strong, very serious work (restoration) to strengthen it may be needed.
There may be a solution in the seams, it simply crumbles, in this case it is enough to buy a deep penetration primer, “Yunis”, “Optimist”, “Ceresit”, etc., any of them will cope with the task.
Primer “Ceresit ST 17” is available in the “winter” version (if there is a need to perform work at low temperatures).![][1 ]
Using a thin brush (no wider than the masonry joints), apply primer to the joints and dry them.
Such primers penetrate deeply into the base, strengthening it, and the seam will definitely not crumble (crumble).
If the mortar is partially or completely absent from the seams (spilled out), then prepare a mortar, cement + sand 1:3 (cement M500).
Next, we clean the seams from the remnants of the old mortar, which does not adhere well to them, prime the seams (see above), dry them and fill them with new mortar, and you can also unstitch the seams.
The work is, of course, very labor-intensive, I think that there is a point in such work if the building is of some historical value.
If not, then it is simpler, more logical and correct, to plaster the surface with leveling plaster and finish with decorative plaster (as an option).
Organization of the process
A lot of attention is paid to the issues of organizing and ensuring the safety of work, SNiP for laying brick walls, since labor productivity, construction time, and the final result depend on them.
Ease of use is important
First of all, the mason must be able to comfortably move within his plot and work without unnecessary movements. Professional teams are usually divided into units, each of which consists of 2-3 masons with various qualifications. Which one exactly depends on the thickness of the masonry and its architectural complexity.
Preparing jobs for masons
The plot is divided into three zones, which is clearly visible in the photo below:
- The working zone is a strip along a section of the wall, up to 70 cm wide, where masons work;
- The materials storage area is a longitudinal strip up to one and a half meters wide, on which ordinary bricks and mortar are placed. To perform masonry with simultaneous cladding, this zone must be twice as wide, since space is also required for the facing brick.
- The auxiliary area is the passage area, which occupies a little more than 0.5 m.
SNiP for brick walls: placement of materials on the plot
When there are openings in the wall, a container with mortar is placed opposite them, and it is more convenient to place a pallet with bricks on the line of the wall. If lightweight wall masonry is carried out, then the main materials are alternated with reinforcement and loose filler, or other heat-insulating material.
All materials must be prepared in advance, and only the solution is supplied immediately before the start of masonry. When building a small private house, it is much more convenient to mix it on site using factory-made masonry mixtures, which many.
These are universal dry mixtures M150, which are suitable not only for laying bricks, but also for plastering walls. pouring floors. Compositions of a higher grade are used for pouring foundations, armored belts, and monolithic lintels. A package like the one in the photo below costs about 160 rubles. Colored mortars are usually used for laying decorative bricks.
Factory dry masonry mixture Colored mortar for facing masonry
- If you find that buying ready-made mixtures is too expensive, nothing prevents you from installing a concrete mixer and making the solution yourself. When brick walls are erected, SNiP provides for the use of simple and complex masonry mortars.
- Simple solutions contain only one binder; complex solutions contain at least two. In the first case, it is a cement or lime mortar, the second option: lime-cement or clay-cement. Lime and cement play the role of a modifying additive and make it possible to obtain a solution with higher plasticity.
- The most popular is cement mortar with a lime additive, as it is suitable for all types of bricks, except for raw clay stone (adobe). It just needs a clay-cement mortar, which is also suitable for the construction of any outbuilding.
Table of proportions of dry components in solutions
Instructions for the proportions of binders and fillers in solutions are presented in the table above. The first in the line is cement, then the second binder, and then sand. Water is added until the required consistency is achieved, but usually its amount does not exceed 30% of the total mass. Sand can be used heavy (quartz) and light (pumice, slag).
Tools and accessories
The amount of equipment used in the work also depends on the volume of work and the complexity of the task being performed. When building a one-story house, you may not need some tools, but the basic set of tools should be the same as you see in the table below.
Appearance of the tool
Normative base
Strictly speaking, there is no single SNiP “Brickwork of walls”, since masonry work requires compliance with a huge number of norms and regulations related to various aspects of the construction industry.
That is why, when discussing construction standards concerning the construction of external and internal self-supporting walls, interior partitions and cladding, experts turn to a whole range of documents:
- Organization of construction. Organization of production in construction and architecture - SNiP 12 - 01 - 2004.
- Load-bearing and enclosing capital structures - SNiP 3.03.01 - 1987.
- Occupational safety and health in construction and production – SNiP 12 – 04 – 2992 (Section IX), as well as SNiP 12 – 03 – 2001 (Part 1).
The sequence of any operations is described in the corresponding document
These standards contain information regulating the entire process of construction of walls and other architectural elements made of brick or building stone. GOST for brickwork is mandatory for all permanent buildings without exception, so you need to study the requirements even if you plan to build a small shed on your site with your own hands.